


Do you prefer to make your own seasonal decor? Then this post is for you. This floral Easter egg DIY provides great texture and freshness for your spring seasonal decor.

These floral eggs are not only super cute and fairly simple to make, but they are also inexpensive. I got the bulk of my supplies at the Dollar Tree, but you would never know it. Come see how you can make these yourself.
*Affiliate links might be included for your convenience. These affiliate links mean a small commission is earned if you make a purchase using these links at no extra cost to you. As an Amazon Associate qualifying purchases support this website. For more information: Full Disclosure Policy.
Details about the Floral Easter Eggs
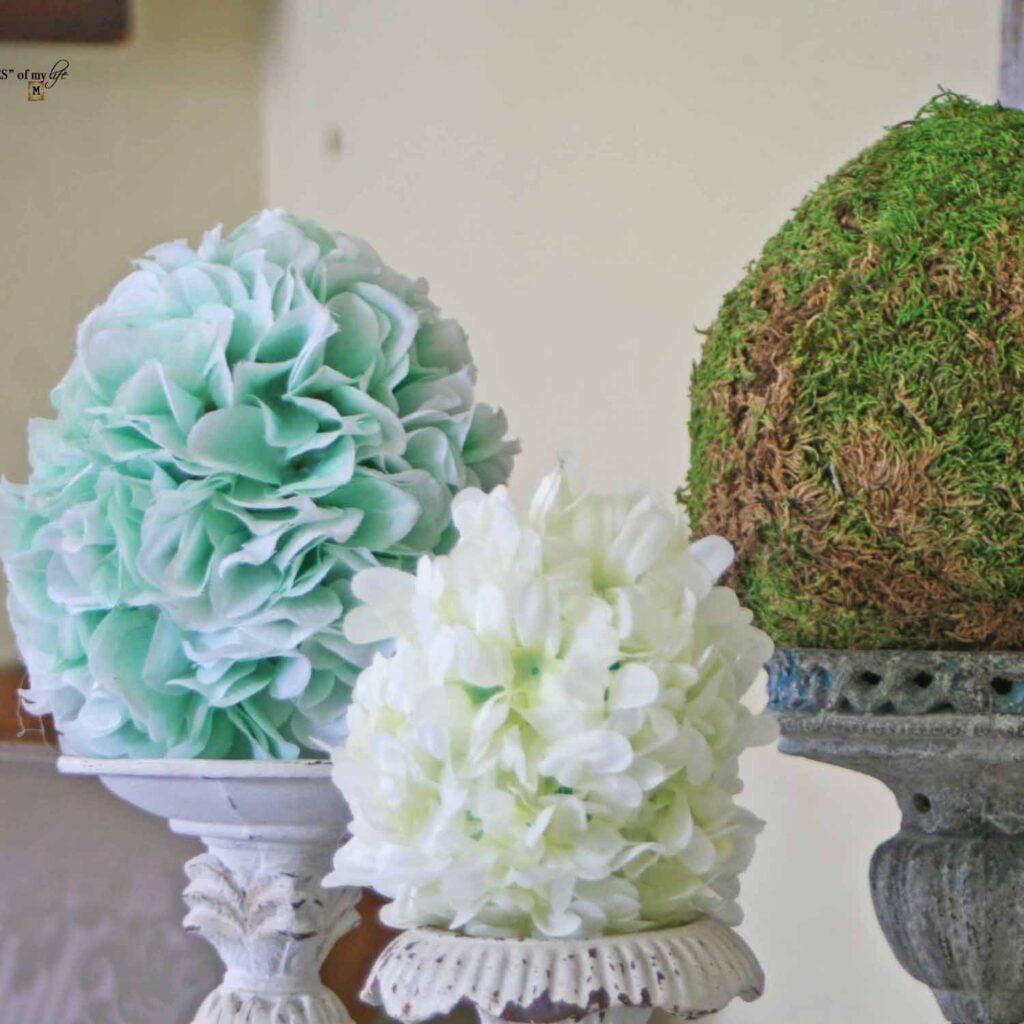
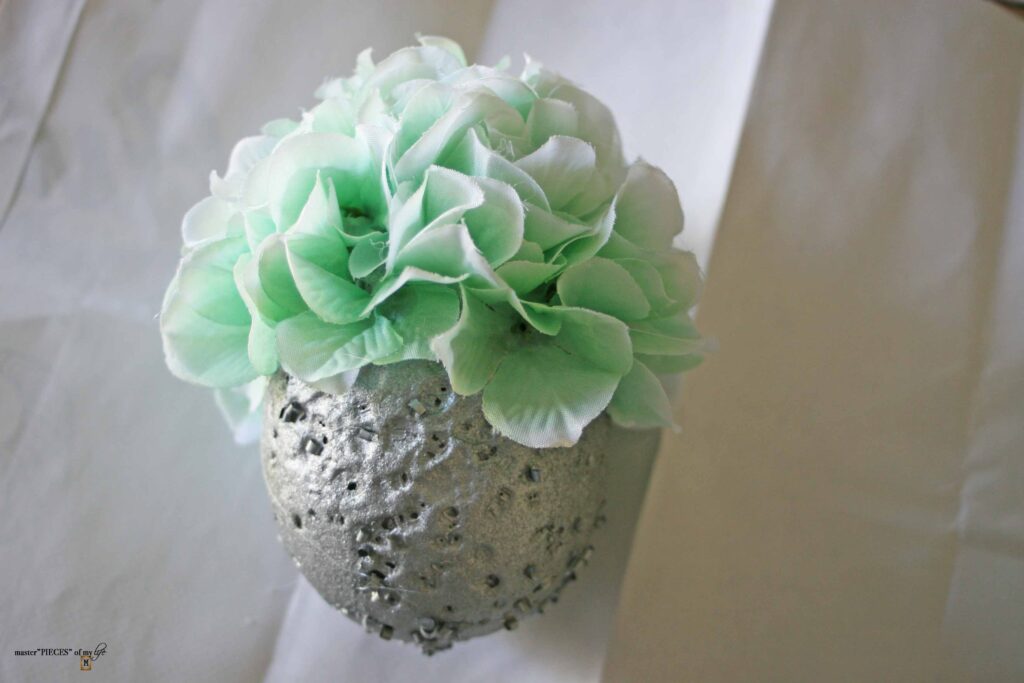
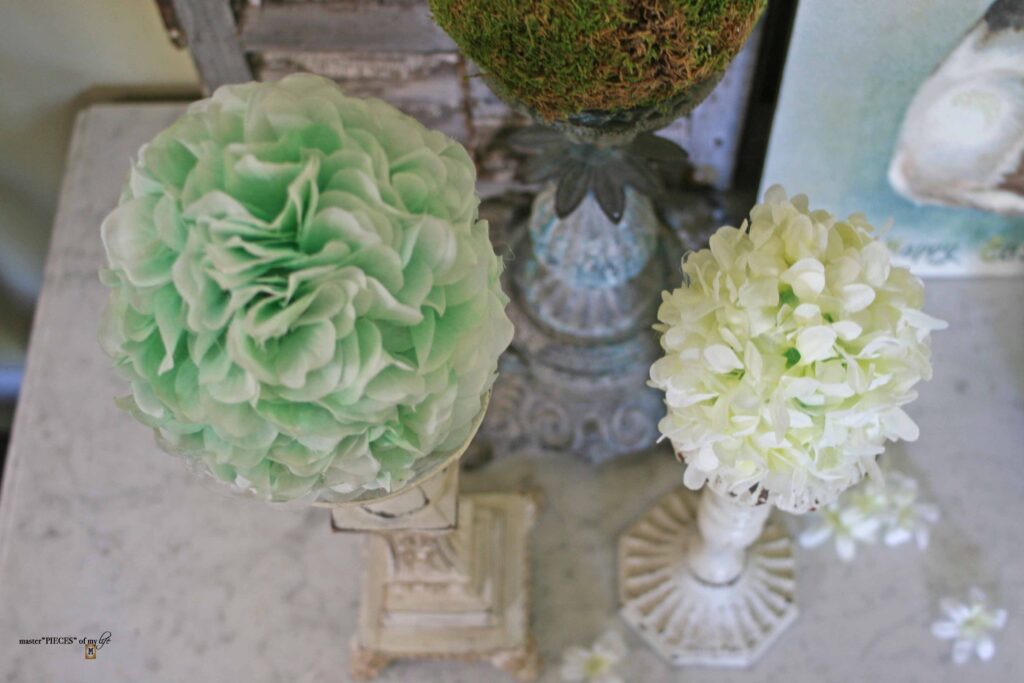
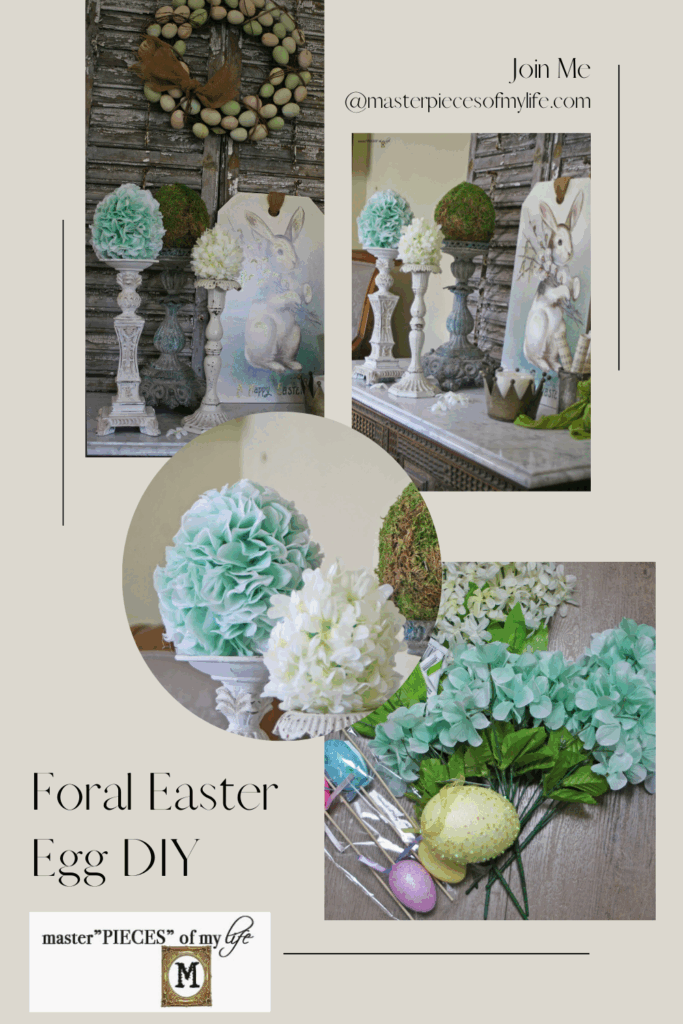
I created a hydrangea and a hyacinth egg. I chose these because they are both favorite blooms of mine, but you can select whatever flowers you prefer.


My hydrangea egg has soft minty green petals, because we all know, green is a favorite of mine. I also liked the diminutive size and soft colors of the hyacinth flowers, which complimented the hydrangea green nicely. Once again you can pick whatever colors speak to you and | or coordinates with your decor.

I also sourced the styrofoam eggs from the Dollar Tree. They were a bit loud for my taste, but we will change all that. I simply needed them as egg forms, which we will transform to beautiful floral Easter eggs.
How to make Floral Easter Eggs
Although these floral eggs are fairly simple to make, they do take a bit of time. I did mine in different batches. You can also binge watch a favorite show and crank them out.
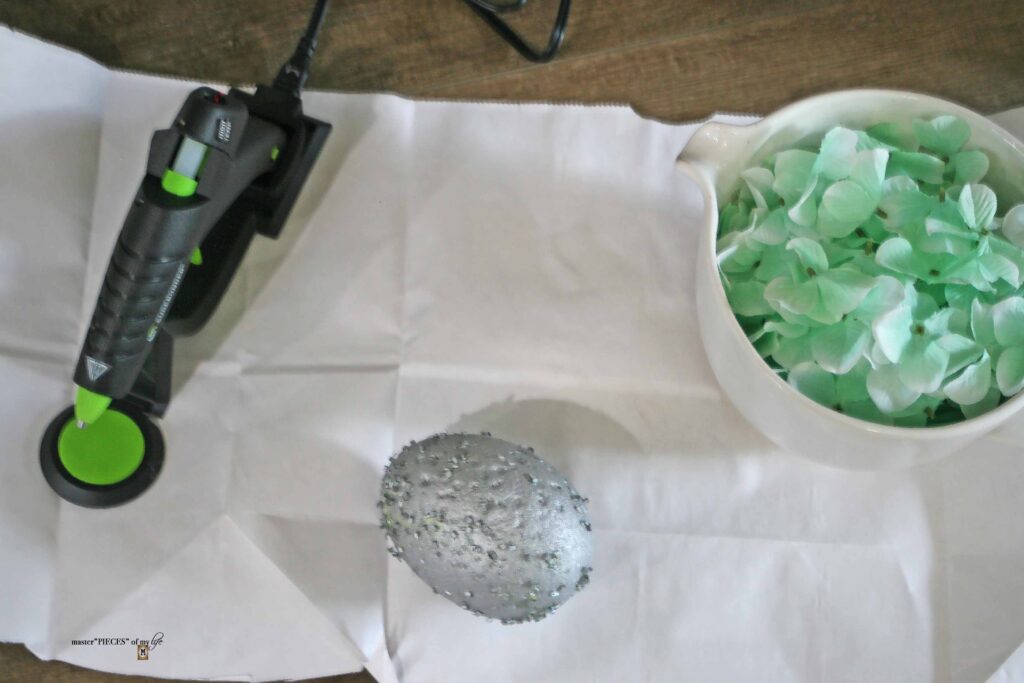
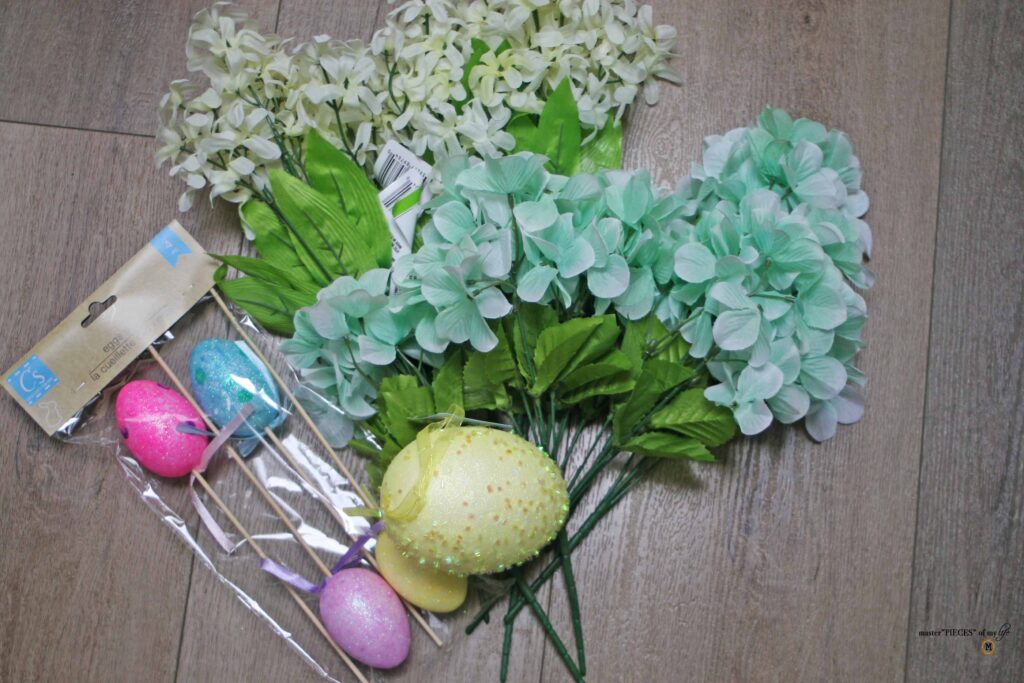
Supplies
- Hot glue gun {glue sticks as needed}
- Floral stems
- Egg forms
- Spray paint (optional)
Directions
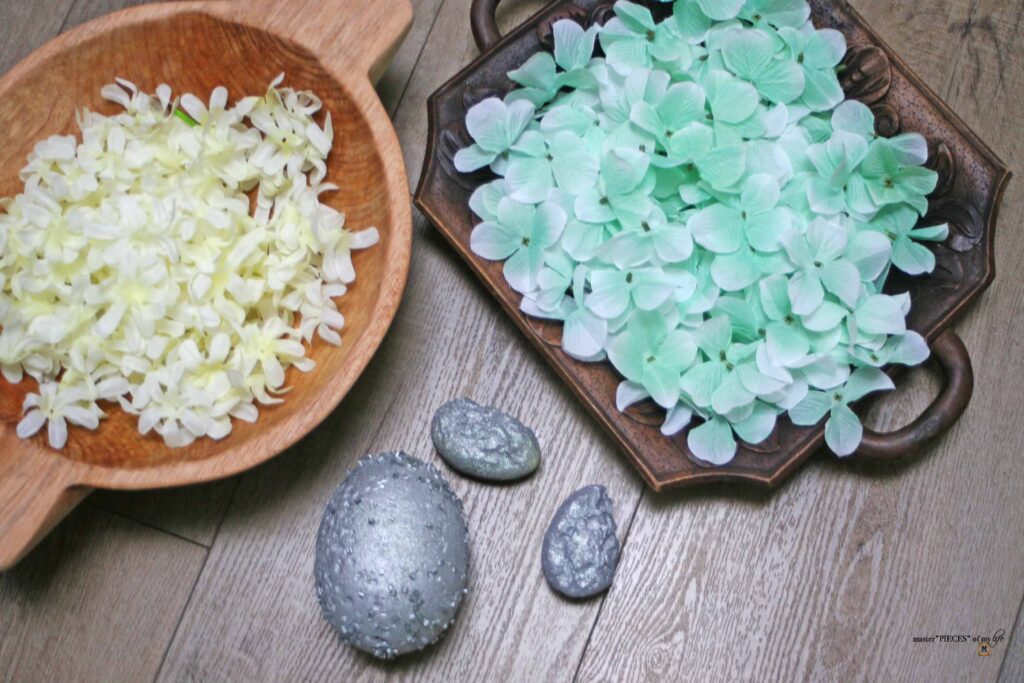
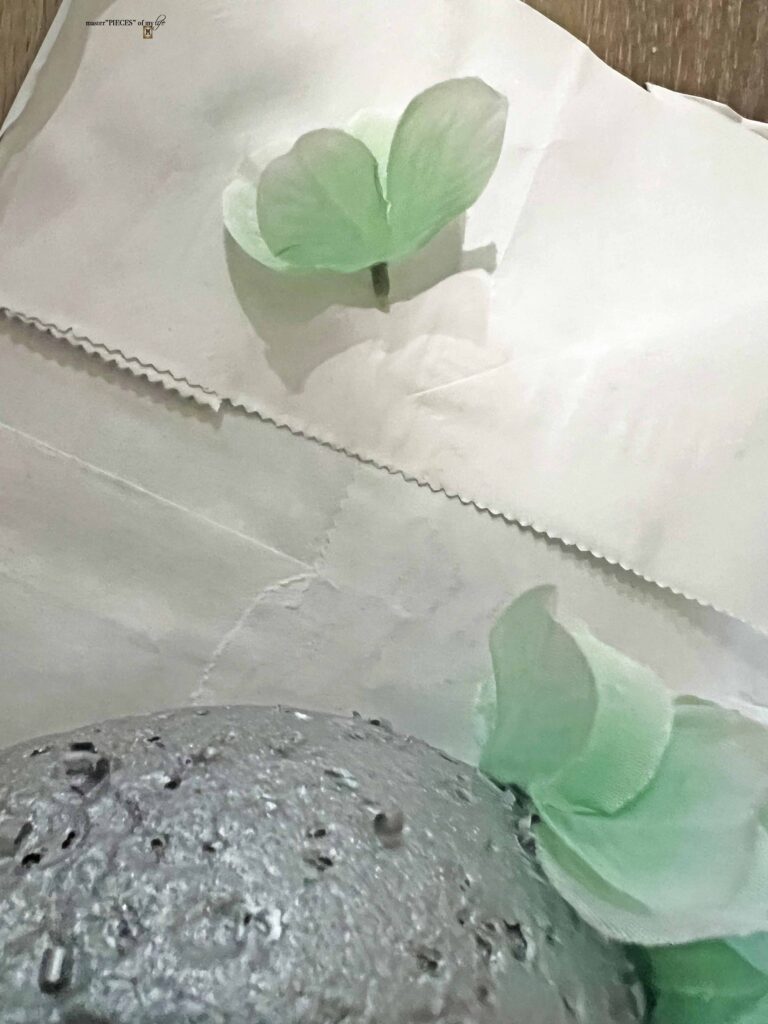
- Remove all petals from floral stems
- Strip Styrofoam eggs of an decor or embellishments
- Spray paint eggs forms a neutral color and allow to dry fully
- Pinch petals and hot glue center to egg form starting at top of egg
- Continue to glue one petal at a time right next to each other until egg its completely covered

Tips for the Floral Easter Egg DIY
I spray painted my eggs before gluing the petals to neutralize the color, but if you simply use white styrofoam crafting egg forms you can skip this step.
Can you see in the picture below what happened to the smaller eggs after I spray painted them? Yup, they shriveled up. I don’t even want to know what chemical reaction caused this to happen, but I had to move on to plan B. In my Easter bin I have a ton of left over plastic eggs from when my kids were littles and participated in Easter egg hunts {they are 21 and 18 now}.
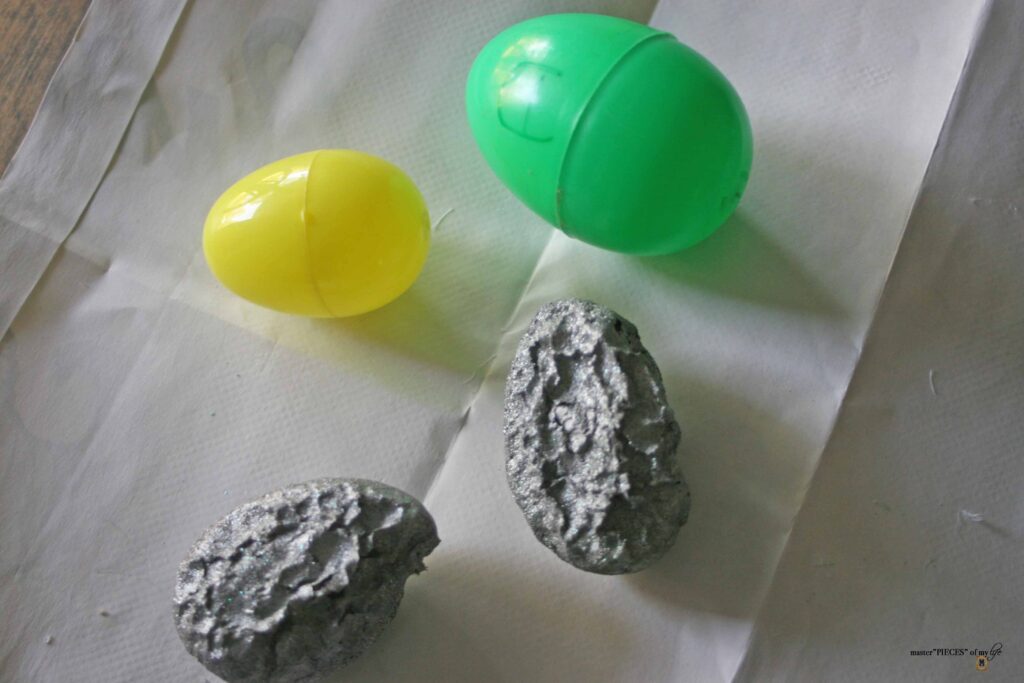
Some might call this hoarding, but I simply call it being prepared. I’ve used these plastic eggs in more than one occasion for various crafts. A few years ago I decoupaged a bunch of these plastic eggs with sheet music, which you can read about here {easter eggs}.
I chose a green egg as the back drop for the hyacinth egg and it worked beautifully. A small yellow egg sat at the ready as well in case I had enough petals to make a 2nd hyacinth egg. I did not. The project does require a lot of petals. I bought 6 stems of each flower type. I used all the green hydrangea petals on the large egg. Although I have some hyacinth petals left over they are not enough to cover an entire 2nd egg.

When you are hot gluing the petals to the egg form, please be very careful. I burned my fingers more than I should have, because I was rushing through the project. Give yourself plenty of time to glue the petals carefully and safely.
Styling the Floral Easter Eggs
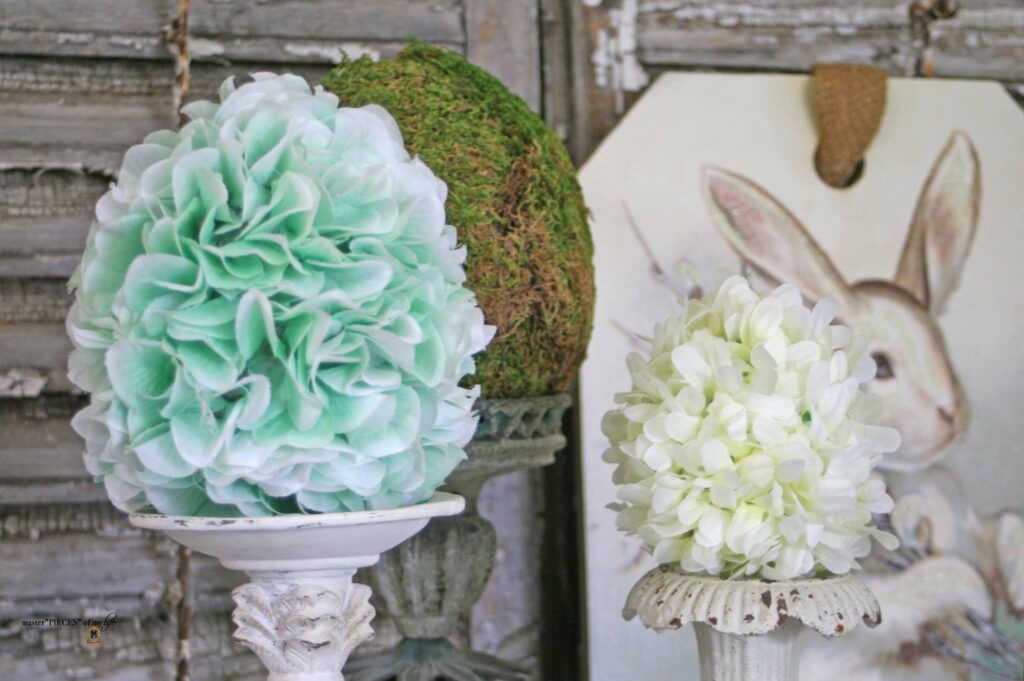
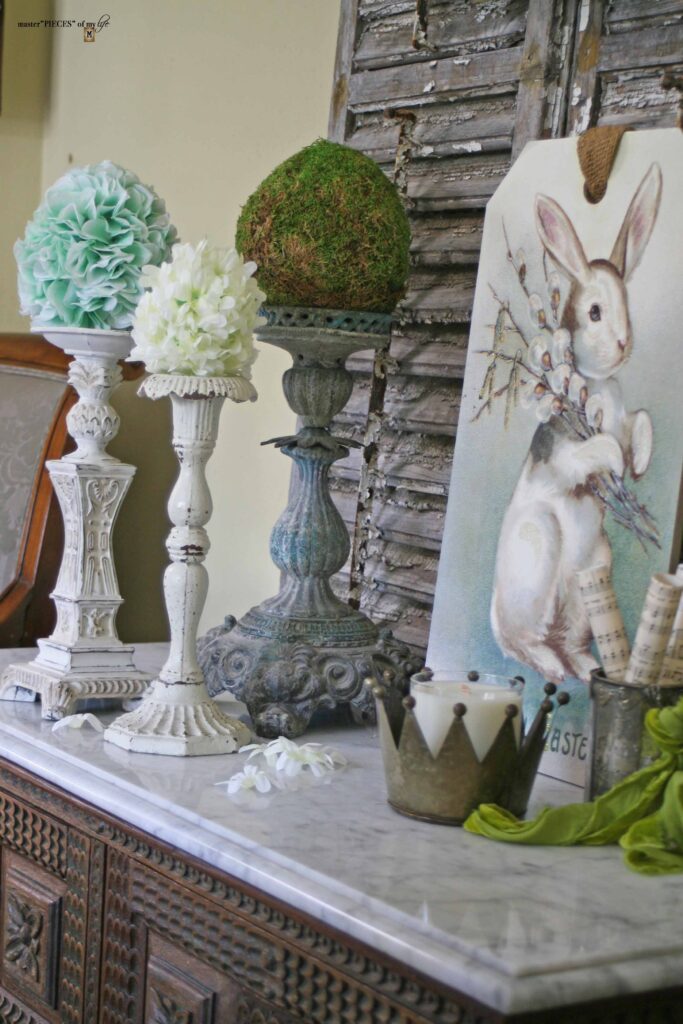
Now, for the really fun stuff. Time to play with our new toys. I created a simple vignette on the sideboard in the dining room, using cast iron candle holders to style the floral eggs. You can read how to get the look here {faux cast iron candlestick DIY}.
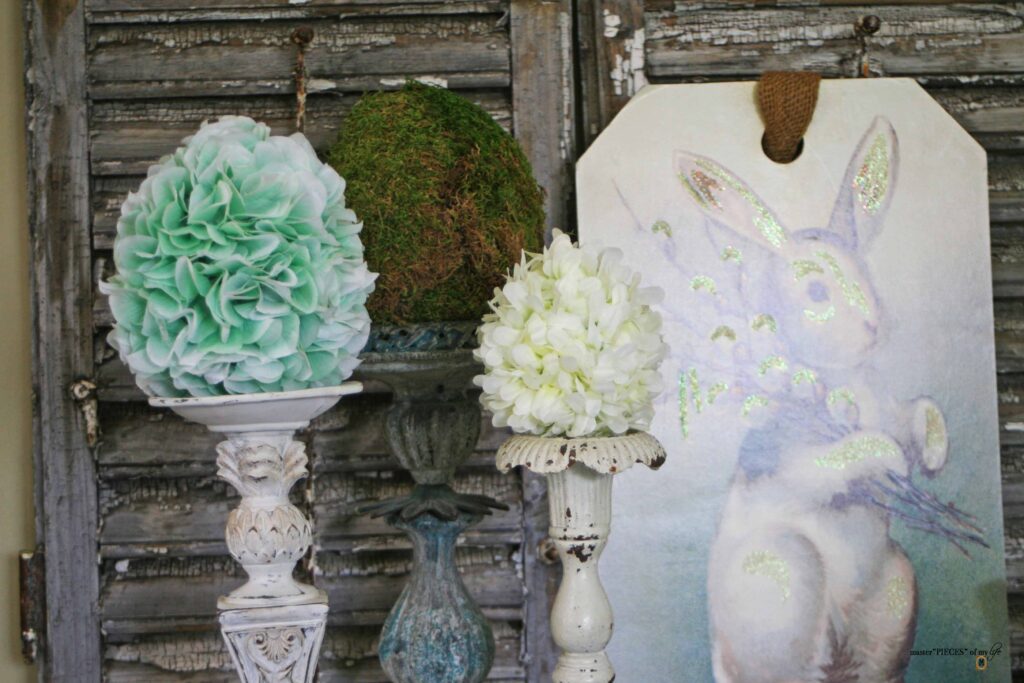
The candlesticks hold the floral easter eggs nicely, including an over-sized moss Easter egg I created a few years ago {5 fabulous was to DIY Easter eggs}. I love the botanical vibes.

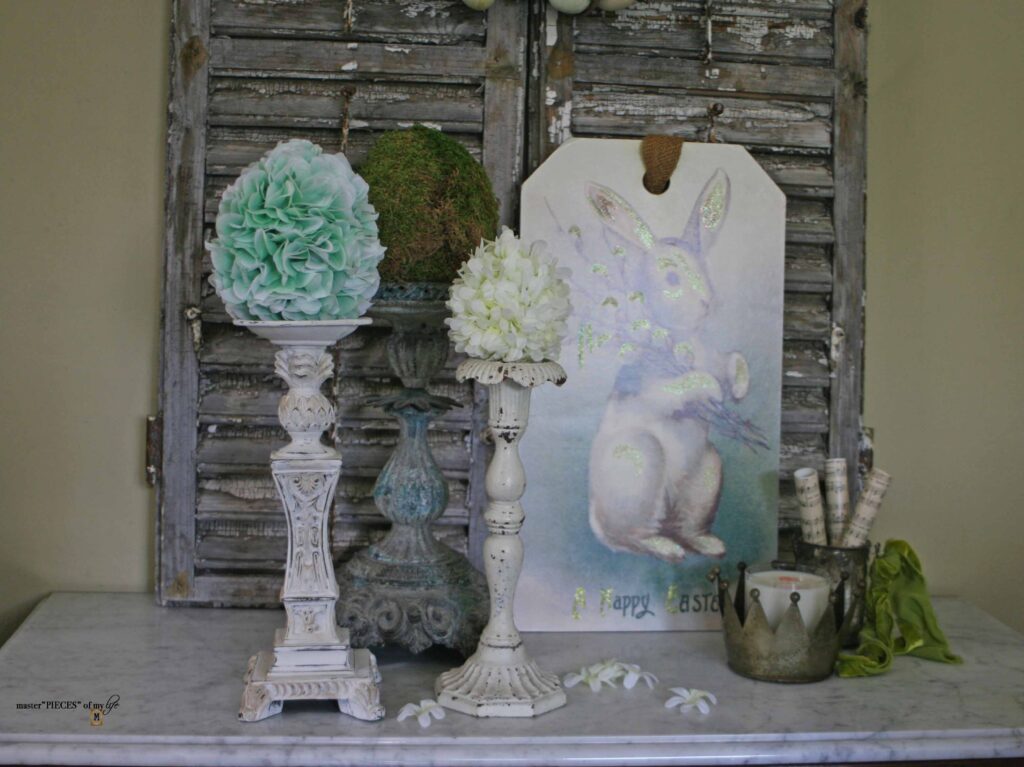
The vignette is balanced on the other side with a bunny rabbit Easter sign, a candle in a brass crown and little glass votive basket holder. The basket was from this project I recently shared here {thrifted goodies – the Easter basket edition}. An Easter egg wreath hangs on the chippy shutters to crown and round off the Easter vignette.


This is my last Easter project for the season, but I have so many spring projects coming your way. The rain has started to let up around here, and we have been able to work on some gardening projects. I’m excited to share soon.

Thanks for stopping by and I hope to see you again soon.


Shop the Floral Easter Egg Look
- Green Silk Hydrangeas
- Bluish Green Faux Hydrangeas
- Champagne Silk Hydrangeas
- Purple Silk Hyacinth Stem
- White Faux Hyacinth Stem
- 3 6-inch Crafting Egg Set
- 20-Piece Assortment Foam Eggs
- White Distressed Candle Pedestal Holder
- Cordless Hot Glue Gun (this its the one I use & I love it!)
- Hot Glue Gun Glue Sticks
- Silicone Finger Protectors (this is the set I bought)


“A flower blossoms for its own joy.”
Oscar Wilde