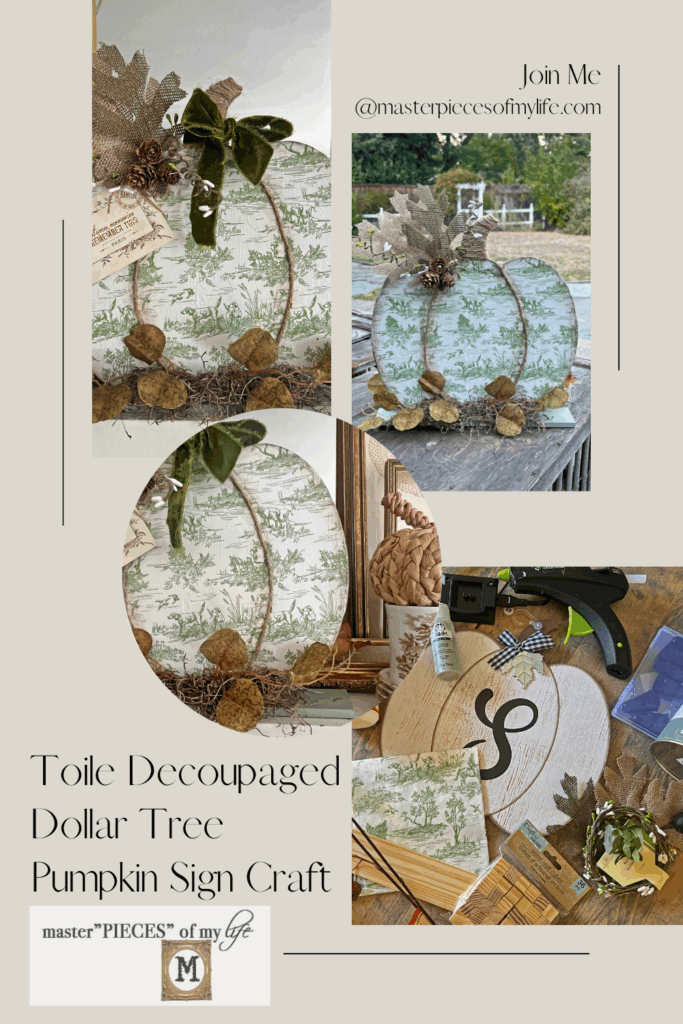
Toile Decoupaged Dollar Tree Pumpkin Sign Craft
Hello friends! Do you like toile patterns as much as I do? If you do, you are in for a treat today. A toile patterned decoupaged pumpkin sign DIY adds a bit of refinement and elegance to the otherwise rustic vibes of fall decor.
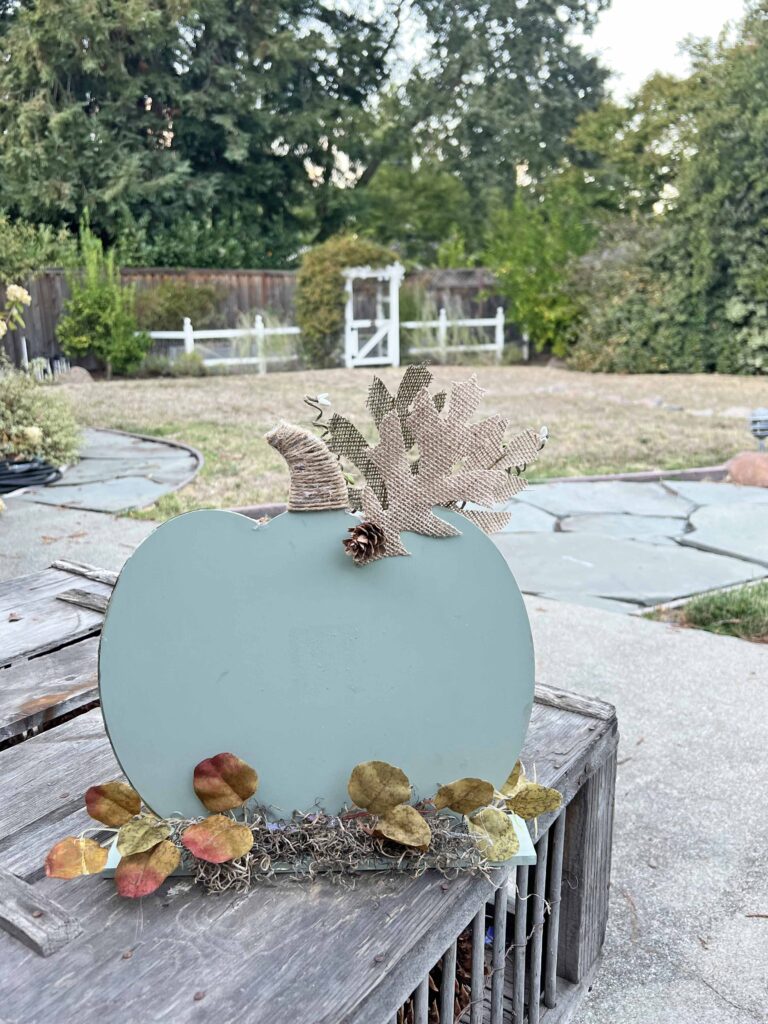
You will never believe how this sign looked like before it got a dress change. A simple Dollar Tree Pumpkin sign is transformed to Fall decor with a bit of sophistication. Come on in and let’s get crafting.
*Affiliate links might be included for your convenience. These affiliate links mean a small commission is earned if you make a purchase using these links at no extra cost to you. As an Amazon Associate I earn from qualifying purchases which support this website. For more information: Full Disclosure Policy.
Inspiration for the Toile Dollar Tree Pumpkin Sign Craft
I love anything toile. It can be on bedding or pillows or table linens, or whatever it might be and my eye is always drawn to it. Our bedroom had black & cream toile bedding at one point, there’s a couple of gray toile throw pillows in the living room right now, and I have a couple of toile pants in my closet, which do not fit me anymore, but that’s a topic for a different post for another day. The point being, toile is my jam and here we are.
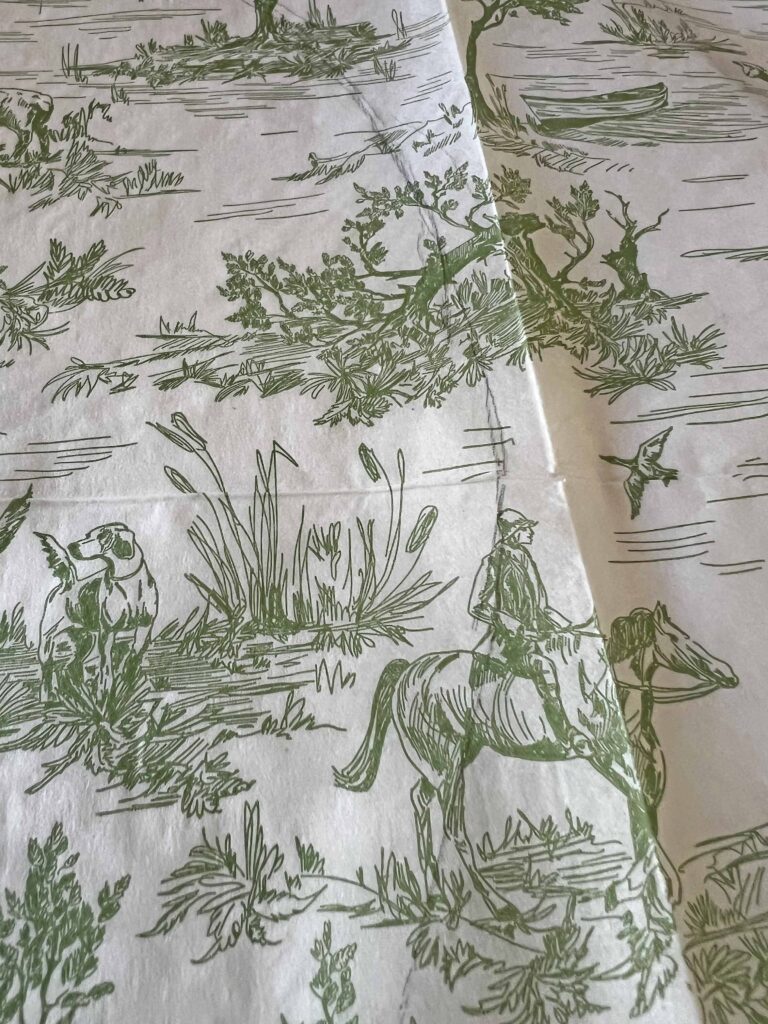
If you’re a regular reader, then you know green is my jam as well. I bought these green toile napkins for a different Christmas themed project, which I will be sharing real soon, but since I have a whole pack of napkins I thought I would use them for a Fall project as well. I’ve crafted so many regular shaped pumpkins through the years, I thought a flat pumpkin sign would be a nice alternative.
How to Create a Toile Decoupaged Pumpkin Sign
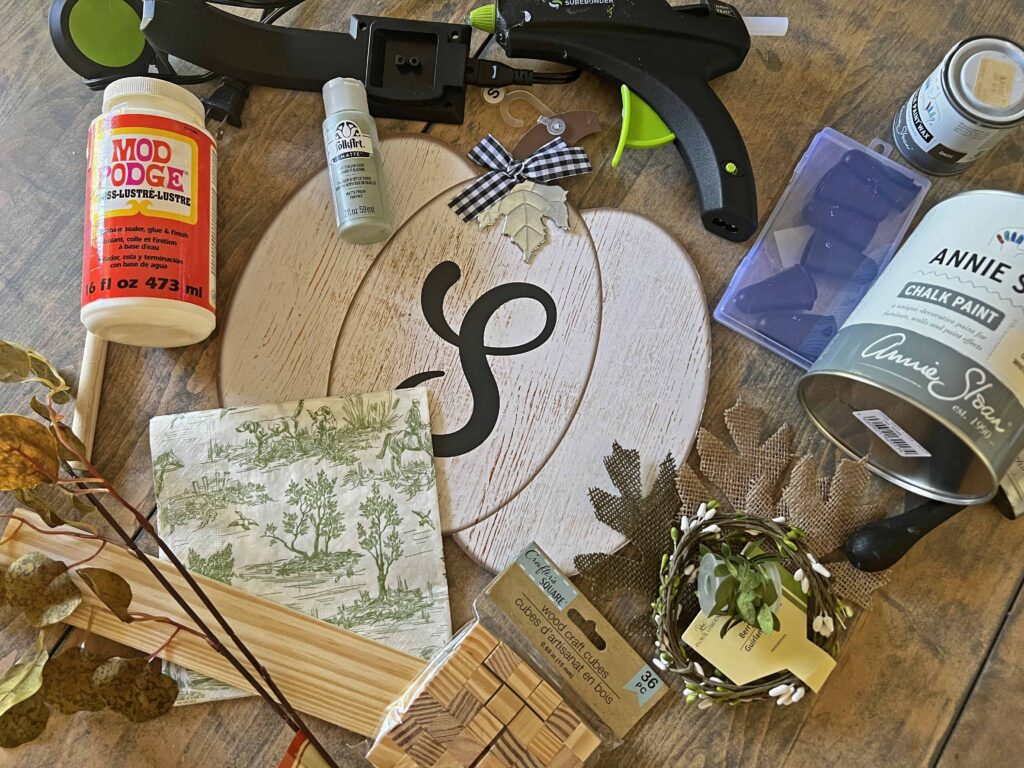
The bulk of my supplies I sourced from the Dollar Tree, including the pumpkin sign, wooden stand, burlap leaves, decorative wired tendrils and eucalyptus leaves. I include sources for other options in the shopping section below, including the napkins, which are from Amazon.

Supplies
- Pumpkin Sign
- Green Toile Paper Napkins (or whatever design you prefer to use)
- Decoupage Medium
- Jute Twine
- Green Acrylic Paint
- White Paint
- Dark Wax
- 2×12 Wood Plank
- 6 Mini Wood Cubes
- Burlap Leaves
- Decorative Wire
- Mini Pine Cones
- Spanish Moss
- Faux Eucalyptus Stems
- Decorative Tag
- Velvet Ribbon
Tools
- Paint Brush
- Foam Brush
- Small Wax Brush
- Hot Glue Gun & Glue Gun Glue Sticks
- Silicone Finger Protectors
- Scissors
- Pencil
Crafting Pro Tip: As I recommend with all my projects, read all the instructions through once and then re-read everything again. This way, you are familiar with everything you need and know what to expect.
Instructions
- Read instructions thoroughly and assemble all supplies & tools
- Remove all tags and stickers from supplies
- Remove embellishments from pumpkin sign (mine had a metal leaf and check fabric bow, which I’ll save for some other project some other day)
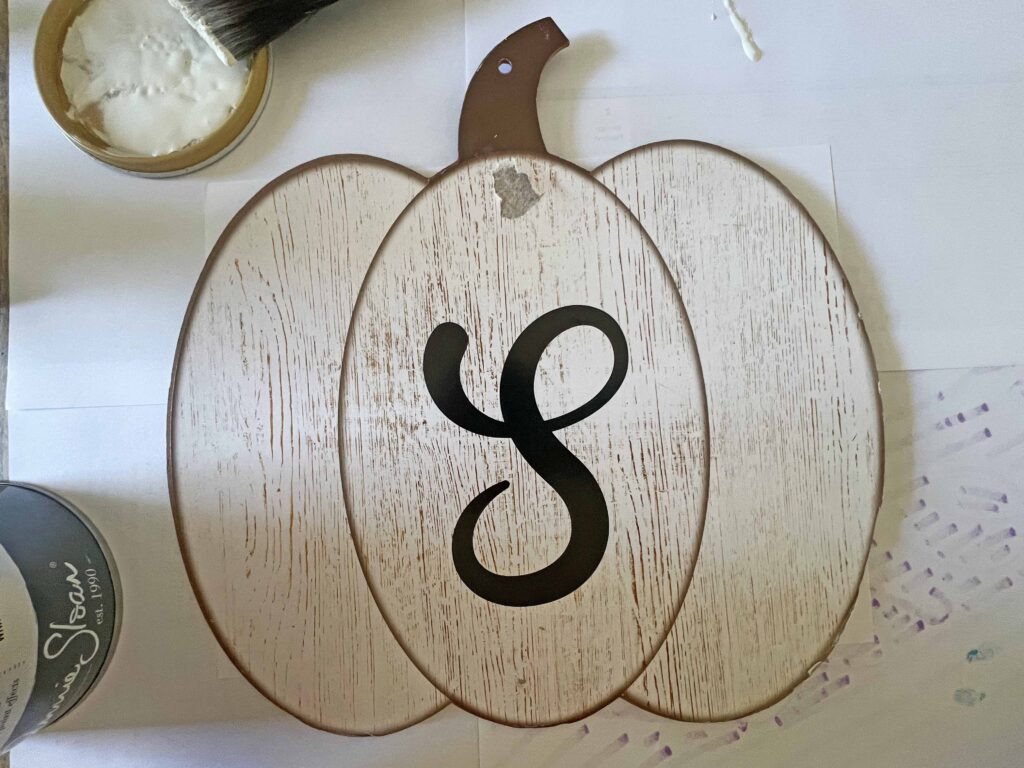
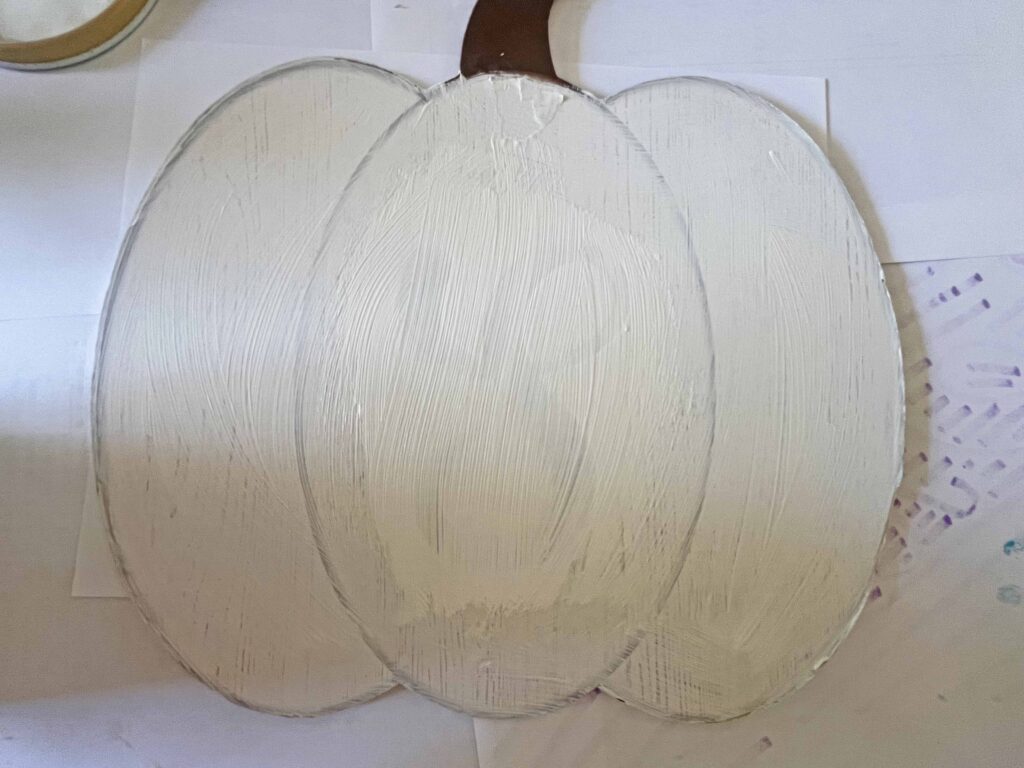
- Use white paint to cover any design and create neutral background on pumpkin sign
- Set pumpkin aside to dry
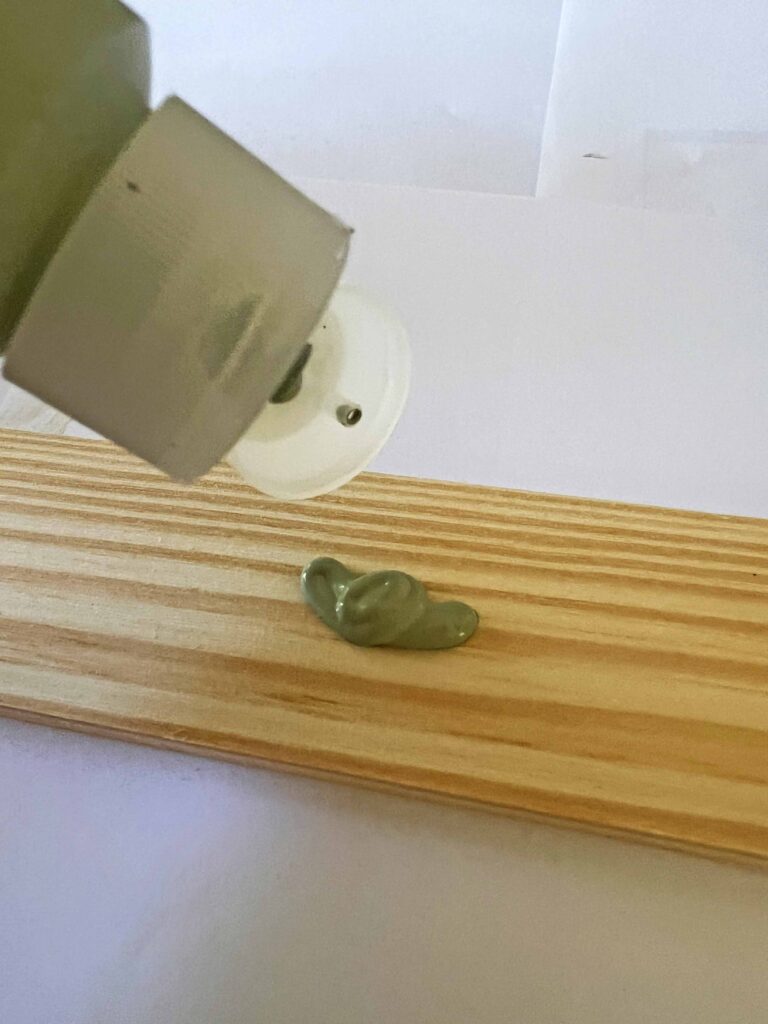
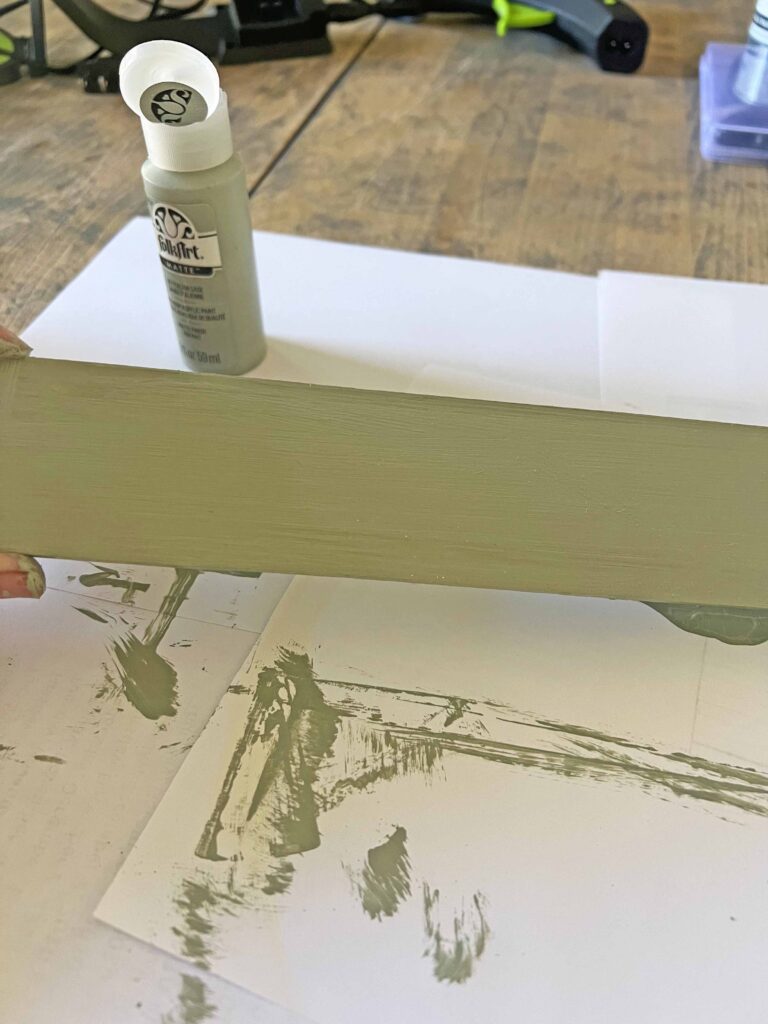
- Paint 2×12 wood plank with green acrylic paint on all sides and set aside
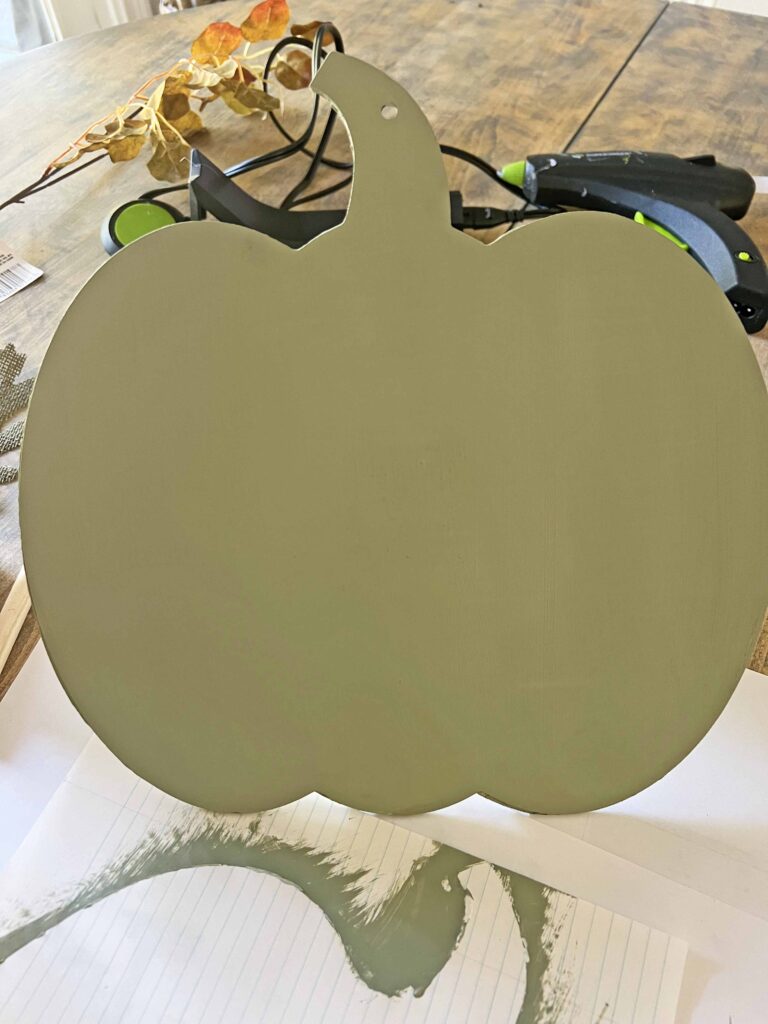
- Once front side of pumpkin is dry, paint the entire back side with the green acrylic paint
- Peel paper napkin layers so you only have top layer with design (I used two napkins for this project)
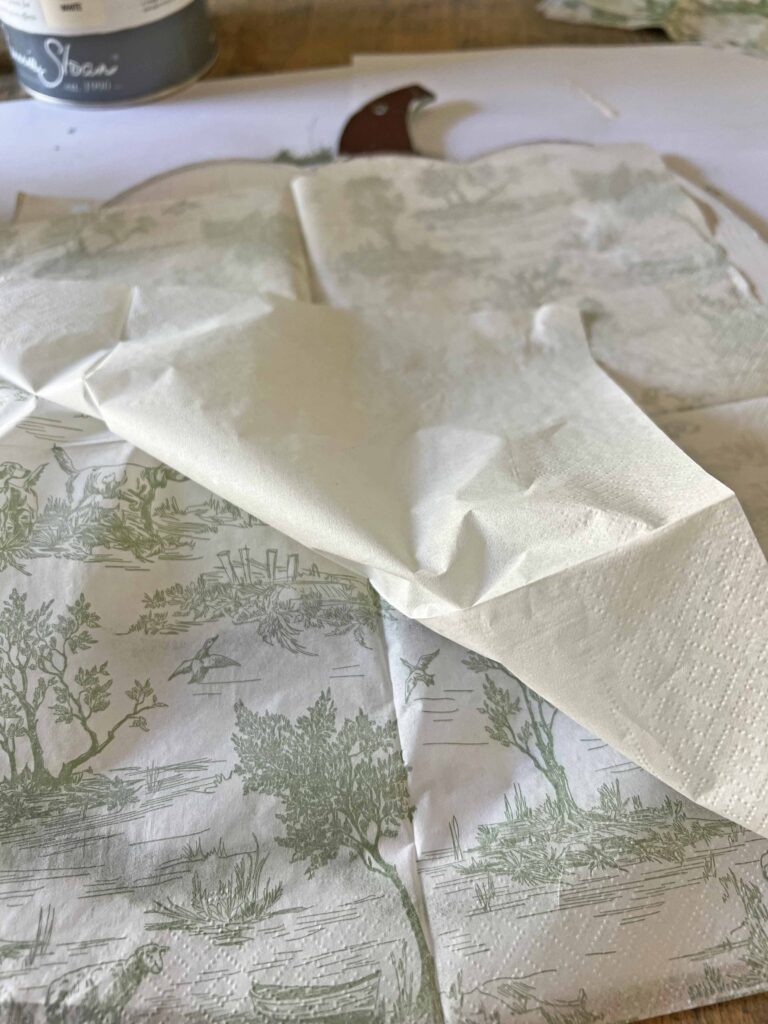
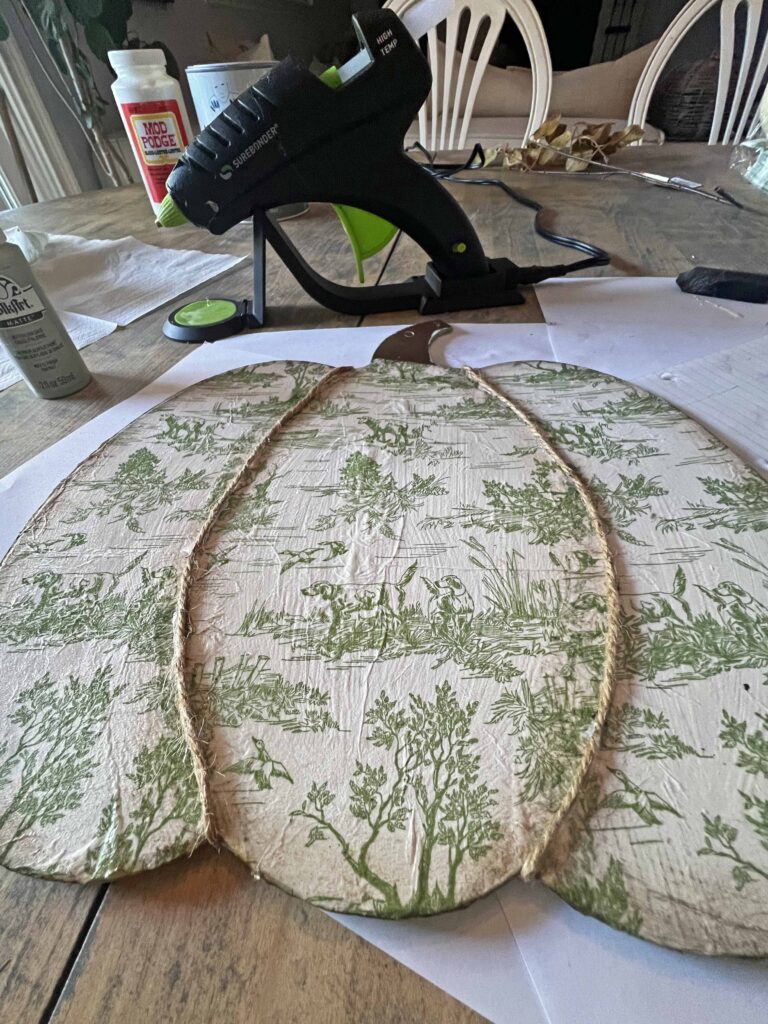
- Once pumpkin is fully dry, cut out a piece of napkin that fits center section of pumpkin
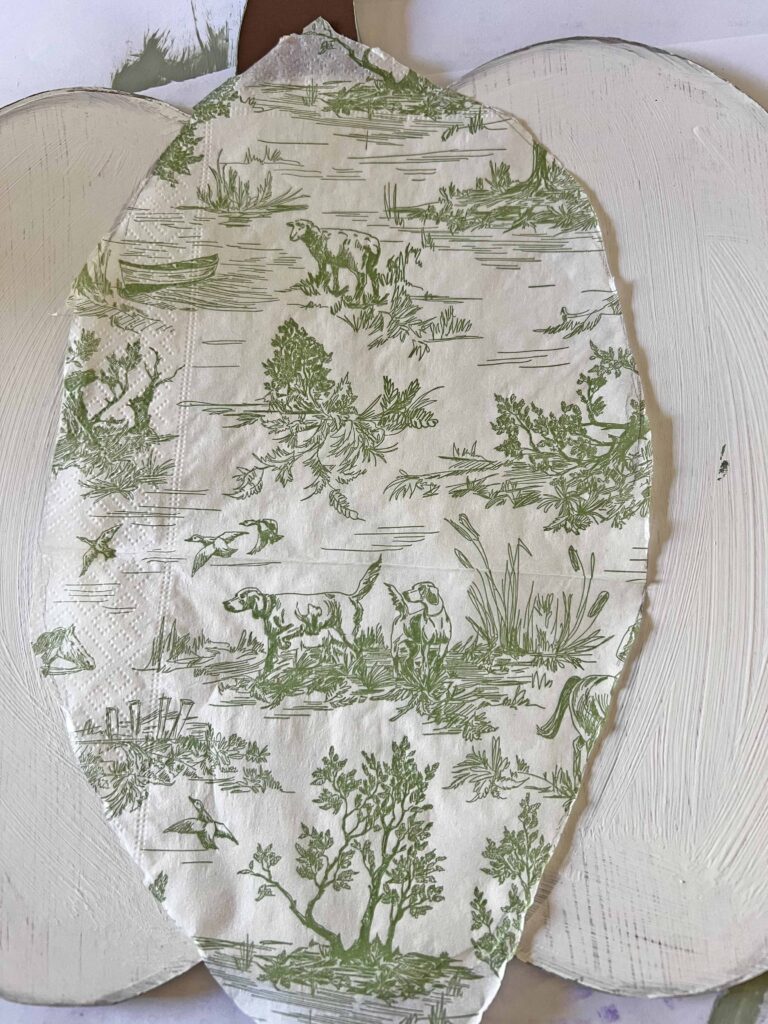
- Using foam brush apply a layer of decoupage medium on middle section of pumpkin and lay napkin section down carefully, making sure to prevent air pockets and rips
- Then repeat the same 2 previous steps for the left and right section of the pumpkin overlapping the napkin layers
- Note: If you have a gap or uncovered section just cut a piece of napkin to size and decoupage in open section; the process is pretty forgiving
- Trim any excess napkin around the edges; I used the lighter method but you can use sand paper or a scissor
- Plug in hot glue gun to heat up
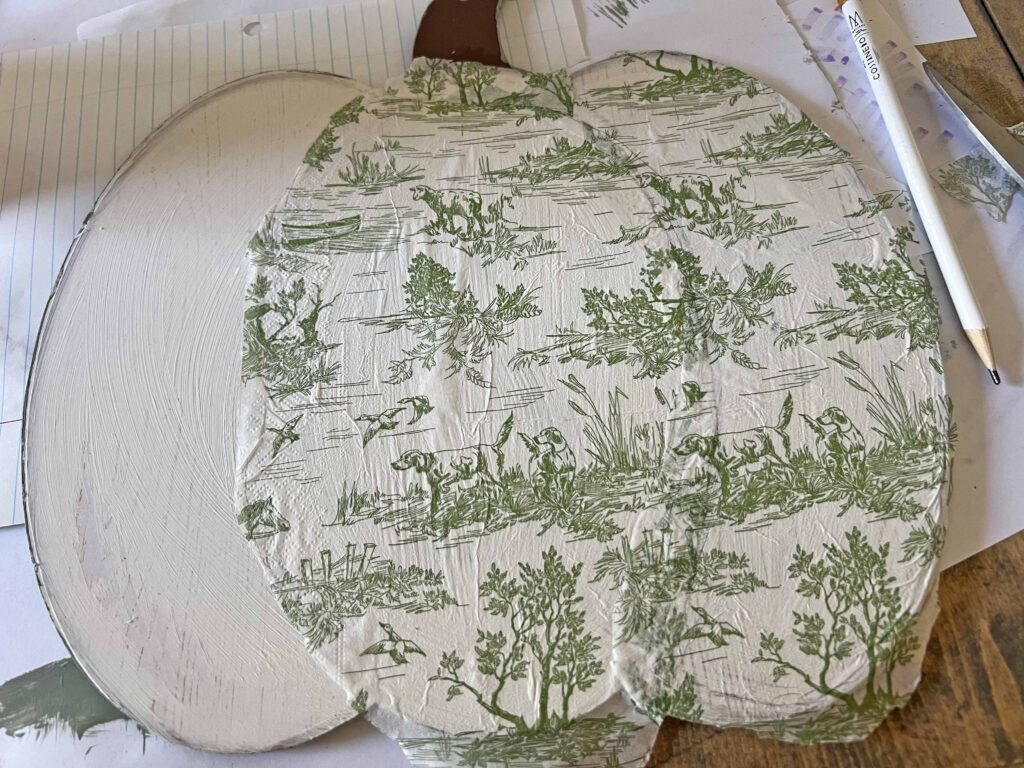
- Using a pencil draw a light line where ribs go down pumpkin as a guide
- Apply a thin layer of decoupage medium on top of napkin covering entire pumpkin to seal it
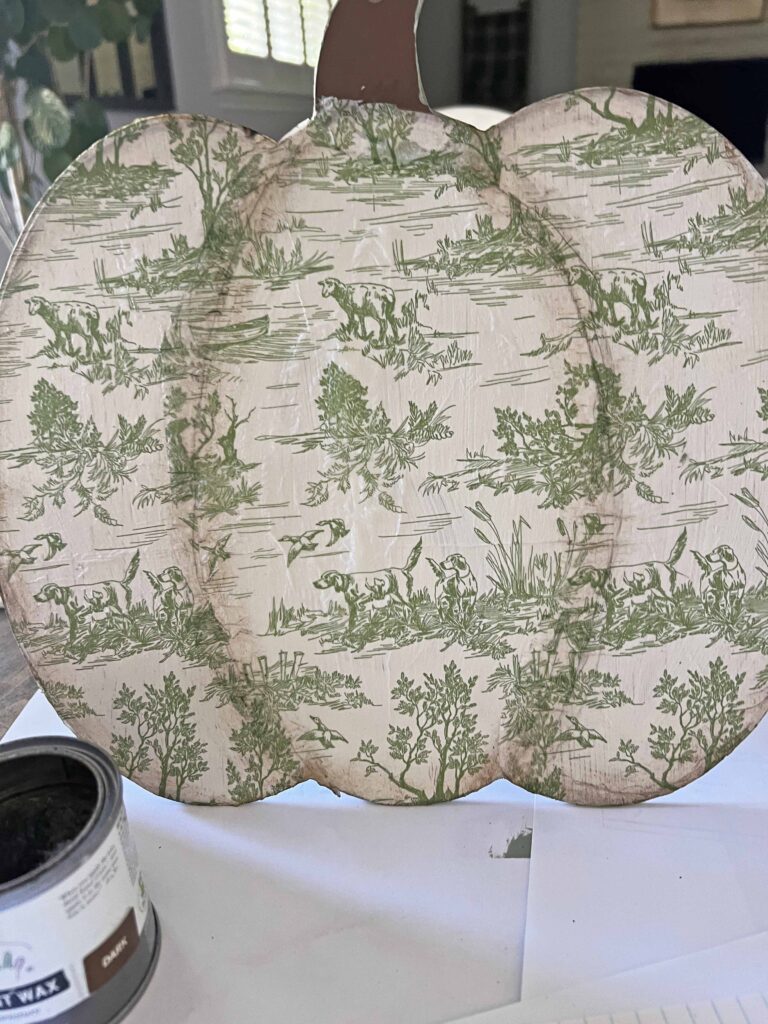
- Once decoupage medium is set, use the small wax brush to apply the dark wax around the edges of the pumpkin and where the ribs go down the middle of the pumpkin to create depth, dimension and also patina.
- Using hot glue gun adhere 2 pieces of twine where the ribs go from top to bottom of pumpkin over pencil lines & the dark wax shadowing
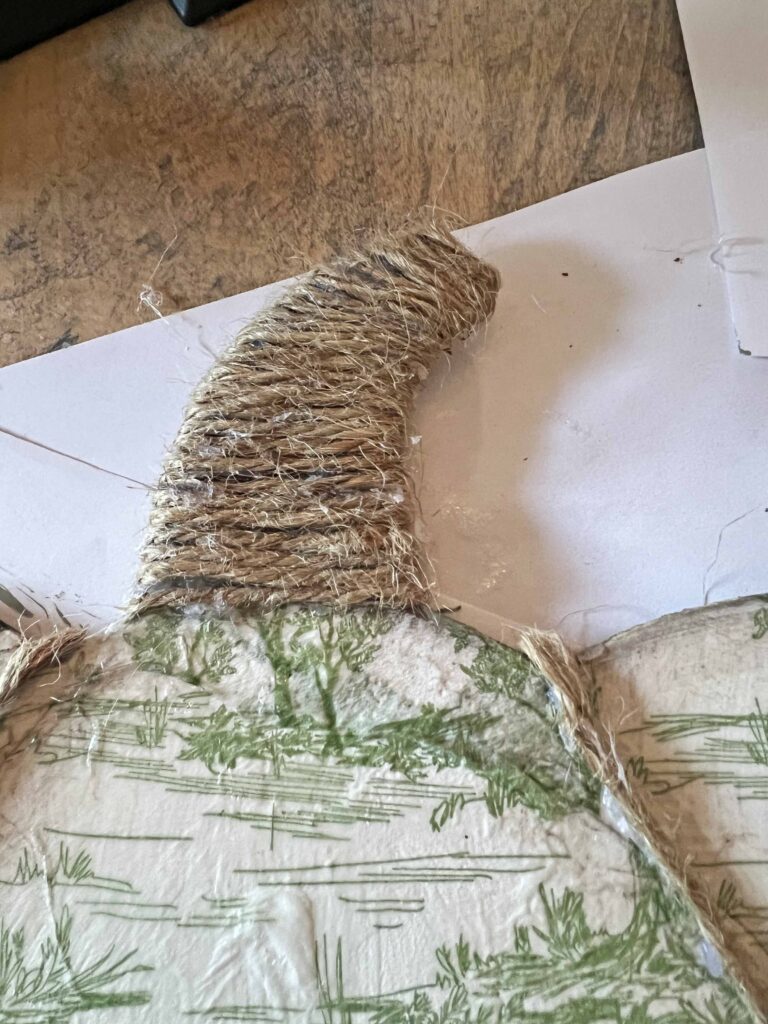
- Cover entire stem with jute twine, starting at the bottom and wrapping all the way around until fully covered, using hot glue along the way to adhere it securely
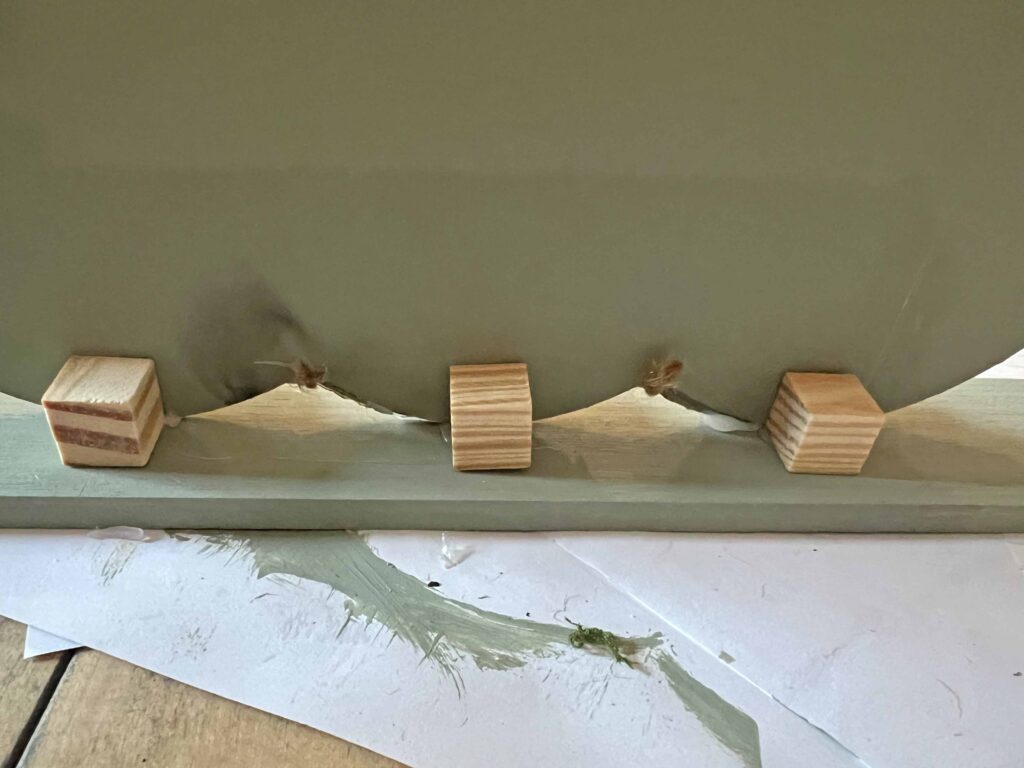
- Glue bottom of pumpkin centered on 2×12 wood slab
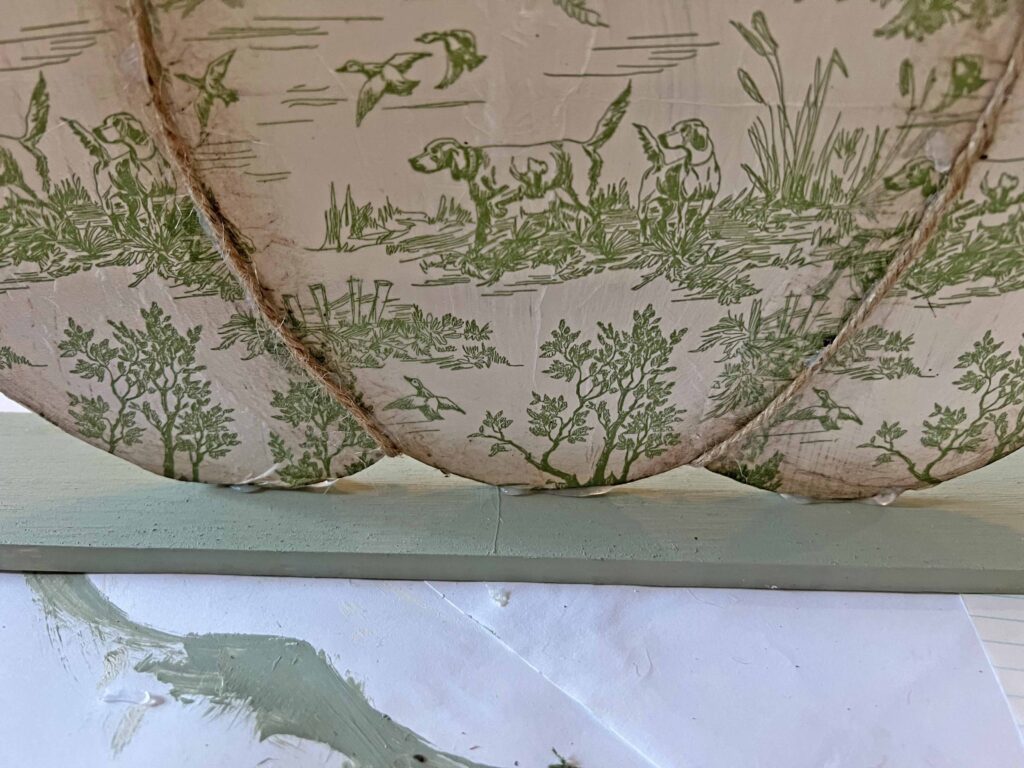
- Hold in place until pumpkin can stand on it’s own
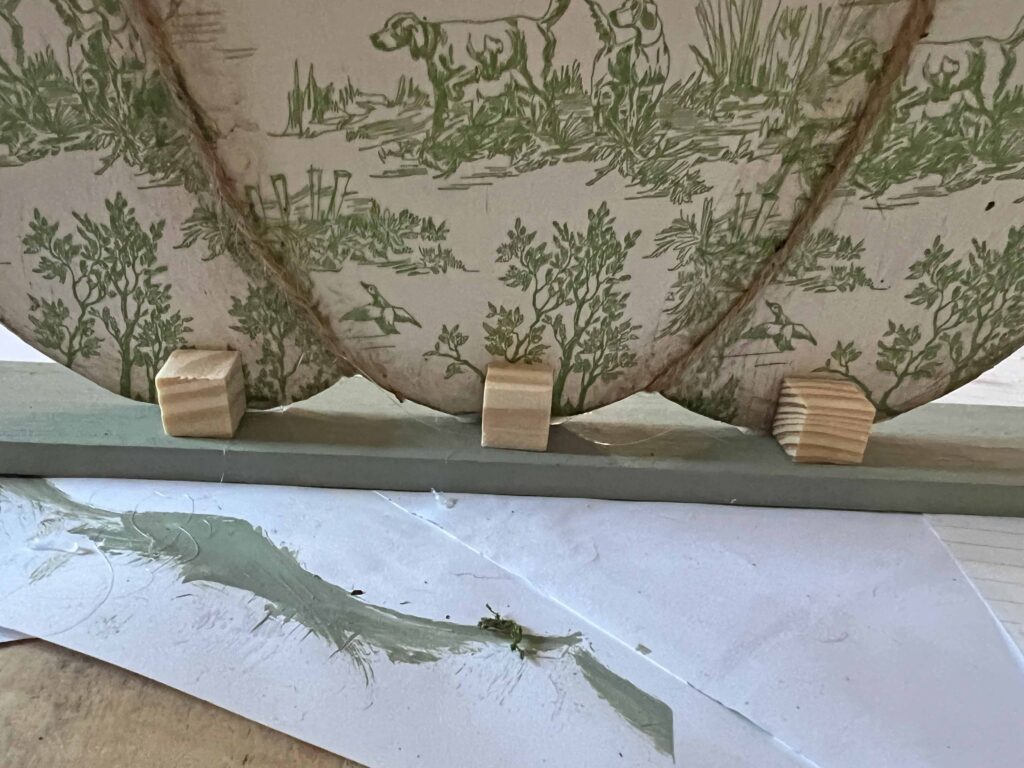
- Attach 3 wooden blocks on bottom of pumpkin using hot glue to secure it on stand
- Repeat the step above on other side (green side) of pumpkin to fully secure the pumpkin in place
- Glue Spanish moss on the bottom of pumpkin creating a bed and hiding all the mechanics on both sides
- Add faux eucalyptus leaves on Spanish moss by apply hot glue on stems and inserting into moss on both sides

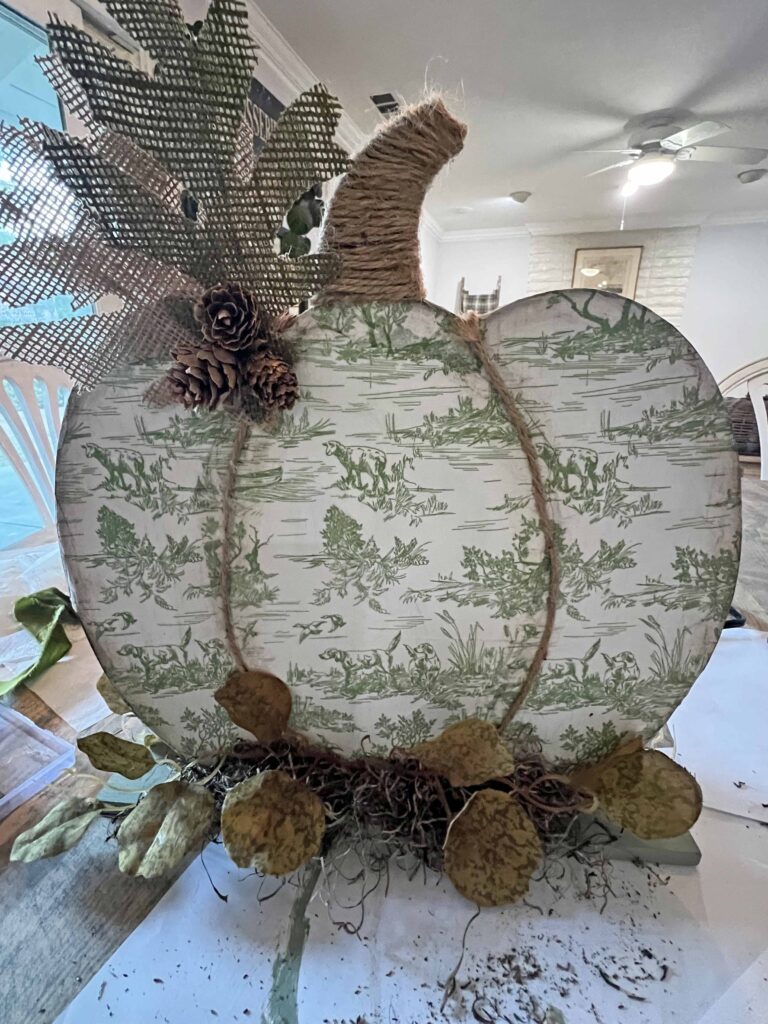
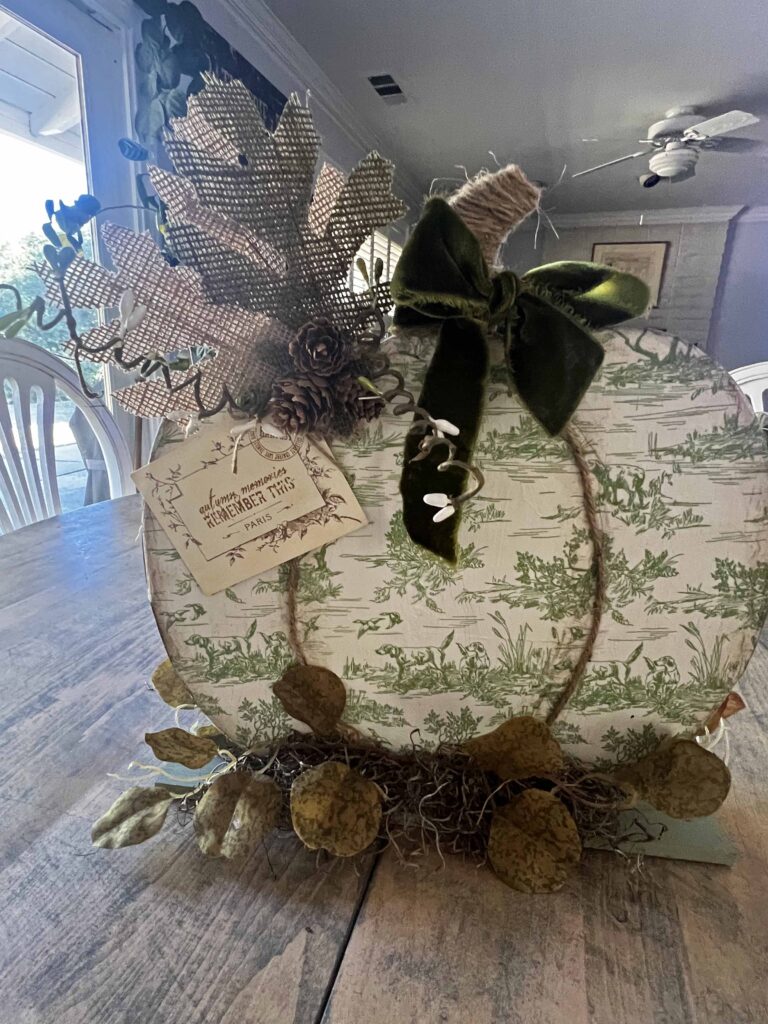
- Glue burlap leaves, mini pine cones, tendrils and tag on base of stem to one side
- Glue a leaf and pine cone on the back of pumpkin if desired
- Tie a velvet ribbon bow on stem
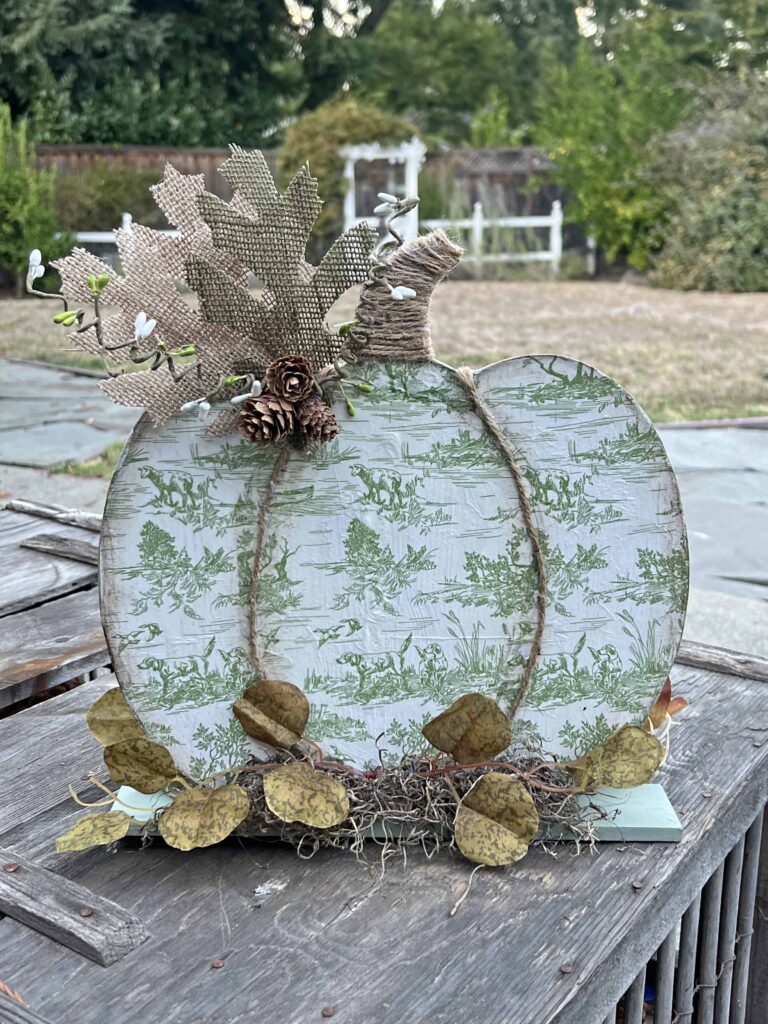
- Voila! Enjoy your new unique Fall pumpkin decor
Tips & Tricks for the Toile Decoupaged Pumpkin Sign
There are many, many steps to this DIY, and you can do them all or adapt it to your own preferences. I chose to make the sign two sided so if the back shows, it’s still pretty from the other side. If it’s on a sofa table or tablescape where the back is visible; this makes it two sided friendly.
The Spanish moss or some other type of moss and|or greenery are necessary to cover up the mechanics of the structure to hold up the pumpkin. All the other decorations are totally optional. Choose embellishments and trims you have on hand or are your preference. All the embellishments I used are from my craft stash and not necessarily for this particular project. I brought everything together when I started the project. Some items I didn’t use, and I also added others I hadn’t anticipated. Allow creativity to guide you and give yourself the freedom to experiment.
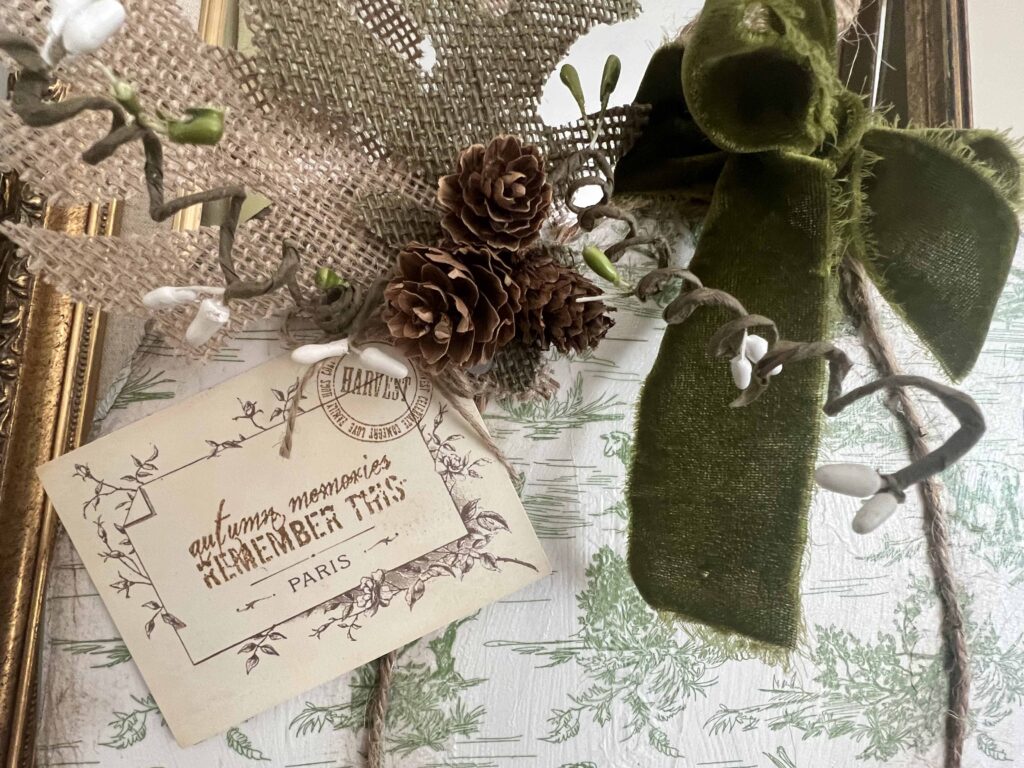
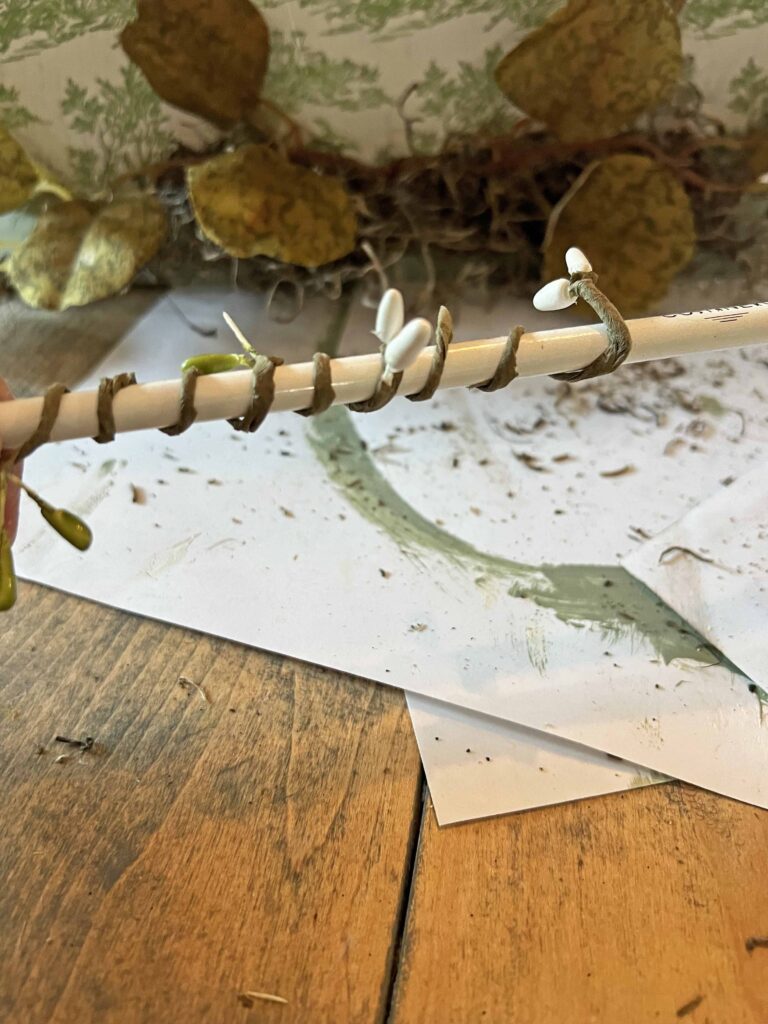
To create the tendrils use a decorative floral wire around a pencil several times to form the spiral effect. It’s a super easy technique and the tendrils add great dimension with the leaves and pine cones on the top of the pumpkin.
Decoupaging is a pretty forgiving technique, and although it can initially be intimidating it proves to be fairly easy after minimal experience. This post {How to Decoupage Easter Eggs} can be helpful with technique pointers. When you use paper napkins for decoupaging, make sure you only use the top layer of the napkin with the printed design. Napkins come either 2-ply or 3-ply, and you want to remove the blank layers before you begin.
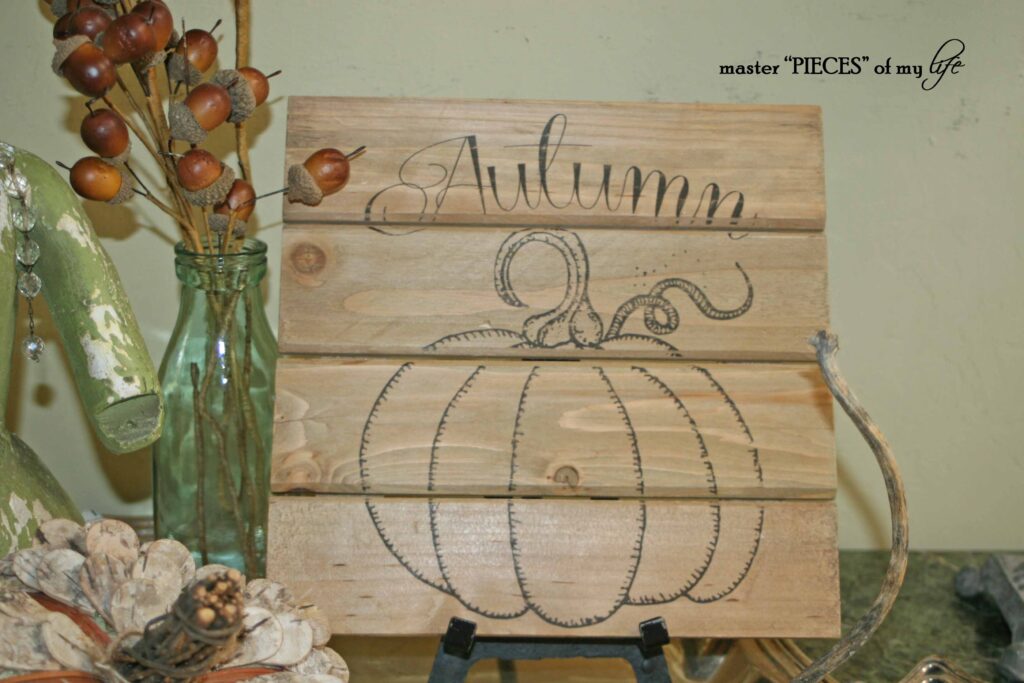
I selected the monogram pumpkin sign from the Dollar Tree for two reasons. The sign had a white neutral background and the letter was a small area to cover up. Please know I used white chalk paint to cover the monogram, and it took me three coats of paint to fully cover the black letter. I later realized I should have painted what was considered the front in the solid green and used the back as the decoupaged front. It would have been easier in this respect, but hindsight is 20/20.
Closing Thoughts
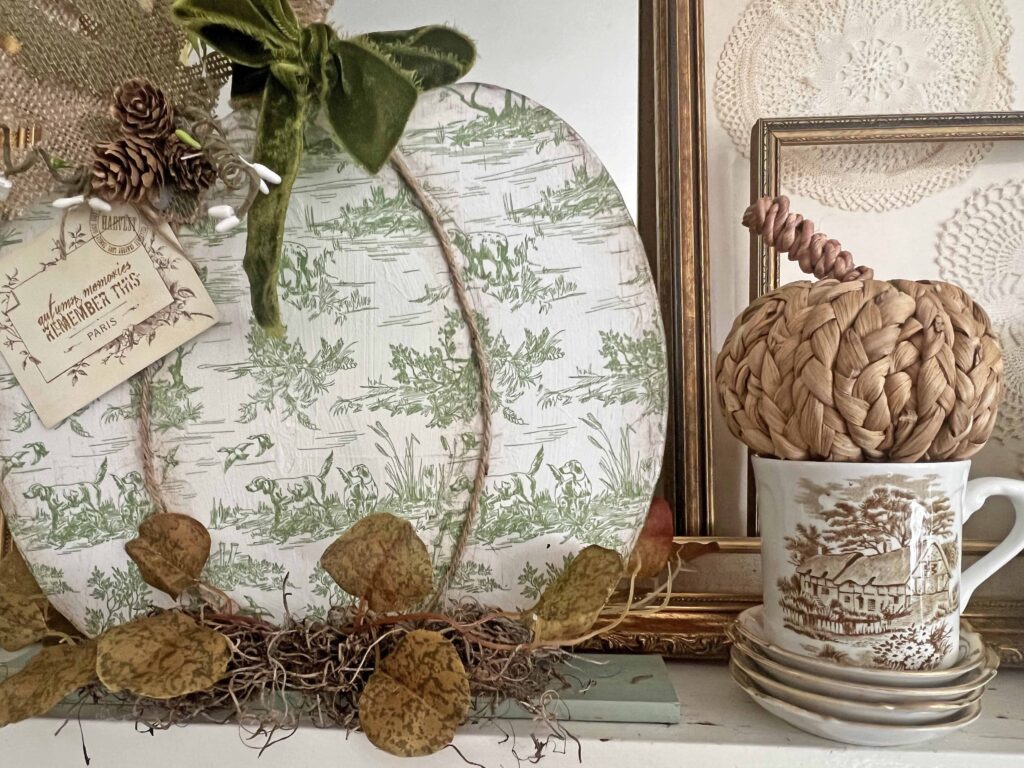
Many toile patterns include pastoral scenes. The pattern I used here includes outdoor scenes with animals, including horses, sheep, birds, and, and….hunting dogs that look like our Misty girl. A personal touch in our projects is the best. It endears whatever we create at an intimate level.
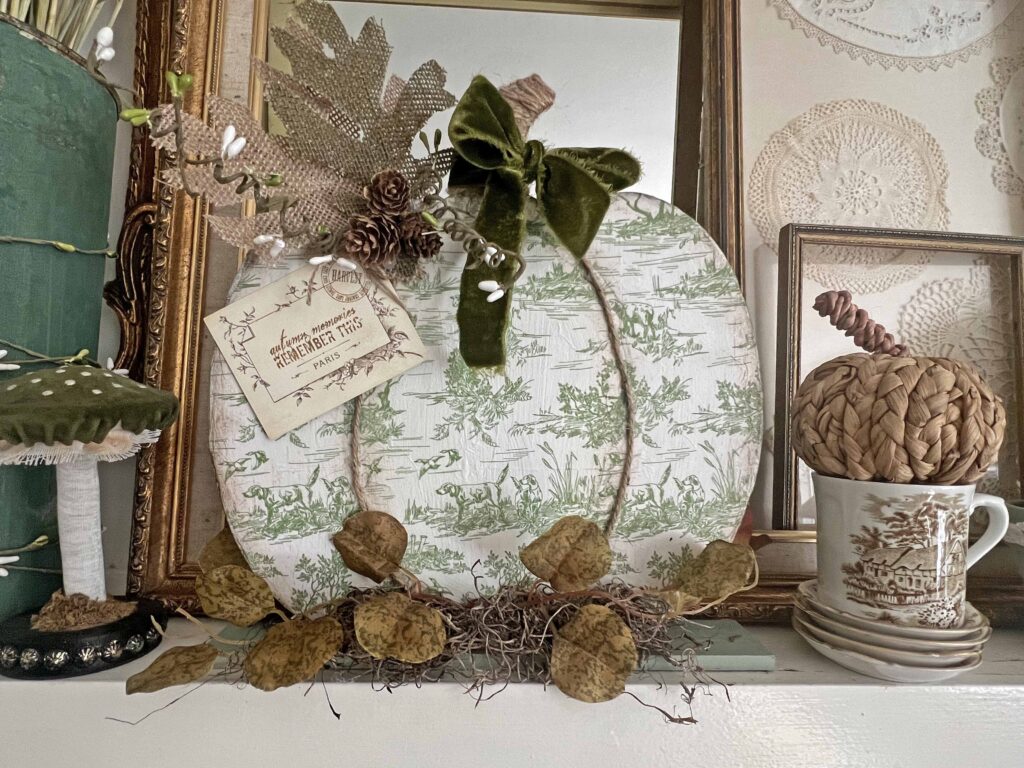
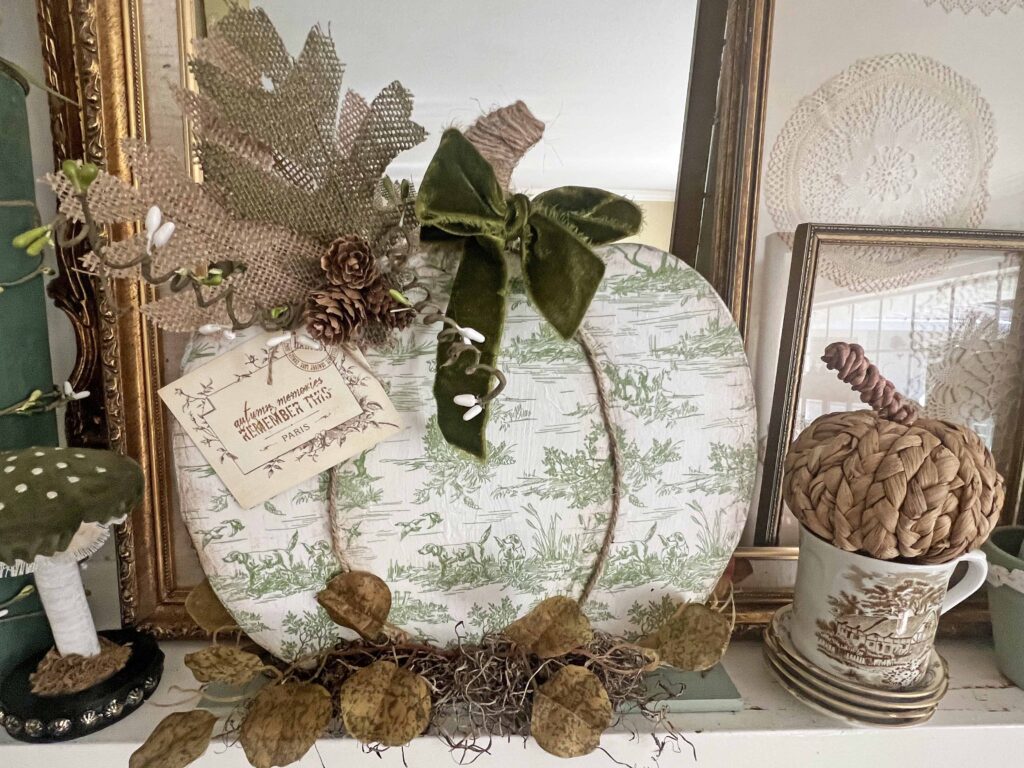
I staged the toile decoupaged pumpkin sign on the mantel, creating a spur of the moment mantel scape. I just grabbed a few things I had on hand, including a few recent projects and some thrifted pieces I have been using on repeat around here.
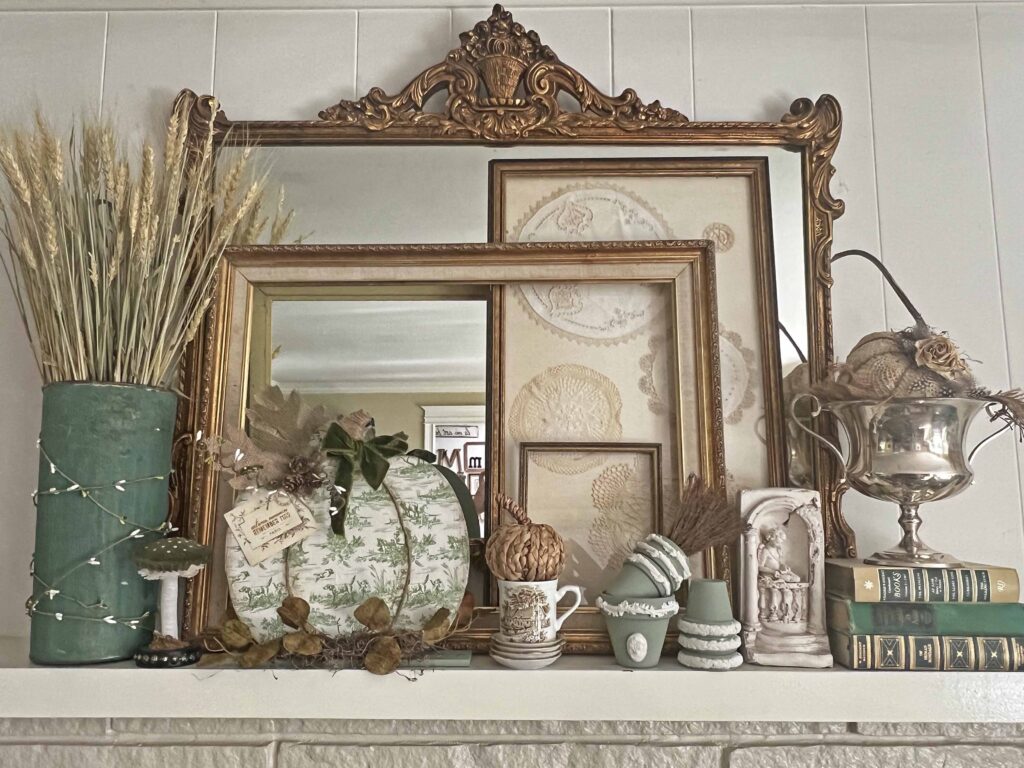
The green bucket and the cherub statuary are thrift finds, which you have seen before and you will be seeing again. They are both super versatile for my personal style. The green bucket is rustic and grungy, while the statuary has that vintage garden vibe. The small transfer ware cup in the middle is from my latest thrift outing. It had me at brownish transferware with a hint of olive green. The next installment of Thrifted Goodies comes out next Thursday so make sure to drop by or even better, sign up to receive all Master”Pieces” of my Life new posts to your in-box.
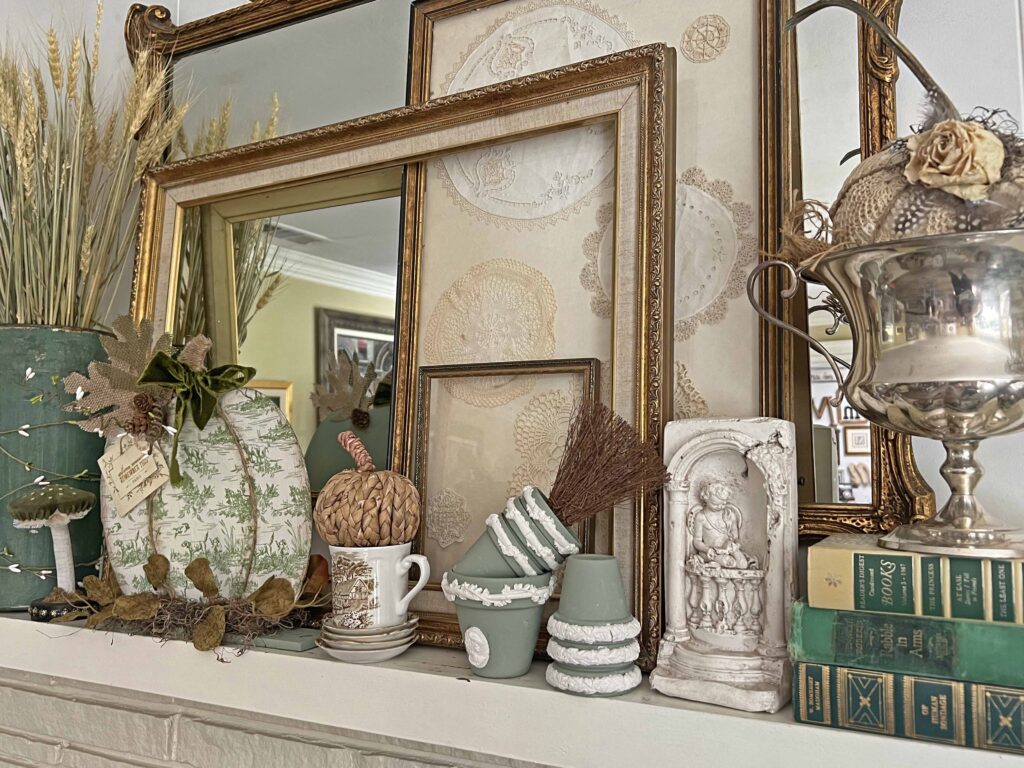
The mantel scape also includes another recent Easy Boho Pumpkin DIY along with the faux Wedgwood Jasperware pots I created not too long ago. Decorating your home with your own creations gives it your personal style stamp and creates unique looks. It’s also less expensive and extremely gratifying. I hope this project inspires you to create a personal decor piece for your own home. Thanks for being here friends.

Shop the Toile Pumpkin Sign Look
- 12 Inch Wood Pumpkin Shape
- Green Toile Paper Napkins
- Mod Podge Decoupage Medium
- Jute Twine
- Italian Sage Acrylic Paint
- Burlap Leaves
- Spanish Moss
- Mini Pine Cones
- Green Velvet Ribbon
- Vintage Tags

More Related Posts
Most Recent Posts
Autumn is a second spring when every leaf is a flower, and every pumpkin a lantern.”
Albert Camus
SO cute, MJ!! Love the green toile for fall…such a pretty color for the mantel!
Thanks so much Rachel! Yes, two favorites of mine. XO- MJ
Genius!! I love the added pattern! So cute and creative!??
Thank you baby girl! I appreciate the love. ??
This turned out so great! I adore toile and love the green color! It blends beautifully with your decor! Pinning now because I have that same pumpkin to use!
I’m so glad you liked it Donna. That’s so funny that you have the same sign but not surprising. Can’t wait to see what you do with yours! XO- MJ
Oh my goodness MaryJo, the colors of your pumpkin took me back to when we purchased our home. We had toile wallpaper on the walls that color. We did take it down, but if it would have been a hunting scene, I may have kept it. I kept a small piece of it to do something with it. I love this pumpkin project! I think I have a pumpkin like this one in my stash. I’ll have to take a look at those napkins, they are divine!
Thanks Cara! We always like the same looks. You have good taste friend. lol. XO- MJ
Gorgeous pumpkin – such an upgrade! And I love your mantle scape.
Thanks so much Bethany. I appreciate your sweet words. XO- MJ
I always love everything toile & the green is so perfect for fall! This is amazing!
What a pretty pumpkin! I’ll be featuring your post at Thursday Favorite Things tomorrow. 🙂
Thanks so much Pam. I’m so happy you liked it and appreciate the feature. XO- MJ
Thank you for sharing your Toile Decoupaged Pumpkin Sign at Create, Bake, Grow & Gather this week Mary Jo. I’m delighted to be featuring this project at the party tomorrow and pinning too.
Thanks so much! I’m glad you liked it. XO- MJ
OH, this turned out so beautifully, MaryJo! Thank you for sharing this post with us at the Will Blog for Comments #50 linkup. Have a great week! We hope to see you at #51 with more posts to share (old or new), which opens next Monday morning.
Thanks Jennifer. And thank you for hosting. It’s always fun to join. XO- MJ