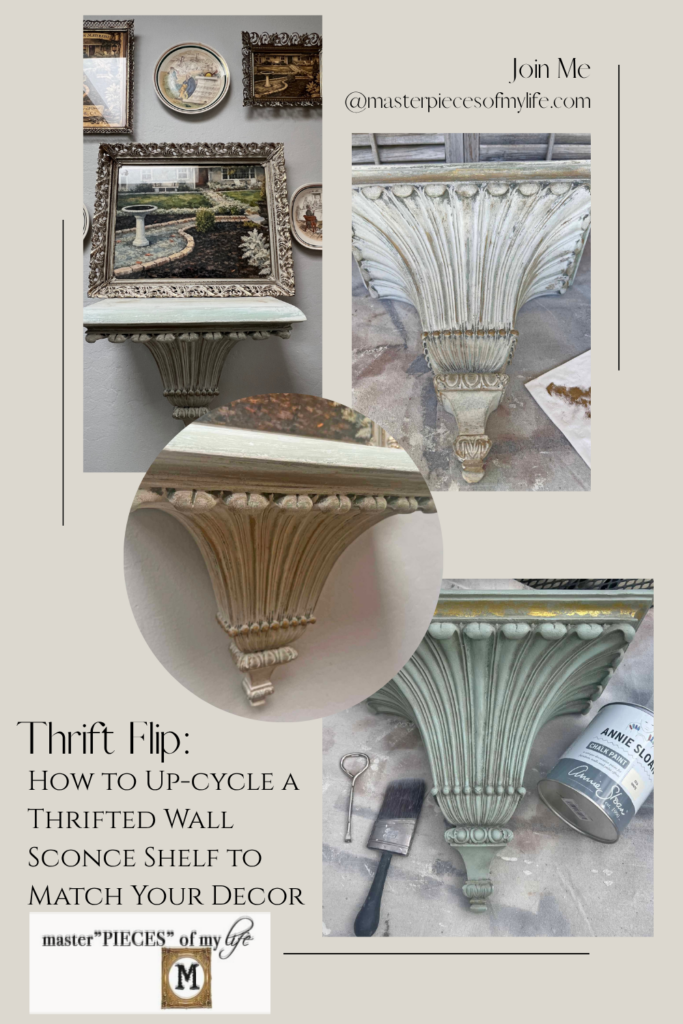
Thrift Flip: How to Up-cycle a Thrifted Wall Sconce Shelf to Match Your Decor
Do you find unique decor accents at thrifts but the color or style doesn’t necessarily match your aesthetic? Don’t let that deter you! Making a thrifted find truly yours involves looking past an item’s current appearance to see its potential. By applying personal, creative touches to match your unique style creates a signature piece. This latest thrift glow-up involves an easy up-cycle for a wall sconce shelf with a few easy steps.
Thrift stores are a wonderful resource for finding decor items at a great value. The problem is these thrifted decor items are usually a bit outdated or unloved. There are super easy ways to up-cycle thrifted items with paint, wax, gilding, gels and more converting them into uniquely trend forward decor pieces.
Key Takeaways
> Transform thrifted decor by reimagining and repurposing
> Step by Step Tutorial – Flipping a sconce wall shelf
> Tips & Recommendations for thrift flips
> Other thrifted decor flip inspiration
> FAQs
*Affiliate links might be included for your convenience. These affiliate links mean a small commission is earned if you make a purchase using these links at no extra cost to you. As an Amazon Associate I earn from qualifying purchases which support this website. For more information: Full Disclosure Policy.
Transform, Up-cycle, Repurpose – Make it Yours!
Making a thrifted find truly yours begins with intentional hunting, followed by cleaning and altering, finally finished with a custom styling, which reflects your personal style. Look beyond an item’s current condition, including shape, color, dirt, and outdated hardware. These are all easy fixes with some elbow grease, a coat of paint and finishing mediums.
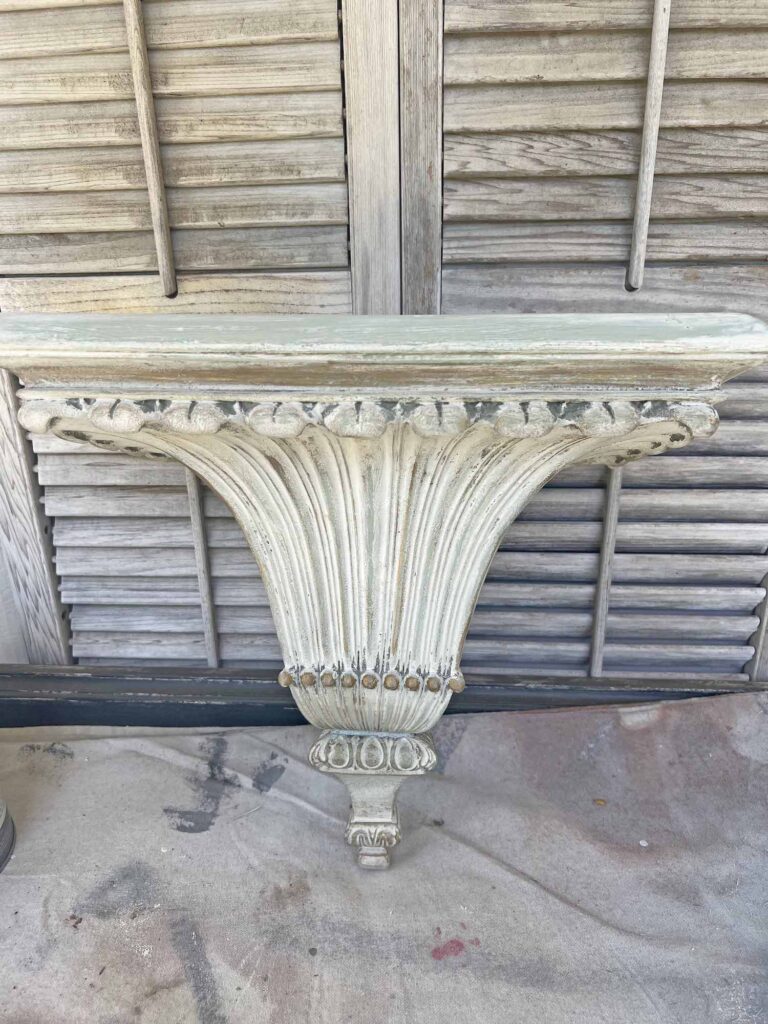
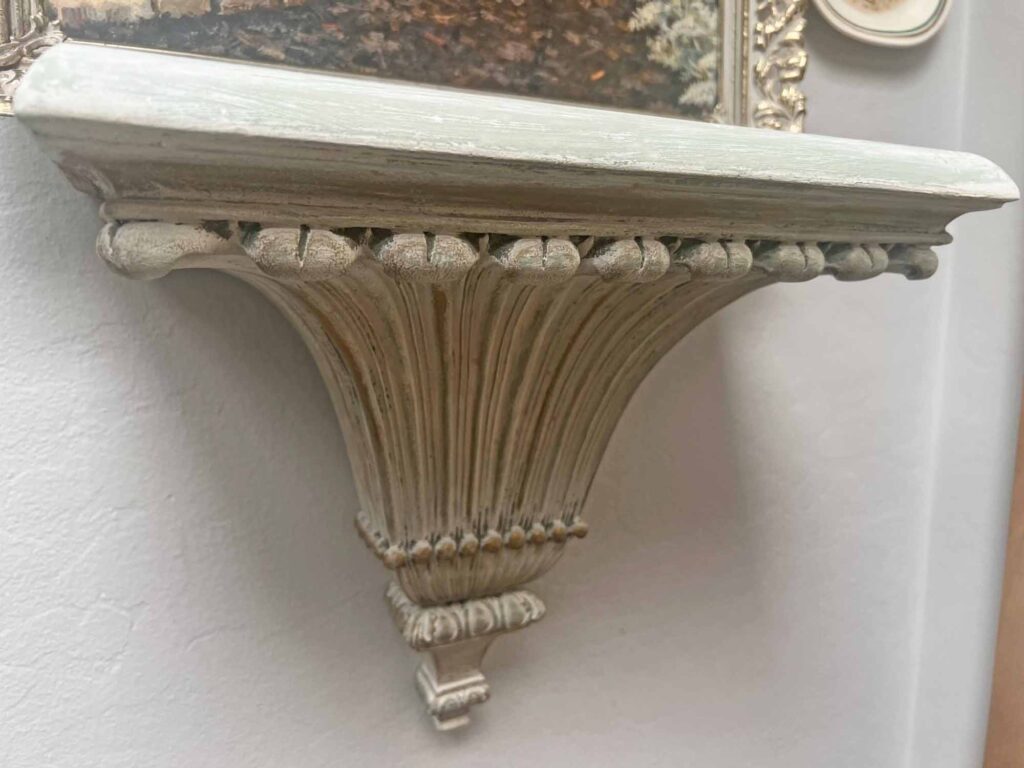
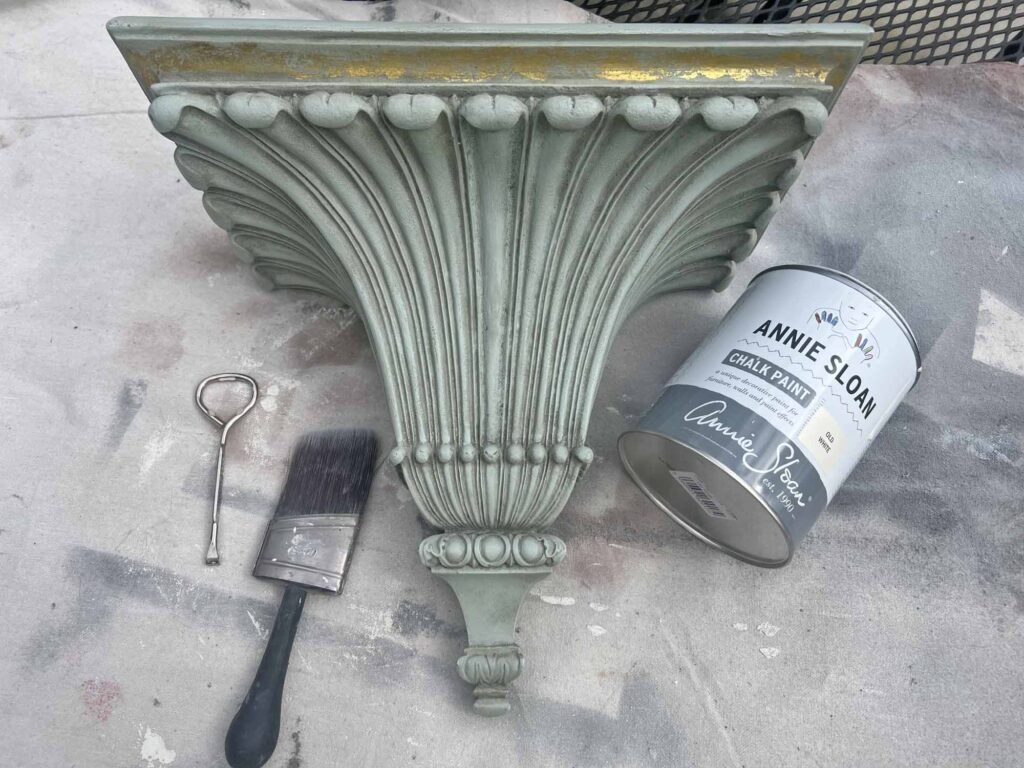
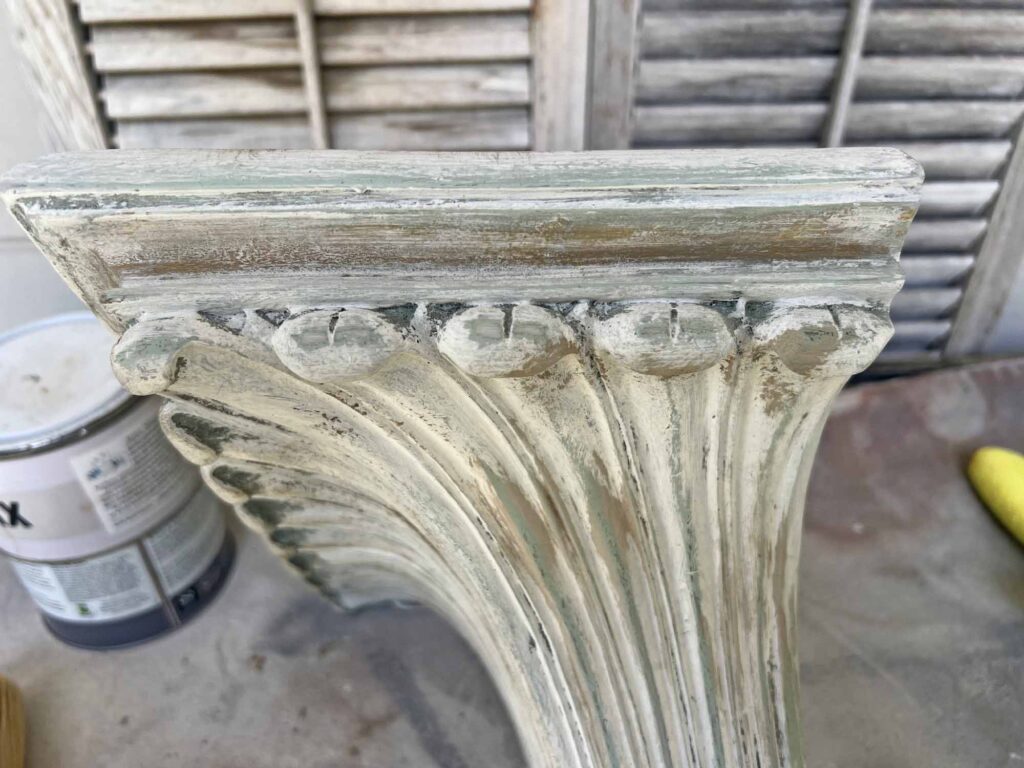
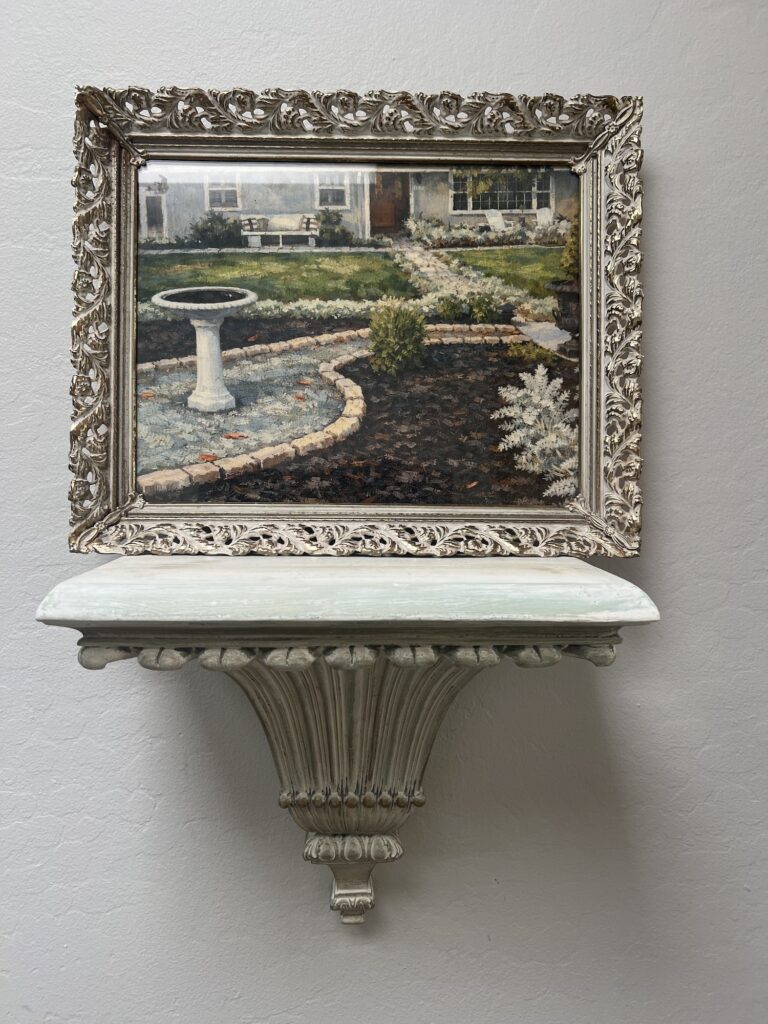
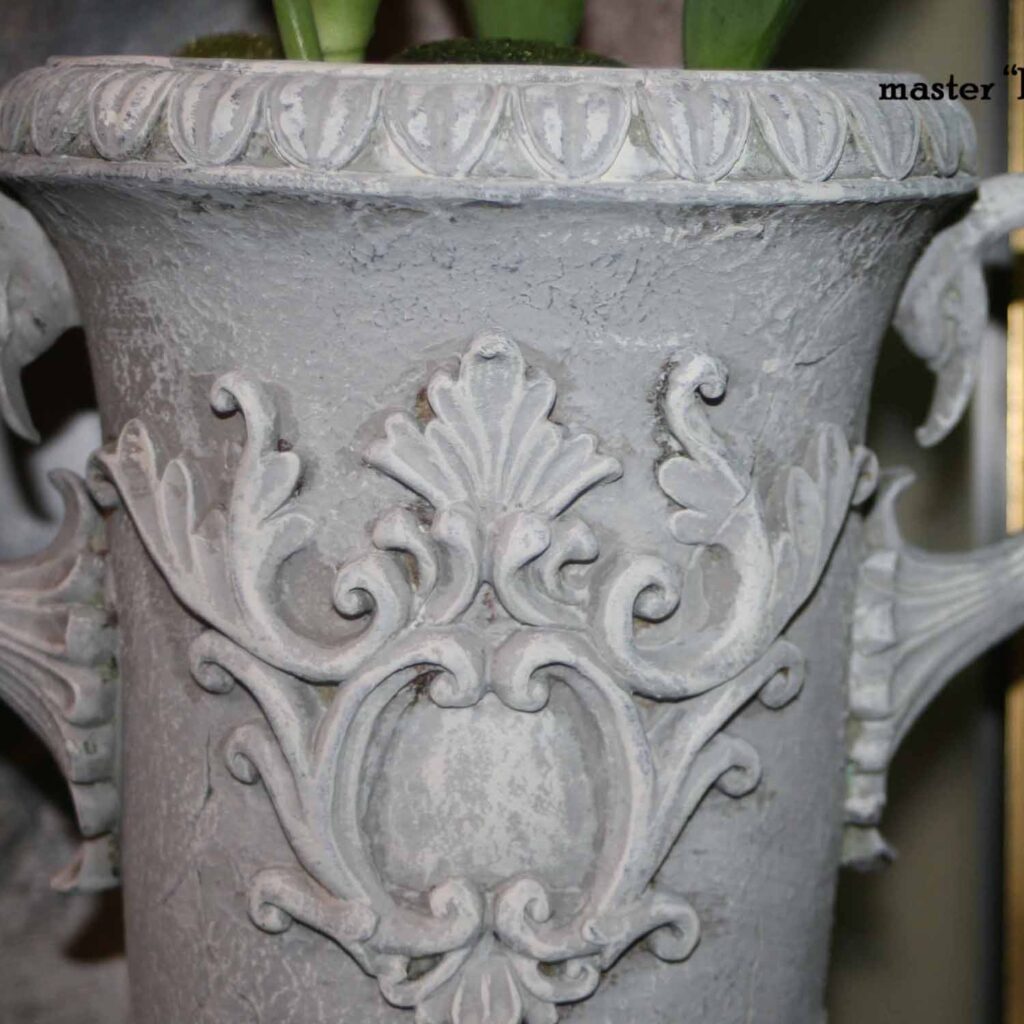
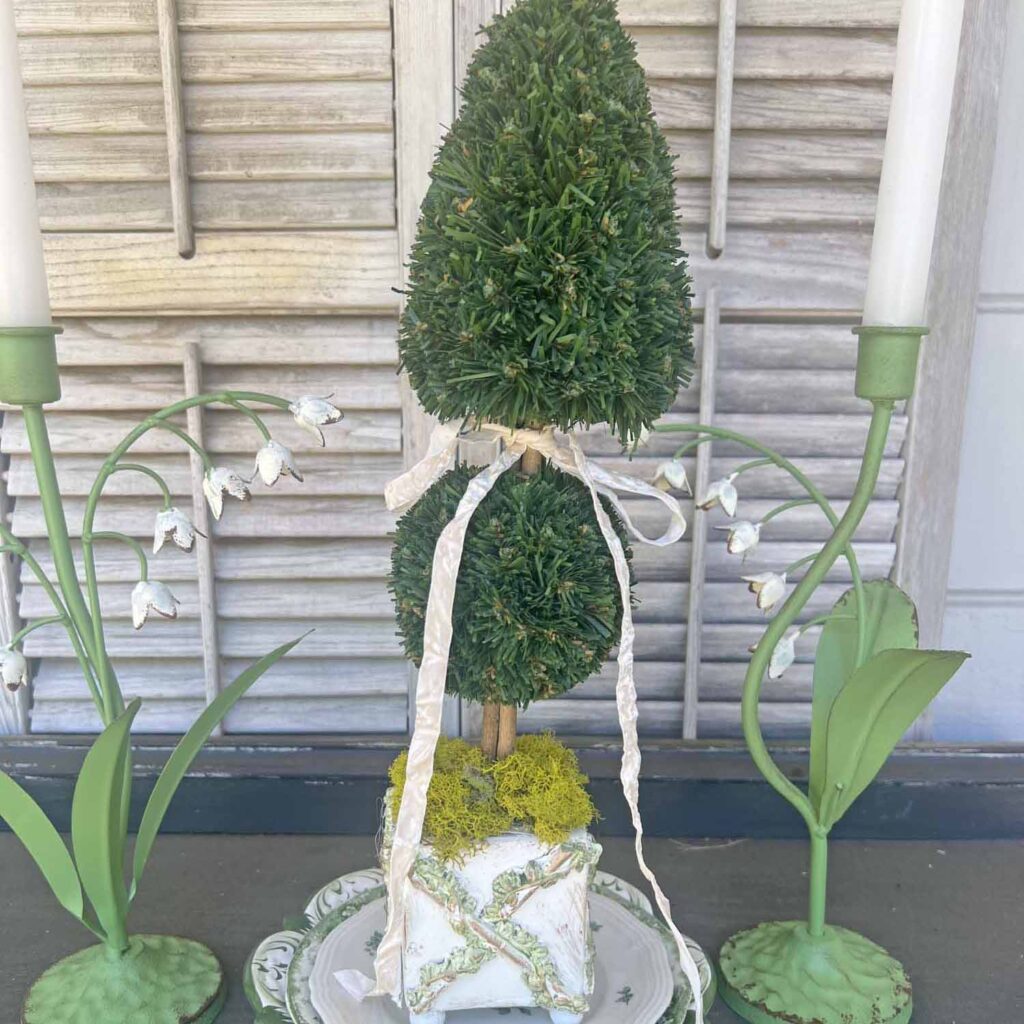
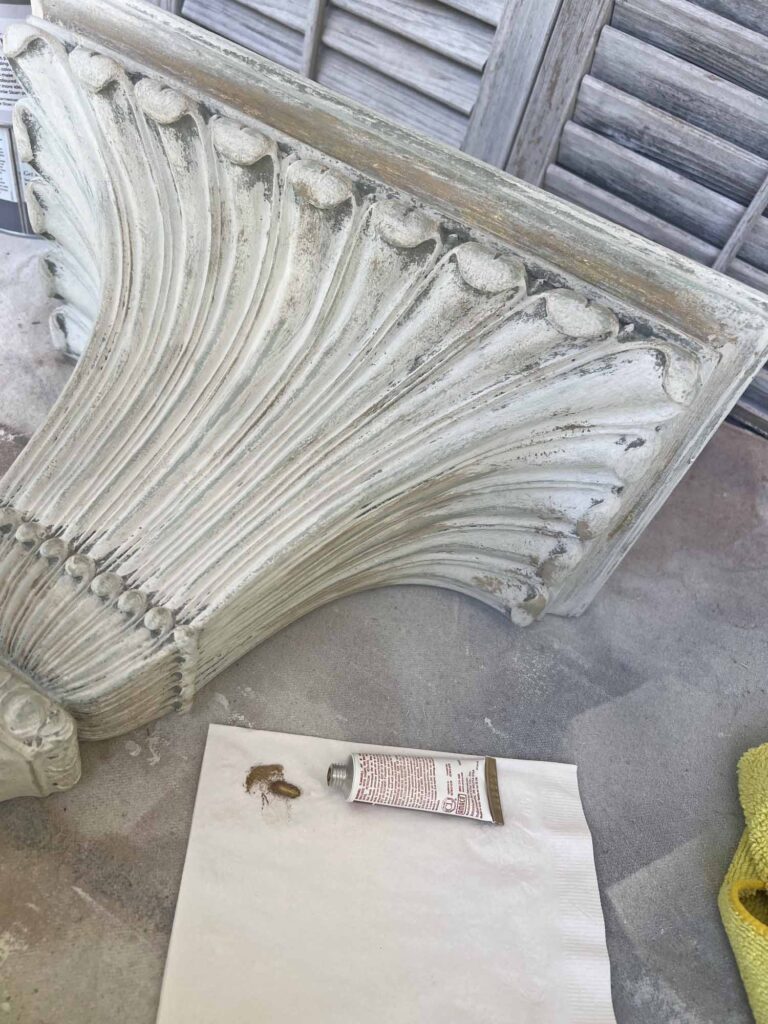
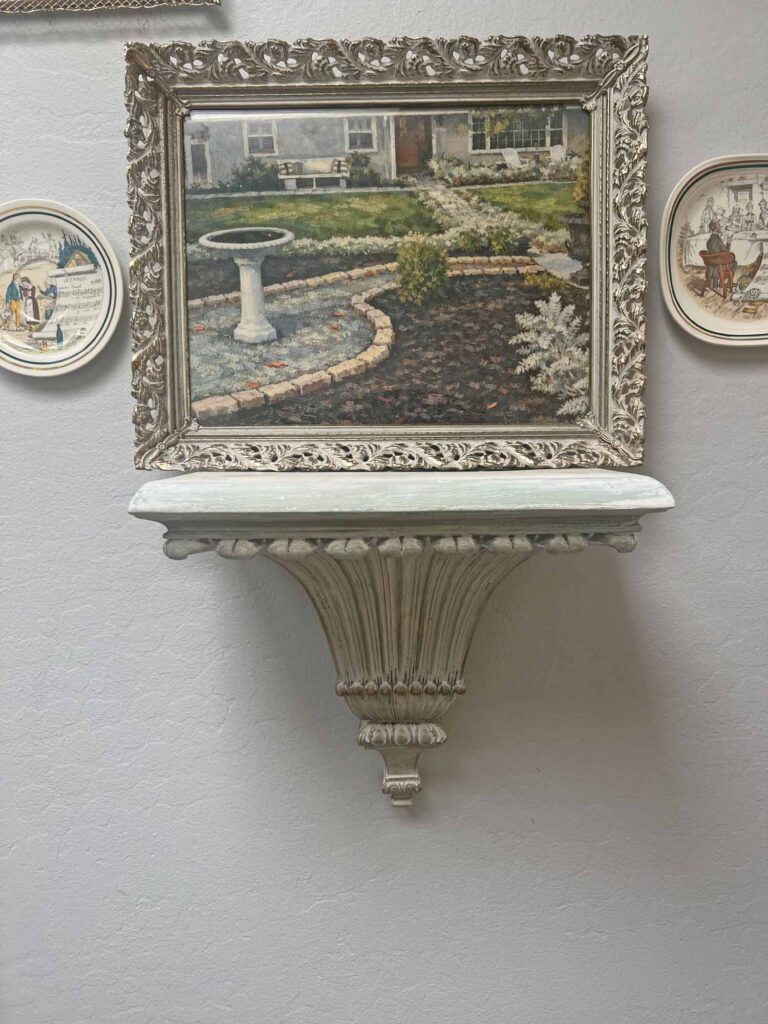
This wall sconce was a thrift score many moons ago and had served its purpose in the guest room with a dusty blue and brown color palette. I love the profile of the piece and all the vintage vibes. The color fit perfectly at the time for the guest room, but had been relegated to the garage for a bit after the guest room was dismantled (a different story for another time). Fast forward to today, and I resurrected the sconce for the gallery wall project I shared last week. The dusty blue didn’t fit the look I was going for so I simply used my magic paint wand and updated it to fit my decor. And here we are.
The Key is Vision…

MJ Thrifting Pro Tip:
Look at the potential of an item beyond its current state or condition. Items can be altered, up-cycled and recreated with TLC, elevating them to a trend forward piece which fits perfectly with your decor aesthetic.
How to Up-cycle a Thrifted Wall Sconce Shelf to Match Your Decor
Let me preface this by pointing out that the shelf sconce was a pretty piece all on its own, and the dusty blue was a nice shade with lovely distressing. But, and it’s a big but, it didn’t necessarily fit the decor aesthetic to coordinate with the vision for the gallery wall in a new space. I was able to transform the wall shelf with paint and distressing techniques to coordinate my personal style. Always stay true to your style and your home will be cohesive and a reflection of you.
MJ Crafting Pro Tip:
Read all the instructions through once & then re-read everything again, familiarizing yourself with everything you need & know what to expect. Avoiding surprises during a project prevents unnecessary stress.

STEP-BY-STEP INSTRUCTIONS
Prep
- Read instructions thoroughly and assemble all supplies & tools
- Remove all packaging, tags, stickers, etc. from supplies
- Clean thrifted piece
Paint
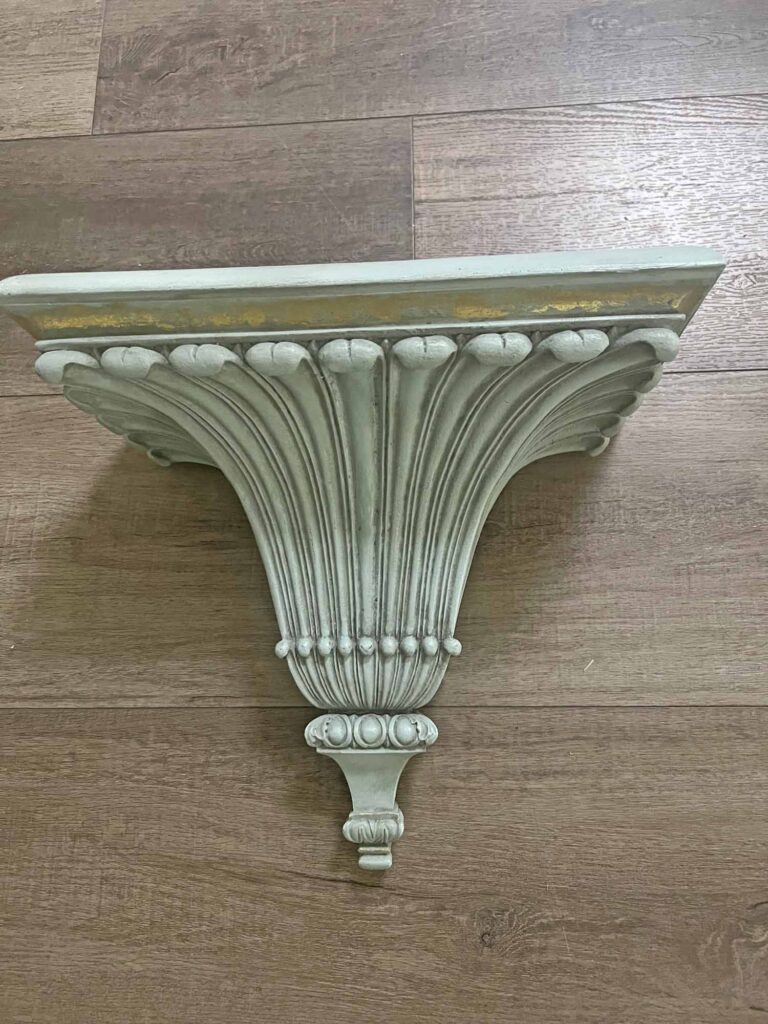
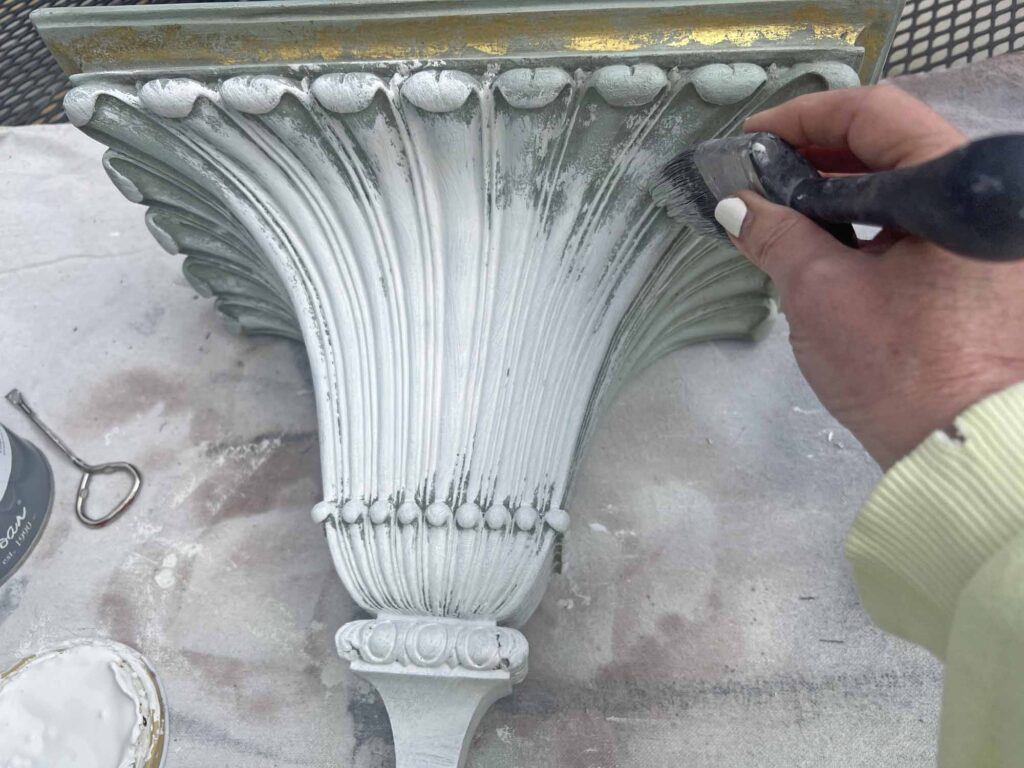
- Using paint brush apply a coat of paint to item
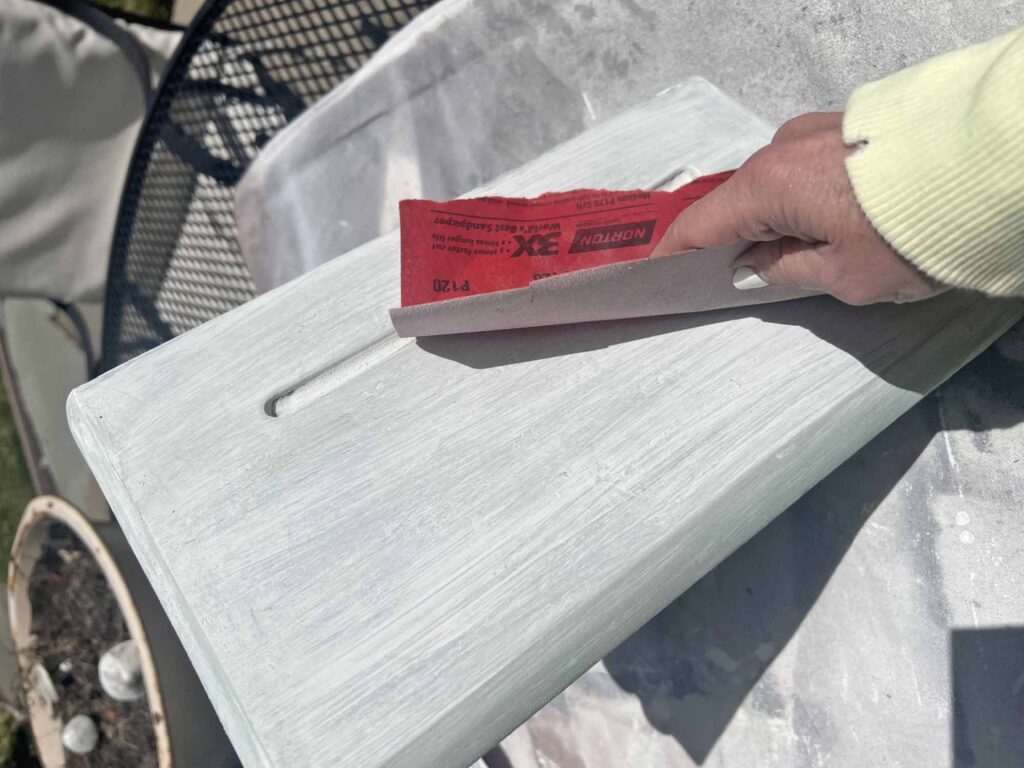
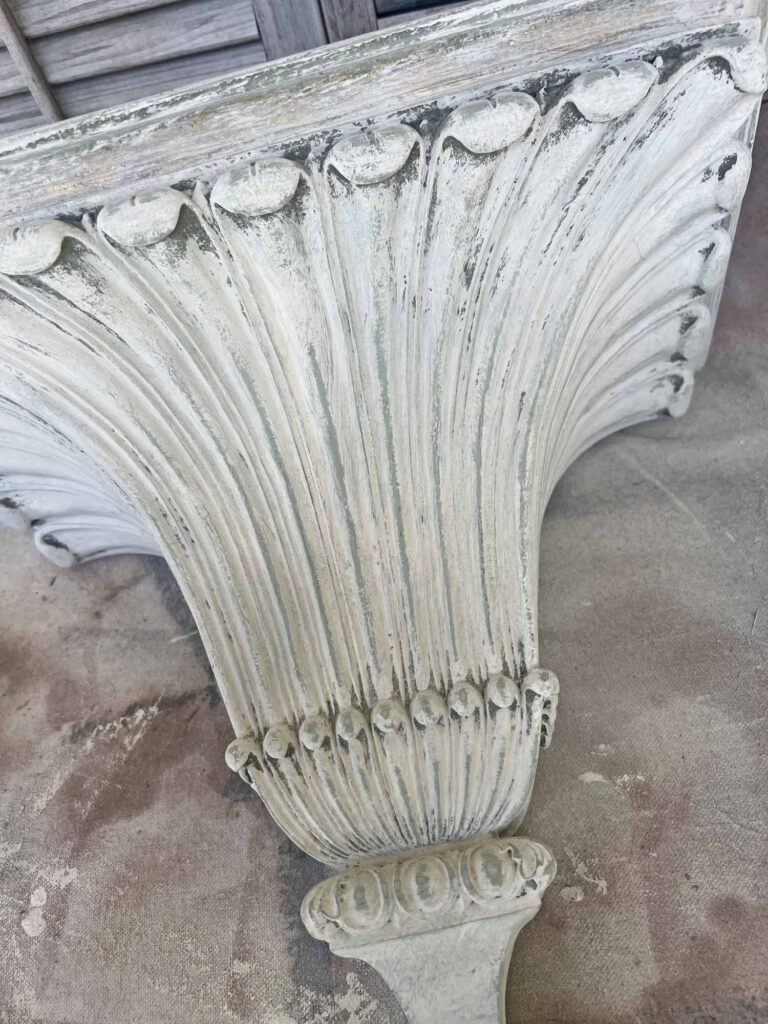
- After first coat of paint is dry, lightly sand piece all over to smooth paint and distress
- Repeat above steps if you desire a stronger finish (I only used one coat for this particular project since I wanted the old finish to peak through)
Distress
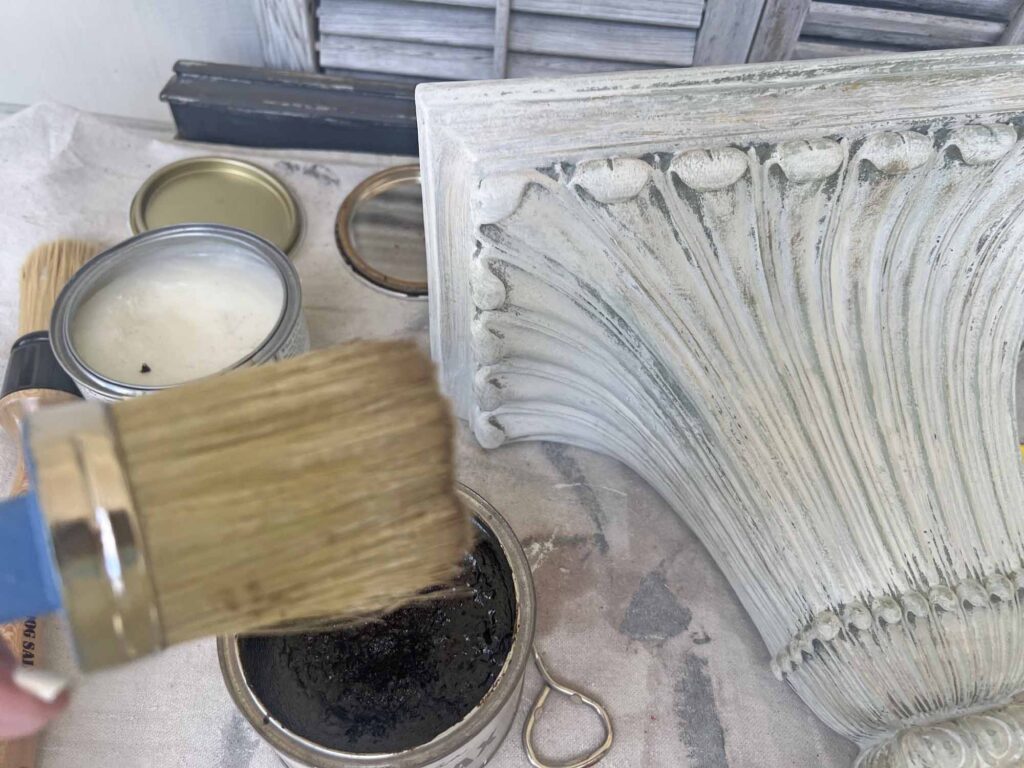
- Using a wax brush gently apply dark wax around relief details and wipe away excess to achieve an aged look (start slowly with dark wax- you can always add more but it’s very difficult to remove excess)
- Once paint its fully dry and you’ve sanded it down for a smooth finish make sure to dust it off to remove any sanded particles ( I use a clean paint brush to do this)
- Once dark wax is set to your satisfaction, apply gold gilding on areas you want to highlight, creating depth and interest (you can use your finger or small brush for this step as you prefer)
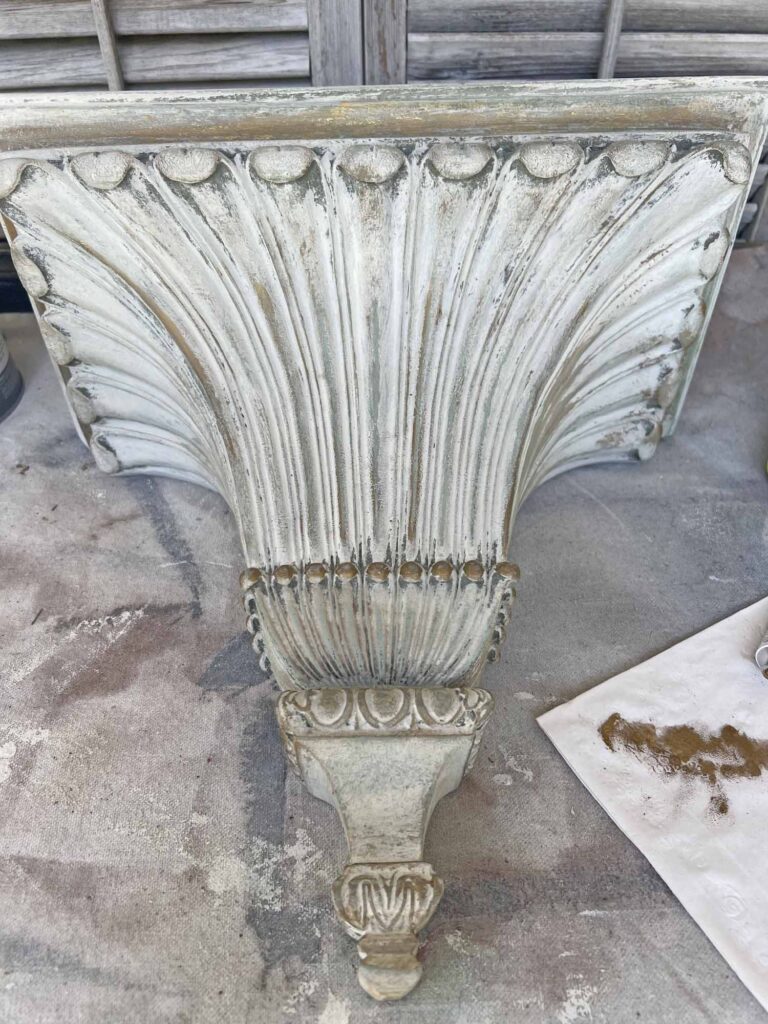
- Apply a coat of clear wax to seal entire piece
- Using a rag buff the piece to create a smooth finish
Style
- Once piece is finished hang in a favorite spot to showcase decor
- Voila! A decor accent easily transformed to fit your decor aesthetic
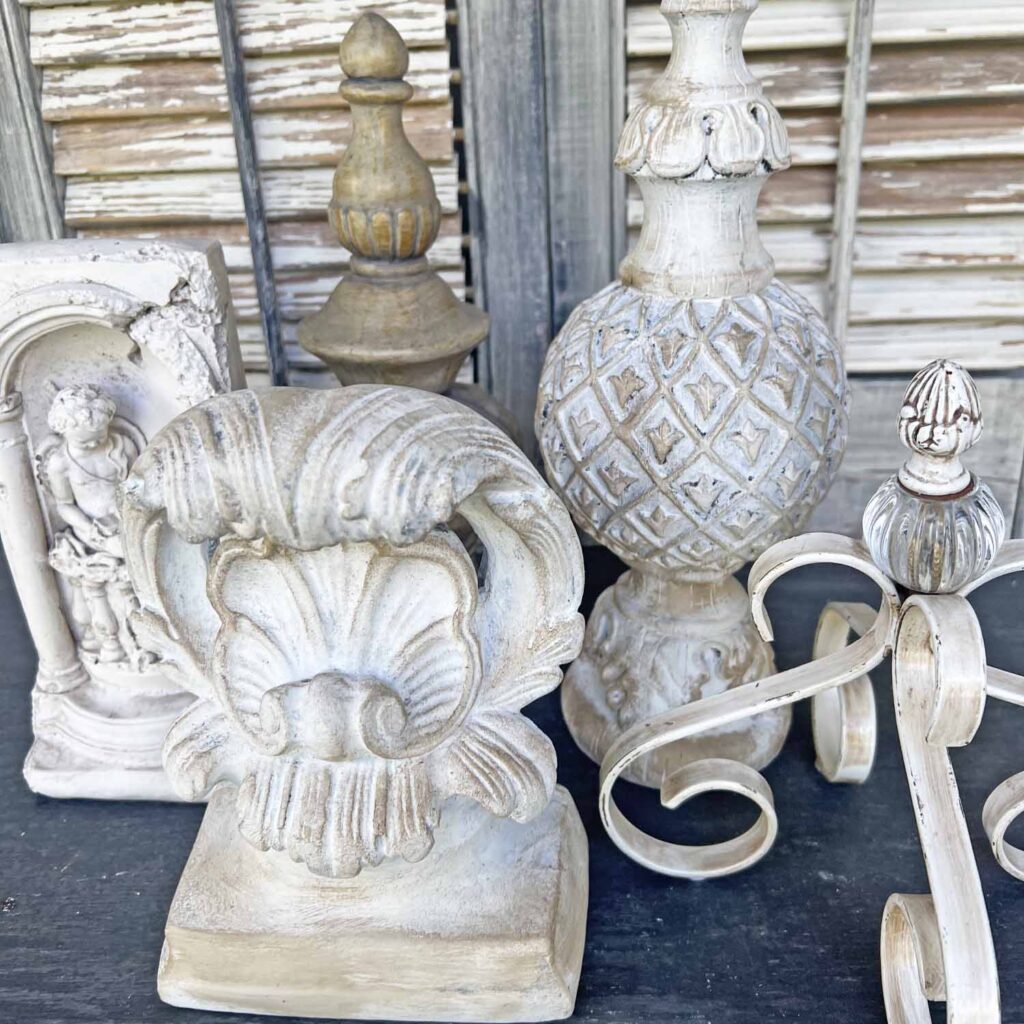
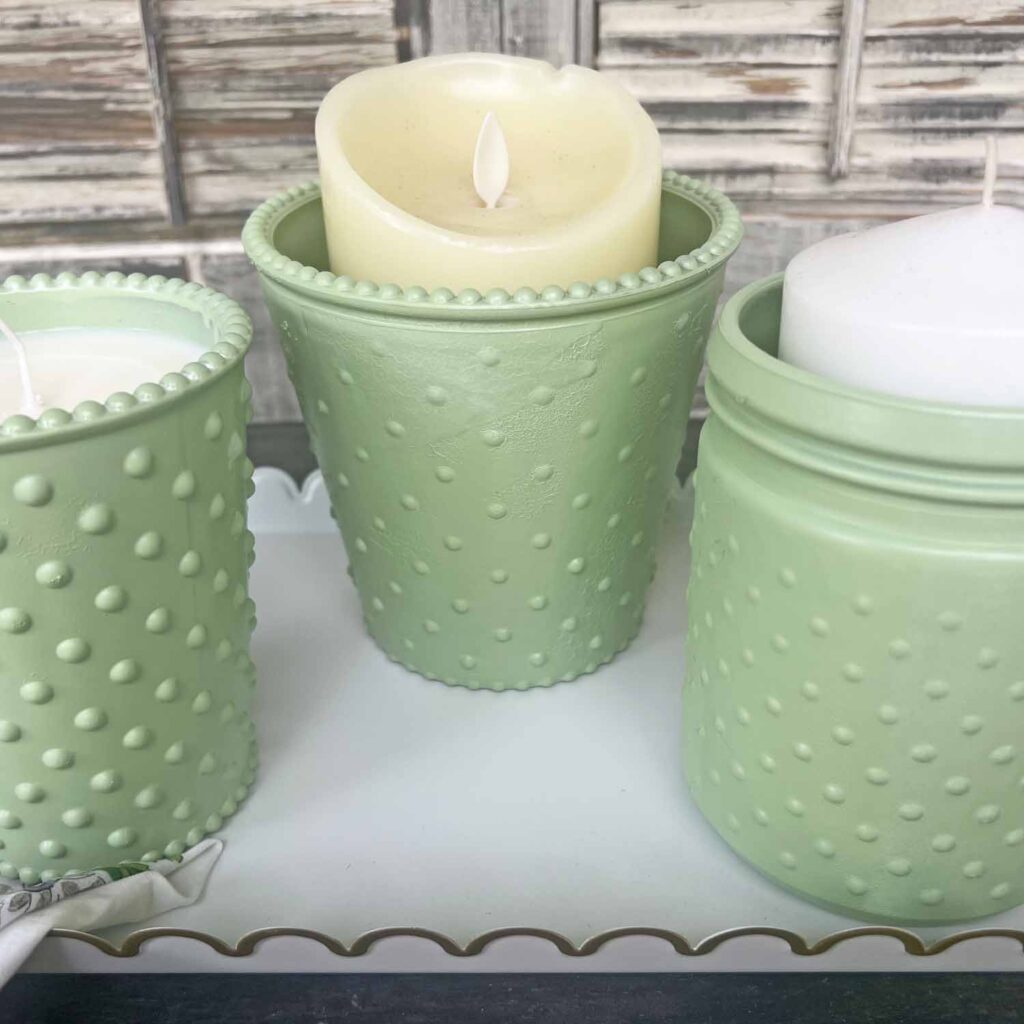
More Thrift Flip Posts
Look for these items to flip at your next thrifting treasure hunt…
SHELVES ~ FRAMES ~ PLANTERS ~ BASKETS ~ CANDLE STICKS ~ GLASSWARE ~ URNS ~ BOXES
MJ Thrifting Pro Tip:
Make a list of items you would like to find while thrifting on your phone, including desired dimensions, shapes and colors. This way you will always have the list with you whenever you pop into a thrift. Update the list regularly as you find treasures and seek others. Have fun!
Tips & Recommendations to Keep In Mind
Chalk Paint
I prefer to uses chalk paint for furniture and smaller projects like these, for ease of use. Chalk paint doesn’t require a primer, goes on easily on most materials like wood, clay, fabric, glass and more, plus it distresses beautifully. I know it’s not the most economical paint, but it is eco-friendly and in this instance you get what you pay for. The results and process are worth it in my book and if you haven’t tried it, I suggest you give it a go. I’m partial to Annie Sloan and highly recommend it.
Distressing Techniques
I love patina and grunge and nine times out of ten, I will distress hand crafted projects. For today’s project I included sanding, dark furniture wax and a gilding medium to add age and character to the sconce shelf. These are easy techniques, which add depth and dimension to a finished piece. Use as much or as little as you wish or skip one of the steps all together if you don’t care for the look. For example, exclude the gilding if vintage glam is not your jam. Make it yours!
Finishing Waxes
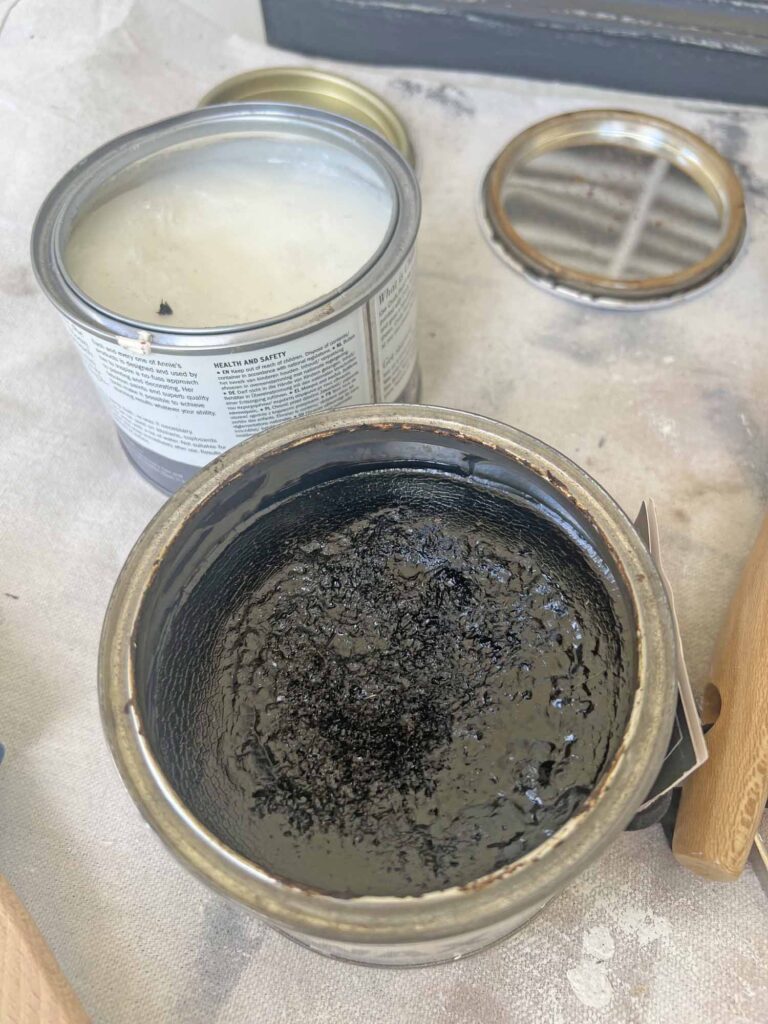
I used clear and dark furniture waxes for this project for different purposes and to create finishing layers. The dark wax is used for aging and distressing purposes. A gentle hand goes a long way. I recommend starting slowly in less noticeable areas and add more as you see fit to achieve the desired look. The clear wax helps remove any excess dark wax if necessary. The clear wax also creates a finishing layer to a piece, which once is buffed with a rag creates a smooth, silky finish.
Gilding Options
I love the look of gilding, which always provides that vintage vibe. Rub ‘n Buff is used for this project in the Gold Leaf finish. There a few different gold options in the Rub ‘n Buff line, so do your homework. Some lean rose gold-ish while others are darker or brighter. The Gold Leaf color is my personal favorite, which I’ve learned through trial and error. Don’t be afraid to experiment, that’s how you learn. Other gilding options include gold leaf, gilding waxes and metallic glazes plus more.
Sanding Purposes
In this particular project, sanding was used for different reasons. Sanding between coats of chalk paint smooths the finish and preps it for the next coat of paint. Use a dry paint brush to sweep the piece and remove loose particles before applying the next layer. Sanding also creates a distressed effect where previous layers are exposed to provide an age and weathered effect. Sandpaper comes in different grits and a 400 grit was used for this project. The higher the grit number the softer the sandpaper. For example, to fully strip a piece you want a low grit number in the 100s with a highly coarse texture.
MJ Crafting Pro Tip:
If you apply too much dark wax, clear wax can help remove some of it. When using dark wax it’s best to start slowly with just a little bit and add more as desired. Slow and steady wins the race here.
Grab a copy of my free
Vintage Home
Decor Guide
This guide provides 10 easy ideas to add timeless charm to your home with a free PDF full of images and inspiration.
We are always striving to master the art of joie de vivre around here. If you enjoy the good life and want a reflection of this in your home, please consider joining the Masterpiece community. Sign up you won’t miss any new content, receiving all new posts directly into your in-box.
Closing Thoughts ~ Conclusion on the Thrifted Wall Sconce Up-cycle
Thrift flips is an easy and economical way to decorate your home with intention in your own personal style. Home decor can be overwhelming with the variety of options at different price points. Instead lean into thrifts and find unique pieces to make truly yours, which makes your home stand out with a one of a kind stamp nobody else has or can replicate. Your home should be a reflection of you and should tell your story.
There’s something incredibly satisfying by creating something with your own hands with your signature style. Are you a crafter? If so, what’s your super power? Sewing, painting, decoupaging….? I hope you found this inspirational and helps your creative muse. Thanks for dropping by today and can’t wait to see you next time.
Au Revoir!


FAQs – Thrift Flip
Q1. What are good items to look for at thrift stores to flip?
A1. There’s a myriad of items which an be repurposed. The only limitation is your imagination. Look at pieces that have good bones, meaning a good shape, scale, presence, which can be enhanced and altered to fit your personal style.
Q2. What other techniques can I use to transform a thrifted find?
A2. There are as many techniques to refinish a forlorn thrifted piece as there are thrift finds out there. Beyond paint, sanding, wax and gilding, you can use spackle, stains, polishes, glazes, crackle mediums, paint removal techniques plus more. Use high end pieces as inspiration to guide you through the creative process.
Q3. What is the easiest way to transform a thrifted treasure?
A3. Besides given a neglected thrifted treasure a good cleaning and polish, paint is a magic wand. Paint can transform so many items from different materials, including wood, ceramics, glass, wicker and more. Paint can be use to hide imperfections, coordinate with existing decor, update an outdated look, achieving a desired finish. Experiment with different varieties like latex, acrylic, milk and my most recommended chalk paint.
Shop the Look
- Annie Sloan Chalk Paint® (Old White, 1 Litre/33.8 Fl Oz) a unique decorative paint for furniture, cabinets and home décor with no sanding or priming
- Annie Sloan Chalk Paint® Wax (120 mL, Clear) – Protective Furniture
- Dark Antique Wax for Vintage and Antique Furniture Restoration | Provides Dark Colored Protective Finish and Seal | Multi-Surface Protection
- Chalk Paint Brushes for Furniture
- Paint Brush Set of 5, Wax Brushes and Chalk Paint
- Rub and Buff Gold Leaf 0.5oz/15ml Gilding Wax
- Rub and Buff FinishWax Metallic Gold Leaf, 0.5-Fluid Ounce, Pixiss Blending and Application Tools for Applying Metallic Wax Paint
- Lint Free Rags – 100% Cotton Cloth, Soft T-Shirt Rags, Lint Free Cloth for Staining Wood, Cast Iron, Dusting, Polishing, Painting
- Touch of Class Lionna Wall Shelf
- Touch of Class Clareville Antique White Acanthus Leaf Wall Shelf

Don’t forget to Pin It and save for later. You never know when inspiration will strike!
For more inspiration follow me on Pinterest.
Most Recent Posts
Creativity is the language we use to communicate the urgency of our dreams for a better future.”
Audre Lorde
Nice work on the wall sconce and the gallery wall. Love the pictures of your home. Everything came together beautifully.
Lynne, Thrifting Wonderland
Thanks so much Lynne. I appreciate your kind words. Happy June friend. XO- MJ
Great project! I have always loved sconces in decor. You and your “magic paint brush” really bought it back to life. Good tips! ~Susan
Thank Susan! Yup, paint is a great magic trick. Lol. XO- MJ
So beautiful! You really have such a touch! I love seeing all of your pieces being given a new life!
Love you baby girl! You are eveything….XOXO