


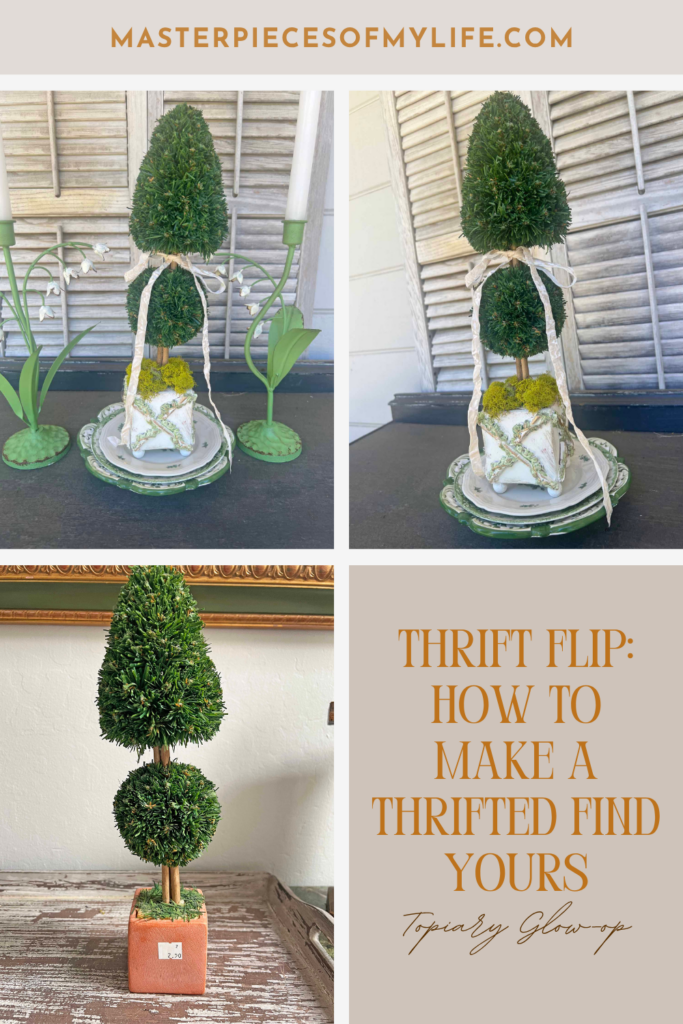
Do you want to learn how to make a less than thrifted find look like an expensive decor accent? Making a thrifted find truly yours involves looking past an item’s current, often outdated, appearance to see its potential, then applying personal, creative touches to match your unique style.

A charming, but a bit sad, looking topiary is transformed here with easy flip techniques including, paint, mould castings, dark wax and gold gilding. This decor accent goes from drab to fab with some easy glow-up steps while leaning into personal style preferences.


Key Take Aways
Making a Thrifted Find Yours – An Amazing Glow-up
> Transform thrifted decor by reimagining and repurposing
> Step by Step Tutorial – Flipping a neglected, potted topiary
> Tips & Recommendations for thrift flips
> Other thrifted decor flips
> FAQs
*Affiliate links might be included for your convenience. These affiliate links mean a small commission is earned if you make a purchase using these links at no extra cost to you. As an Amazon Associate I earn from qualifying purchases which support this website. For more information: Full Disclosure Policy.
Transform, Up-cycle, Repurpose – Make it Yours!
Making a thrifted find truly yours begins with intentional hunting, followed by cleaning and altering, finally finished with a custom styling, which reflects your personal style. Look beyond an item’s current condition, including shape, color, dirt, and outdated hardware. These are all easy fixes with some elbow grease, a coat of paint and finishing mediums.
Thrifting is a great source to find those one-of-a-kind decor pieces that instantly add character, spark conversation and make your home uniquely yours. Don’t let decorating your home overwhelm you. Instead walk the aisles of your local thrift store and find that unique piece which adds personality and visual interest on a budget. Sometimes these unique finds don’t come to us in perfect condition, but simple altering and transformation techniques is all you need. By repurposing these found items with your personal style creates a customized look at an affordable price.
The Key is Vision


MJ Thrifting Insider Tip:
Look at the potential of an item beyond its current state or condition. Items can be altered, up-cycled and recreated with TLC, elevating them to a trend forward piece.
How to Transform a Thrifted Decor Accent & Make it Truly Yours!
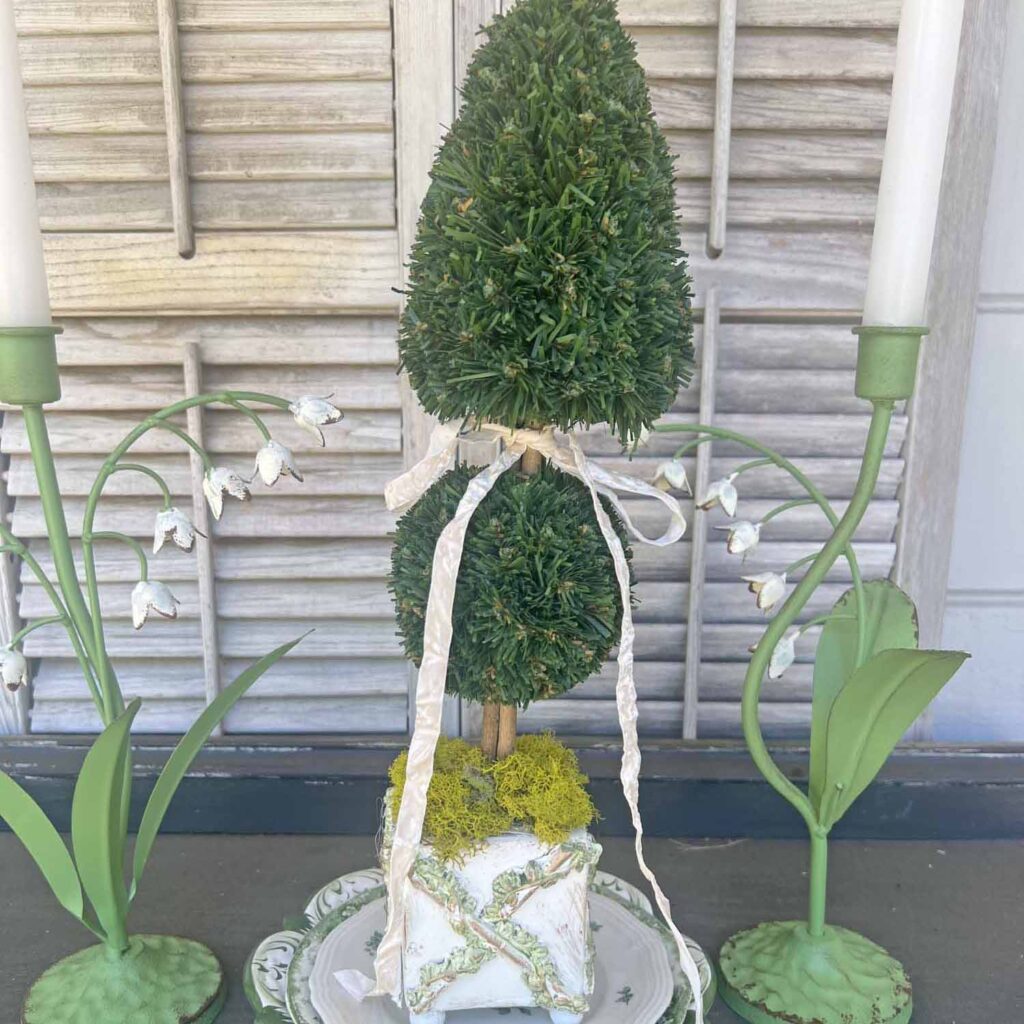
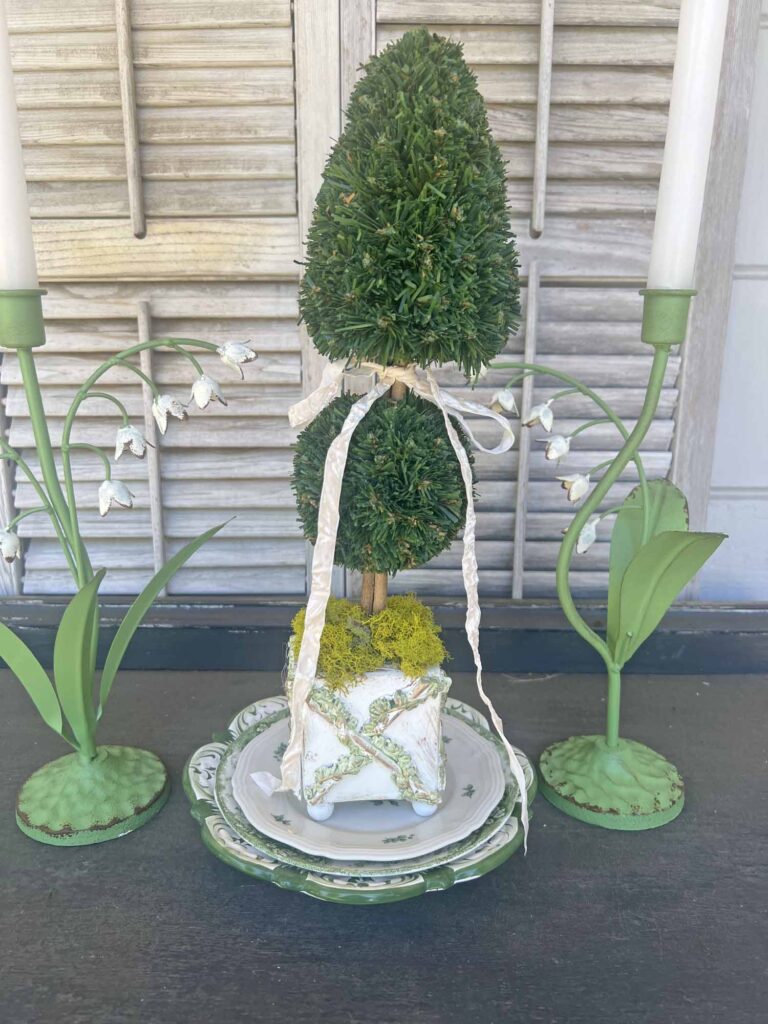
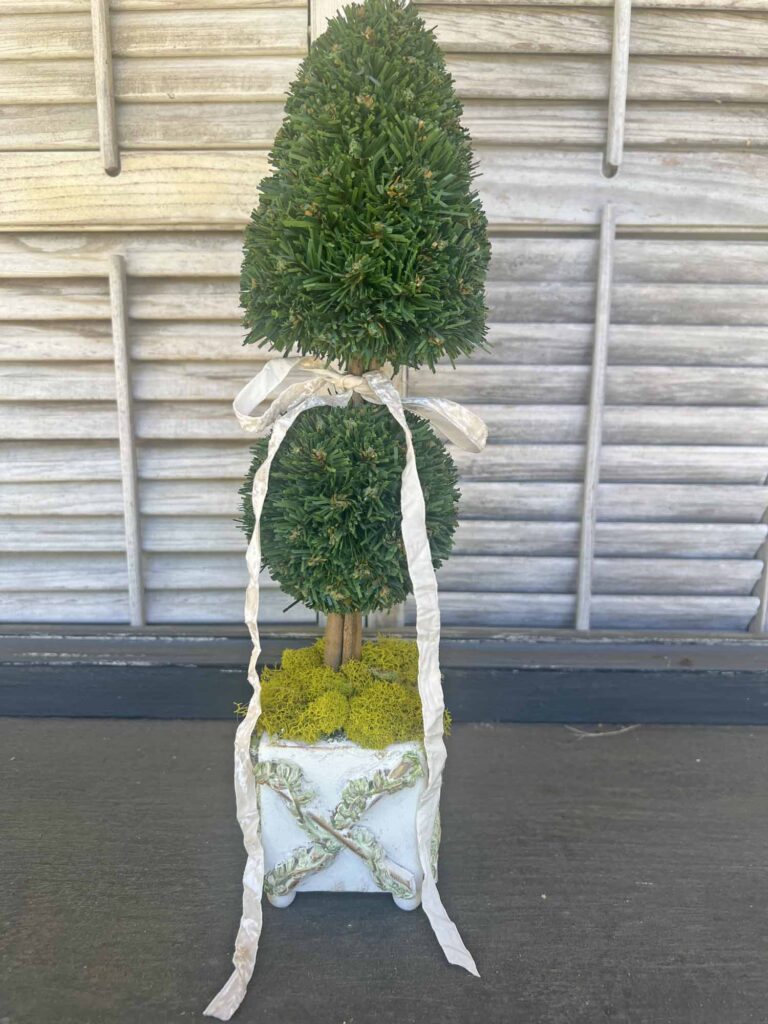
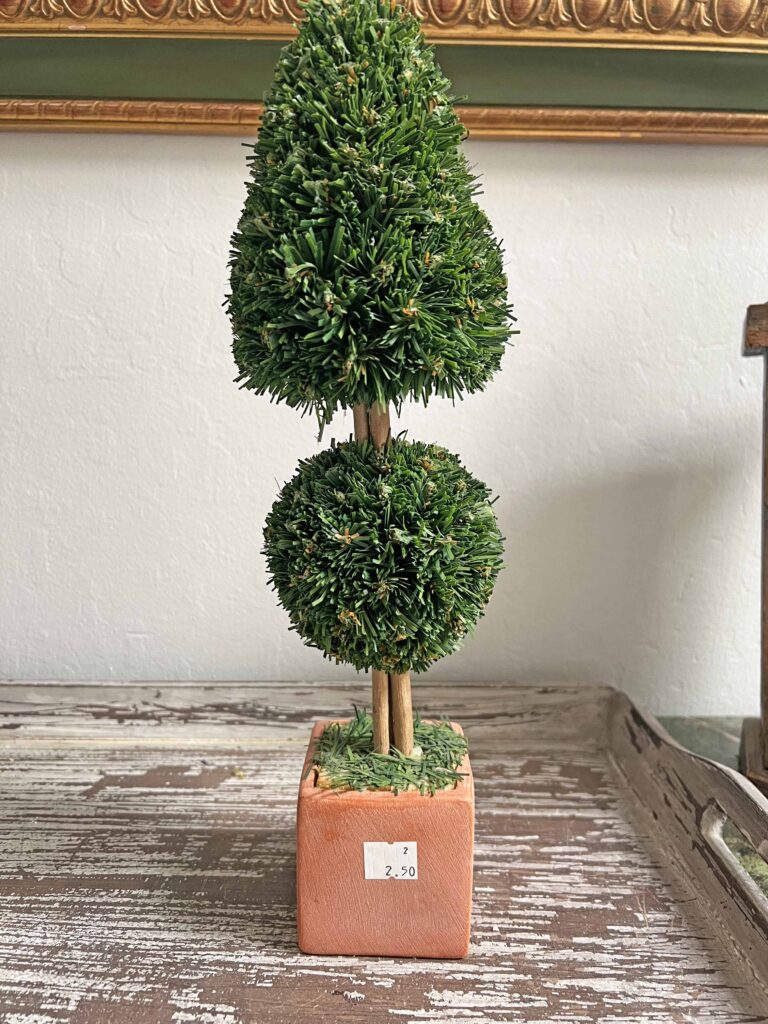
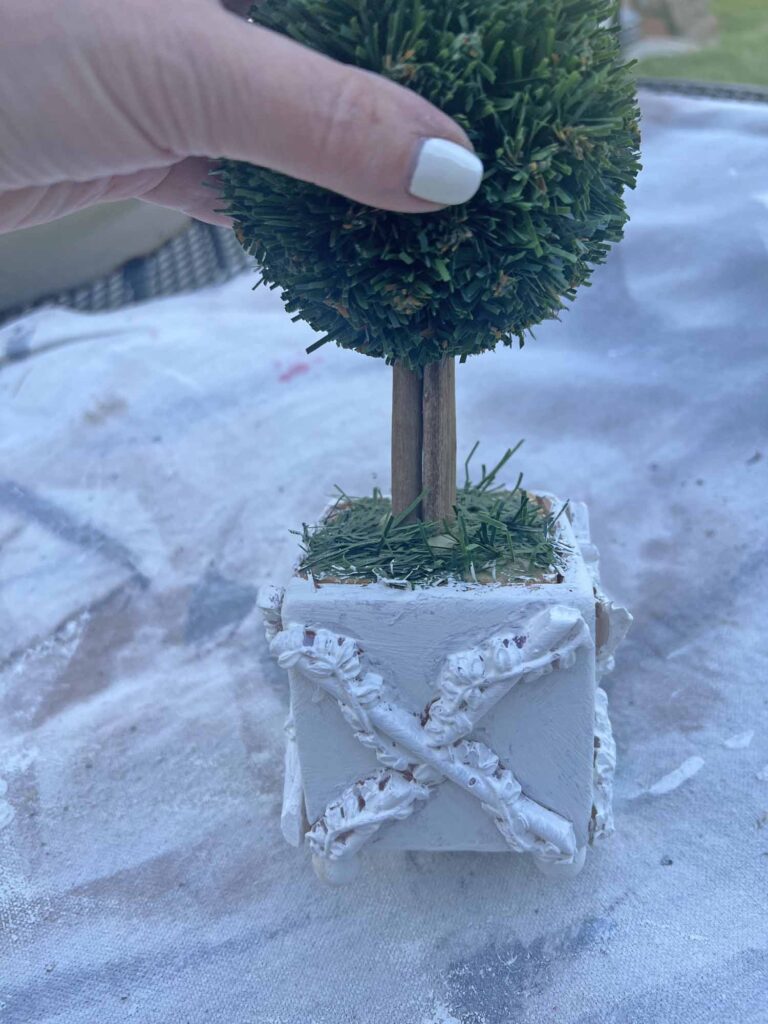
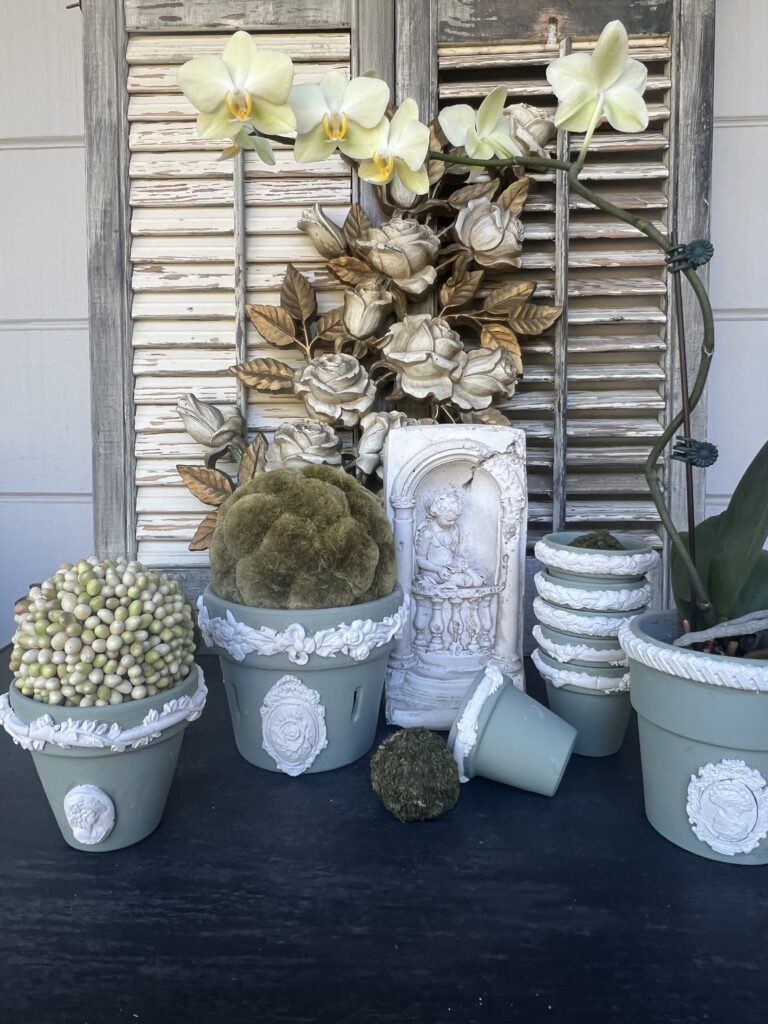
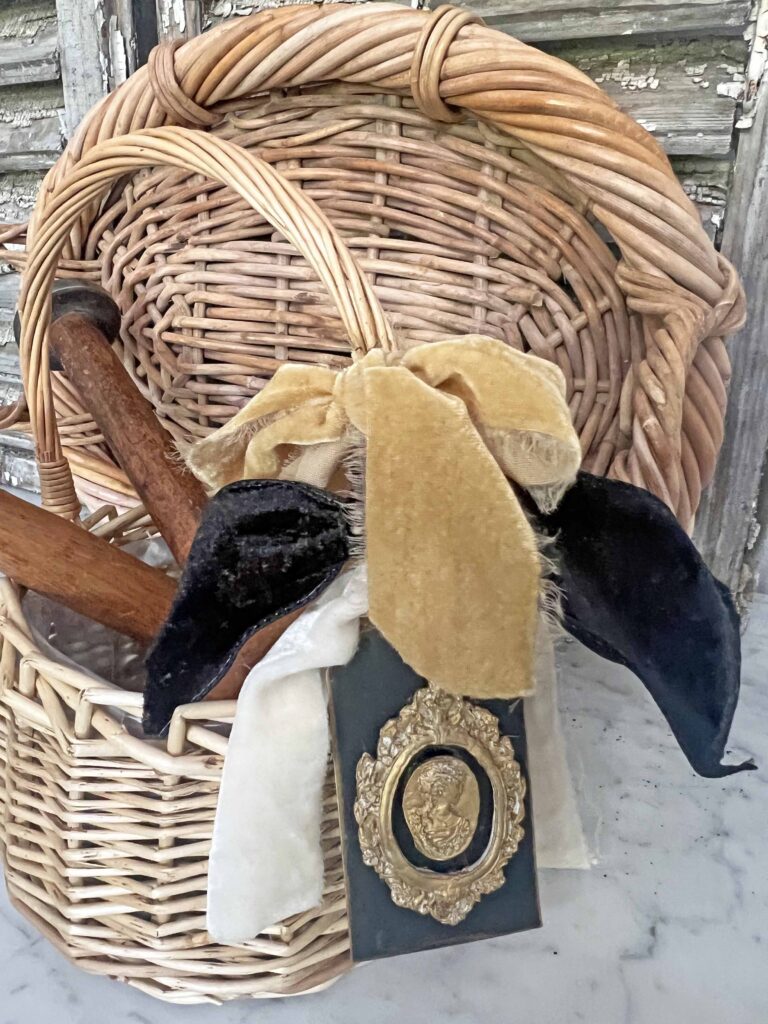
This thrifted topiary cost $2.50. You can read about this particular thrift haul if you are interested here {Thrifting in the New Year: What I Thrifted vs. How I Styled It}. By adding embellishments, applying paint and using distressing techniques the piece is elevated to a finished and charming decor accent. These techniques can be used on planters, pots, frames and many other items found at common thrifts.

MJ Crafting Pro Tip:
Read all the instructions through once & then re-read everything again, familiarizing yourself with everything you need & know what to expect. Avoiding surprises during a project prevents unnecessary stress.
Instructions
Prep Project
- Read instructions thoroughly and assemble all supplies & tools
- Clean thrifted topiary, prepping for up-cycle
- Plug in hot glue gun and allow to heat up so it’s ready to go
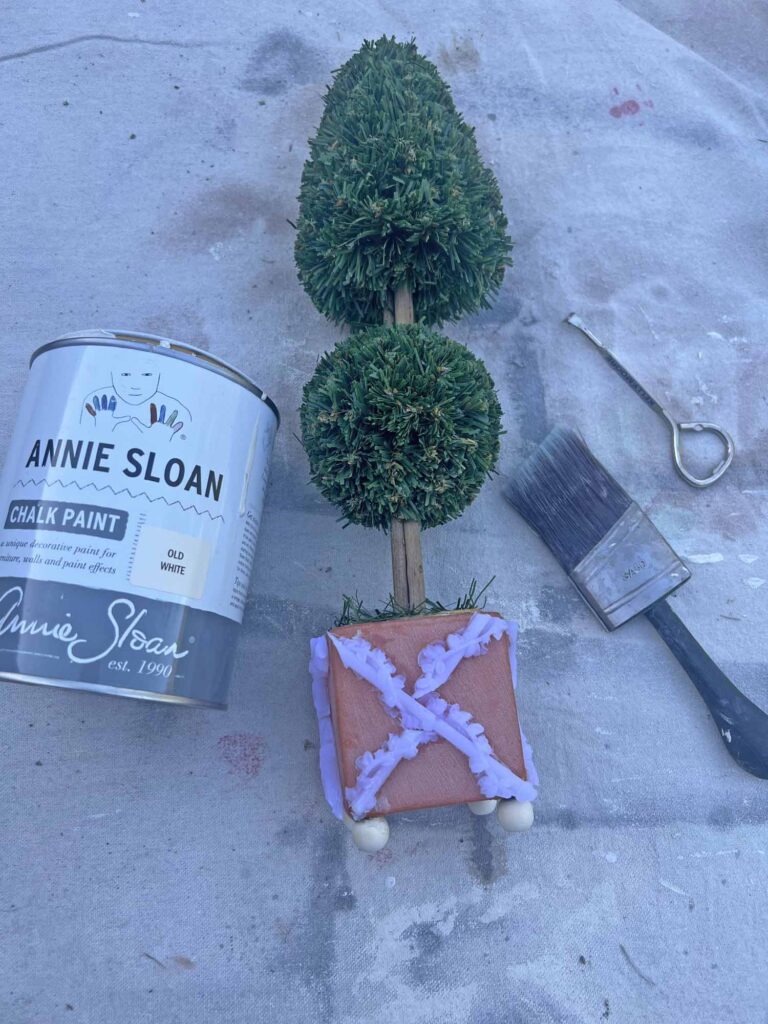
Create Castings
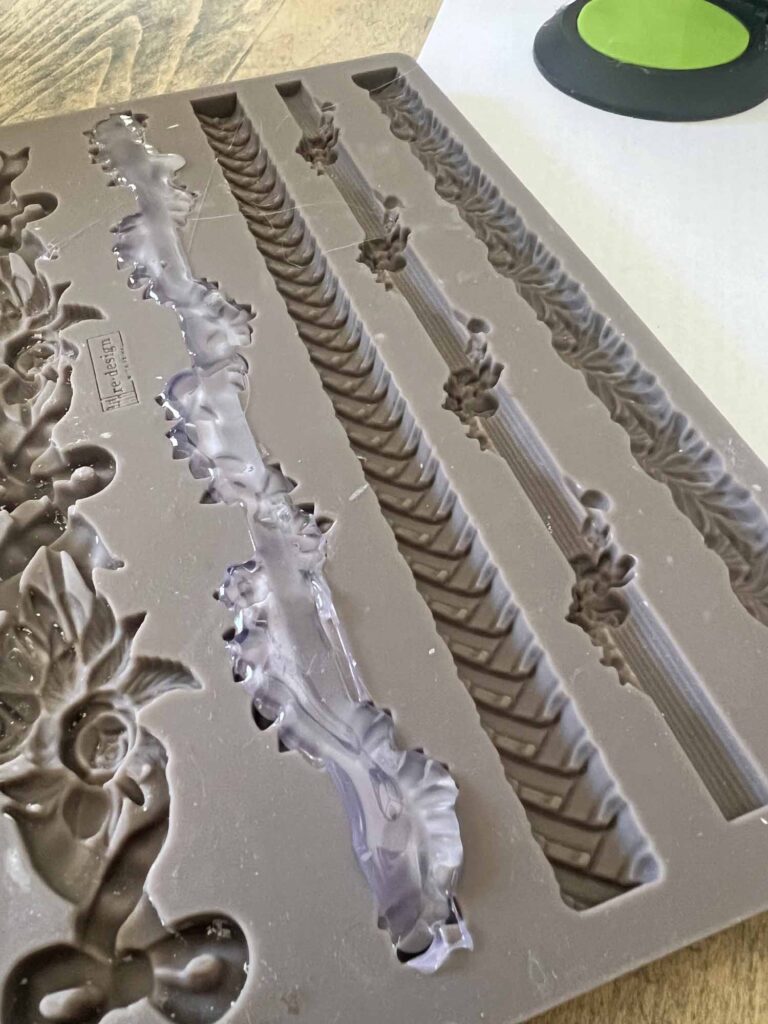
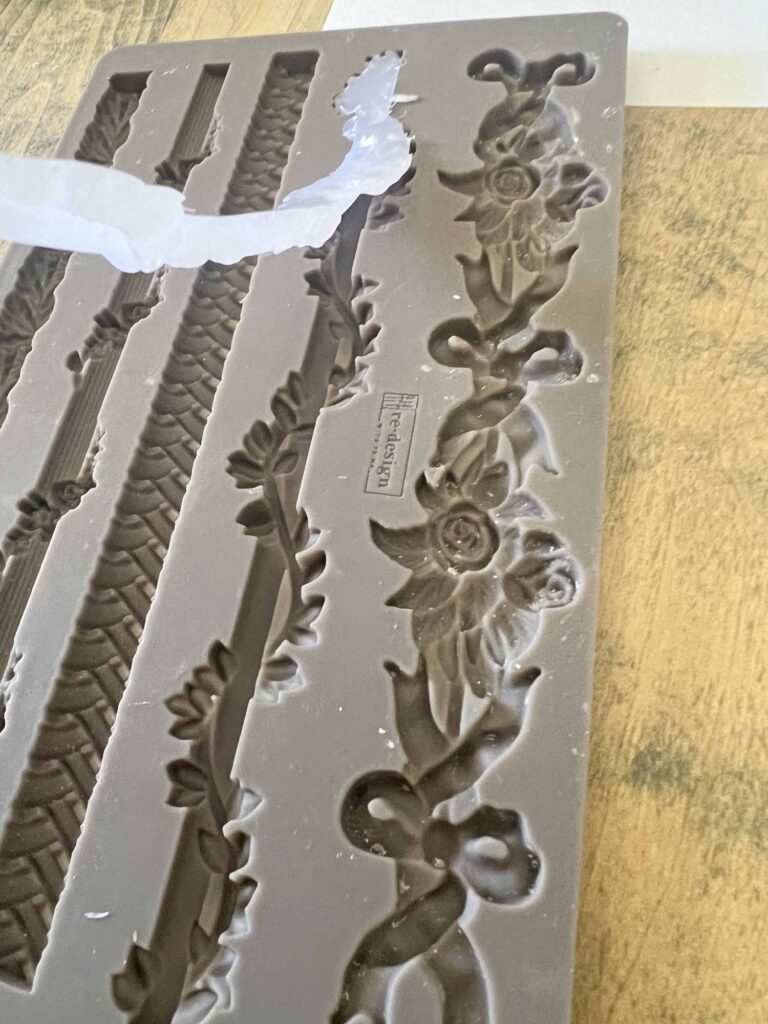
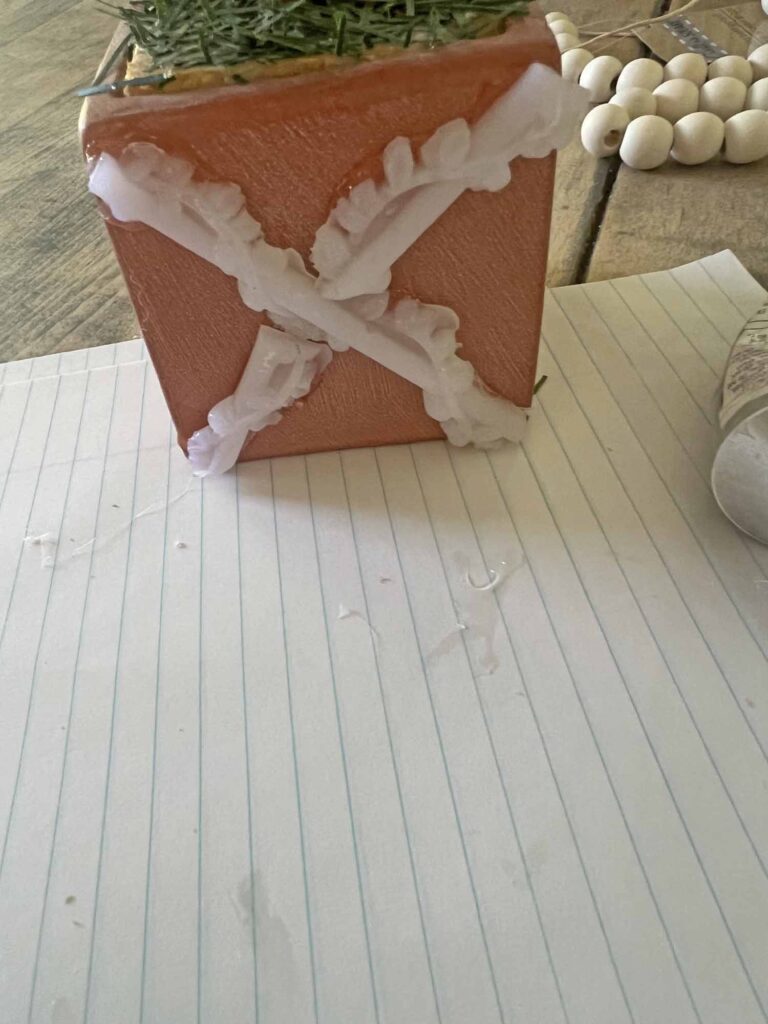
- Identify mold design | shape which compliments topiary planter (you can find the mould I used below in the shopping section)
- Apply generous amount of hot glue into mould slowly and carefully, filling entire mould
- Allow hot glue to set about 5 minutes
- Bend rubber molding to pop casting out
- Repeat above steps to create as many mouldings as needed (I used 4- one for each side of square planter)
Decorate Planter
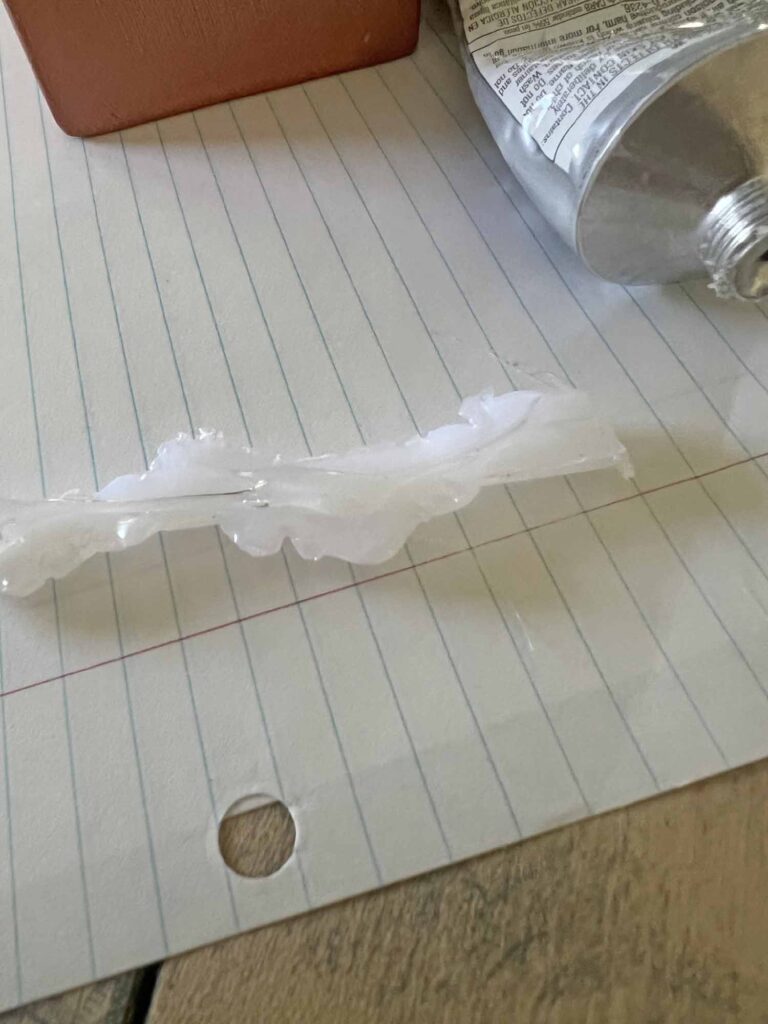
- Using E6000 adhesive attach casting(s) to side of pot (I cut moldings to create criss cross effect)
- Allow glue to cure and create a solid seal
- Using E6000 adhere wooden beads in each corner of bottom of planter (creating feet)
- Allow glue to cure and create a solid seal
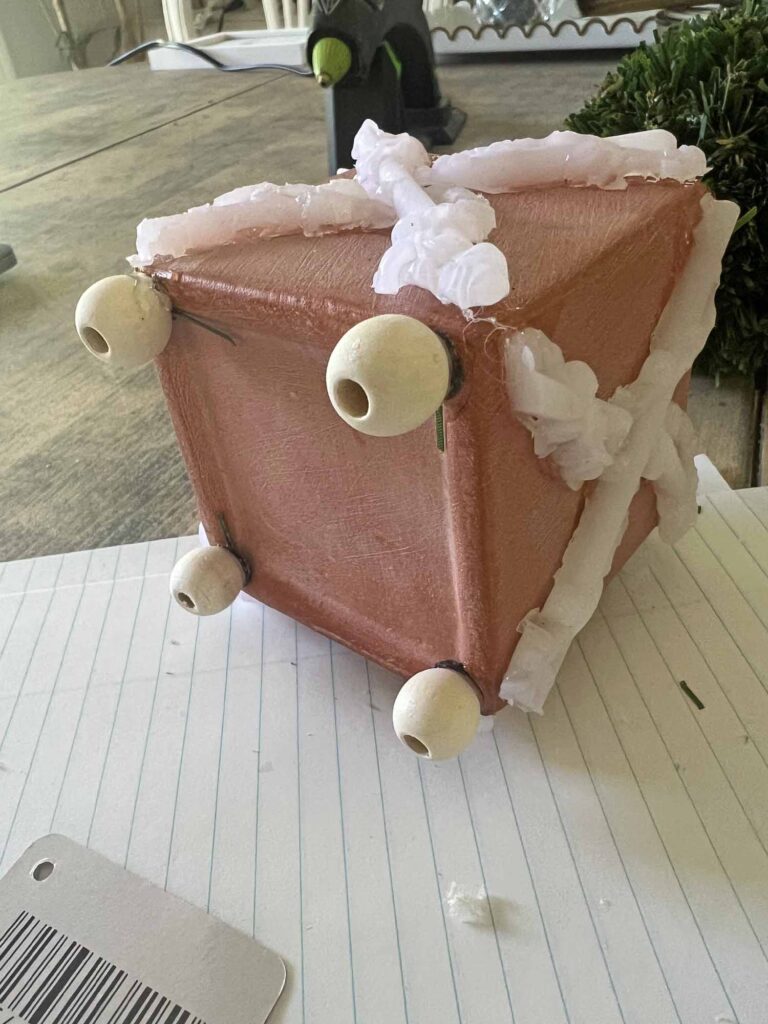
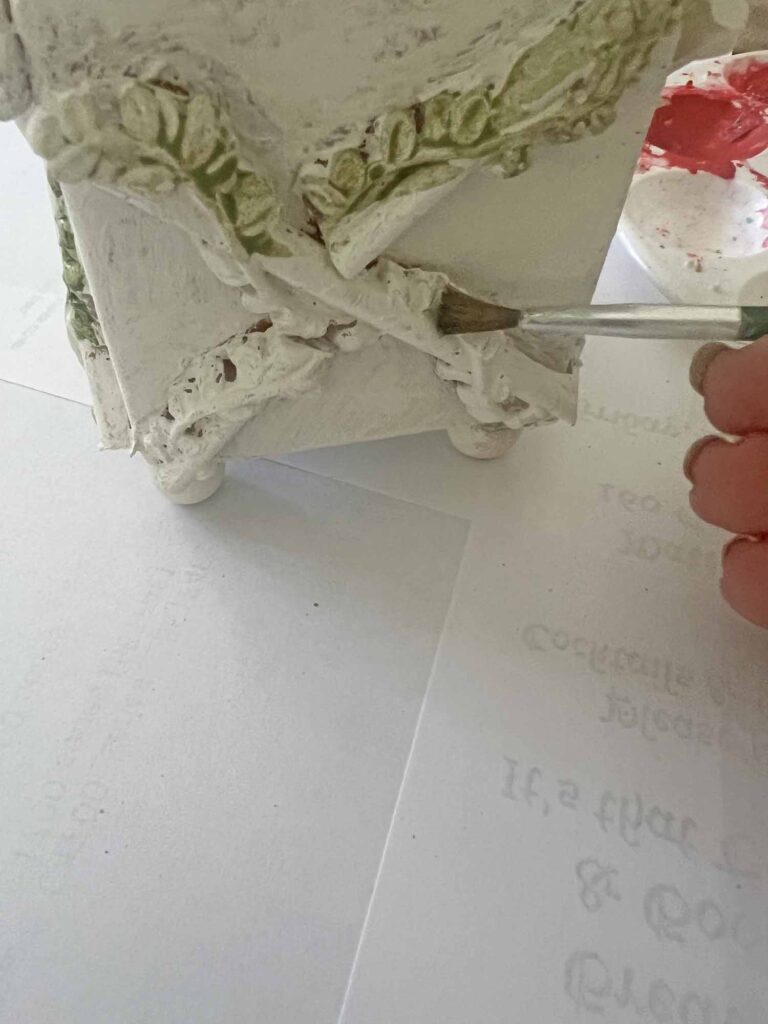
- Once glue is set and everything is in place apply a coat of paint all over pot, allowing to thoroughly dry
- Note: If you’re a messy crafter like I am, clean up any excess glue residue before painting
- Apply a second coat of paint if a stronger finish is needed or desired (I only used one coat)
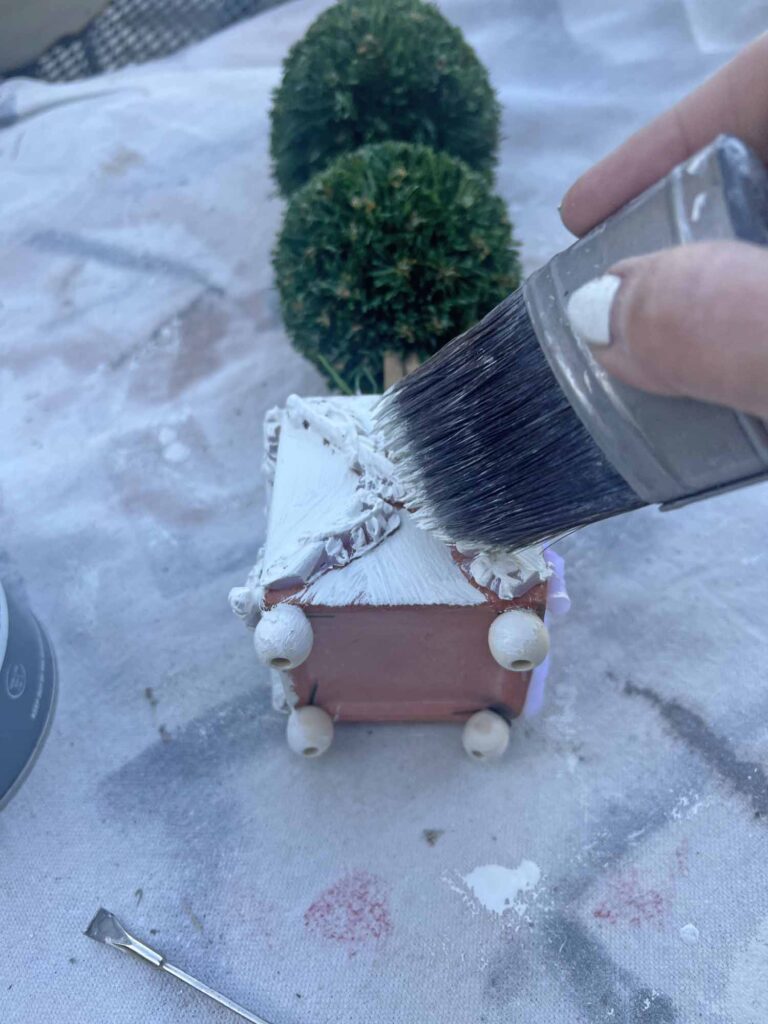
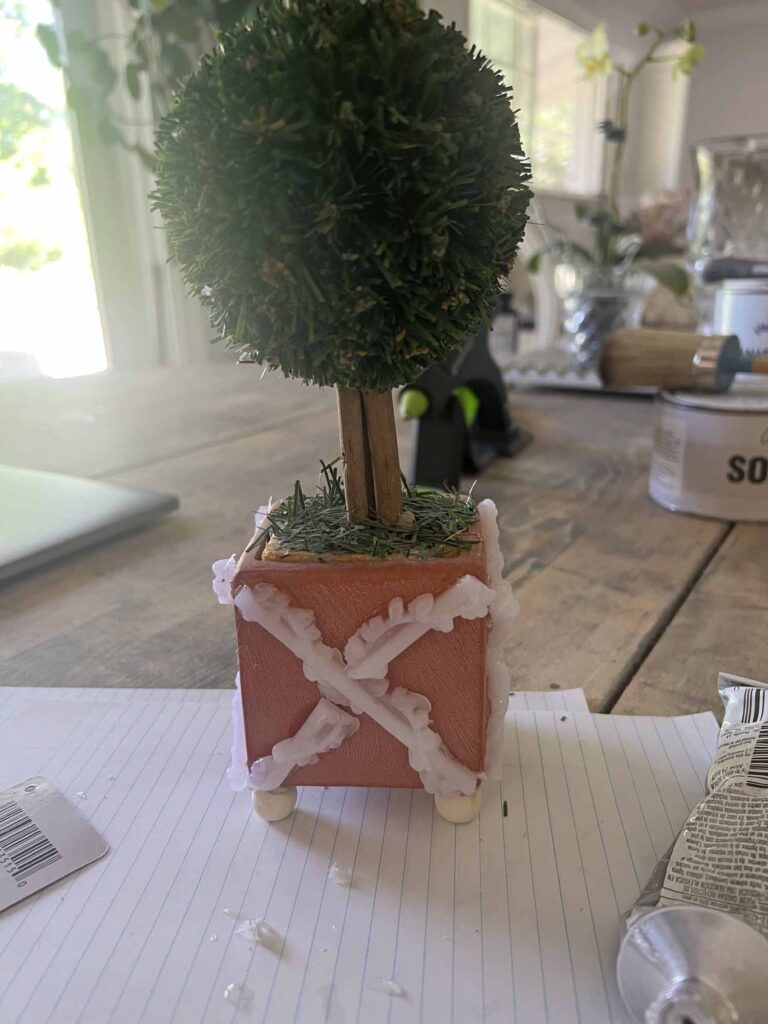
Apply Distressing Techniques
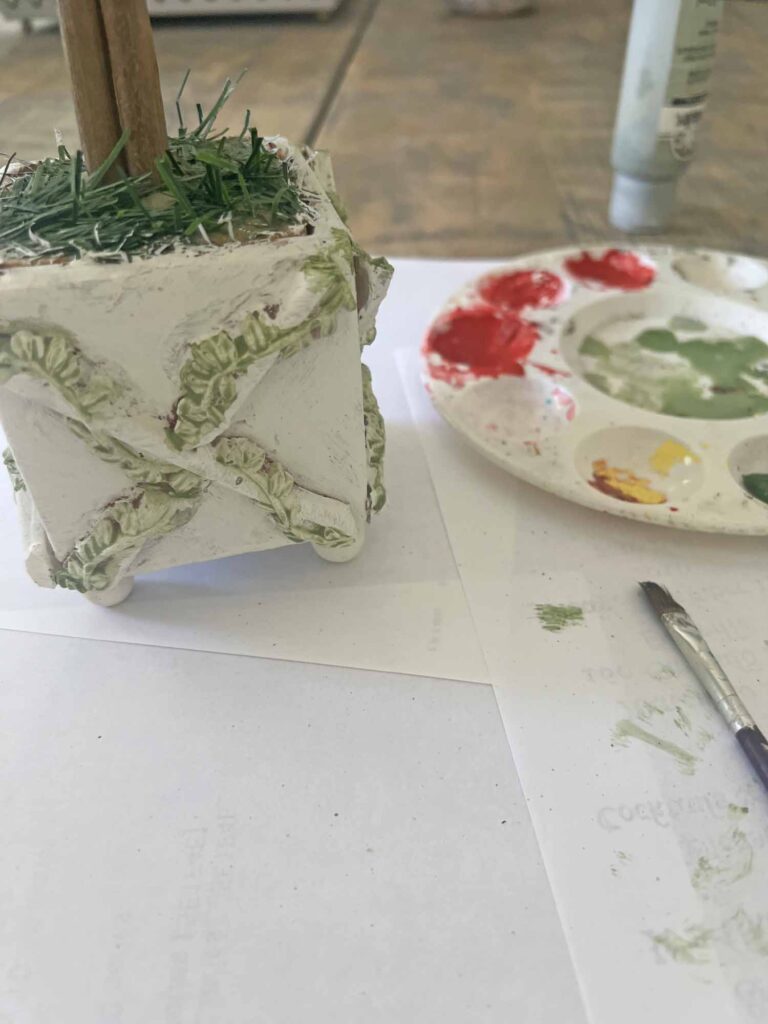
- Using a paint wash (50-50 Acrylic Paint to Water) apply slight coat to leaves on trellis
- Set aside and allow acrylic paint to dry full
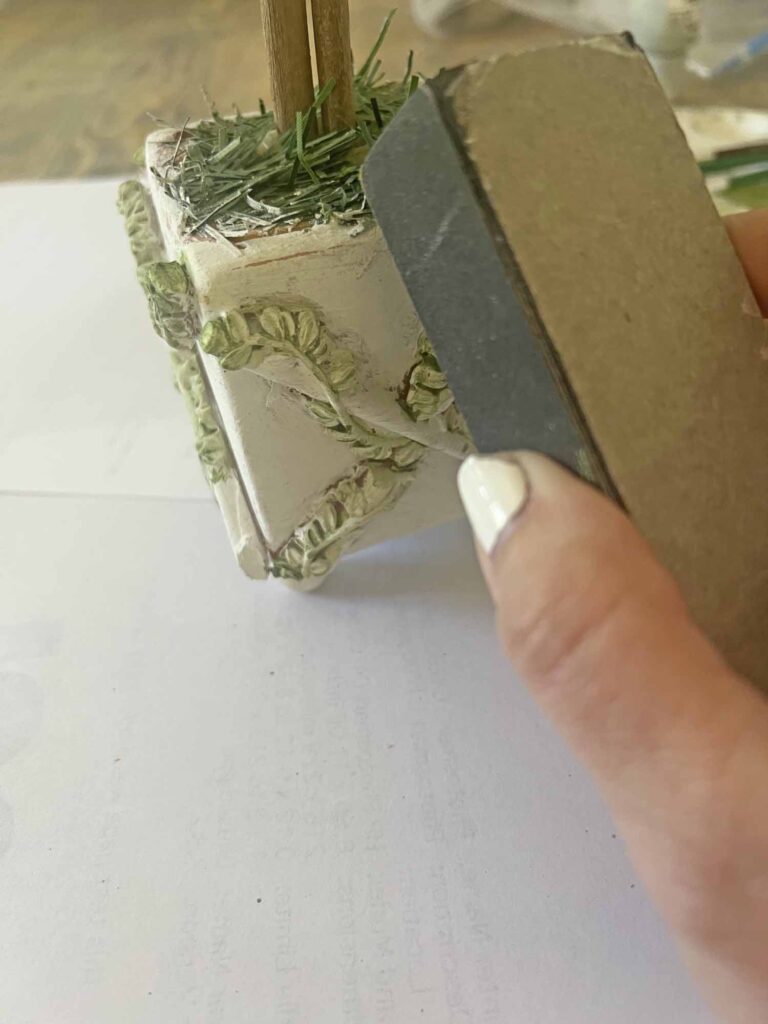
- Sand edges of pot to create distressing effect
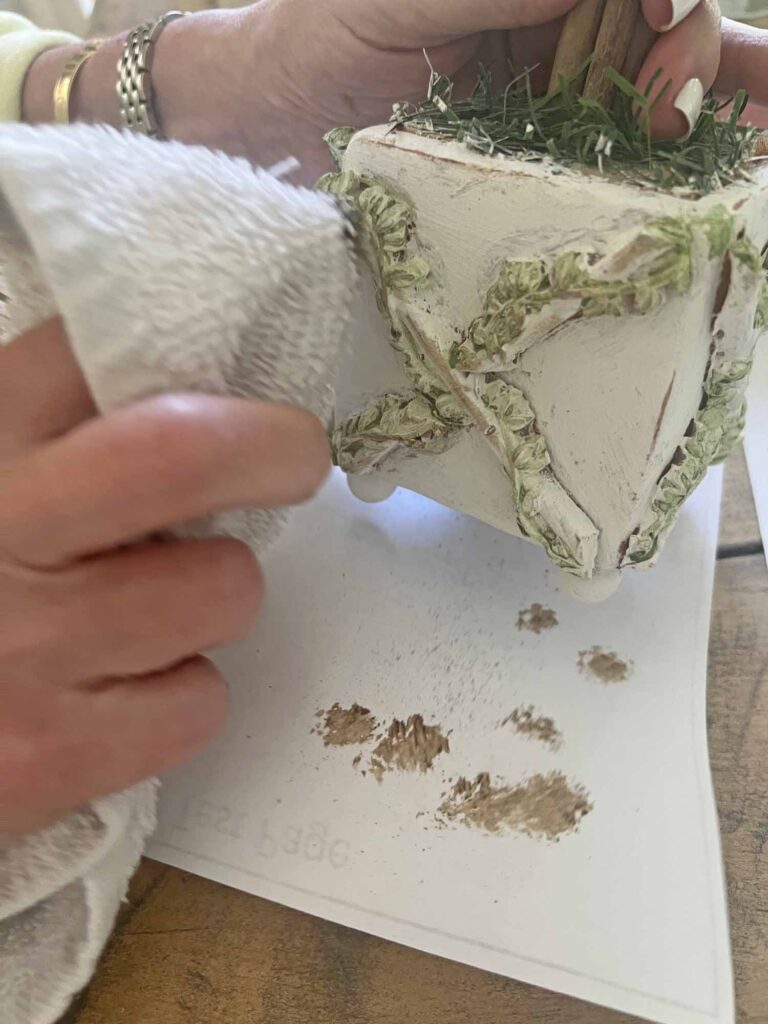
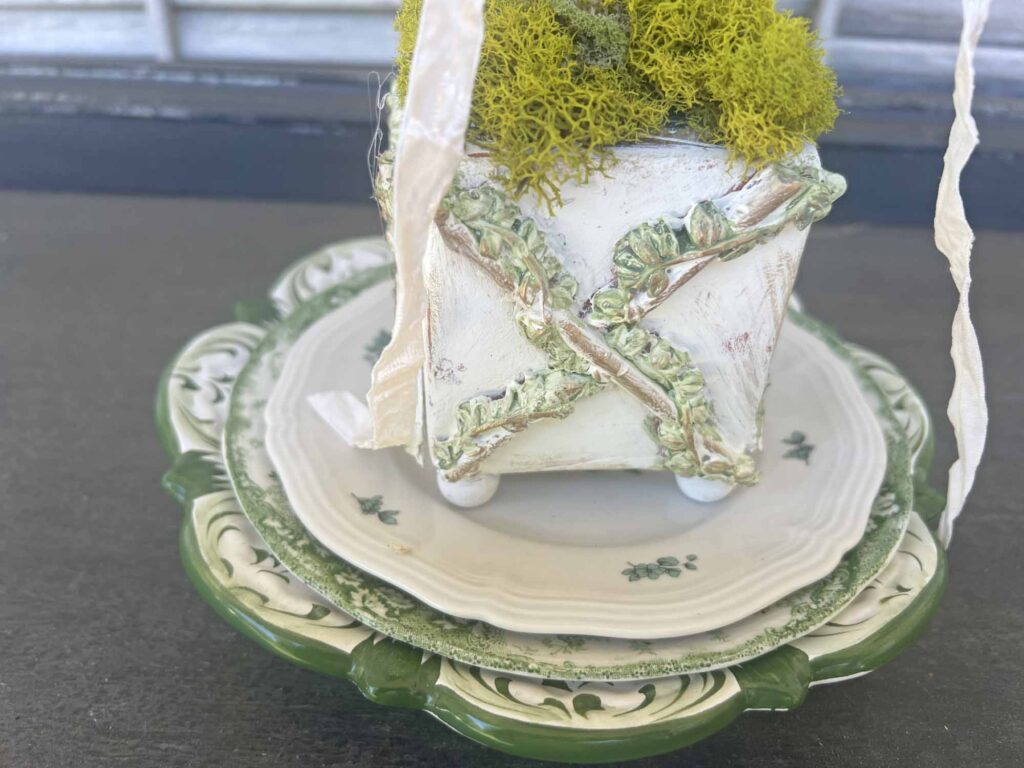
- Using a rag gently apply dark wax around moldings and wipe away excess to achieve an aged look (start slowly with dark wax- you can always add more but it’s very difficult to remove excess)
- Allow wax to set
Add Finishing Touches
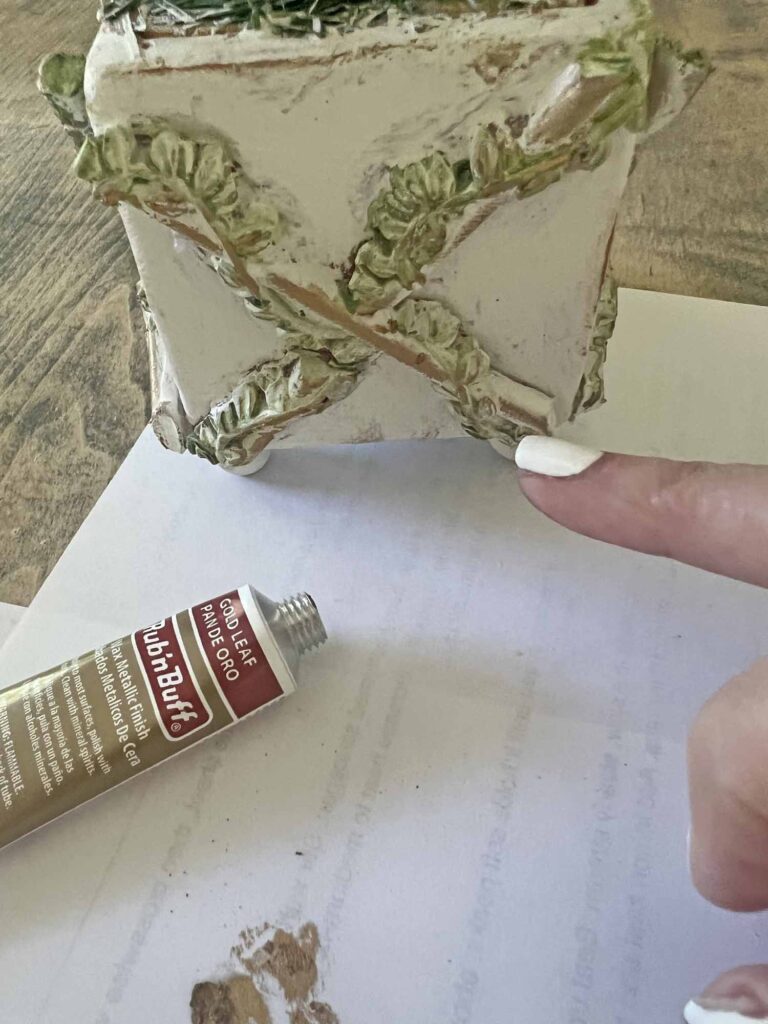
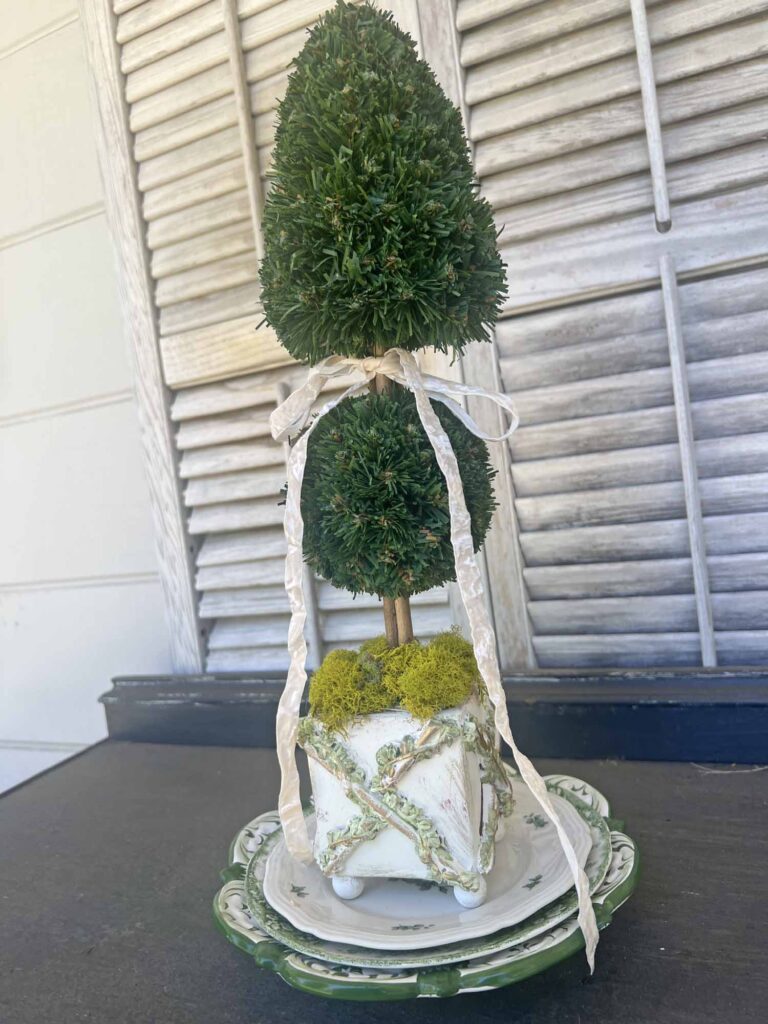
- Apply gold gilding to trellis casting relief to create depth and interest
- Use hot glue gun to add more moss at base of topiary to provide a more finished look

- Add a finishing ribbon
- Voila! Style your topiary and enjoy in a favorite spot in your home
MJ Crafting Pro Tip:
Adhesive can make or break a project. Always select the best man for the job, noting the materials used- fabric, wood, glass, metal, etc. Select the adhesive best for securing a strong bond for desired material. For this particular project, the hot glue creates the mould casting and adheres moss to the base. The E6000 provides a stronger bond to adhere the casting and wooden feet. Both glues are necessary and provide a different purpose.
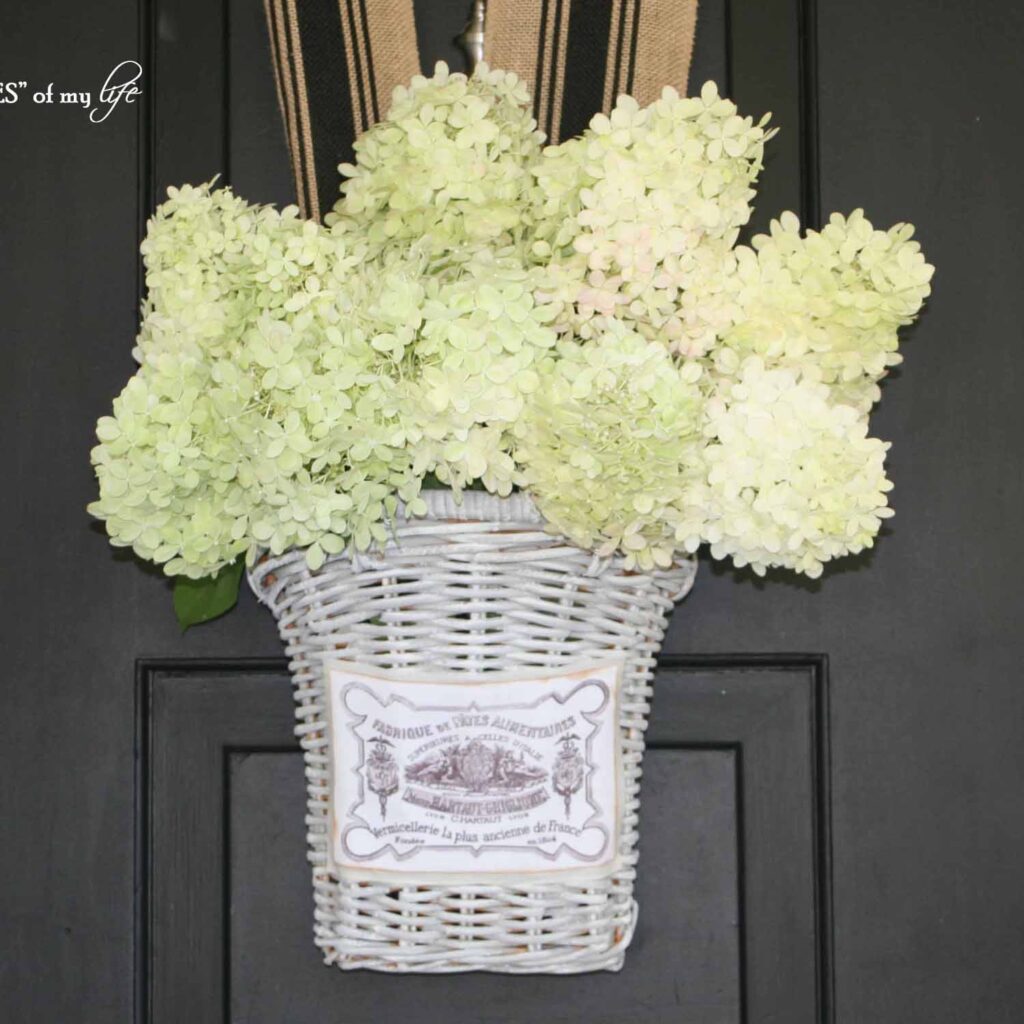
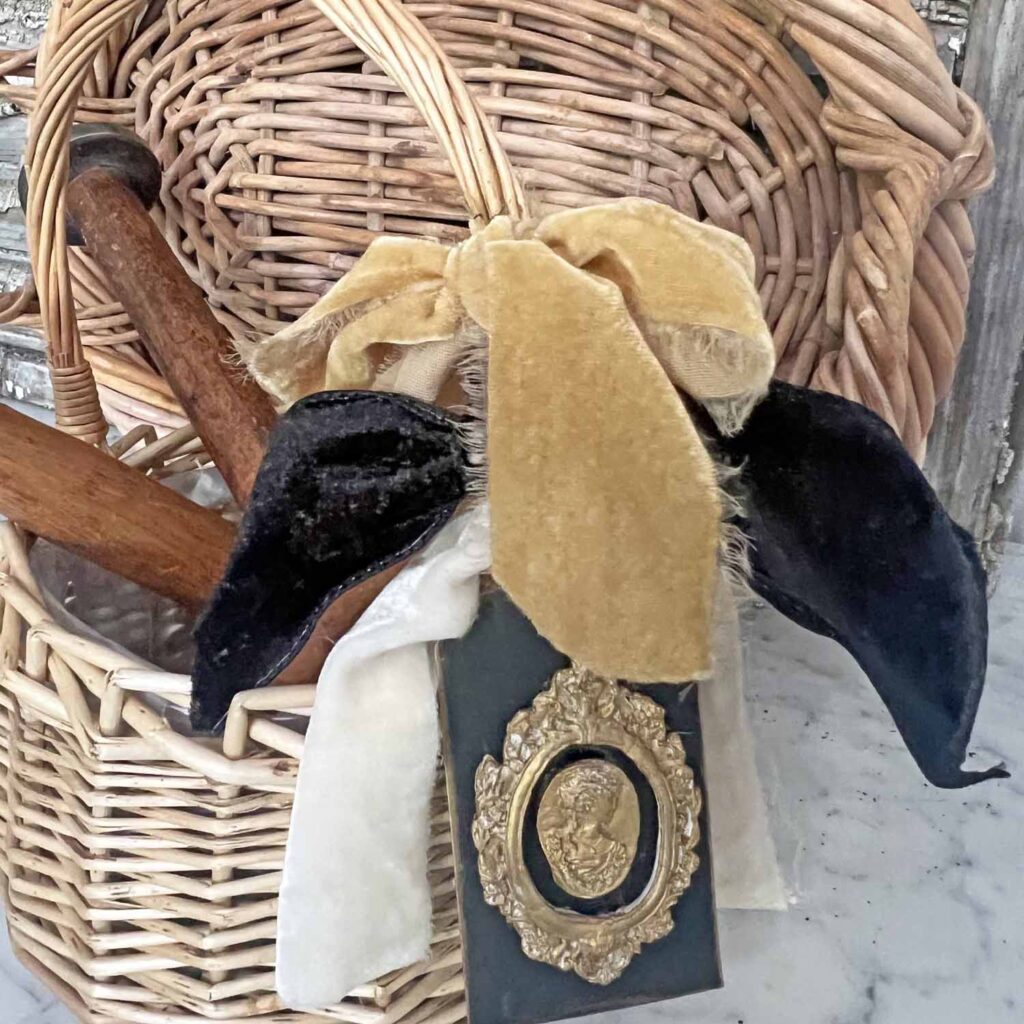
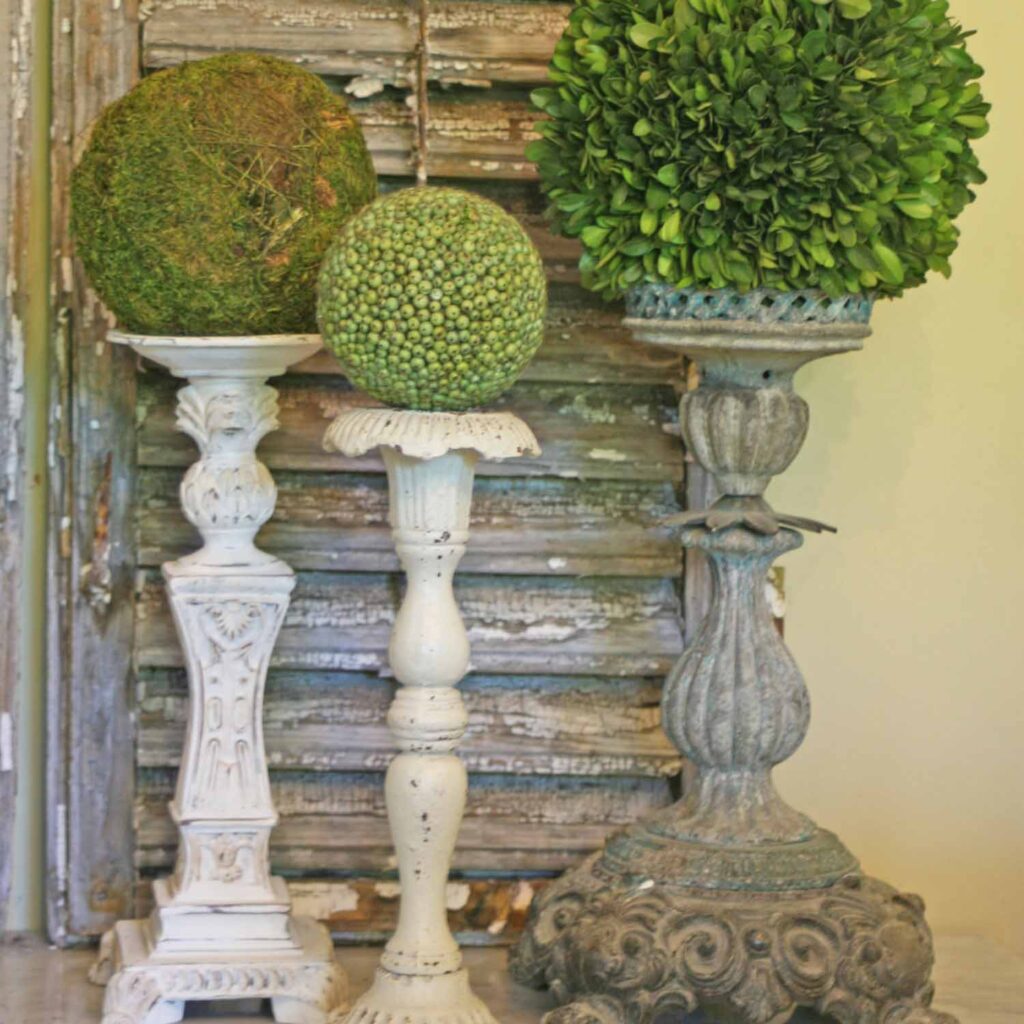
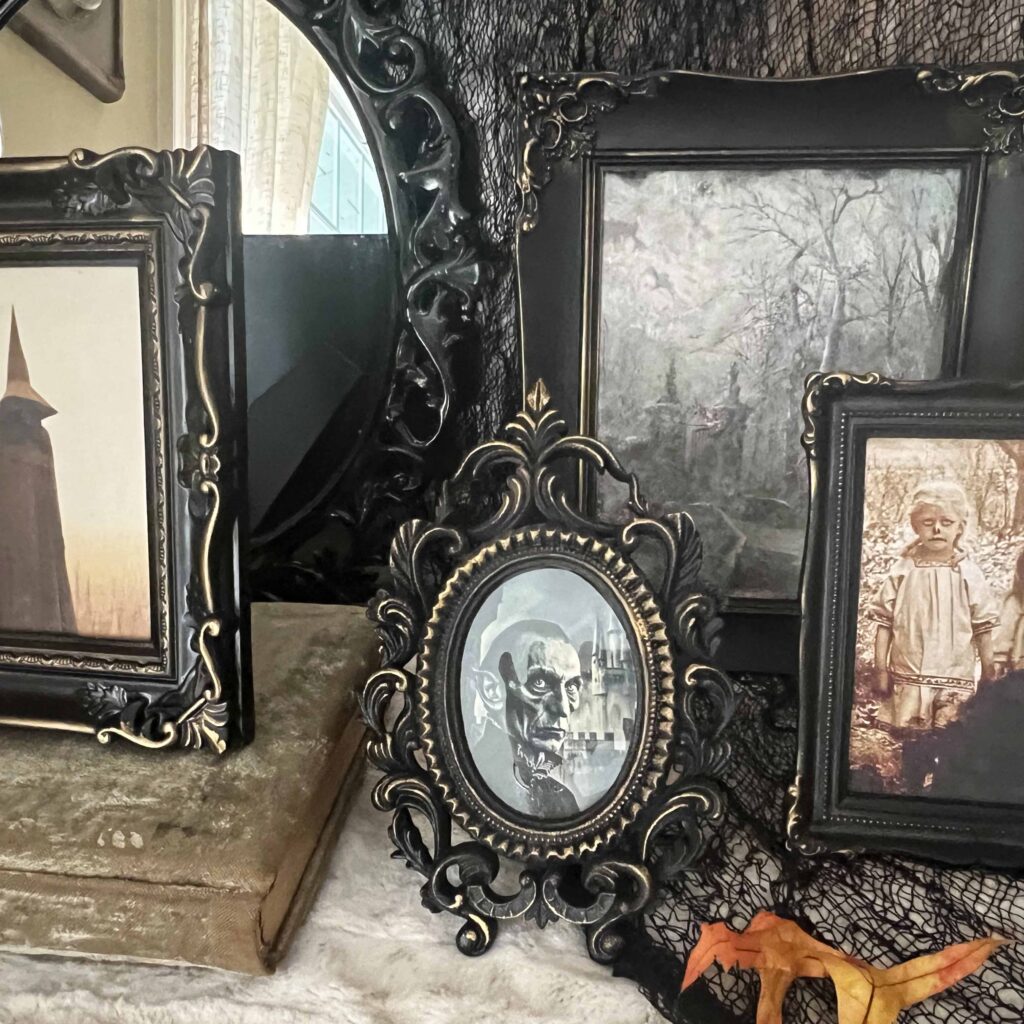
More Thrift Flip Posts
Look for these items to flip at your next thrifting treasure hunt…
FRAMES ~ PLANTERS ~ BASKETS ~ CANDLE STICKS ~ GLASSWARE ~ URNS ~ BOXES
MJ Thrifting Insider Tip:
Make a list of items you would like to find while thrifting on your phone, including desired dimensions, shapes and colors. This way you will always have the list with you whenever you pop into a thrift. Update the list regularly as you find treasures and seek others. Have fun!
Tips & Recommendations
Mould Castings
This is my first time using hot glue to create mould castings. I’ve used air-dry clay in the past, but have seen other DIYs, which used a hot glue gun. I was intrigued and here we are. The hot glue is ten times easier to use than the air-clay, but I feel that clay creates a cleaner casting. That being said, I feel like for this particular project, it was an appropriate medium since the paint, wax and gilding blur much of the design- in a good way. If you want a quick and easy way to create your casting, this is definitely the away to go.
Chalk Paint
I prefer to uses chalk paint for furniture and smaller projects like these, for ease of use. Chalk paint doesn’t require a primer, goes on easily on most materials- wood, clay, fabric, glass and more, plus it distresses beautifully. I know it’s not the most economical paint, but it is eco-friendly and in this instance you get what you pay for. The results and process are worth it in my book and if you haven’t tried it, I suggest you give it a go. I’m partial to Annie Sloan and highly recommend it.
Distressing Techniques
I love patina and grunge and nine times out of ten, I will distress hand crafted projects. For today’s project I included sanding, dark furniture wax and gilding mediums to add age and character to the topiary planter. These are easy techniques, which add depth and dimension to a finished piece. Use as much or as little as you wish or skip one of the steps all together if you don’t care for the look. For example, exclude the gilding if vintage glam is not your jam. Make it yours!
MJ Crafting Pro Tip:
If you apply too much dark wax, clear wax can help remove some of it. When using dark wax it’s best to start slowly with just a little bit and add more as desired. Slow and steady wins the race here.
Finishing Touches
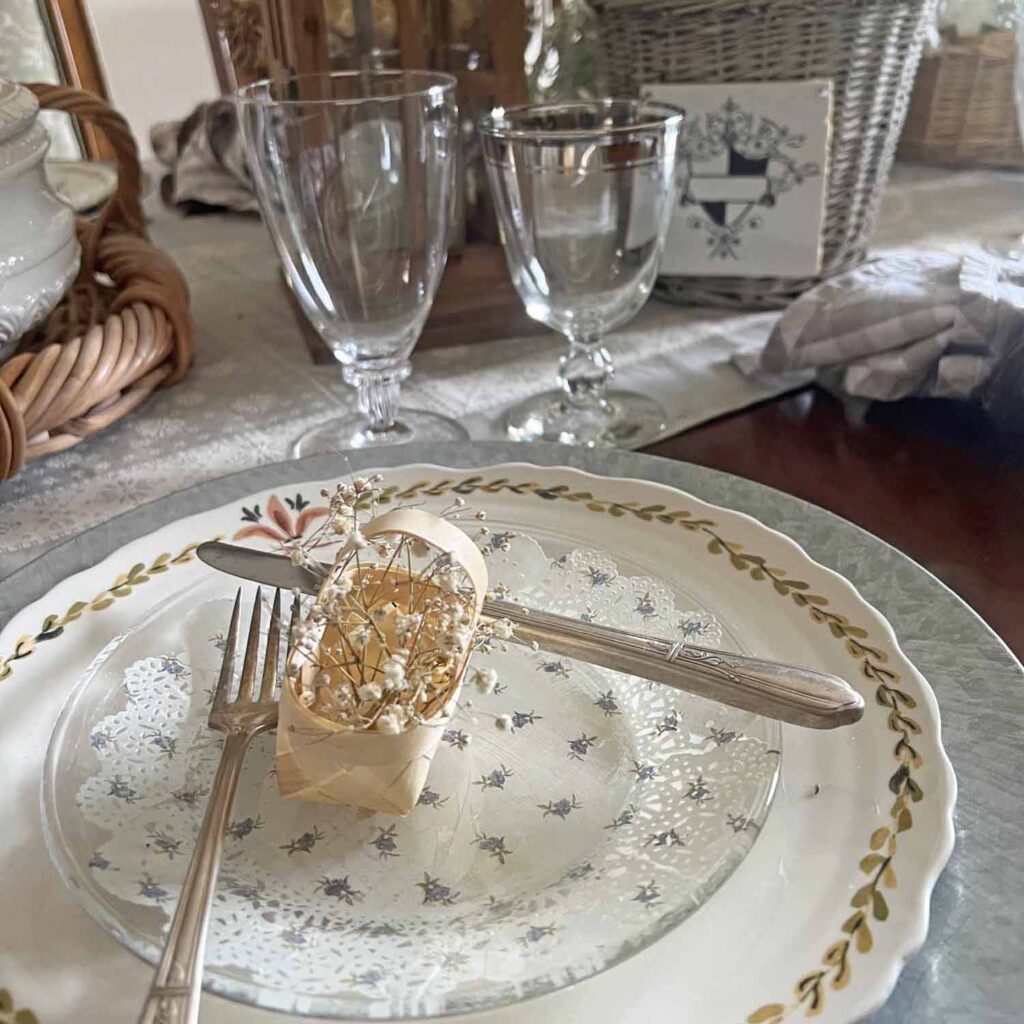
Final details are super important to create a polished and finished decor accent. The new moss base and the velvet ribbon complete the look. It’s the equivalent of accessorizing a boujee outfit. The right shoes and jewelry complete an outfit. Make sure to add finishing touches, which complement your style and coordinate with you interior decor aesthetic.
Trust the Process
Don’t lose sight of the look you are trying to achieve and the end product you wish to create. Throughout this glow-up there were a few times I wondered what the heck I was doing, and thought the project left a lot to be desired (to put it kindly). But as I added each layer my vision became clearer and clearer. Also don’t be afraid to pivot if you find a certain step isn’t serving you well, changing direction sometimes is part of the process and how we learn new techniques. Embrace the creative process.
Styling Ideas
Table top topiaries can really be used almost anywhere. They provide botanical vibes, which brings freshness to any space. Personally, I will be using this particular piece for mantel decor and on side tables, depending on the season and holiday. It would be a cheery accent for a night stand or even a welcome piece in a bathroom. I might use it in protected outdoor areas as well. The possibilities are endless.

Grab a copy of my free
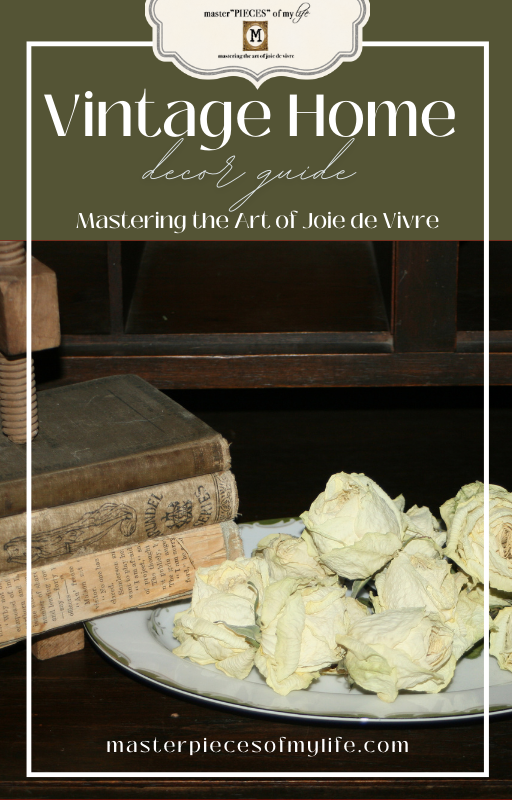
Vintage Home
Decor Guide
This guide provides 10 easy ideas to add timeless charm to your home with a free PDF full of images and inspiration.
We are always striving to master the art of joie de vivre around here. If you enjoy the good life and want a reflection of this in your home, please consider joining the Masterpiece community. Sign up you won’t miss any new content, receiving all new posts directly into your in-box.
Closing Thoughts ~ Conclusion
Thrift flips is an easy and economical way to decorate your home with intention in your own personal style. Home decor can be overwhelming with the variety of options at different price points. Instead lean into thrifts and find unique pieces to make truly yours, which makes your home stand out with a one of a kind stamp nobody else has or can replicate. Your home should be a reflection of you and should tell your story.
There’s something incredibly satisfying by creating something with your own hands with your signature style. Are you a crafter? If so, what’s your super power? Sewing, painting, decoupaging….? I hope you found this inspirational and helps your creative muse. Thanks for dropping by today and can’t wait to see you next time.
Au Revoir!


FAQs – Thrift Flip
1. What are good items to look for at thrift stores to flip?
There’s a myriad of items which an be repurposed. The only limitation is your imagination. Look at pieces that have good bones, meaning a good shape, scale, presence, which can be enhanced and altered to fit your personal style.
2. What other techniques can I use to transform a thrifted find?
There are as many techniques to refinish a forlorn thrifted piece as there are thrift finds out there. Beyond paint, sanding, wax and gilding, you can use spackle, stains, polishes, glazes, crackle mediums, paint removal techniques plus more. Use high end pieces as inspiration to guide you through the creative process.
3. What is the easiest way to transform a thrifted treasure?
Besides given a neglected thrifted treasure a good cleaning and polish, paint is a magic wand. Paint can transform so many items from different materials, including wood, ceramics, glass, wicker and more. Paint can be use to hide imperfections, coordinate with existing decor, update an outdated look, achieving a desired finish. Experiment with different varieties like latex, acrylic, milk and my most recommended chalk paint.
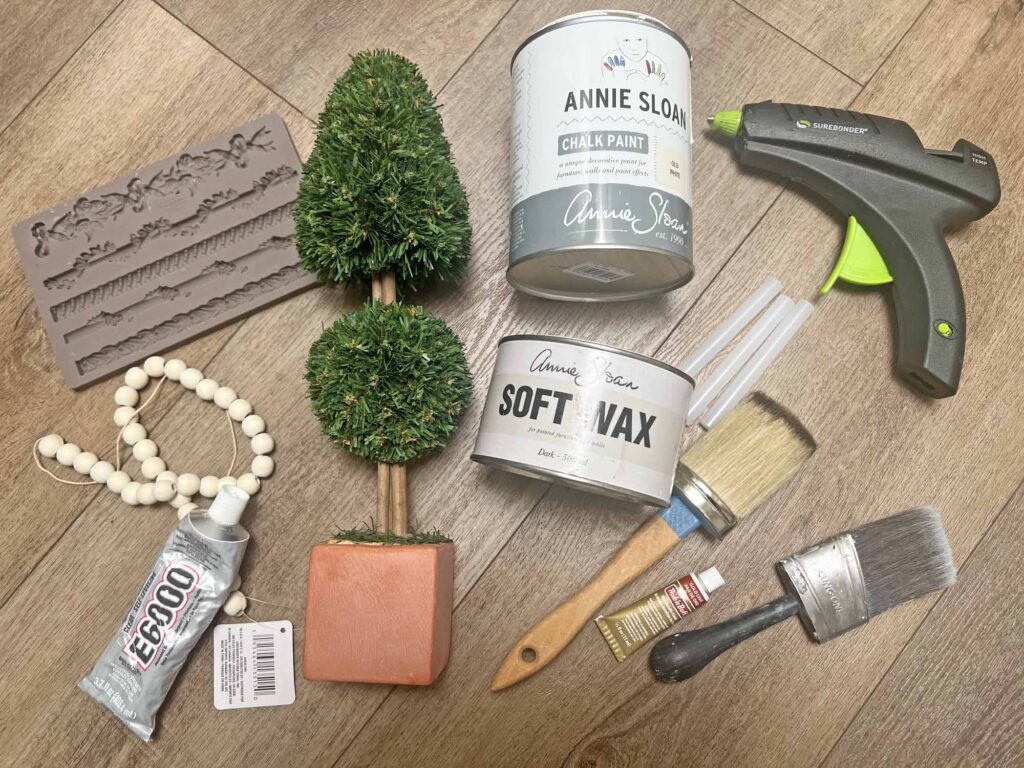
Shop My Thrift Flip
- Redesign Mould 5X8 B, Sicilian Borders
- Surebonder Cordless Hot Glue Gun, High Temperature, Full Size
- Surebonder Full Size Hot Glue Sticks 50-Pack, Clear, Non-Toxic, Multi-Temp
- Annie Sloan Chalk Paint® (Old White, 1 Litre/33.8 Fl Oz) a unique decorative paint for furniture, cabinets and home décor with no sanding or priming
- Dark Antique Wax for Vintage and Antique Furniture Restoration | Provides Dark Colored Protective Finish and Seal | Multi-Surface Protection
- FolkArt Paint, Villa Green Acrylic Paint
- Basics Multi-shaped Polyester Paint Brushes for Acrylic, Oil, Watercolor, etc.
- Crushed Velvet Ribbon 3/8″ x 15 Yards with Wooden Spool Luxury Vintage Velvet Ribbon


Don’t forget to Pin It and save for later. You never know when inspiration will strike!
For more inspiration follow me on Pinterest.
Most Recent Posts


Creativity is not the ending of a thing. But the making of something out of it after it is found.”
James Russell Lowell