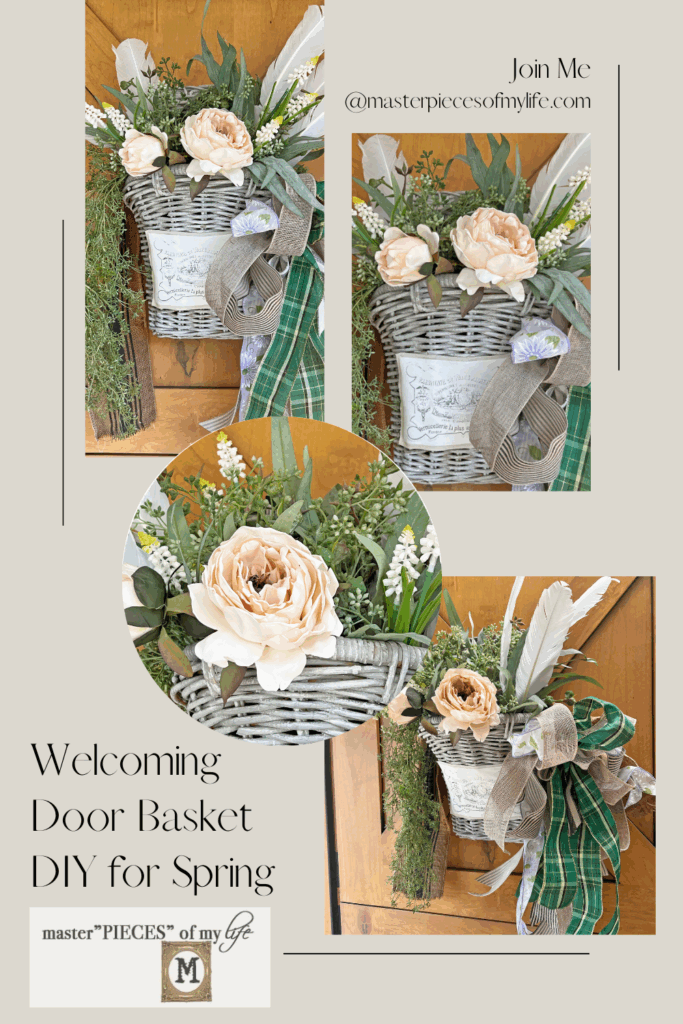
Welcoming Door Basket DIY for Spring
Welcome friends! Today we are going to get a jump start on the upcoming season with a welcoming door basket DIY for Spring. I’ll walk you through all the steps to create a beautiful trend forward front door decorative basket from a $2 thrifted hanging basket.
This Spring basket styling will welcome all who come through your door with a dose of hospitality and happiness. Come on in and let’s get busy!
*Affiliate links might be included for your convenience. These affiliate links mean a small commission is earned if you make a purchase using these links at no extra cost to you. As an Amazon Associate qualifying purchases support this website. For more information: Full Disclosure Policy.
Welcome to Styled 2 Ways – Spring Basket Decor Edition
Styled 2 Ways is a collaboration between my blog, Master”pieces” of my Life, and a new blog on the scene, From the Bay to the Beach, created by Susan. Susan is an old friend of mine and recently started her blog, sharing life style posts about decor, travel, and more. Susan splits her time between the San Fransisco Bay Area and the San Diego beaches.

For the Styled 2 Ways series, two different point of views for a particular styling, project or concept are shared. Although Susan and I both like many of the same things, we both have unique styles of our own, and we want to share how the same idea can be expressed in different ways. Both ways are equally as fantastic, and appreciating other unique takes on the same idea expands our own personal style.
You can find Susan in her other spaces:
When you are done here, please hop over and visit Susan. If you are here visiting from Susan’s place, welcome, I am so happy you are here. Leave me a comment down below; I would love to get to know you. Come on in, have a seat and enjoy!

Inspiration Behind the Welcoming Door Basket DIY for Spring
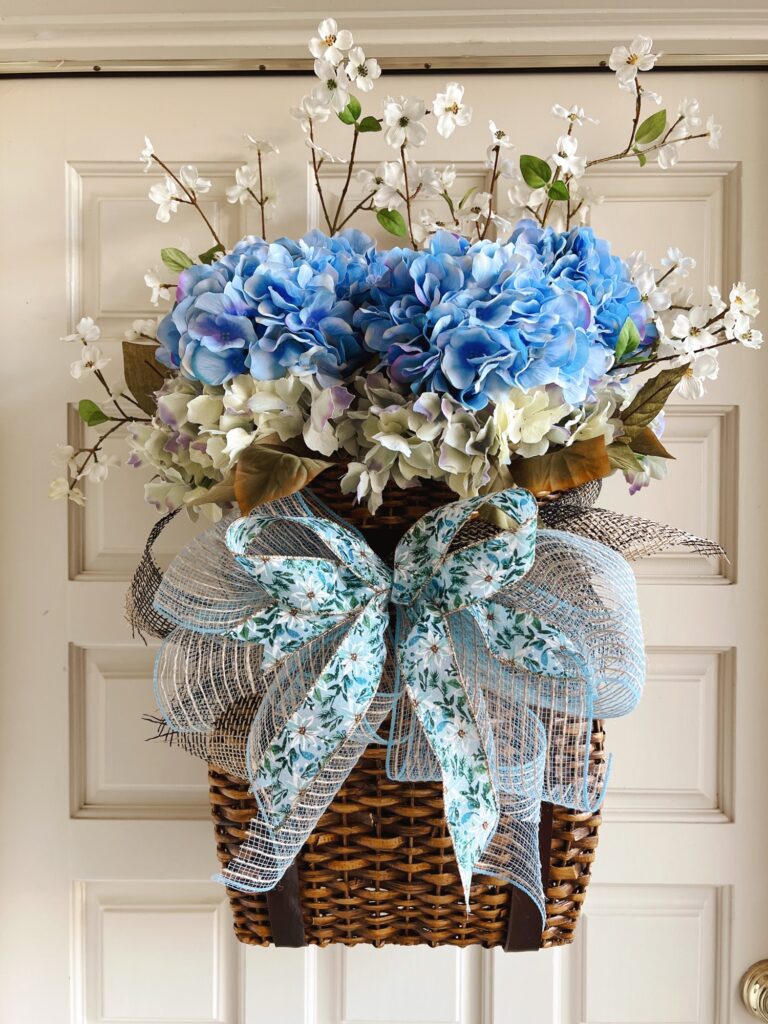
For this Styled 2 Ways edition we chose the same starting point, a hanging door basket. From there the task is to give the hanging door basket all the Spring feels. It’s so fun to see how the exact same project can result in varied results, which are both worthy of spreading Spring goodness on our front doors.
For this Spring door basket styling, I opted to use a thrifted basket I have shared here many times. This basket was an amazing find a few years ago, which was a bit neglected when found. The basket received a transformation, which I shared here {Weathered Basket DIY}. I’ll go into some of the basket up-cycle details below, but you can find more information on the original post.
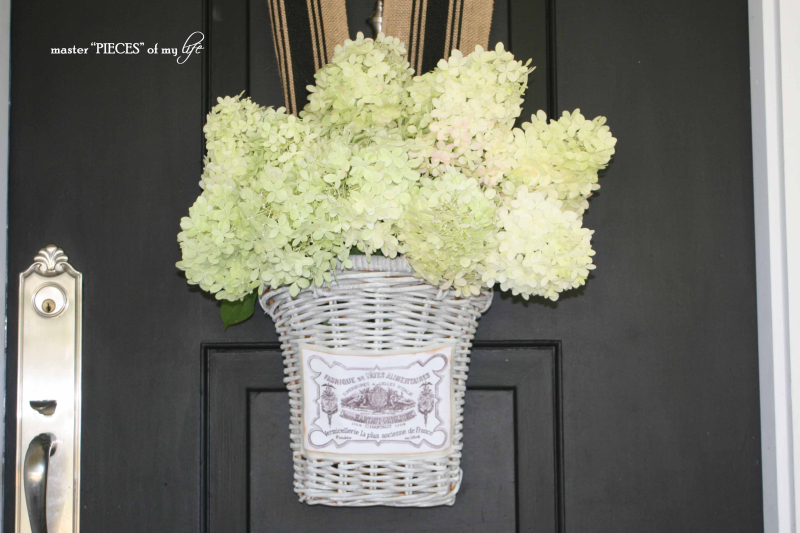
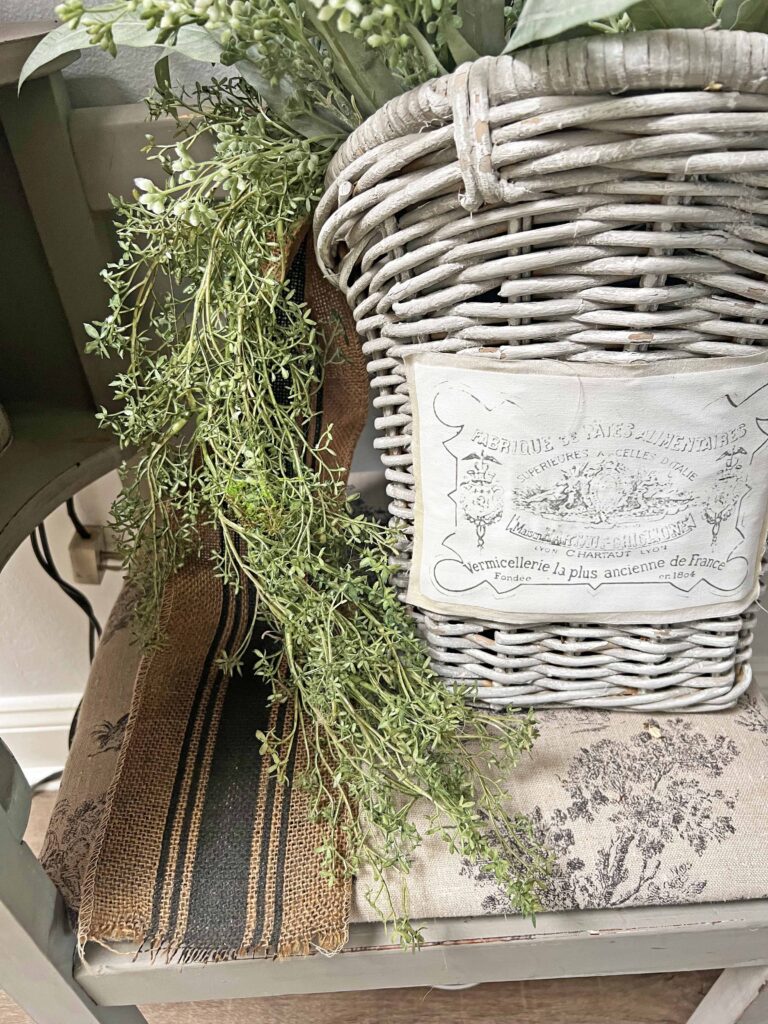
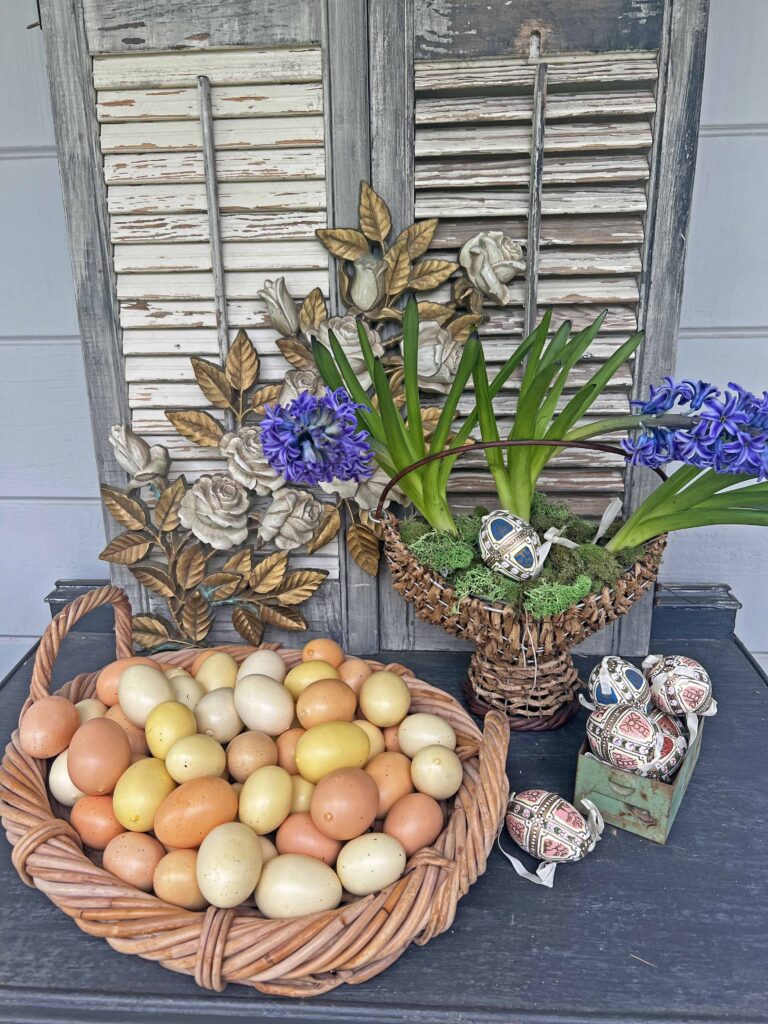
This picture above shows how I styled the basket many times with hydrangeas from the backyard when it was first transformed. When we replaced our front door with the Dutch door, I also replaced the door decor. Most of the year the preserved boxwood wreath adorns the door, which is sometimes replaced with seasonal pieces. And here we are.
The Thrifted Basket Glow-up
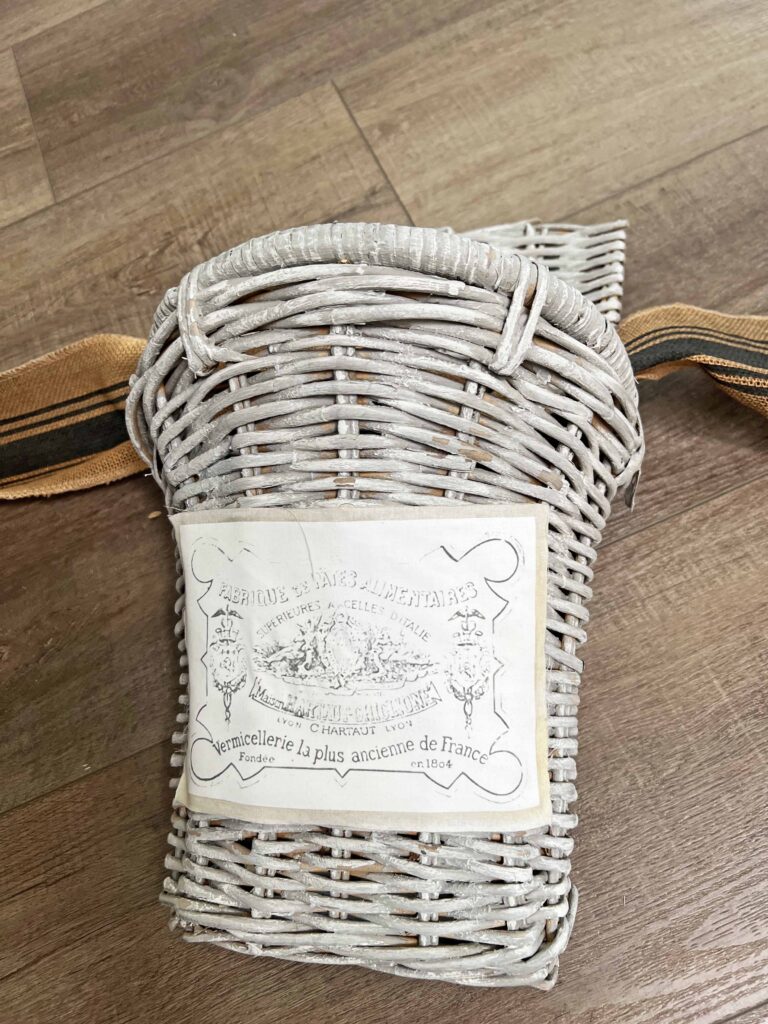
The thrifted basket as you can see below had great bones and style, it just needed some love. With paint and some detailed accents, the basket was infused with French flare.

Paint
The basket transformation started with a paint treatment. A coat of gray paint was applied first. Once the paint dries, a wet paintbrush with white paint was hap-haphazardly applied and wiped down with a paper towel to provide the whitewashed effect. It’s a favorite paint technique around here to up-cycle pieces. I used chalk paint, but the same technique can be used with other paint varieties.
Graphic
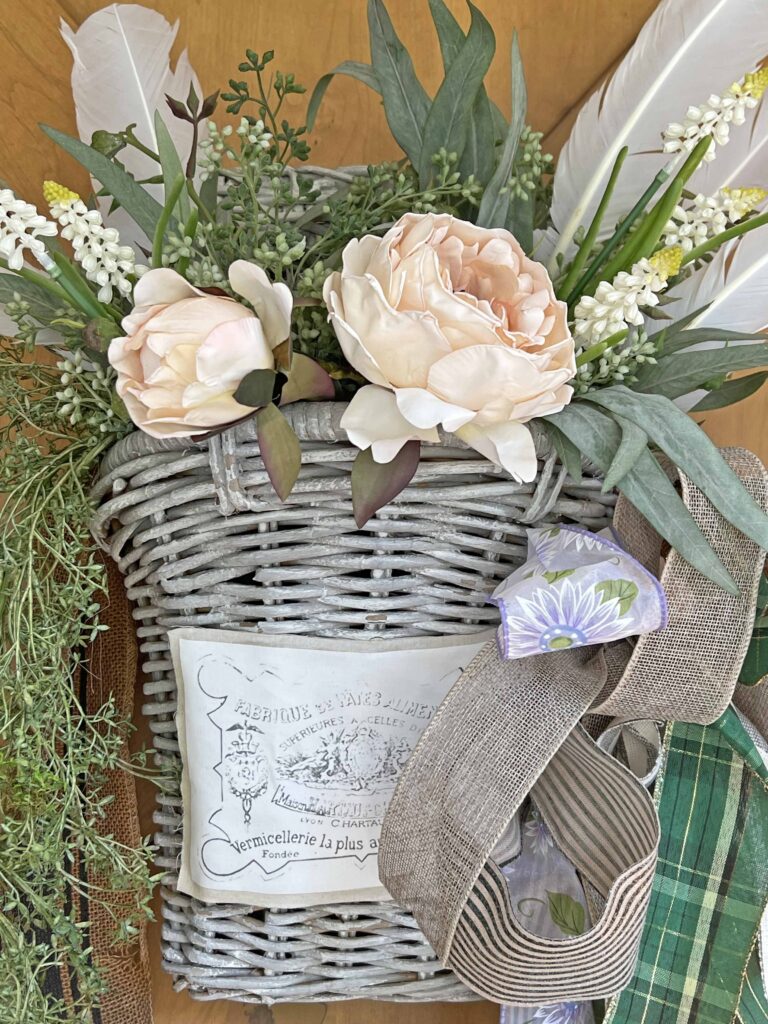
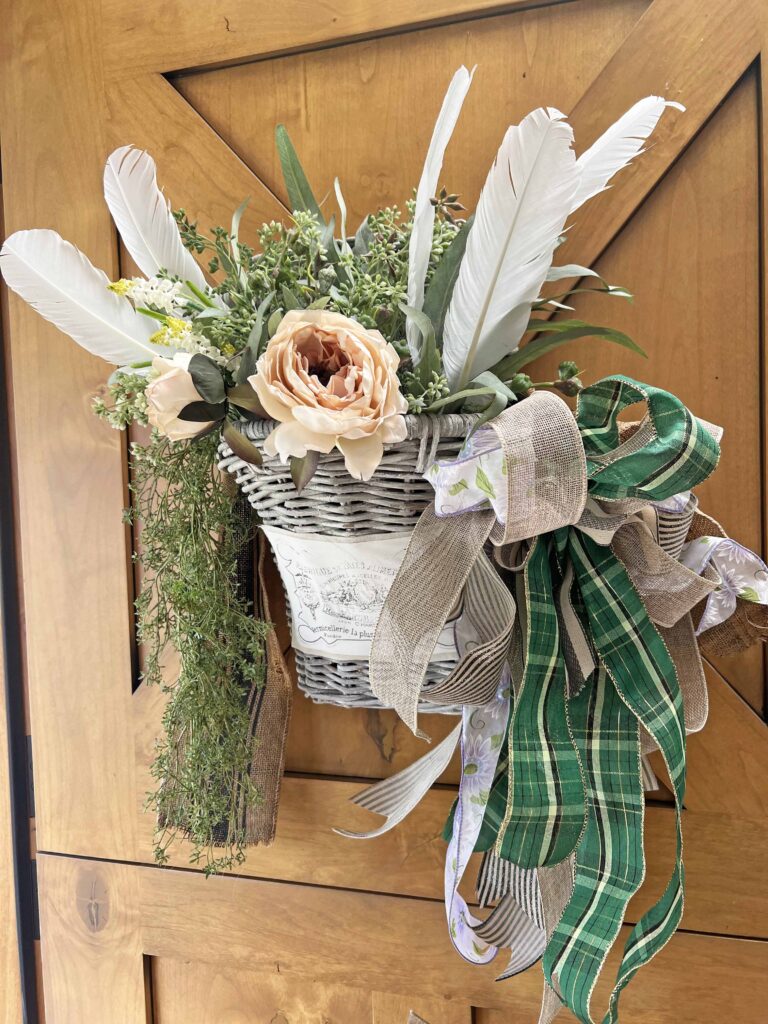
A French label graphic is printed on canvas and layered on muslin fabric. The fabric graphic is attached to the front of the basket. It’s been quite a few years since I gave this thrifted basket its glow-up. I am pleasantly surprised on how well the label graphic is hanging strong. It has faded a bit from being exposed to the outdoors, but it adds to that old world feel, which I love.
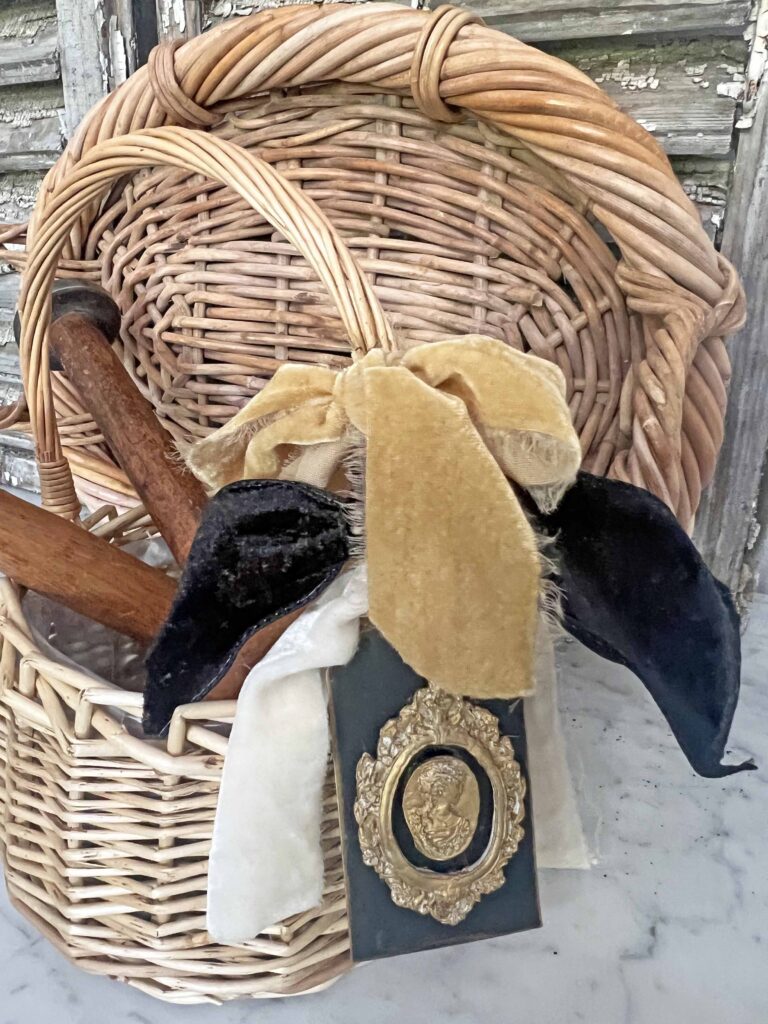
Ribbon
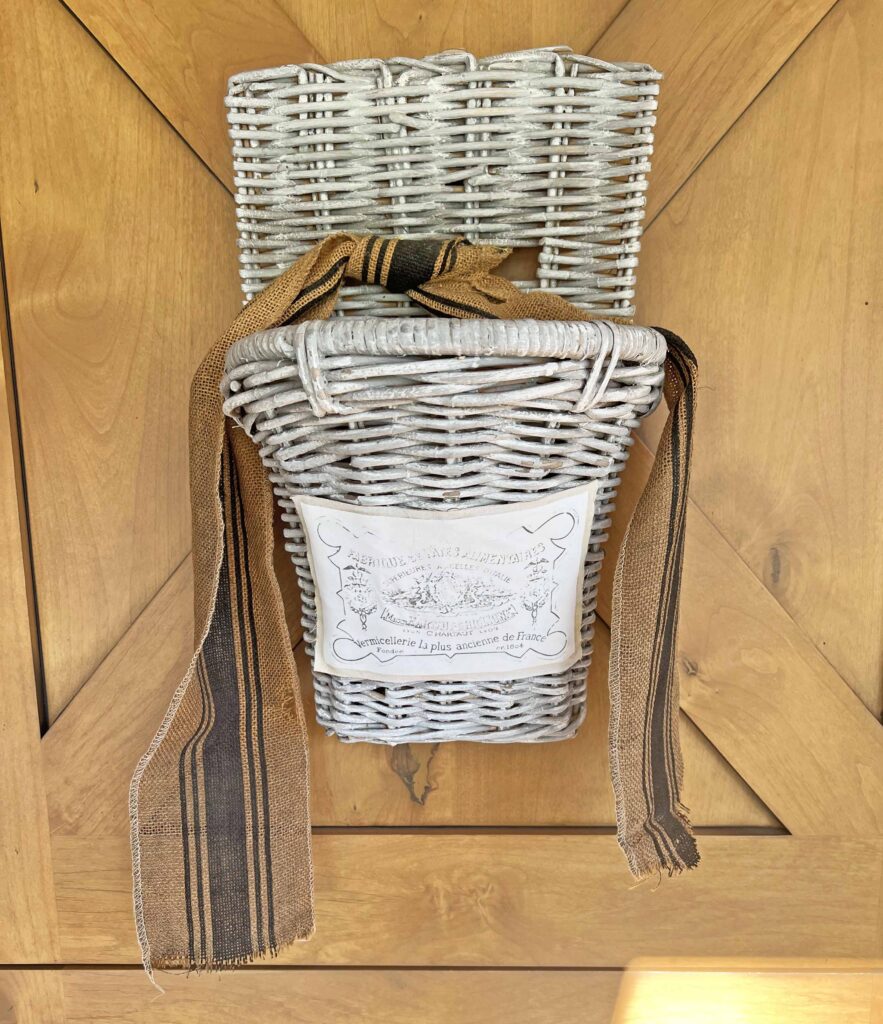
Last, but certainly not least is the hanging ribbon. The basket has two openings in the back, which makes it super convenient for threading a decorative ribbon for hanging. The wide burlap ribbon with a black ticking stripe is the original ribbon I used way back when and it still works perfectly.
Details of the Welcoming Door Basket Styling for Spring
Thriller, Filler & Spiller
The container gardening method of using a thriller, filler and spiller is an old rule, which provides a well rounded and interesting display. I’m sure many of you have heard of it, and it’s the formula used here to create this arrangement.
Thriller
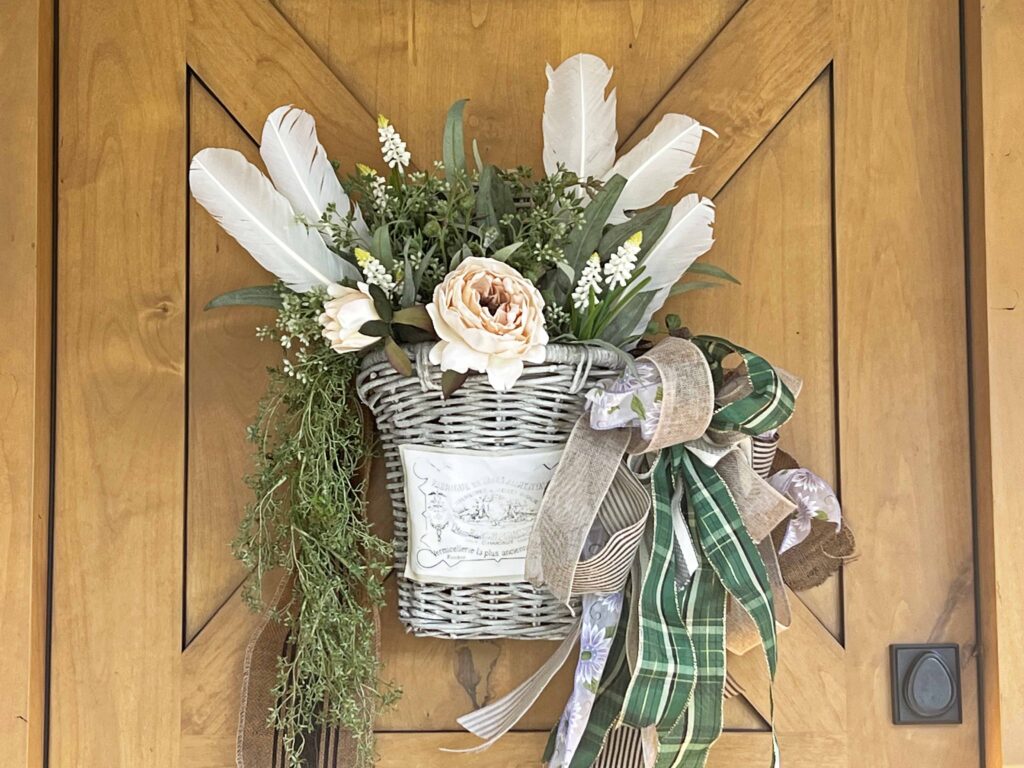
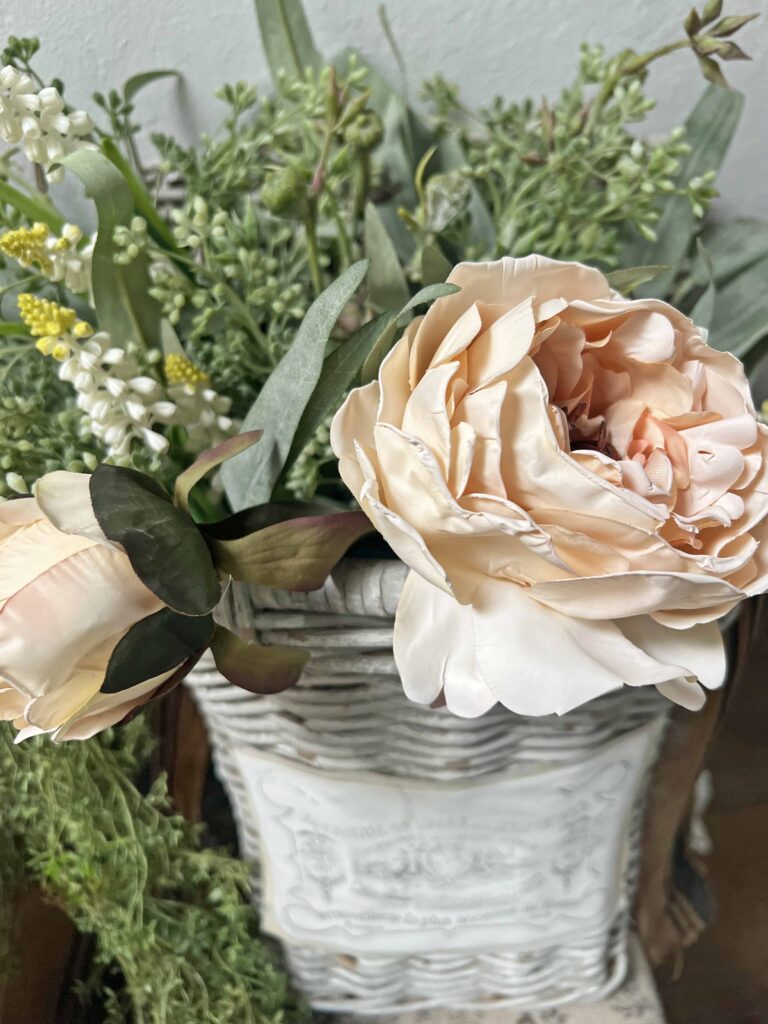
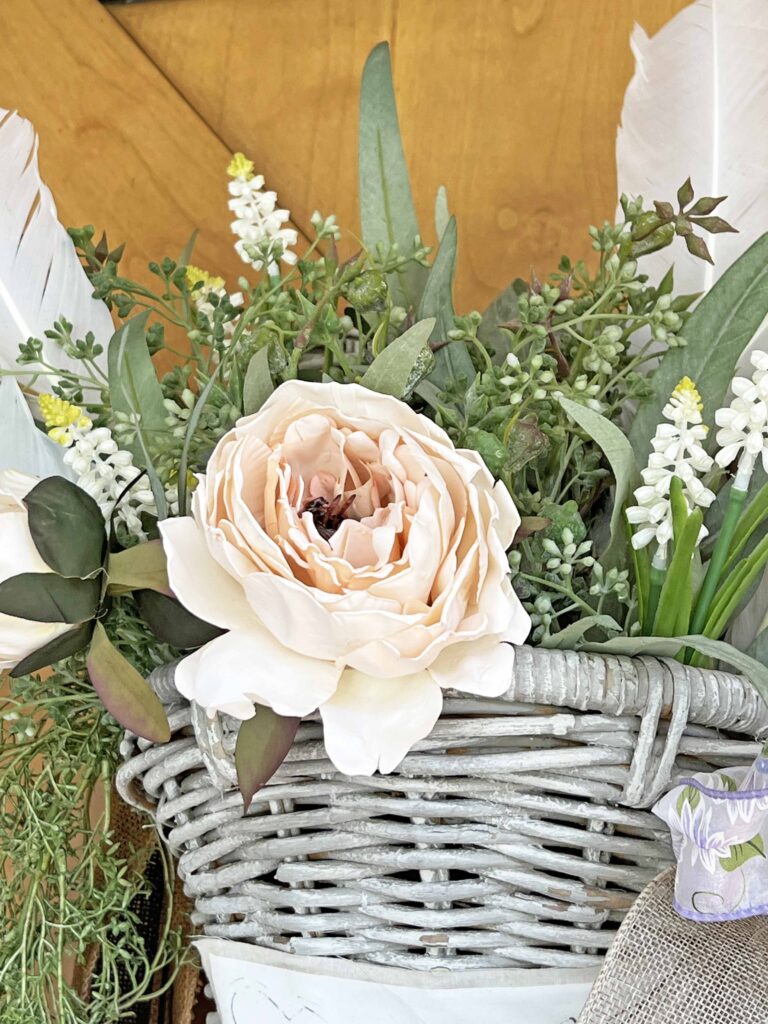
The blush peony stem which is front and center is the thriller of the bunch. It’s the star of the show and sits center stage. Although it appears the arrangement was built around her, she was actually one of the last pieces added.
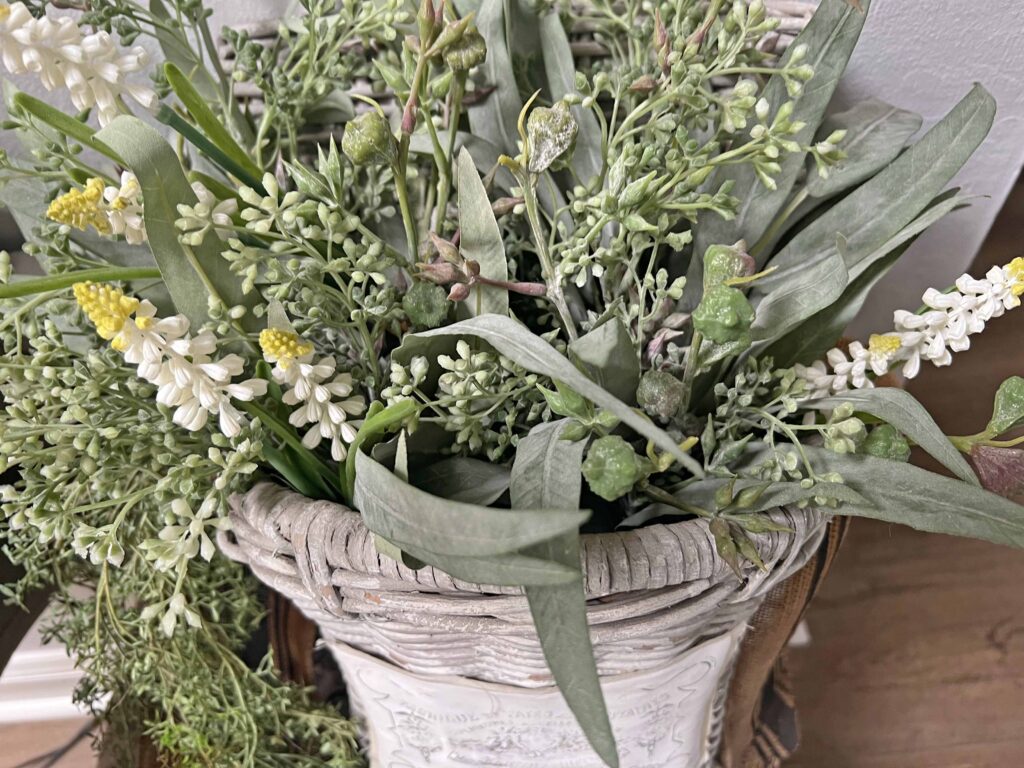
Filler
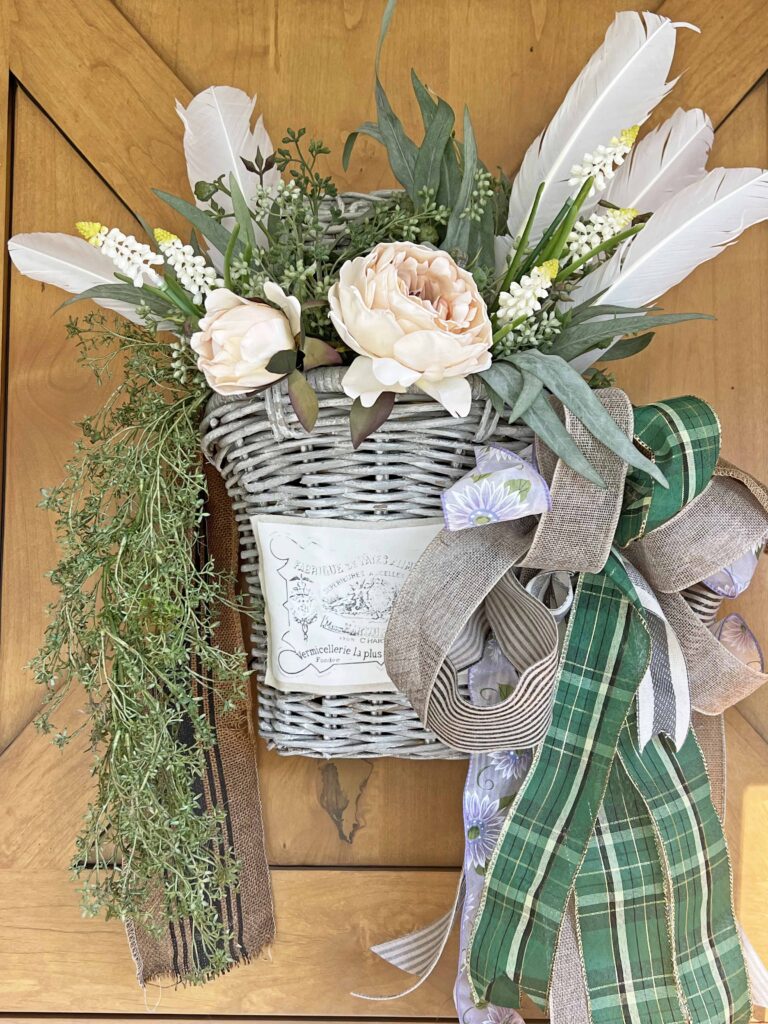
The arrangement started with all the fillers. A couple of stems of seeded eucalyptus filled most of the basket. A few hyacinth bulbs tucked into the eucalyptus added a touch of interest.
Spiller
Tucked underneath the eucalyptus filler sits a trailing vine which spills out on one side. I don’t exactly know the variety of plant since I won it as part of a centerpiece prize at an NCL event many years ago. It was part of a tray arrangement, which I disassembled and use in many different ways.
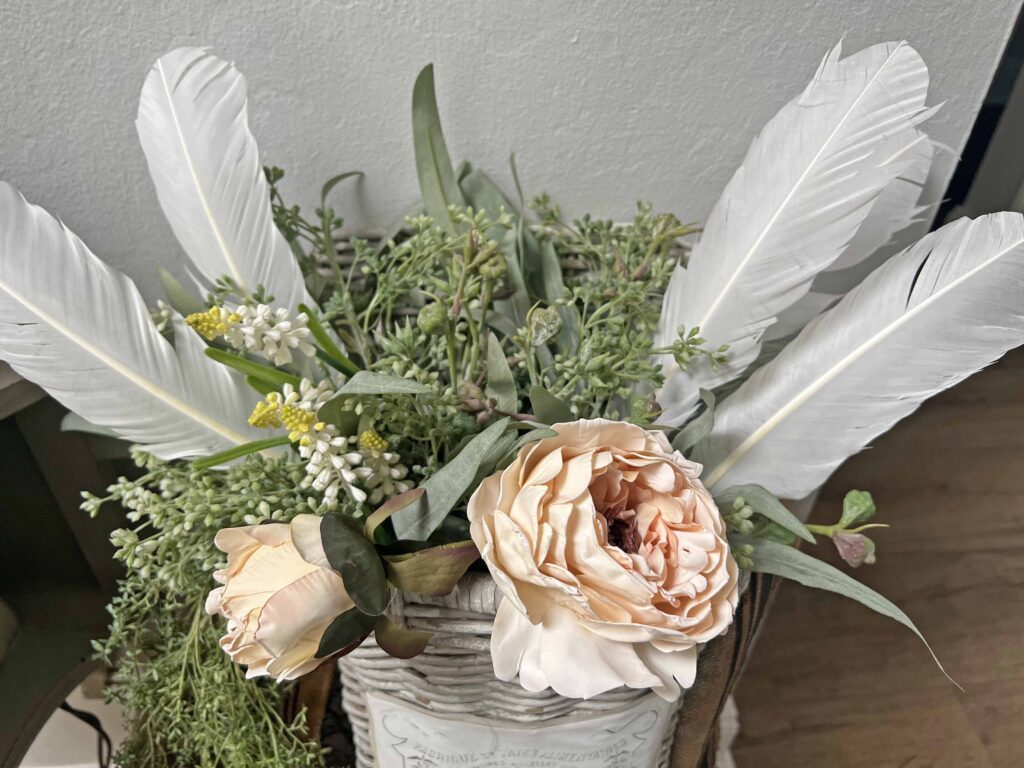
Unexpected Item
Once the arrangement was done, I took a step back to look at it. Although I liked how it looked, I just felt like it needed a little something to give it that special touch. Cue in the white feathers and I love the unexpected effect the feathers bring to the party. Feathers are a great secret weapon for decor and are always favorites around here.
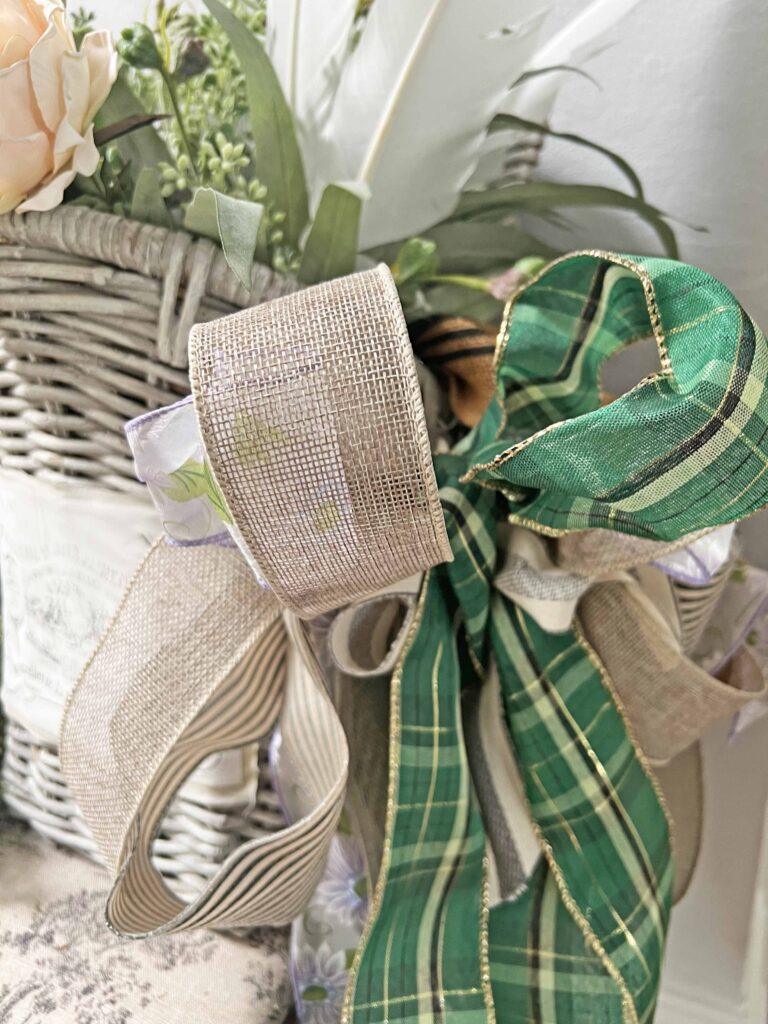
Bow Accent
Of course a bow is needed to finish the styling. The bow hangs on the opposite side of the trailing vine to balance things off, although it sits a bit lower and hangs longer to avoid awkward symmetry.
Tips & Tricks for Decorating the Welcoming Spring Door Basket
I used faux florals for this styling since it’s low mainetance for a hanging basket. I tend to usually use real flowers whether fresh, preserved or dried. But as a decor piece which will be hanging outside for a considerable amount of time, real florals are not practical. Fresh flowers require water, and preserved and dried florals take a beating outside. Sun, wind, dew, frost etc. can deteriorate natural florals, so faux florals for the win here.
I have included hanging basket options in the shopping section below, but please keep in mind thrift stores are a great resource for baskets, which is where I found mine at a fraction of the price. Don’t get me wrong, many new baskets are quite at home around here, but baskets are always abundant at thrifts and you never know what you’ll find. This by far is one of my favorite baskets.
Closing Thoughts
Are you looking forward to spring? I heard the groundhog saw it’s shadow, so six more weeks of winter are anticipated. This doesn’t mean you can’t start getting ready for spring with projects like this. I hope it inspires you!

Easter is also really late this year towards the end of April, providing more time to prepare Easter projects as well. I’m looking forward to sharing amazing spring time content.
Thanks for stopping by and don’t forget to visit Susan to check out her blooming Spring door hanging basket. See ya next time friends!

Shopping the Welcoming Door Basket Decor Look for Spring
- Gray Lined Wall Hanging Basket
- Hyacinth Open Weave Hanging Basket
- Hydrangea Door Hanger Basket Wreath
- Spring Pure Pink Silk Peony Bloom
- Faux Mixed Eucalyptus Seeded Stem
- White Feathers
- Green Black Plaid Bow

More Related Posts
Most Recent Posts
Spring work is going on with joyful enthusiasm.”
John Muir
Pretty basket MaryJo! I love the colors you used! ~ Susan
Thanks Susan! These projects are always fun! XO- MJ
Beautiful!! I love the pops of yellow and purple. The feathers are so cute too!??
Thanks baby girl! Loving the feathers too! Dad not so much. lol. XO- MJ
amazingly beautiful hanging baskets for the front door.
Thank you for sharing and participating at SSPS 347. See you at #348 Hope you had a fun Valentine’s Day
Thanks so much Esme. I’m so glad you liked it. See ya at the party. XO- MJ
Love the door basket. I’m putting one together for my front door and they are easy and fun to do. Have a wonderful week.
Lynne
Thanks so much Lynne. Can’t wait to see your basket. XO- MJ
Mary Jo,
Love your spring basket. Congratulations, you are being featured on YFY / I hope you stop by.
https://eclecticredbarn.blogspot.com/2025/02/spring-decorating-on-tft.html
Hugs,
Bev
Thanks so much Bev! I appreciate the love. XO- MJ
Gorgeous door basket! I am happy to feature you at TFT this week. Have a great weekend ahead!
Thanks so much Amber. I appreciate the support. XO- MJ
MaryJo,
Very pretty!! I have a similar basket that I have an arrangement that I made in that I sue in my Den….I just may have to freshen it up a bit!! Thanks so much for stopping by!! Hope you are enjoying the week!!
Hugs,
Deb
Debbie-Dabble Blog
Thanks Deb. Baskets are always fun to decorate. See you soon friend. XO- MJ