


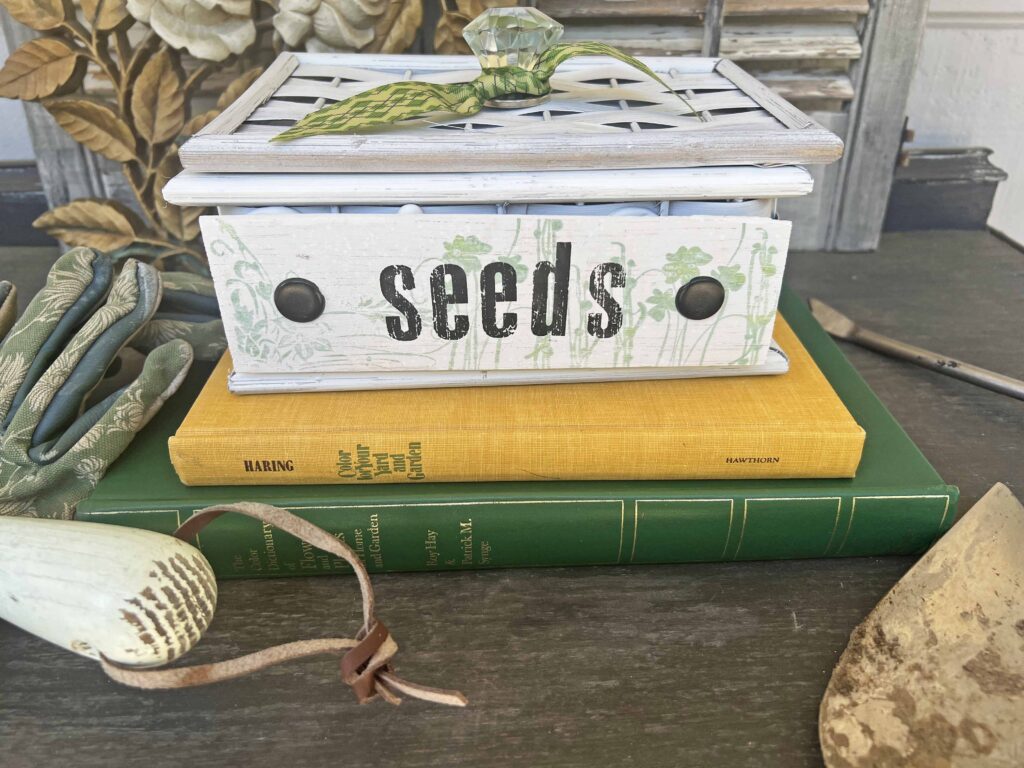
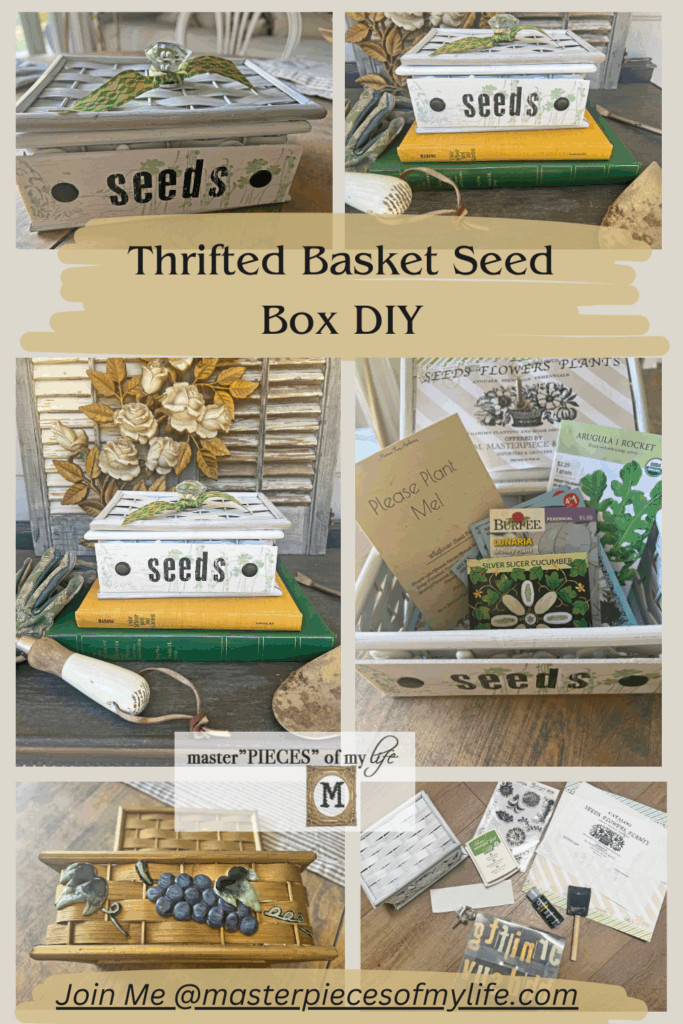
Hello friends! I have a fun seasonal project scheduled to share today. I up-cycled a thrifted basket, which had seen better days, and now it’s converted into the perfect seed box. Come on in, and let me show you how I DIYed a thrifted basket into a vintage inspired seed box.

I’ve had seed packets floating around the house for awhile now. Some in the kitchen, some are in the laundry room and some in the garage, and now they have a knew home. I am super jazzed to share this fun and quirky thrifted basket seed box DIY. Come on in.


*Affiliate links included for your convenience.
Inspiration Behind the Thrifted Seed Box DIY
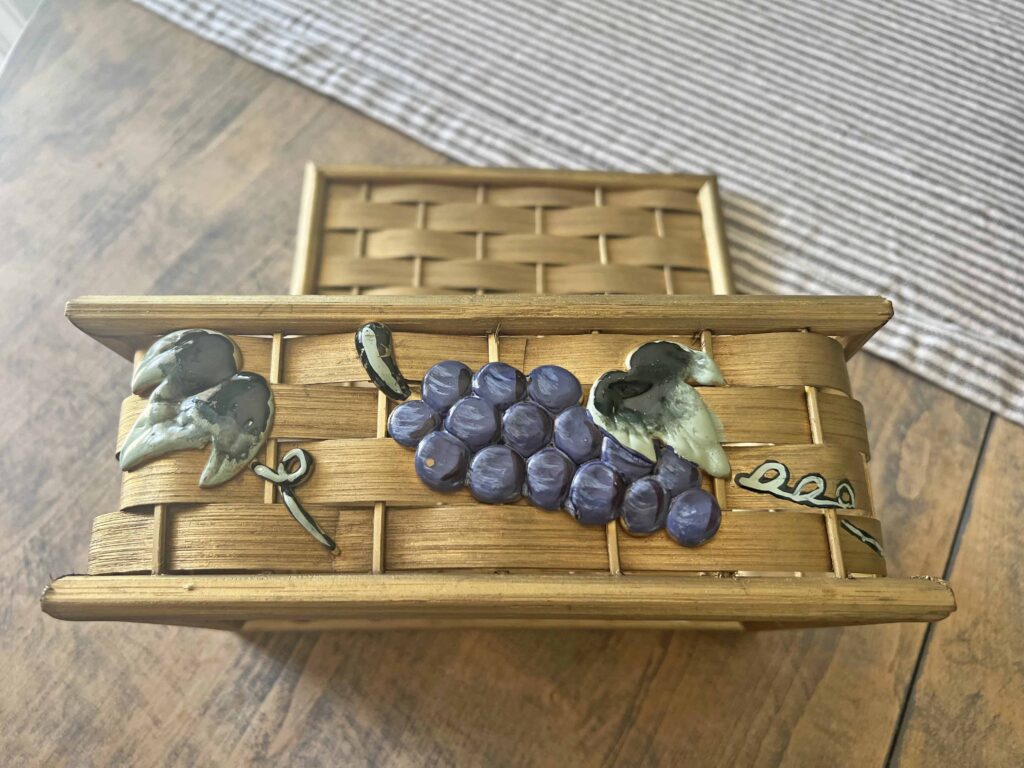
I’ve actually had this wicker basket box for quite awhile now. I knew I wanted to give it a make-over, but not sure for what. Although it was a bit dated, but for just a dollar, I brought it home since it had great bones for something precious. The basket itself is a bit askew, but the hinge mechanism is perfect, which is the most important part for a box to function properly.
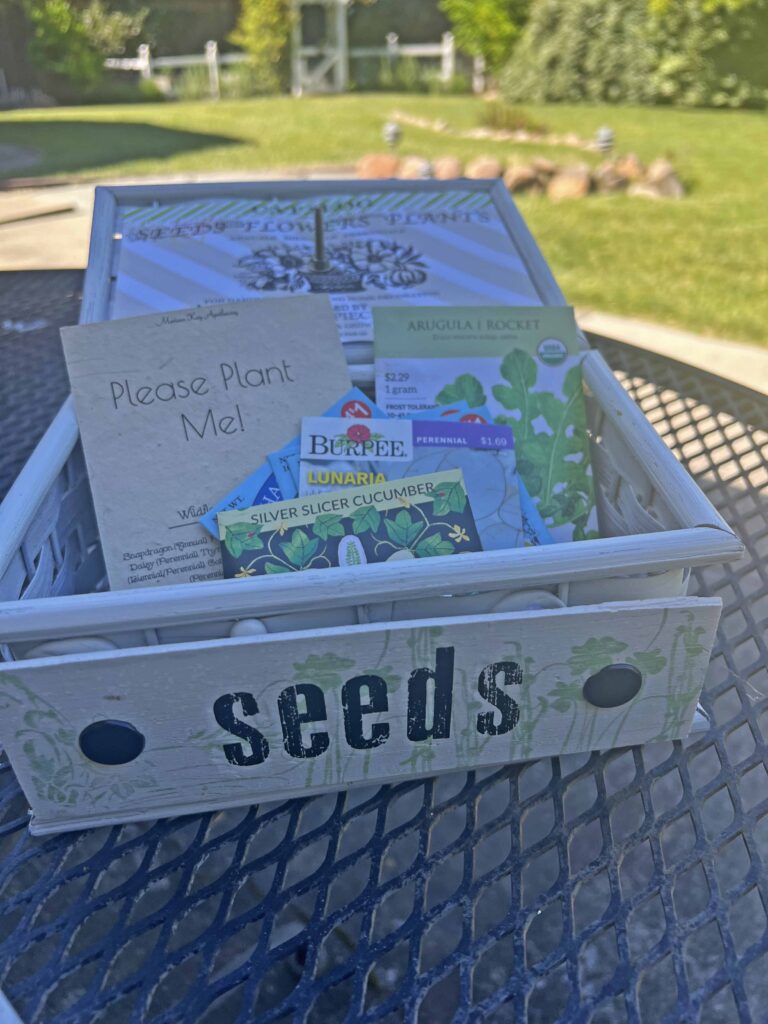
It’s the perfect seed box for all my packets that I keep misplacing. Now all these seed packets have the cutest vintage home. Since the box mechanism worked perfectly, I knew I wanted it for storage. But to store what? The “aha” moment when I decided to use it for seed storage was so gratifying. And here we are.

Process for the Thrifted Seed Box DIY
I recently shared a post all about thrifted baskets, which you can read here {thrifted basket finds, up-cycles and styling ideas}. It’s so easy to make-over a basket into an adorable and useful piece. This box was crying out for a new dress change and with some paint plus key accents it is transformed.
Paint
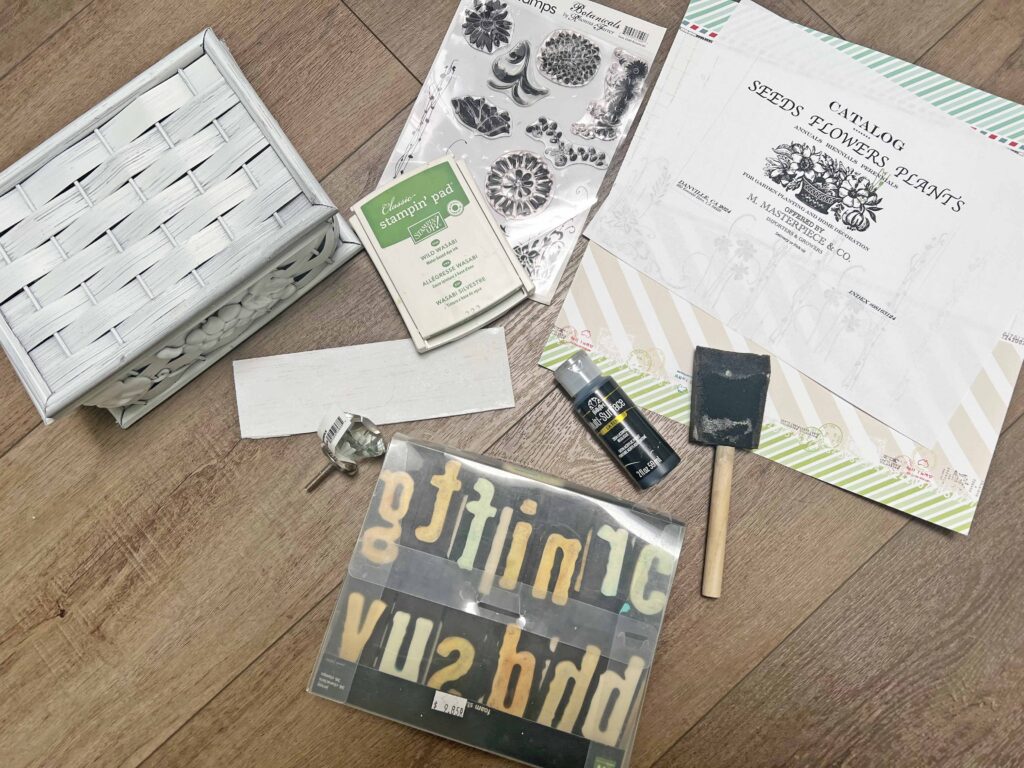
One coat of white spray paint was the perfect start for this make-over. Originally I wanted to remove the grape motif on the front of the box, but it would not budge. I even summoned Mr. M’s assistance, and he could not remove it either. He had a good point. If you did not want it to fall off it would be totally flimsy. Well, I moved on and painted right over it.
“Seed” Sign
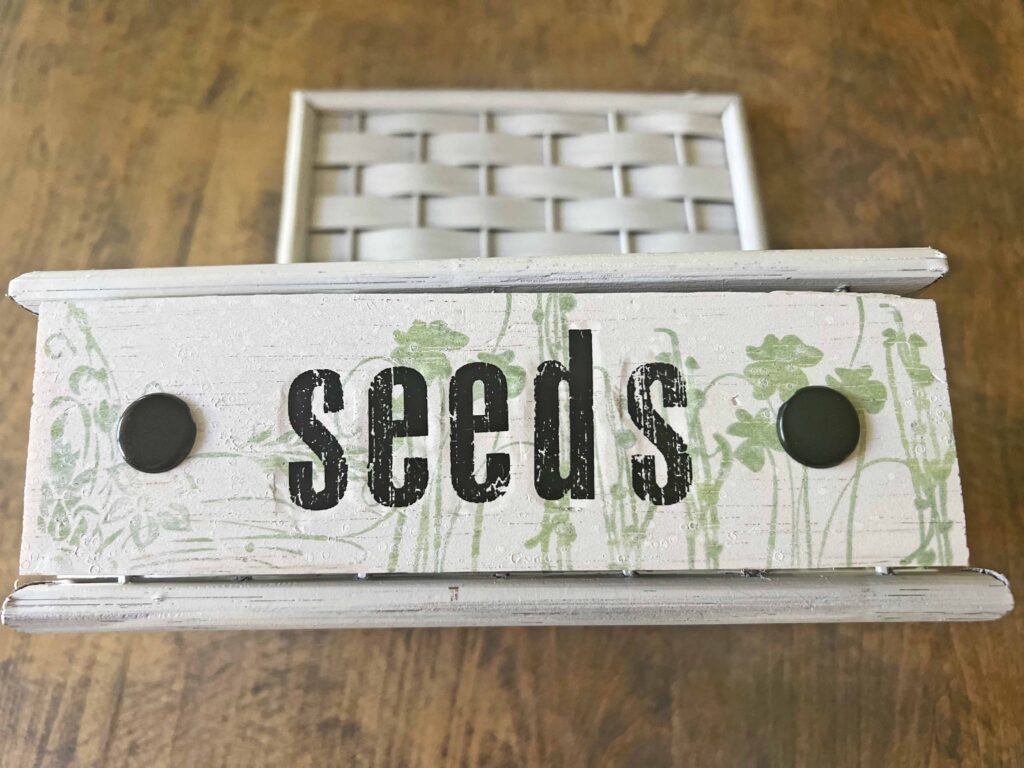
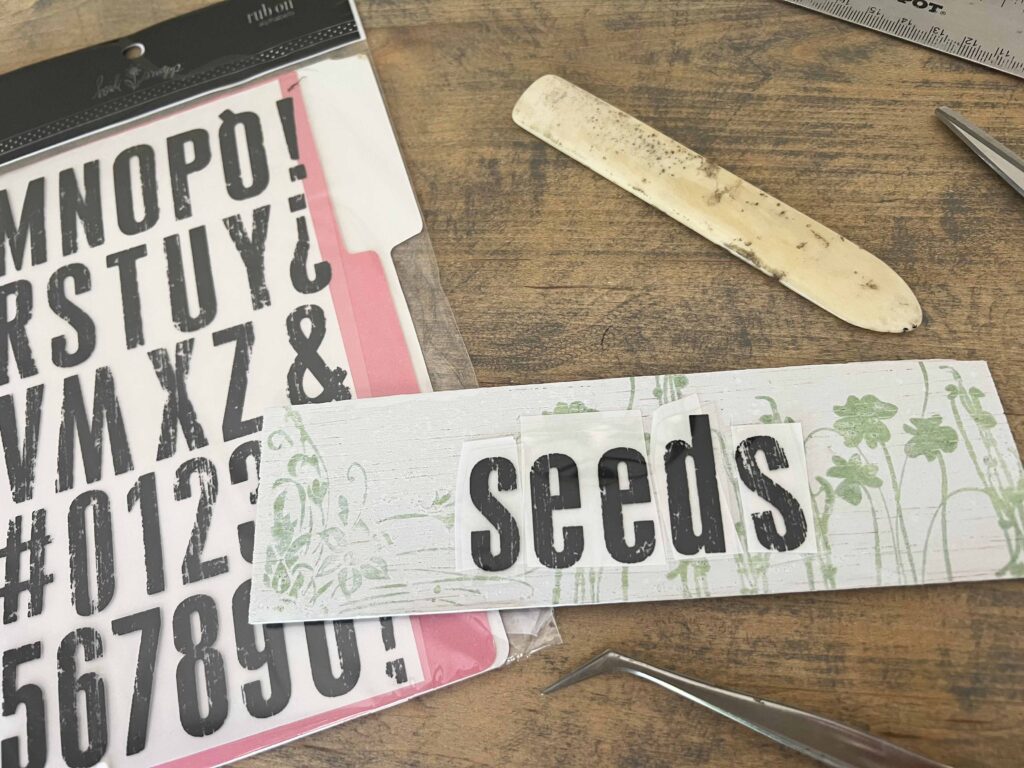
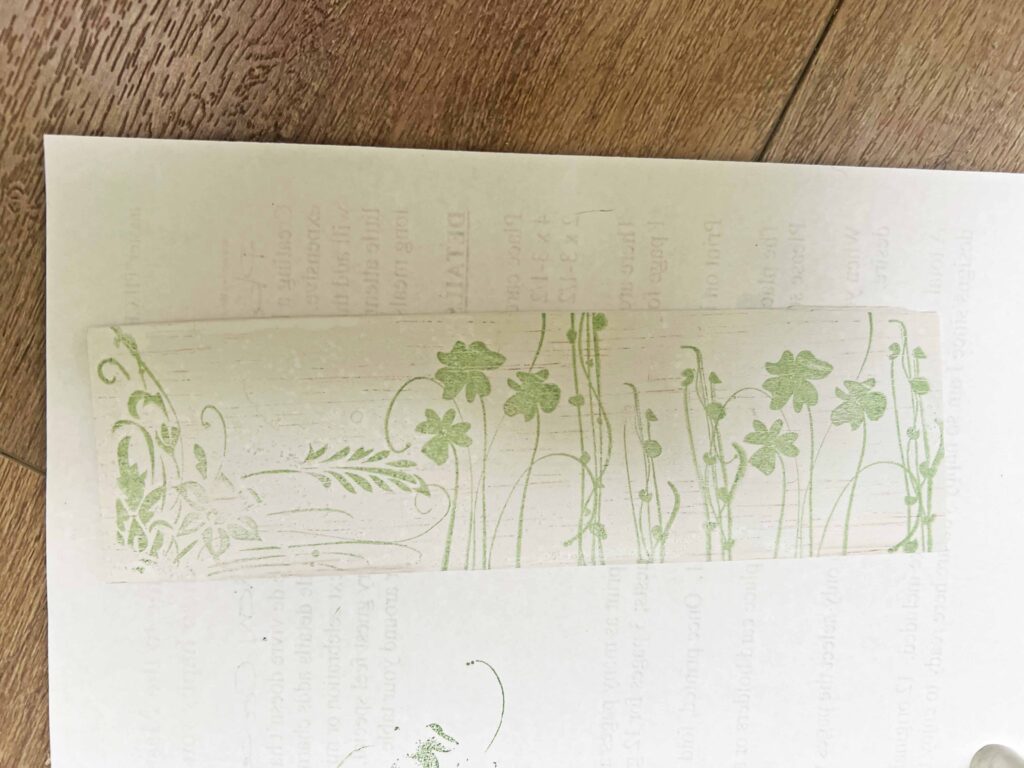
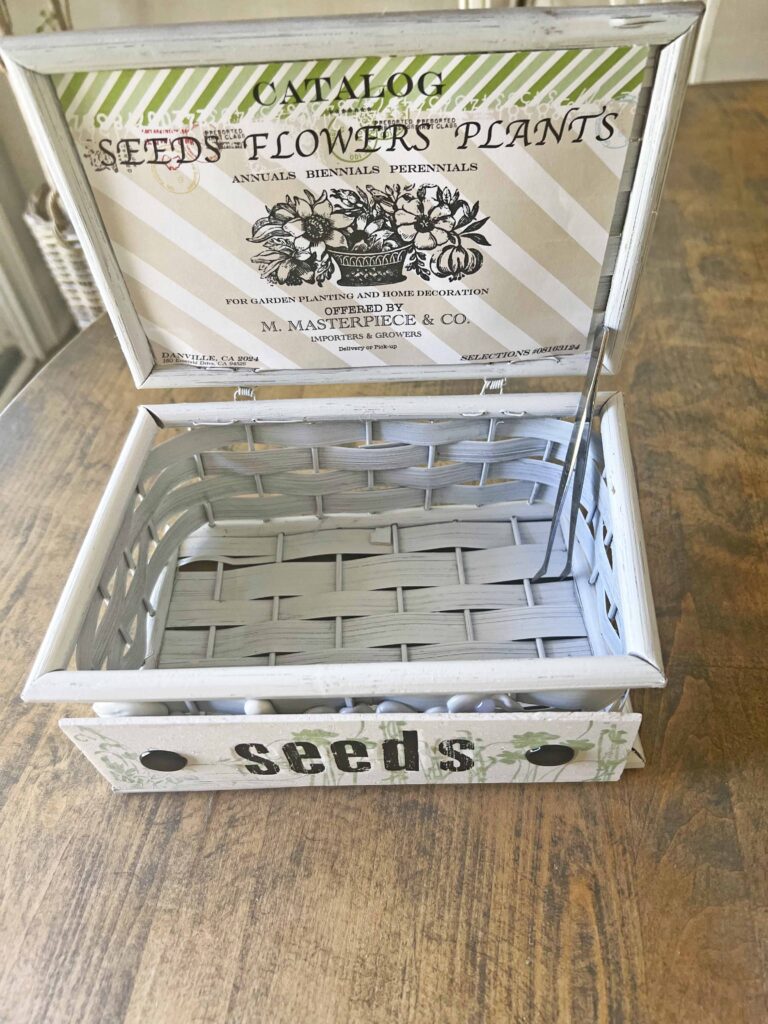
Originally, I planned to stamp the word “seeds” right on the basket, but since the grape and leaf would not budge, I decided to make a sign with the word “seeds” to go over it. I used more of the hobby wood to create the sign. First I stamped some green foliage for the background. Then I used some rub-on letters to spell out “seeds” in black on top. I simply hot glued the sign over the grapes. Problem solved. At the last minute I added the two black brads on each side to finish it off.
Vintage Graphic
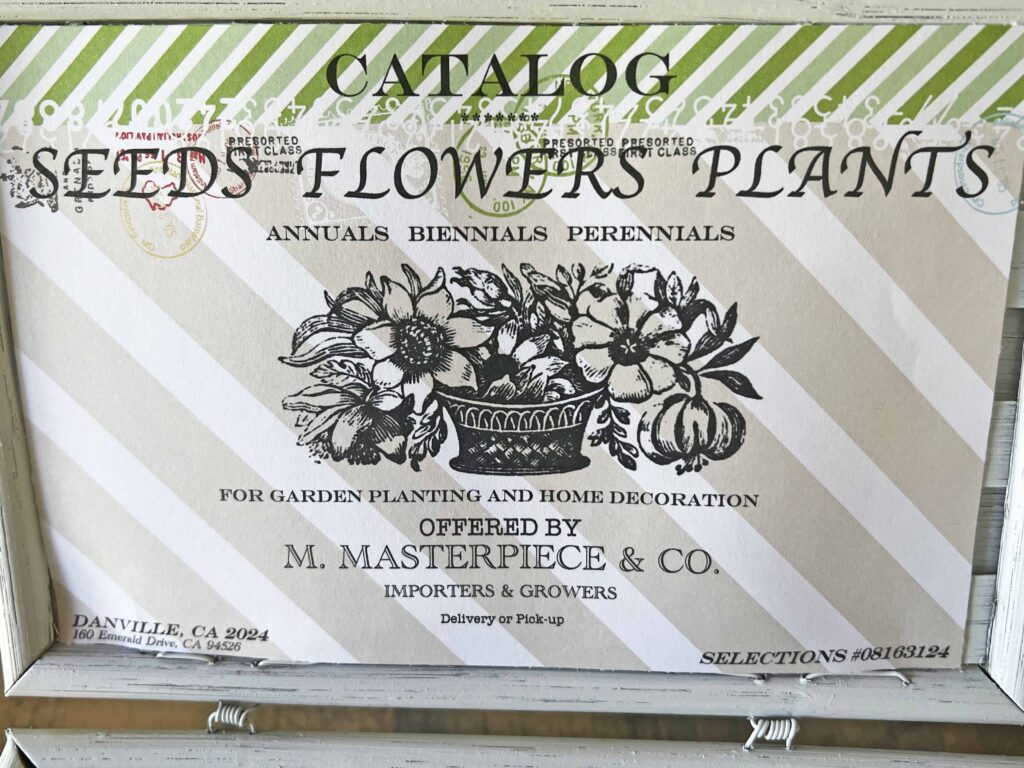
Then to give the box more pizzazz, and give it a vintage vibe, I created a graphic to adhere to the inside of the top. I measured the inside space of the lid and created the graphic using some vintage catalogs as a guide, but injected personal details for fun. I printed it on scrapbook paper from my stash, and attached it to the inside of the box.
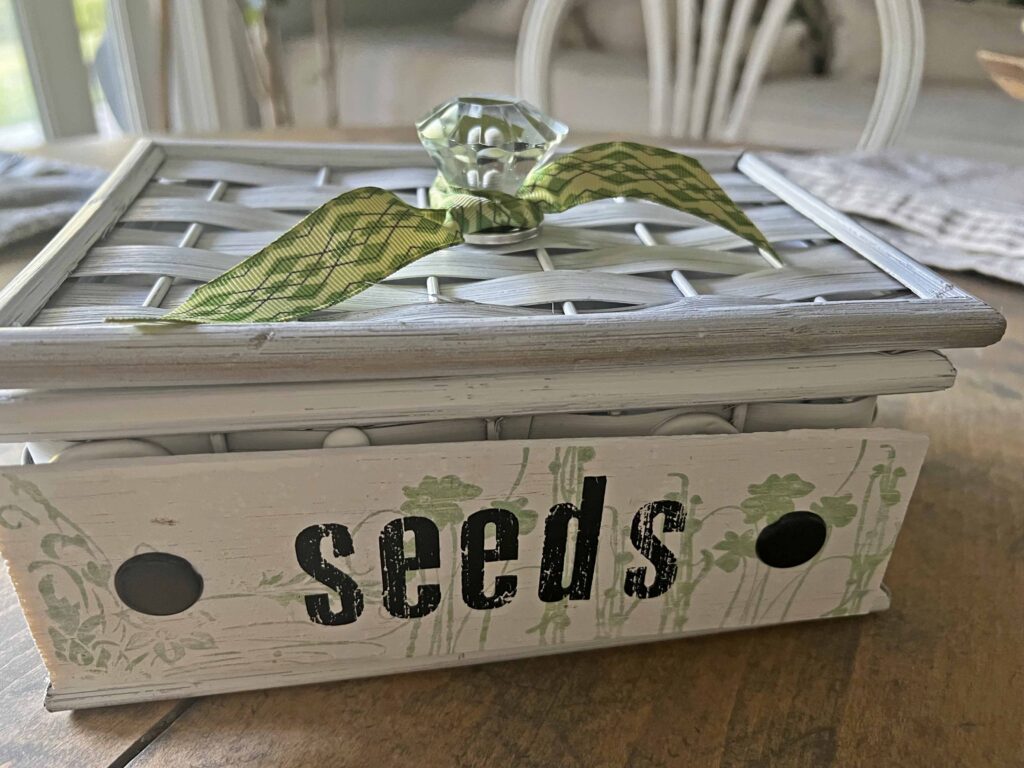
Glass Knob
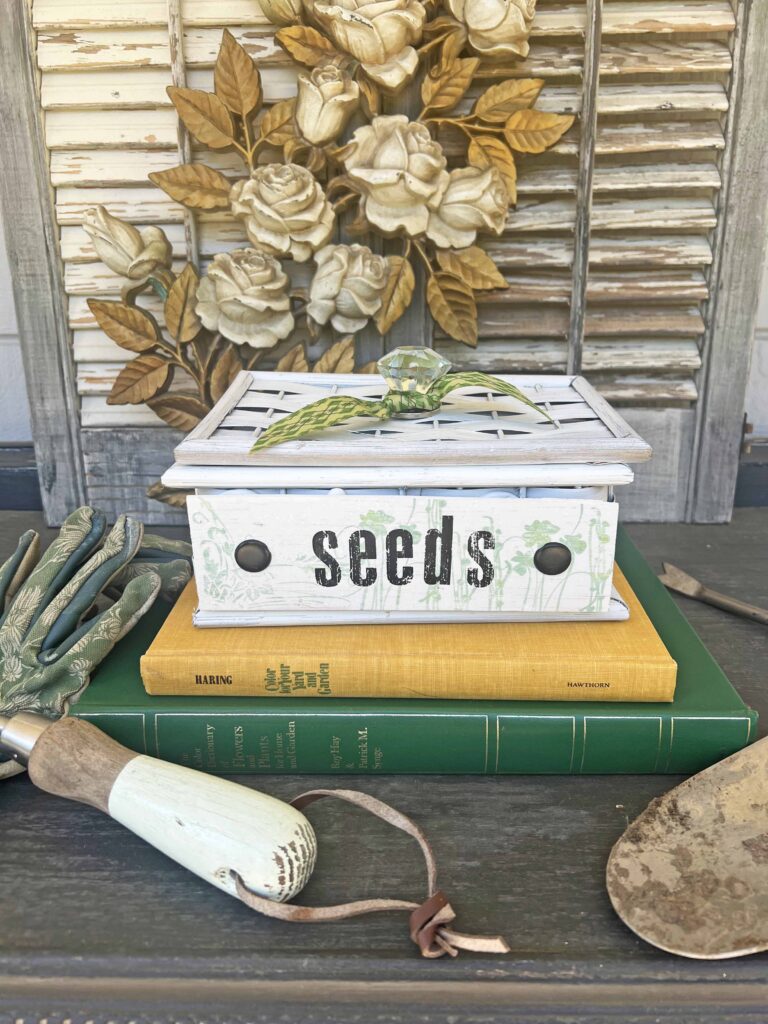
To finish off the box I added a glass knob on the top of the lid as an accent. It’s the jewelry of the project if you will. I actually found the knob at the Dollar Tree last time I was there. I picked it up not knowing what I would use it for, and it’s perfect for this box. A piece of ribbon is the last detail.
Crafting Pro Tip: If you see something at a store that calls to you or is your “style”, pick it up. Even if you do not have a project in mind, simply add it to your supply stash and invariably you will find a purpose for it.
Closing Thoughts about the Thrifted Seed Box DIY
I know this little piece is a bit unique, but there are other items you could pick up at a thrift store to use as a seed box. A cigar box would be a great piece to up-cycle to use as a seed box. A recipe box can also be converted into a seed storage solution. Also there are many little wooden trinket boxes usually painted with country motifs, which with a fresh coat of paint can be transformed. Think outside the box, literally. {wink}
This project proved more of a challenge than I anticipated. The grape and leaf metal details on the front delayed the project a bit. When it was unable to be removed, I set the box aside to decide what to do. It took me some time, but I figured it out. Do not let hiccups like this deter you from a project. Simply set it aside and give yourself space and time for the “aha” moment. It will come (when you least expect it).

Also as this simple project progressed, it stopped being so simple. I was only planning to paint it white and stamp the work “seeds” on the front. Easy, peasy and call it done in an afternoon. But…..then I had to create the little sign to cover up the grapes. I painted the sign then decided to stamp the green vines in the background. All of it added extra steps.
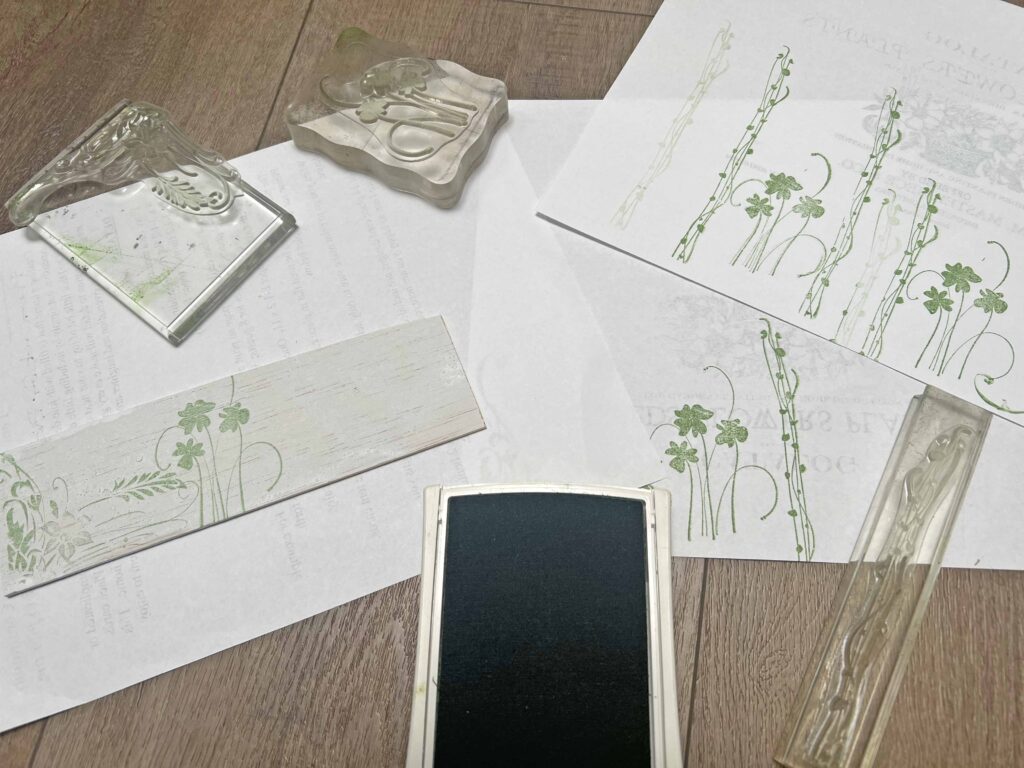
Crafting Pro Tip: When using stamps always, always test on a scrap piece of paper first to reach desired placement, ink saturation and pressure. This way you know exactly how to do it on your finished piece.
Then I wanted the vintage seed catalog graphic on the inside, since it was very stark inside the box. Instead of just finding an image on line to use, I wanted to create my own which took added time. Then I added the knob. Then I added the ribbon. All self inflicted. All worth it though. Sometimes it’s refreshing to let projects guide you. Does that happen to you?
Anyway, I hope this quirky, wonky seed box inspires you to look at thrift store finds with different eyes. Look at pieces for what they can become with some TLC, not for what they look like on the shelf. This way a piece will be transformed with your own personal style to fit into your home aesthetic seamlessly. Have fun creating your own!
Thrifting Pro Tip: Look at a piece beyond it’s current state & appearance for the potential of what it can be.
Key Supplies for Crafting
- This his the glue gun I use. I love that it has a stand to charge but when picked up to use it’s cordless.
- This is the white spray paint I used on this project. Sprays evenly and a little goes a long way.
- This is a great set of botanical acrylic stamps.
- Hobby wood is a favorite around here to make signs and accents for crafts.
- I love the vintage vibes glass knobs adds to projects.
- Pretty ribbon always adds that special detail to any piece.
*The affiliate links mean I receive a small commission if you make a purchase using these links.?As an Amazon Associate I earn from qualifying purchases, which helps me run this blog.


Other Crafting & Gardening Inspiration

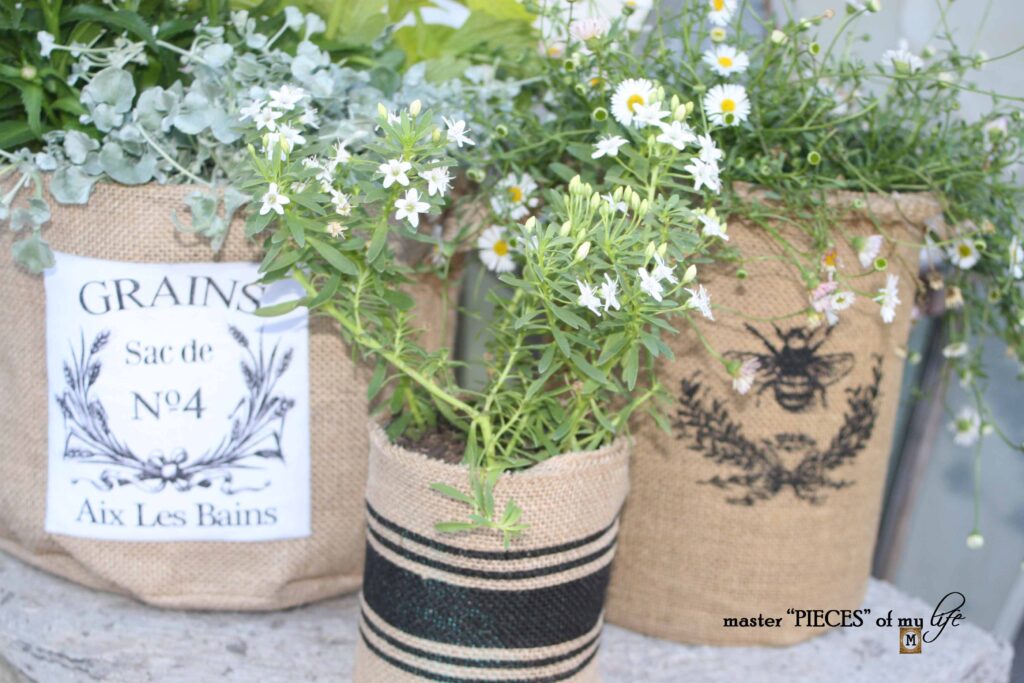
Burlap Container Gardening
Create some unique & fabulous DIY gardening burlap containers for your plants.

Wakefield Garden Pottery Knock-off
Beautiful handmade pottery inspired knock-off done easily and inexpensively.

Springing into Summer Frame Wreath
A pretty basket decorates a summer frame wreath.

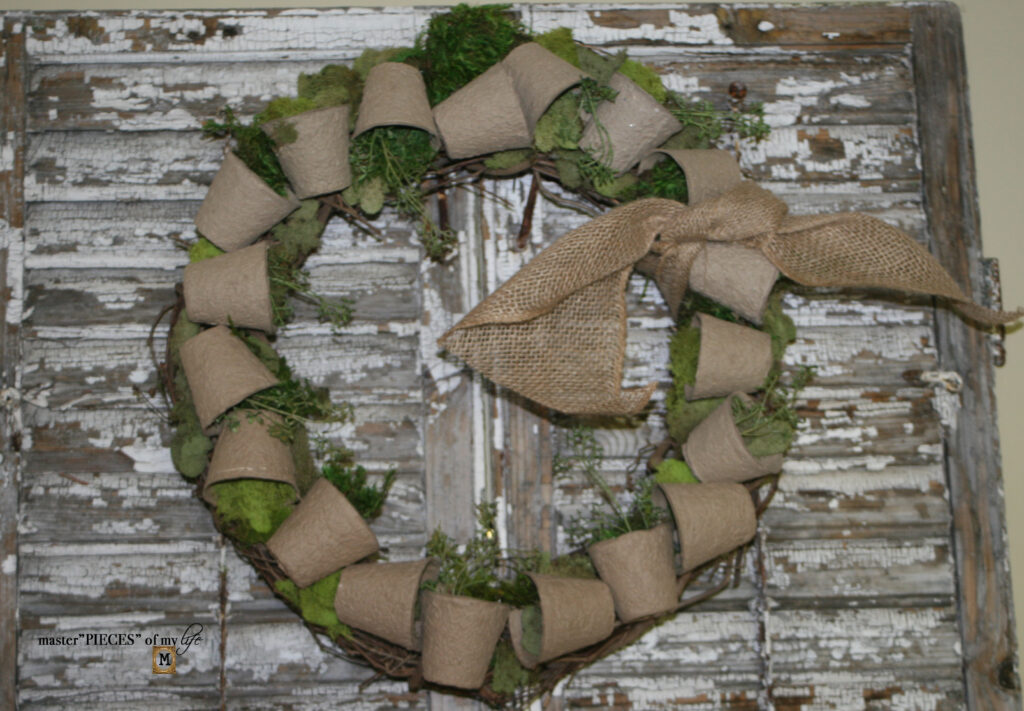
Easy Spring Grower Pot Wreath
Using a grapevine form, peat pots and moss you can create this too.
A seed neither fears light nor darkness, but uses both to grow.”
Matshona Dhliwayo

