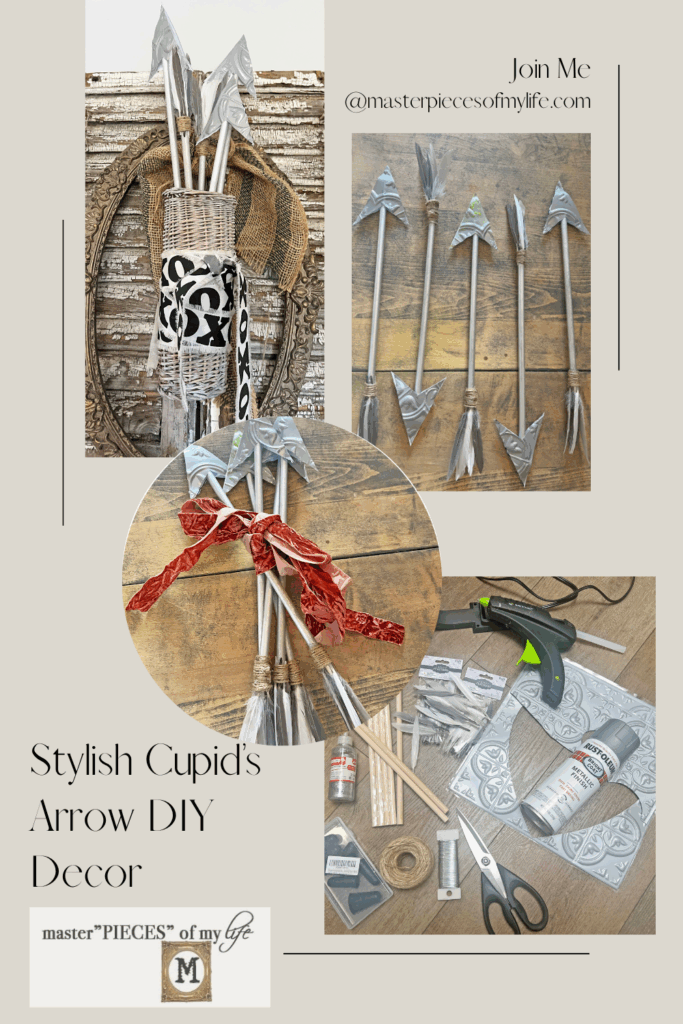
Stylish Cupid’s Arrow DIY Decor
Do you decorate for the Valentine’s Day Holiday? Do you like to create your own decor? Well, if you answered yes to either or both of those questions, then I’m so glad you’re here today. Today’s post is all about a stylish cupid’s arrow DIY, which is a perfect decor accent for the upcoming St. Valentine’s Day holiday.
*Affiliate links might be included for your convenience. These affiliate links mean a small commission is earned if you make a purchase using these links at no extra cost to you. As an Amazon Associate I earn from qualifying purchases which support this website. For more information: Full Disclosure Policy.
Inspiration Behind the Cupid’s Arrow DIY Decor
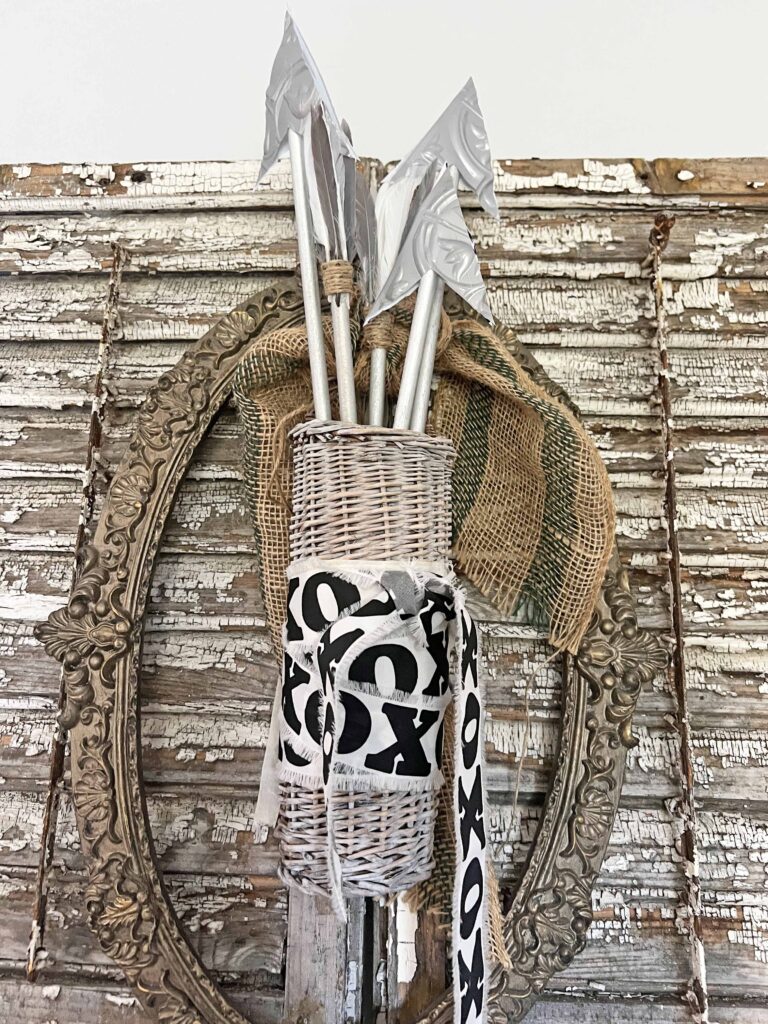
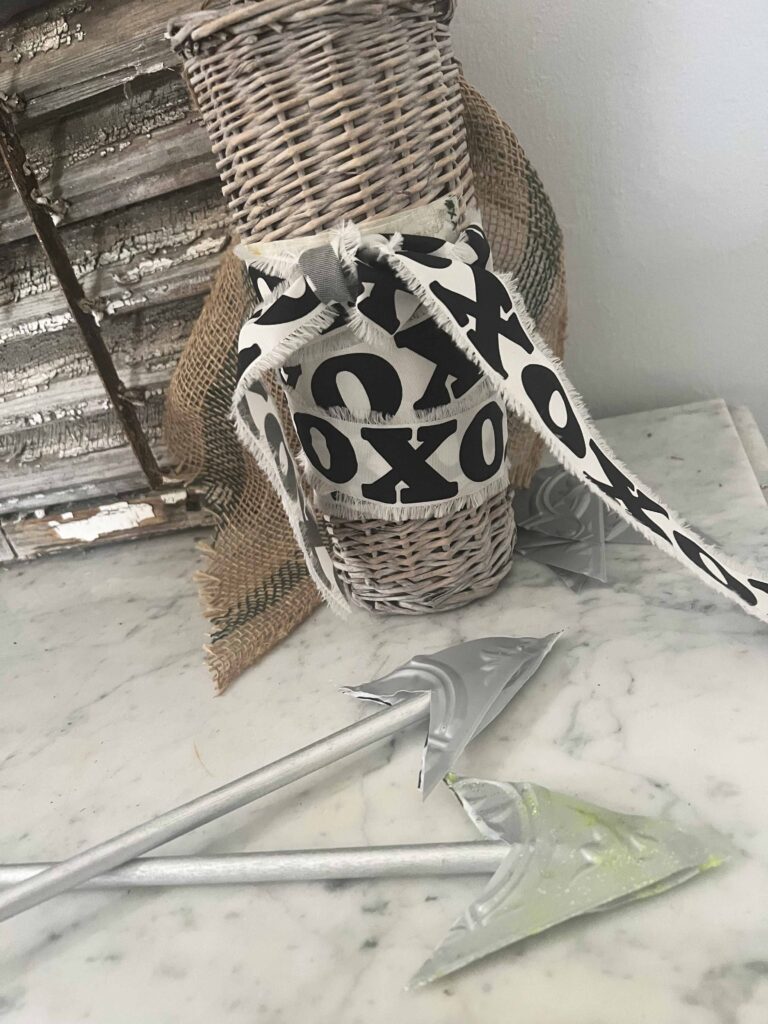
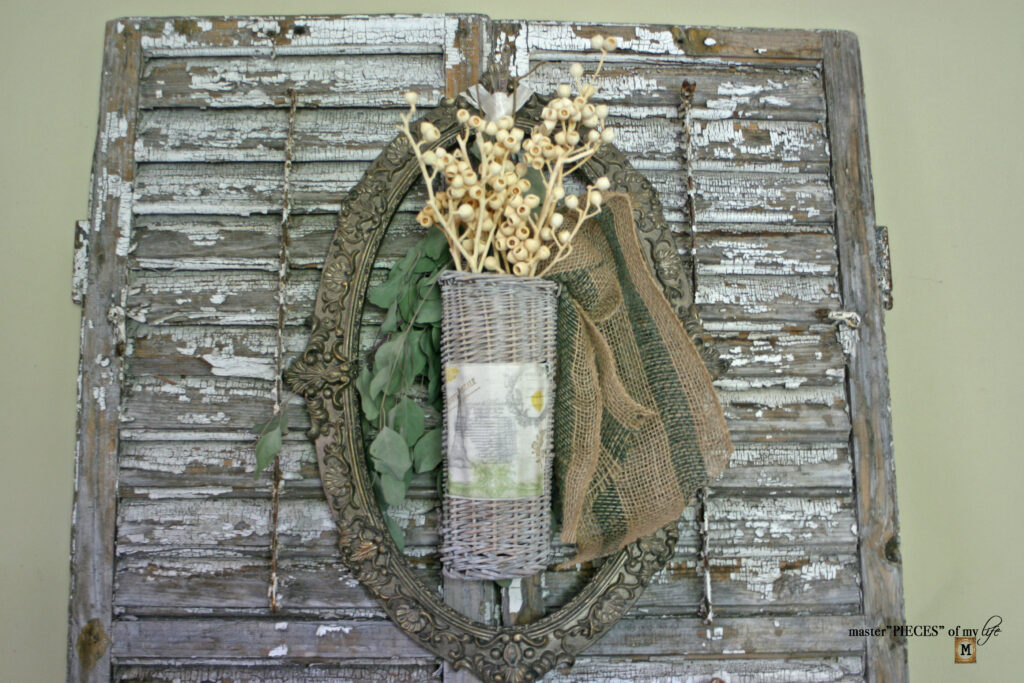
While I was brainstorming with my friend Susan @ From the Bay to the Beach about some content collaborations, I showed her this picture of a hanging basket in my home. Well, she immediately mentioned how it reminded her of a quiver. A quiver is a container to store arrows,… and the seed was planted.
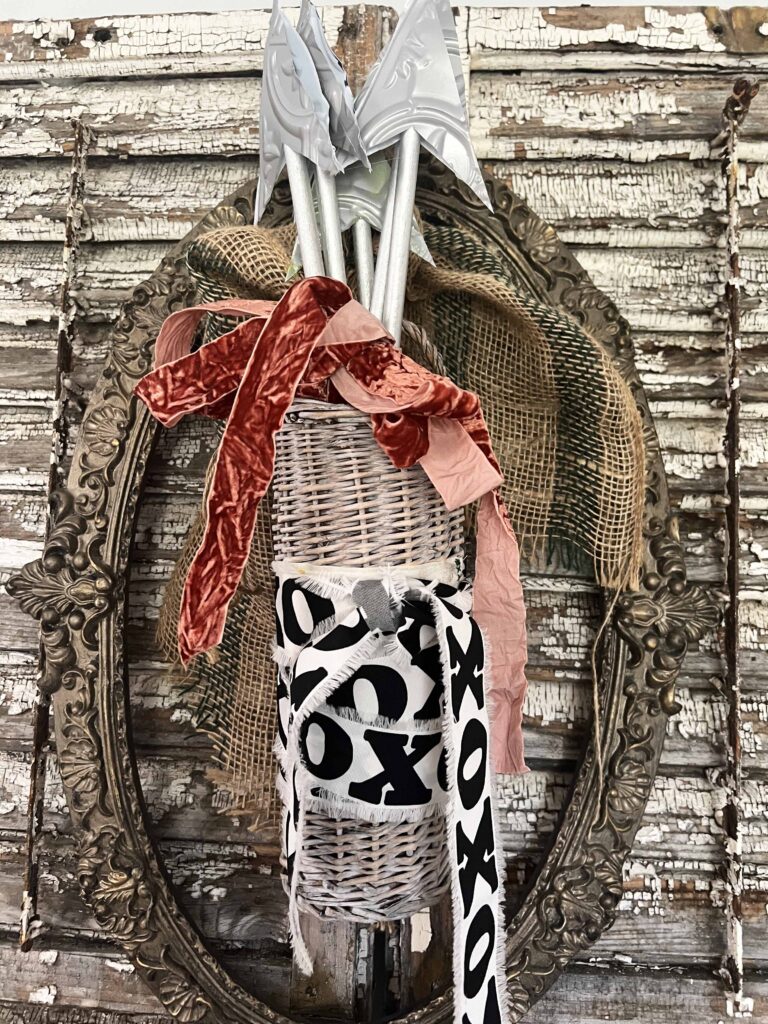
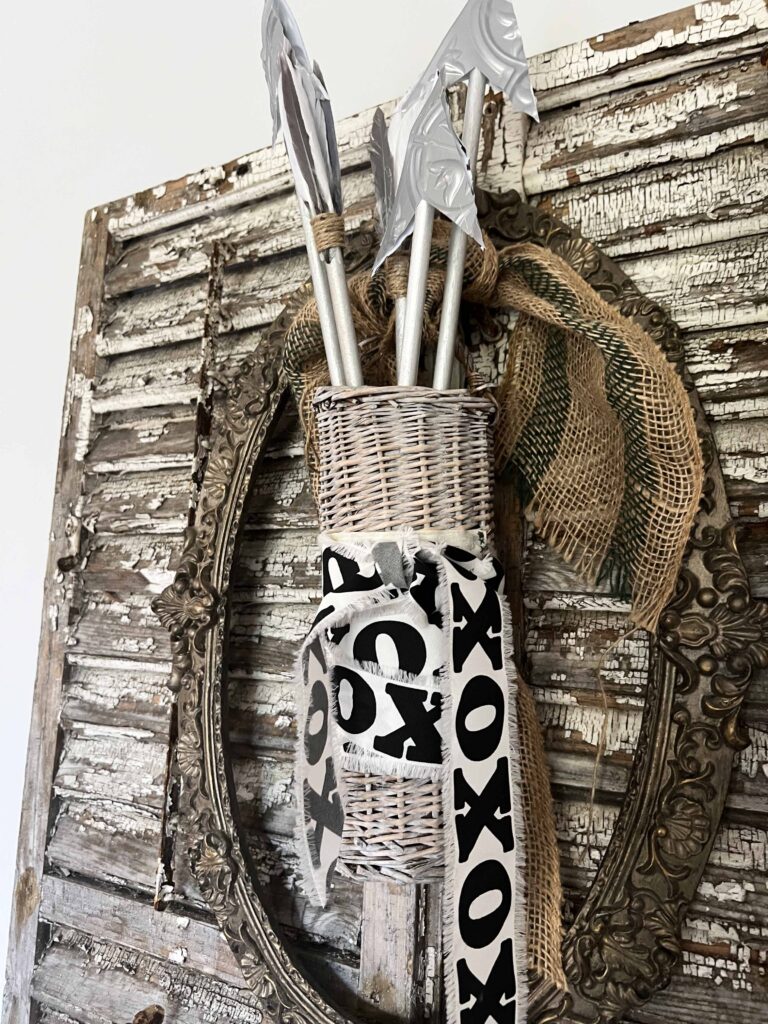
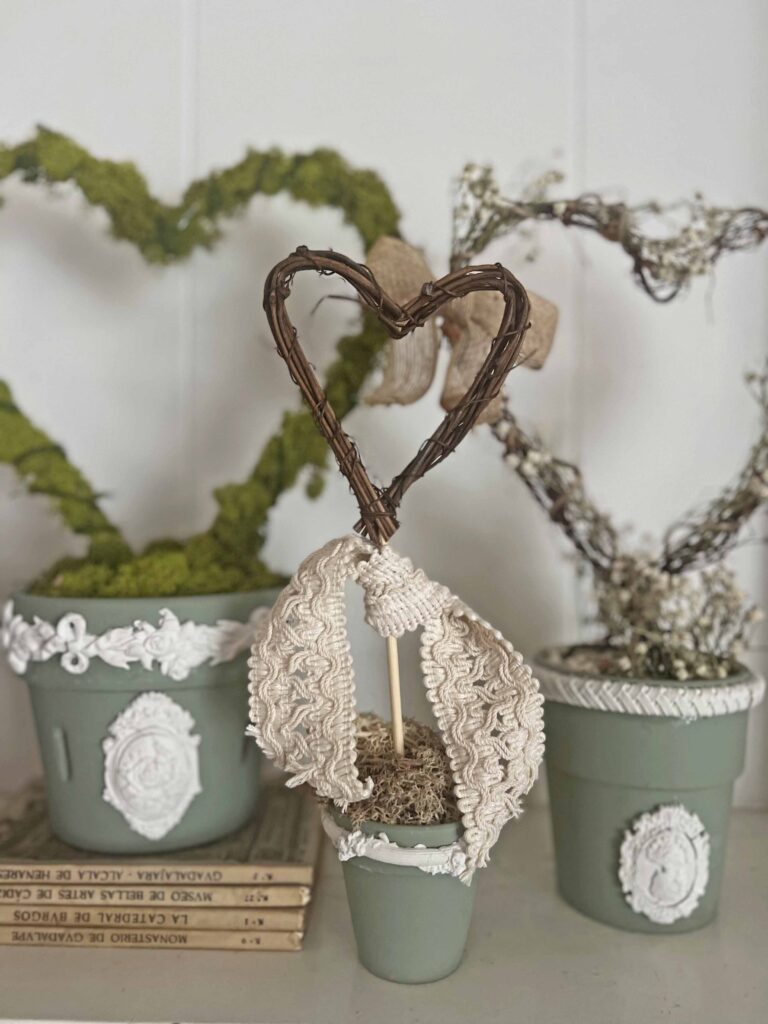
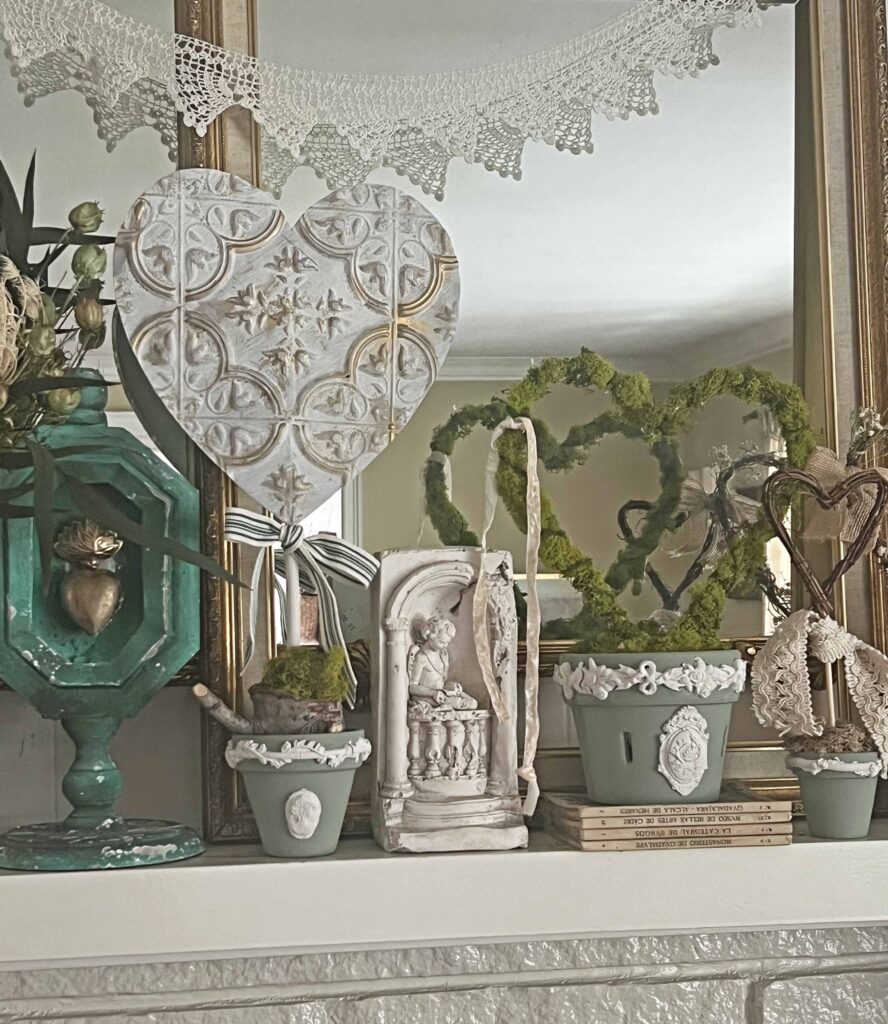
This basket does make the perfect container for arrows and cue in Valentine’s Day and Cupid. My wheels immediately started turning. I had dowels and feathers in my craft stash, but I was stumped for a minute regarding the arrow heads. Then I remembered all the faux tin tile remnants I had kicking around from this project {Faux Tin Tile Heart DIY Valentine’s Day Decor} and this {Faux tile Gingerbread Men DIY}. And here we are.
How To Create a Stylish Cupid’s Arrow DIY
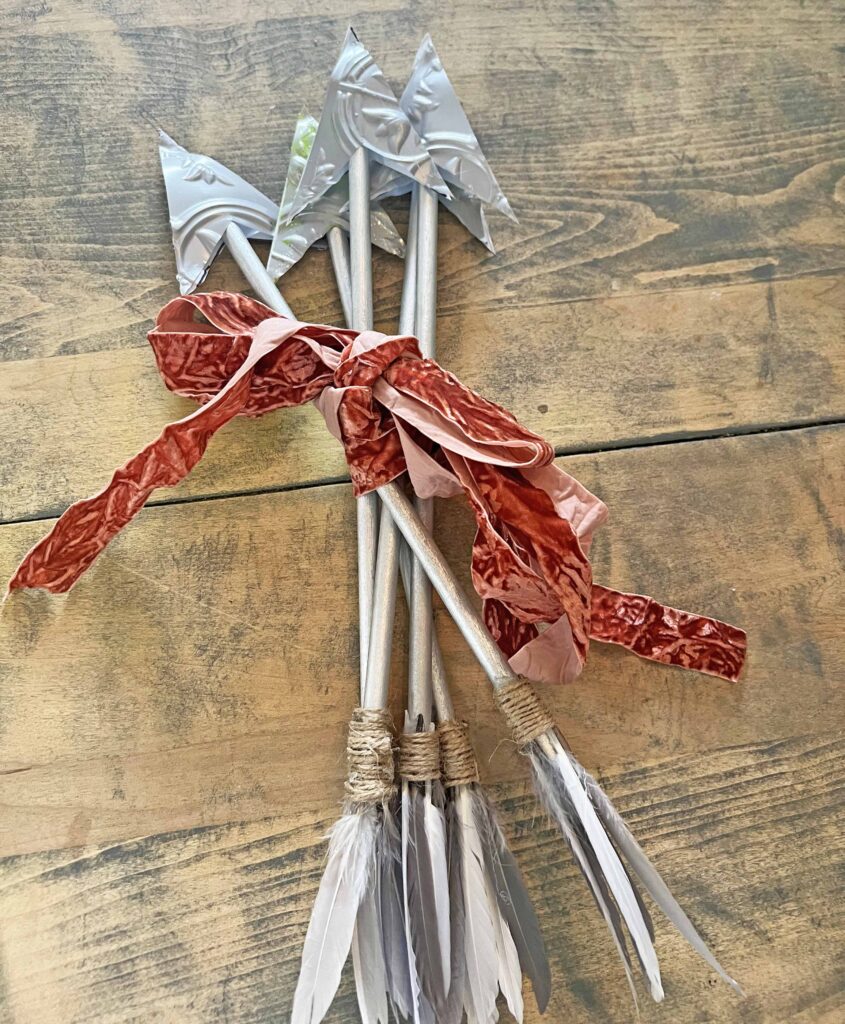
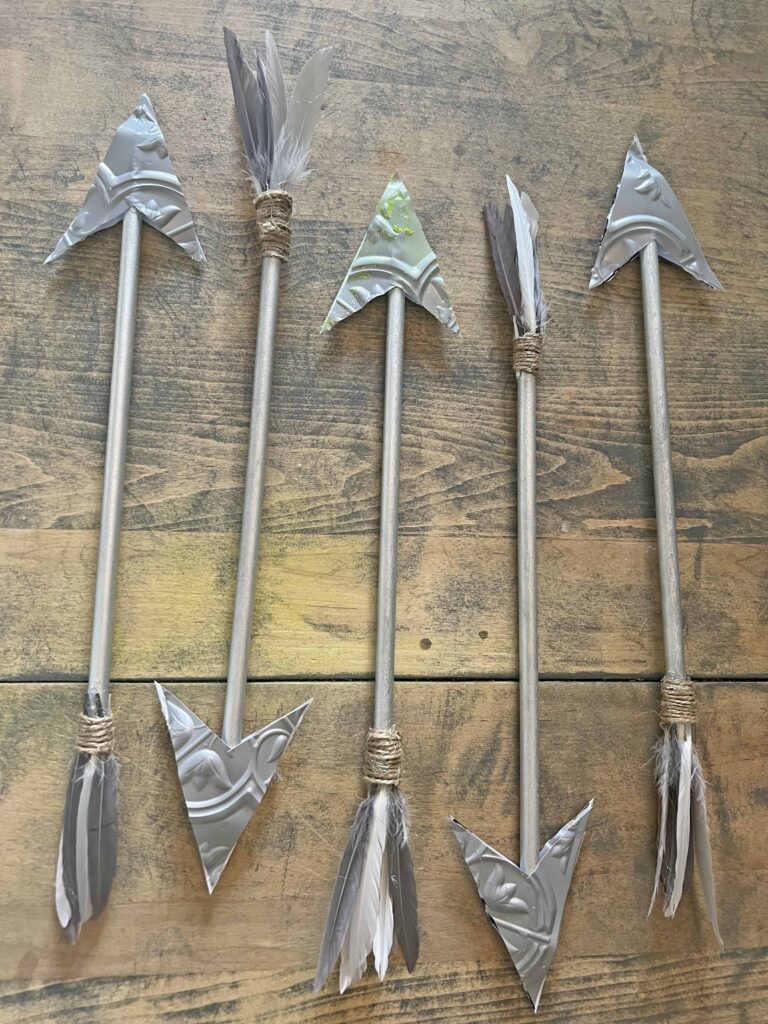
This project is based on creating 5 arrows. You can adjust the supplies accordingly to create as many arrows as you desire. Regardless of how many arrows you create, the basic steps remain the same for each arrow.
Supplies
- 5 Dowels
- 30 Small Feathers
- Faux Tin Tile
- Silver Spray Paint
- Jute Twine
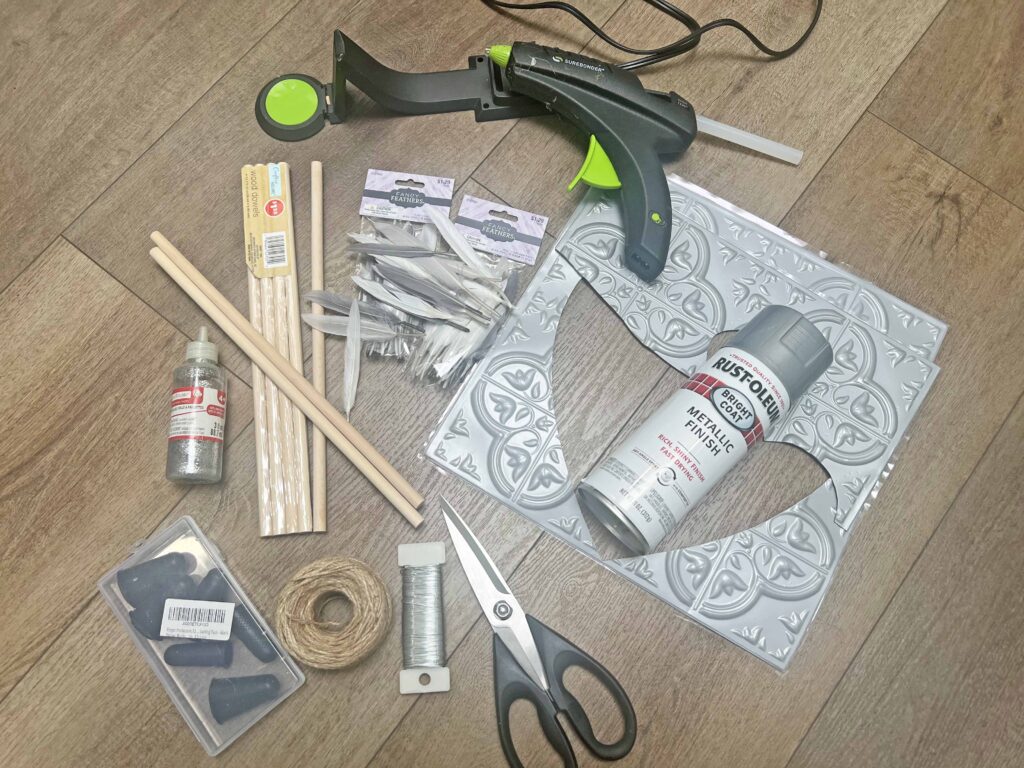
Tools
- Hot Glue Gun and Hot Glue Gun Glue Sticks
- Scissors
- Sharpie
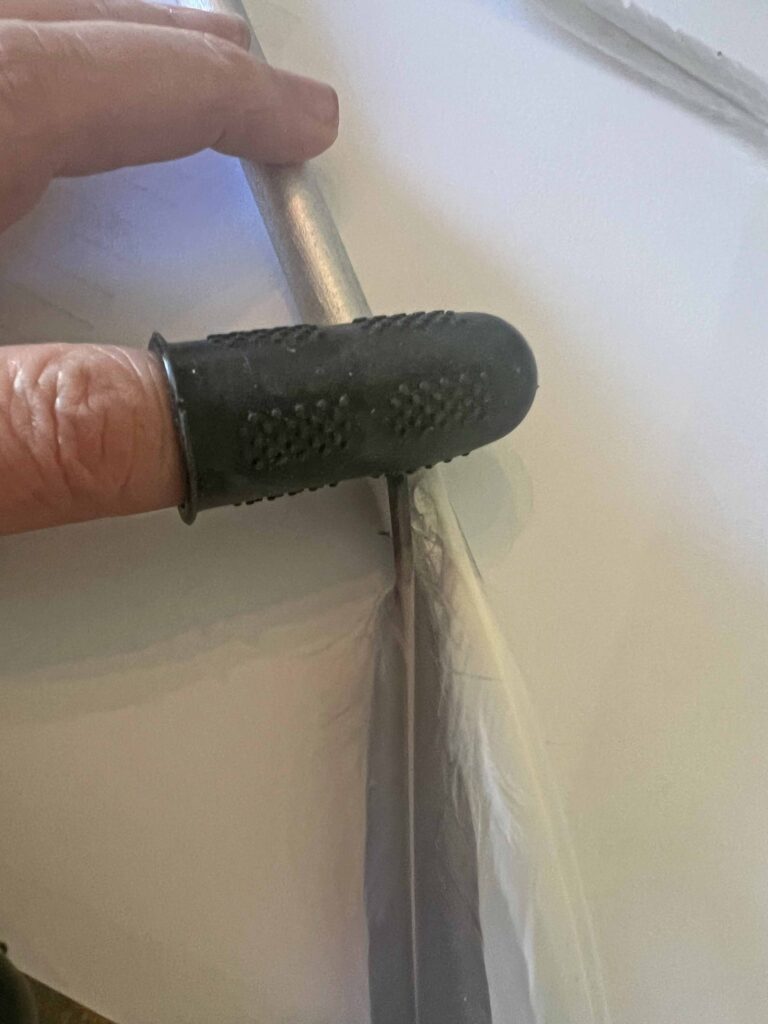
- Silicone Finger Protectors
Crafting Pro Tip: As I recommend with all projects, read all the instructions through once and then re-read everything again. This way, you are familiar with everything you need and know what to expect.
Instructions
- Read instructions thoroughly and assemble all supplies & tools
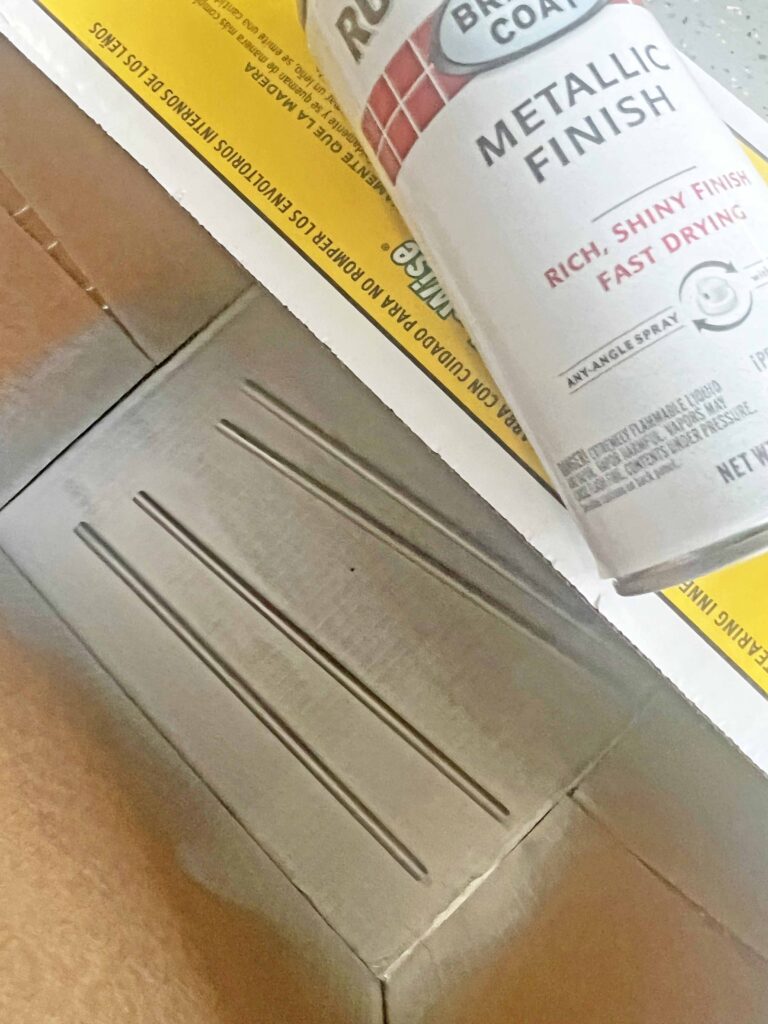
- Spray paint dowels silver and set aside to dry fully
Note: It’s been raining cats & dogs around here so I sprayed painted in the garage and used a box to contain the paint splatter, hence the weird photo.
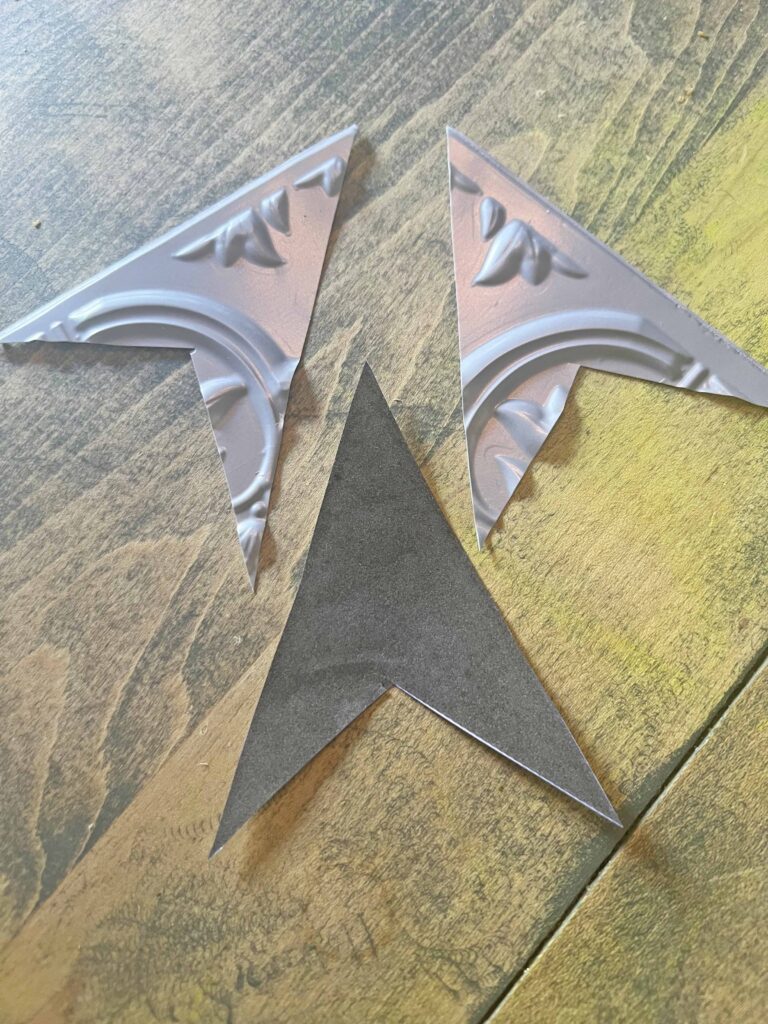
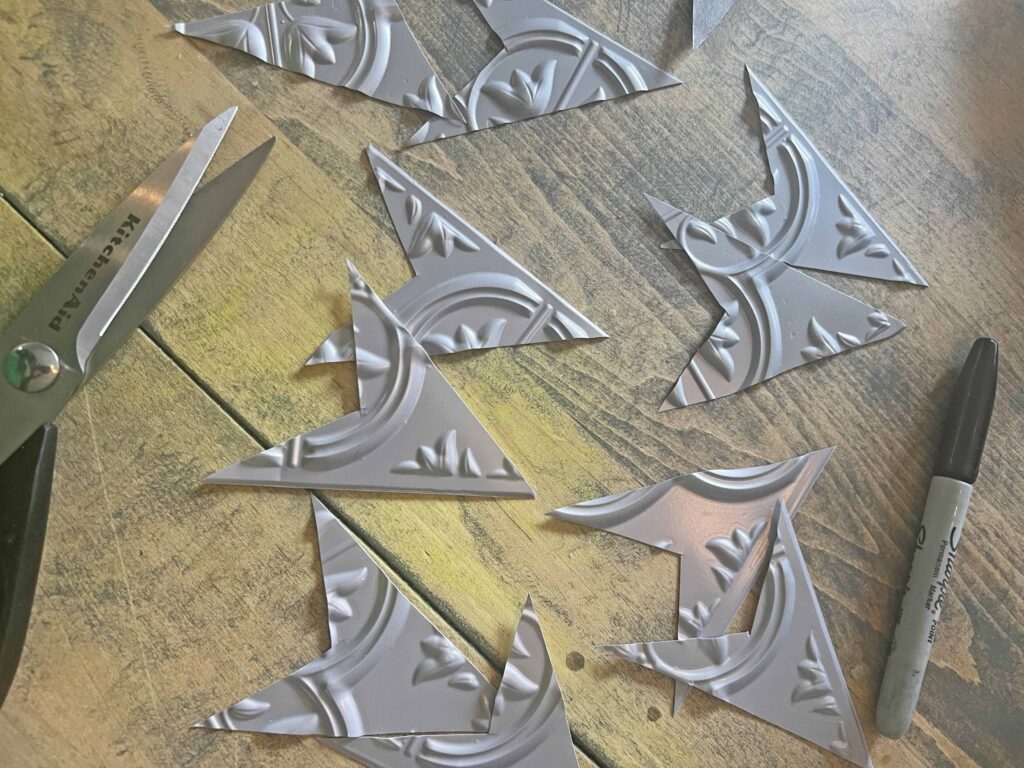
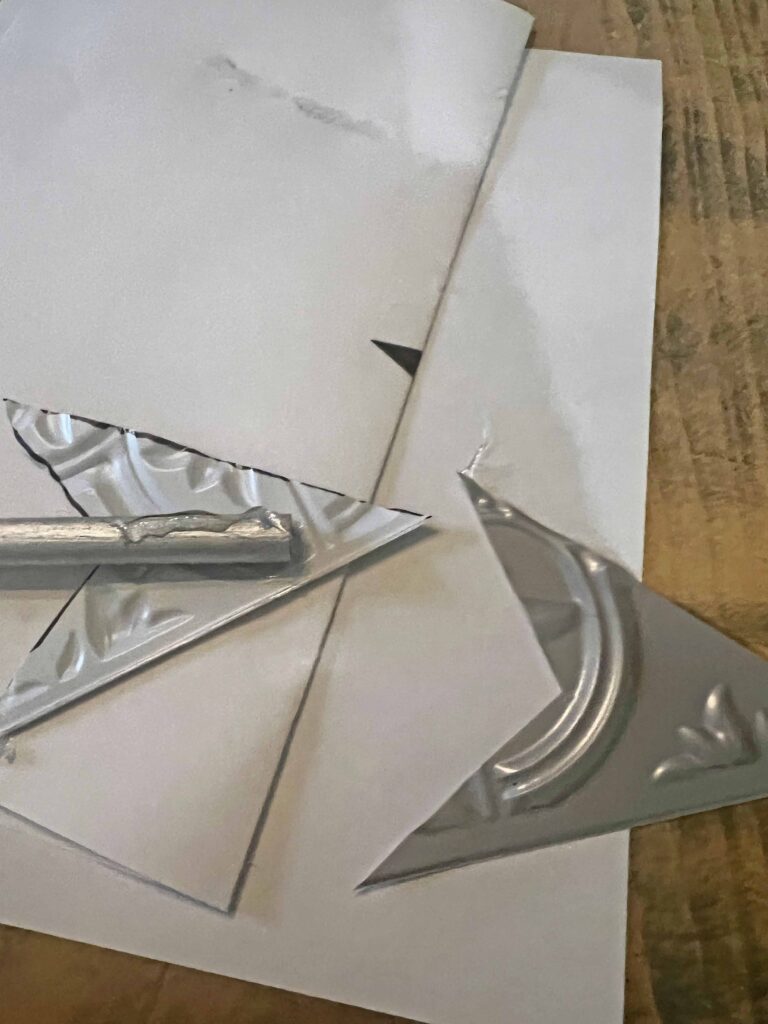
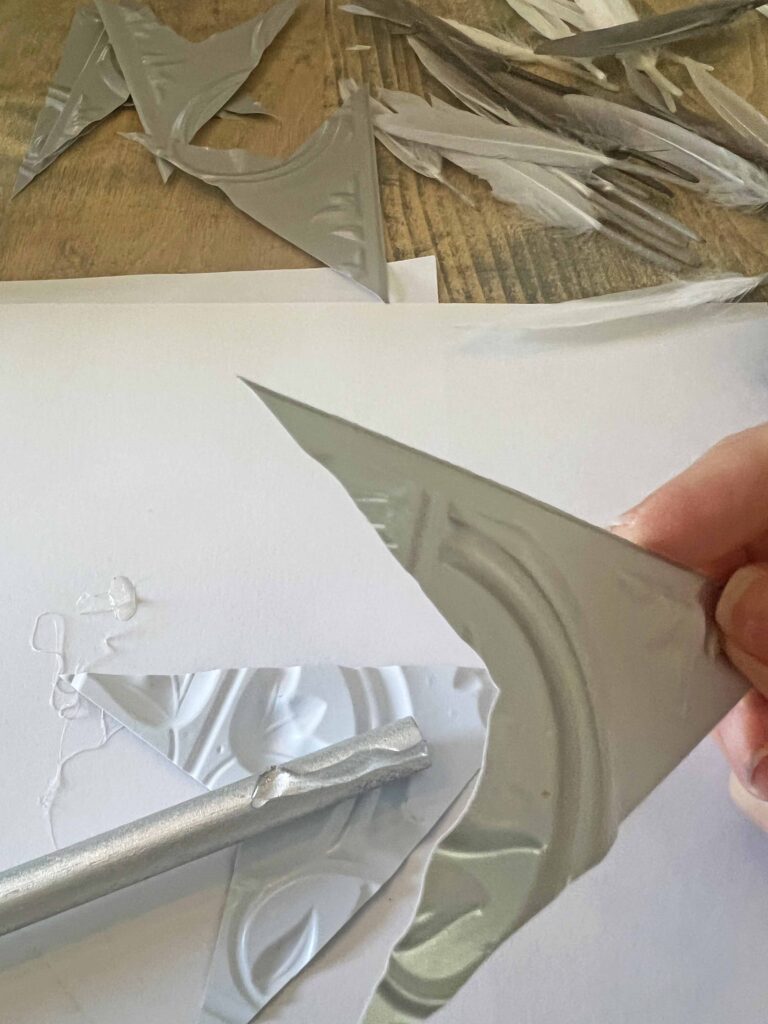
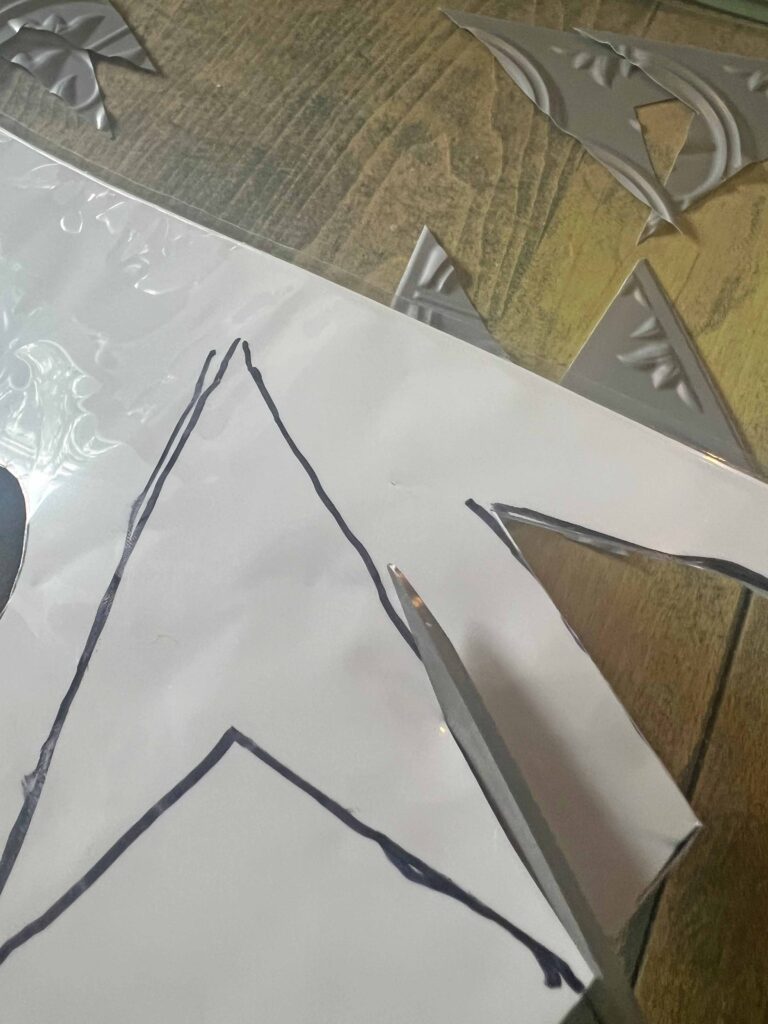
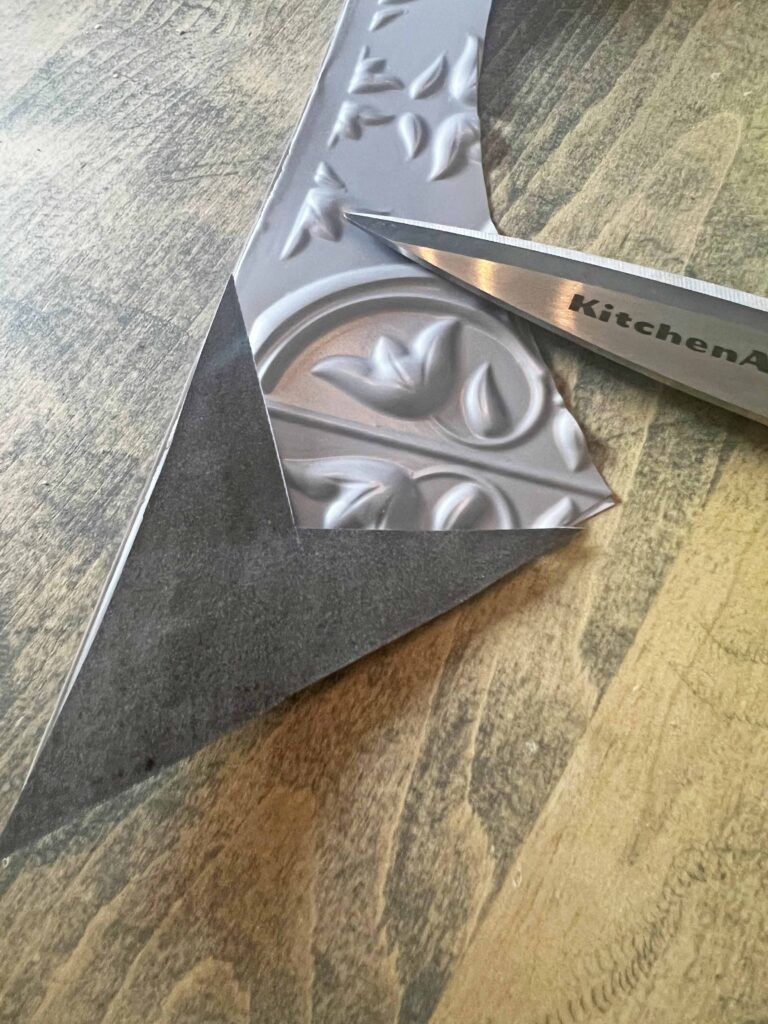
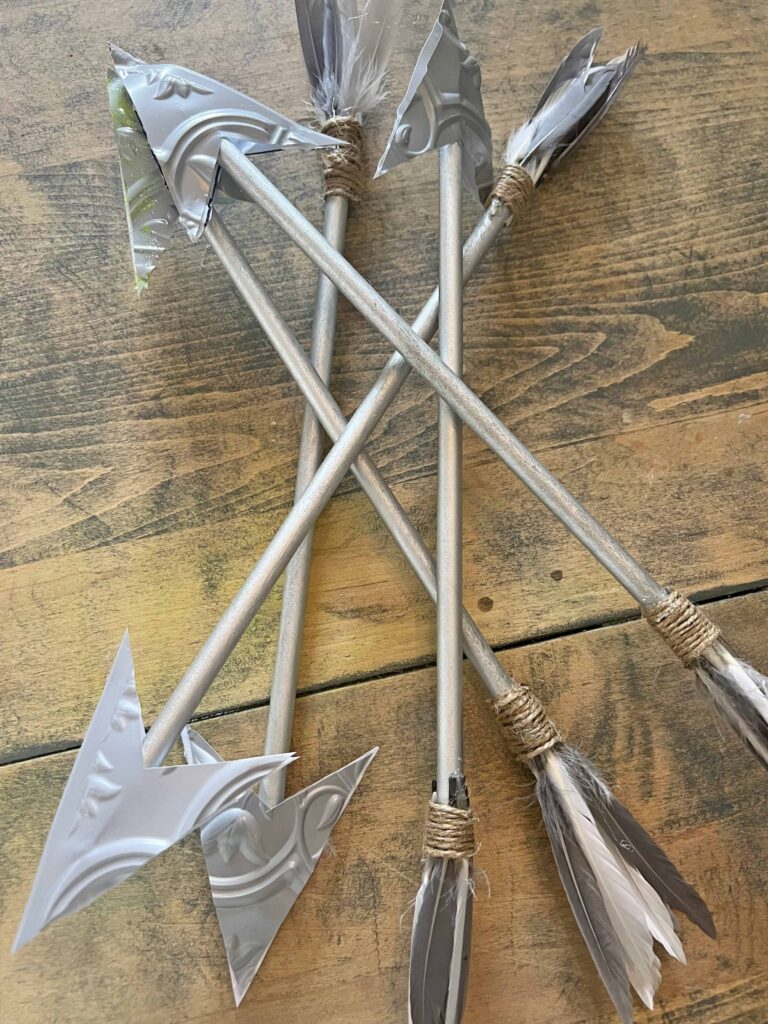
- Cut arrowhead shape from faux tin tile, cutting two pieces for each arrow (I created my own template which I share below in the Tips & Tricks section)
- Set arrowheads aside
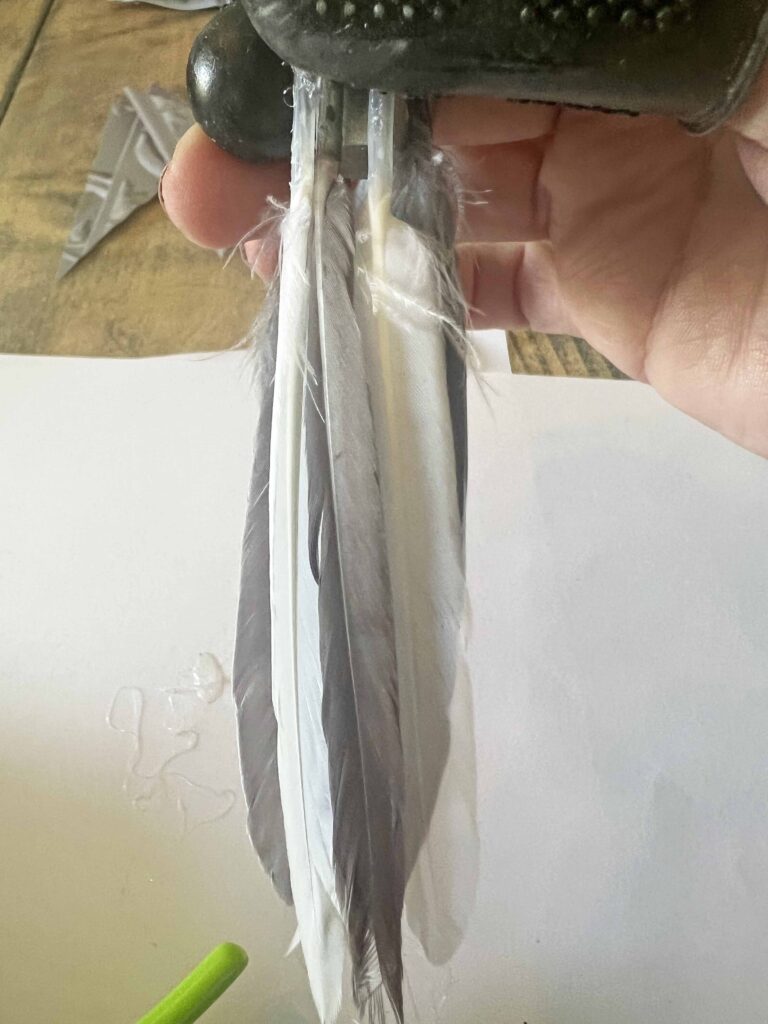
- Assemble 6 feathers and using hot glue gun adhere to an end of dowel, angled down and slightly out (3 on each side)
- Once all feathers are adhered to individual dowel wrap ends of feathers with twine around dowel
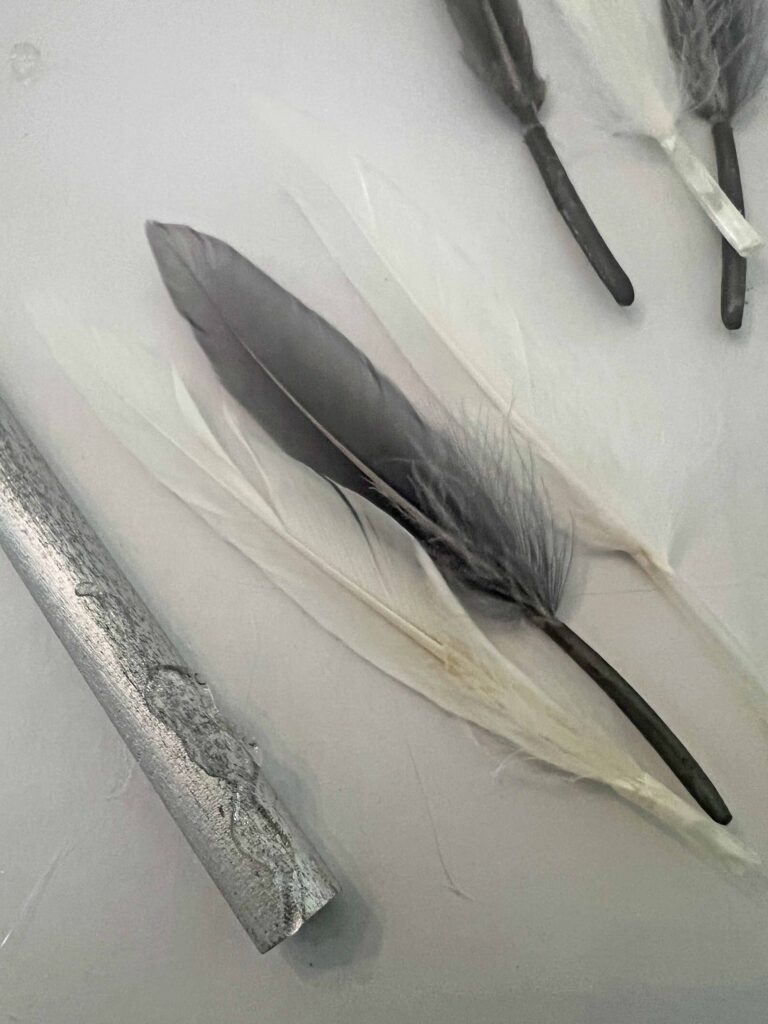
- Hot glue end of twine to secure feathers to dowel
- On opposite end of dowel hot glue 2 arrow heads, sandwiching dowel
- Repeat above steps for the desired amount of Cupid’s arrows
- Voila! Enjoy your new stylish Cupid’s arrow decor
Tips & Tricks for the Cupid’s Arrow DIY
Arrowheads come in varied shapes, and I had a particular image in my head. I created an arrowhead template to cut out the pieces from the faux tin tile. I have included it here for your convenience should you wish to use the same style of arrowhead for your project. It’s not rocket science, but it’s one less thing to do.

I used two techniques to cut our the arrowhead using the template above. The template can be used to draw the shape on the back of the tile with a Sharpie and then cut out arrow head following drawn shape. Or the template can be laid on top of tile and cut by following the template. I preferred the drawing method personally, but everyone’s hands and brain work differently so do what works best for you.
I highly recommend using silicone finger protectors for this project while you’re using the hot glue gun. The silicone finger coverings not only protect, but also allow the freedom to apply pressure when attaching the feathers and arrowheads. The feathers are thin and delicate so the glue easily seeps through; while pressure is beneficial when both arrowheads are attached at the end of the dowel. The finger protectors allow for a secure grip for these tasks.
Initially I wanted to add a bit of glitter to the arrowhead to include some sparkle. At the same time I didn’t want to cover up the details on the faux tin tile. On the first arrow I used glitter glue just on the edges. Well, I think the glitter glue had been in my craft stash too long. It didn’t dispense correctly so I just used my finger to spread it around the whole arrowhead surface. At first it gave it a bit of a sheen and I was happy with the effect.
And then… then it turned slightly green? Hmmm, not sure if it oxidized or whatever crazy chemical reaction occurred, but I quickly decided to skip the glitter step. lol. Always be ready to pivot and adjust during a DIY project you create in your head. Since I didn’t have other glitter options in my stash, I know, shocking, I just moved on. Maybe next year I can glam it up a bit, but for today I am pretty happy with how these Cupid arrows look, with the exception of the greenish alien looking one.
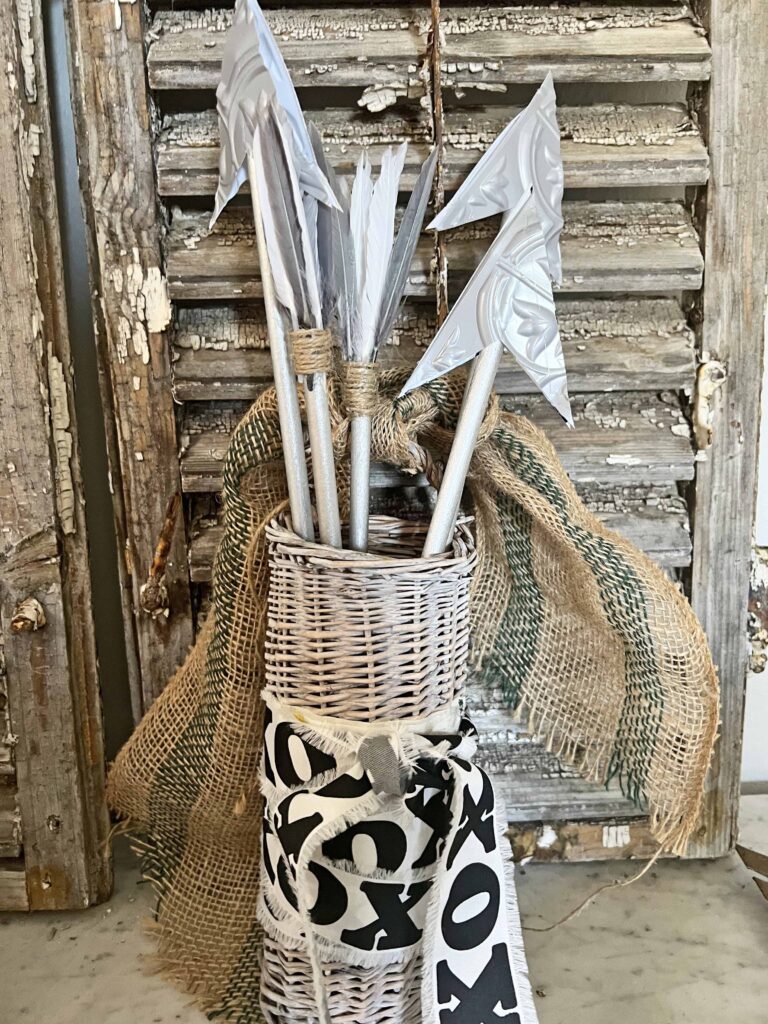
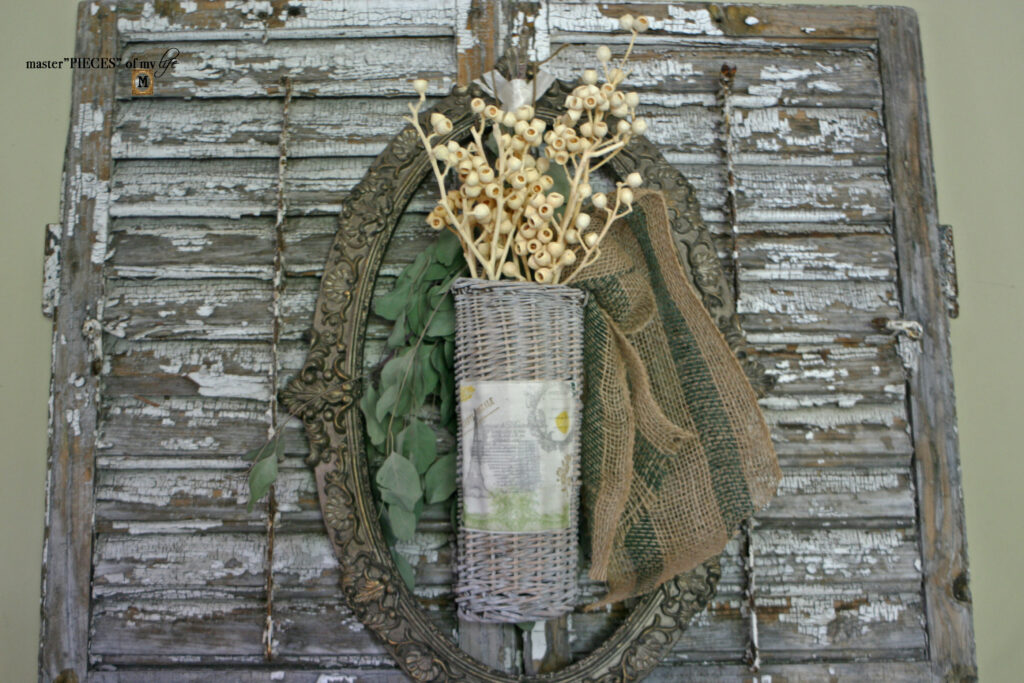
The basket is the perfect accessory for the stylish Cupid arrows DIY. I found this basket on Amazon a couple of years ago and wanted to provide a link for you, but unfortunately it’s currently unavailable. A link to another quiver option is included in the shopping section for your convenience. I find the quiver basket finishes off the vignette nicely.
Thank you Susan for the inspiration, and speaking of hanging baskets, next week is the next installment of Styled 2 Ways, where Susan and I will share Spring inspiration with hanging baskets. Please make sure to stop by or if you would like new Master”pieces” of my Life posts delivered to your in-box simply sign-up below.
Closing Thoughts
Are you looking forward to Valentine’s Day or is it just a day like any other for you? I feel like folks are pretty much divided 50-50 on the topic. We hunker down at home and make a yummy meal with special drinks. Whatever you decide to do, I hope it’s magical. Thanks for stopping by and I hope Cupid’s arrows have you in the mood for love.
Thanks for being here today. Content will start transitioning to spring and all that it brings with it. Let me know in the comments if there’s anything in particular you will like to see or learn about. Au revoir

Shopping the Look
- Faux Tin Tiles
- Small Feathers
- Wooden Dowels
- Hanging Wall Basket
- Jute Twine
- Hot Glue Gun
- Glue Gun Glue Sticks
- Silicone Finger Protectors
- Rust Red Crushed Velvet Ribbon

More Related Posts
Most Recent Posts
He had never met a girl who shot an arrow straighter than Cupid did”
Soroosh Shahrivar