


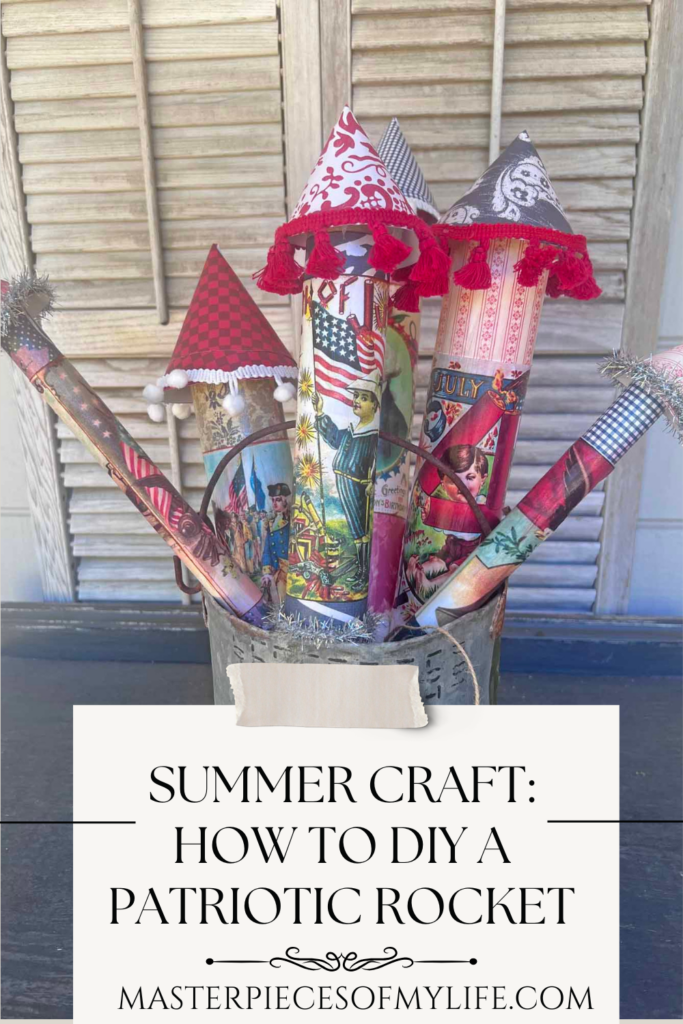
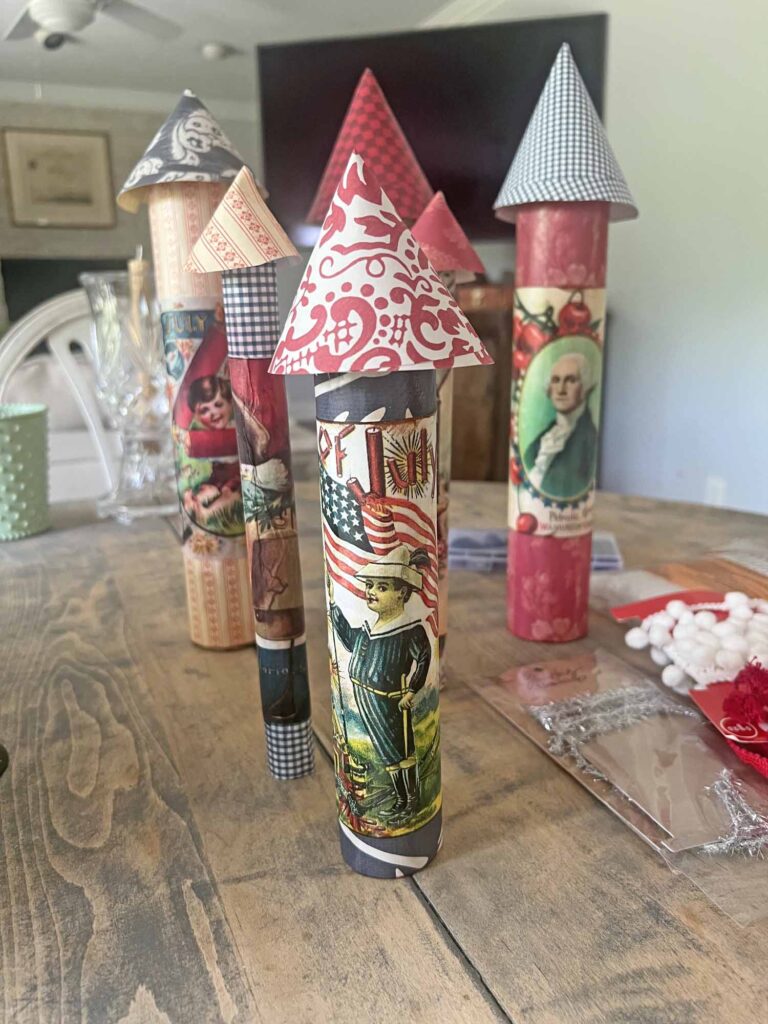
Are you ready to celebrate Independence Day in style? I have a fun and easy DIY to share with you today to amp-up all the patriotic vibes in your home. You can create this patriotic bottle rocket DIY in an afternoon, which creates a charming and creative decor accent for the season. Make as many as you want, in whatever size you want, with the look you want. This is a super easy and customizable craft. Join me as we give our 4th of July décor a serious upgrade.

Crafting your own seasonal decor is good for your mind and spirit, AND it’s also good for the pocketbook. This project uses very basic supplies you might readily have available at home. Easy and budget friendly projects are always a win win all around.

Key Takeaways
How to Craft Patriotic Rockets Easily
> Styled 2 Ways Collaboration
> Celebrating our country’s birthday and all the patriotic holidays
> Step by Step Tutorial – Charming Patriotic Rockets: including what you need, how to make them and what to do with them
> Tips & Recommendations for crafting
*Affiliate links might be included for your convenience. These affiliate links mean a small commission is earned if you make a purchase using these links at no extra cost to you. As an Amazon Associate I earn from qualifying purchases which support this website. For more information: Full Disclosure Policy.
Welcome to Styled 2 Ways – Summer Craft Edition
Styled 2 Ways is a collaboration between myself, MaryJo @Masterpieces of my Life, & Susan @From the Bay to the Beach. Two different points of view for a particular styling, project or concept are shared. A guest host sometimes includes another styling for triple the fun. We publish on the 2nd Wednesday of the month @ 4AM Pacific Time. Thank you for joining us; it’s lovely to have you here.
Although Susan and I both like many of the same things, we both have unique styles of our own, and we want to share how the same idea can be expressed in different ways. Both ways are equally as fantastic, and appreciating other unique takes on the same idea expands our own personal style.
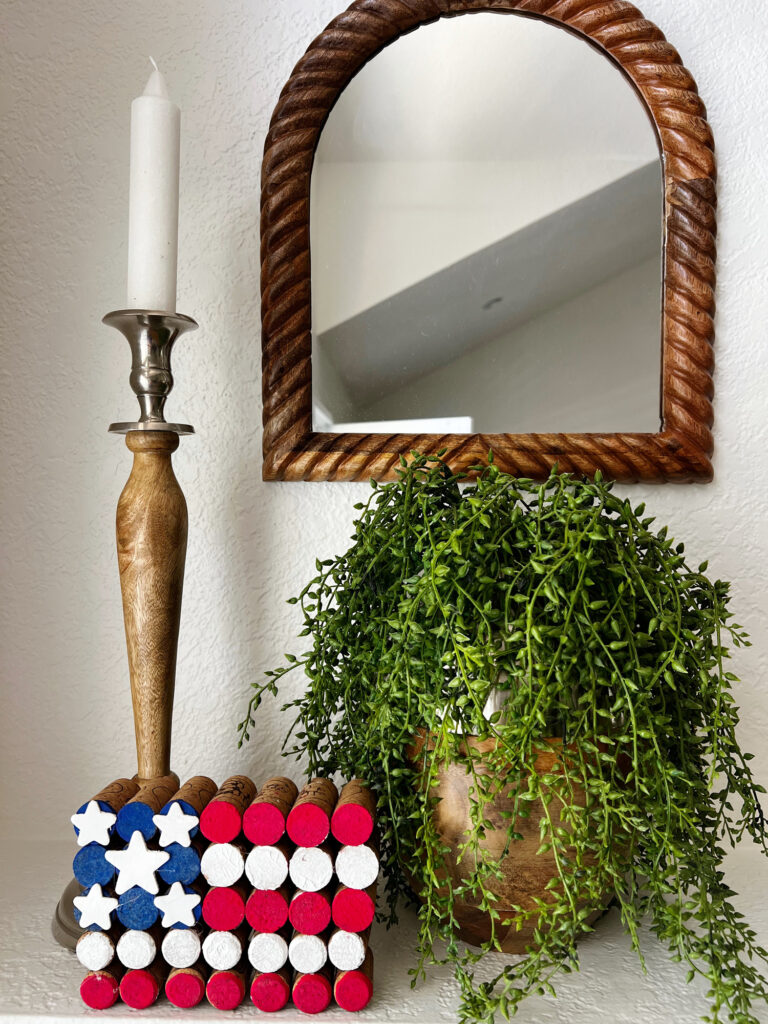
When you are done here, please hop over and check out Susan’s Wine Cork American Flag. If you are here visiting from Susan’s place, welcome, I am so happy you are here. Leave me a comment down below; I would love to get to know you. Come on in, have a seat and enjoy!

Inspiration for the Patriotic Rockets DIY Project
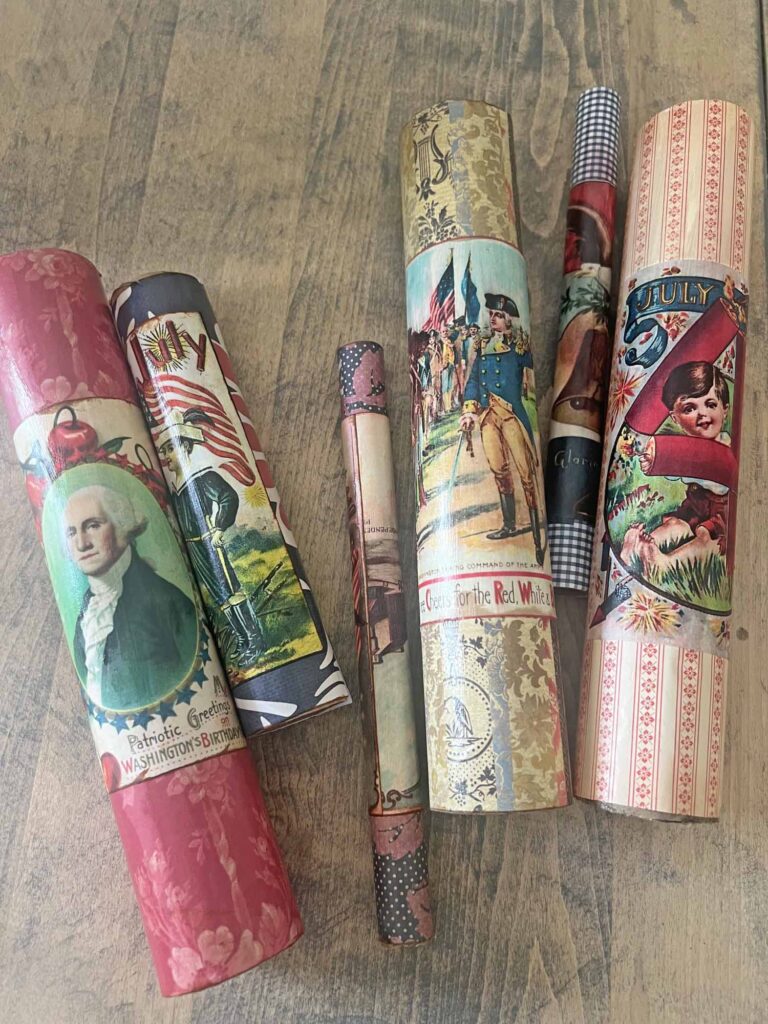
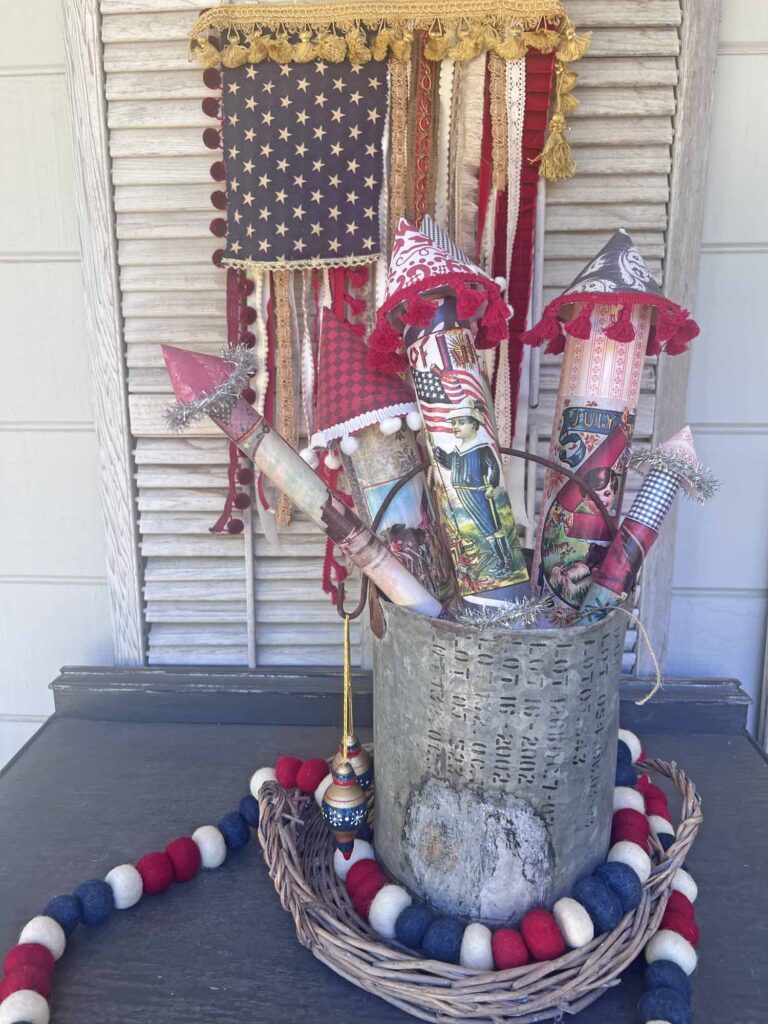
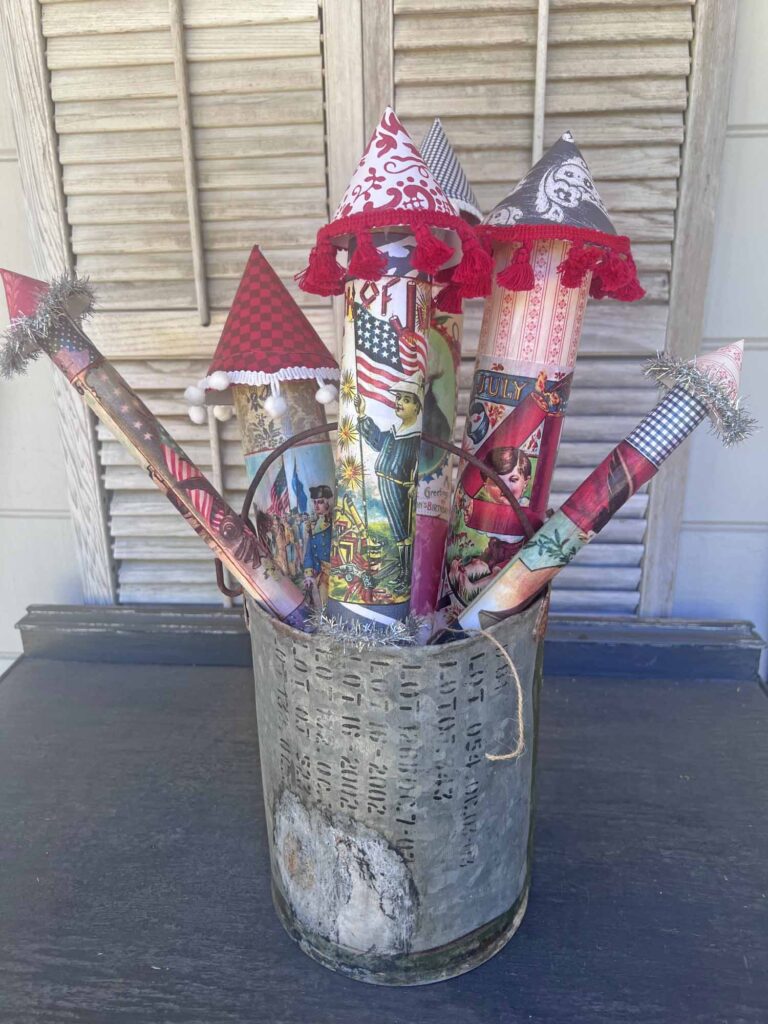
Vintage Bottle Rocket Craft for the 4th of July or any Patriotic Celebration
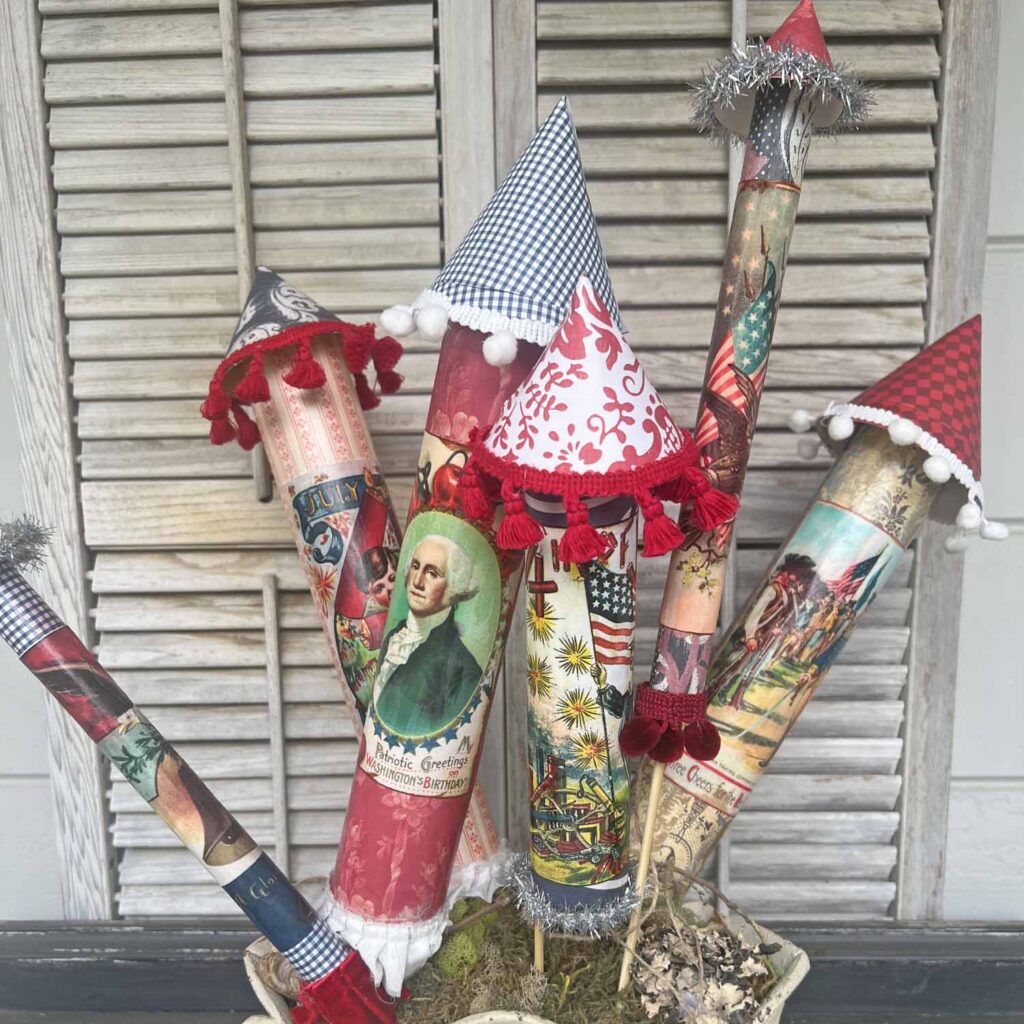
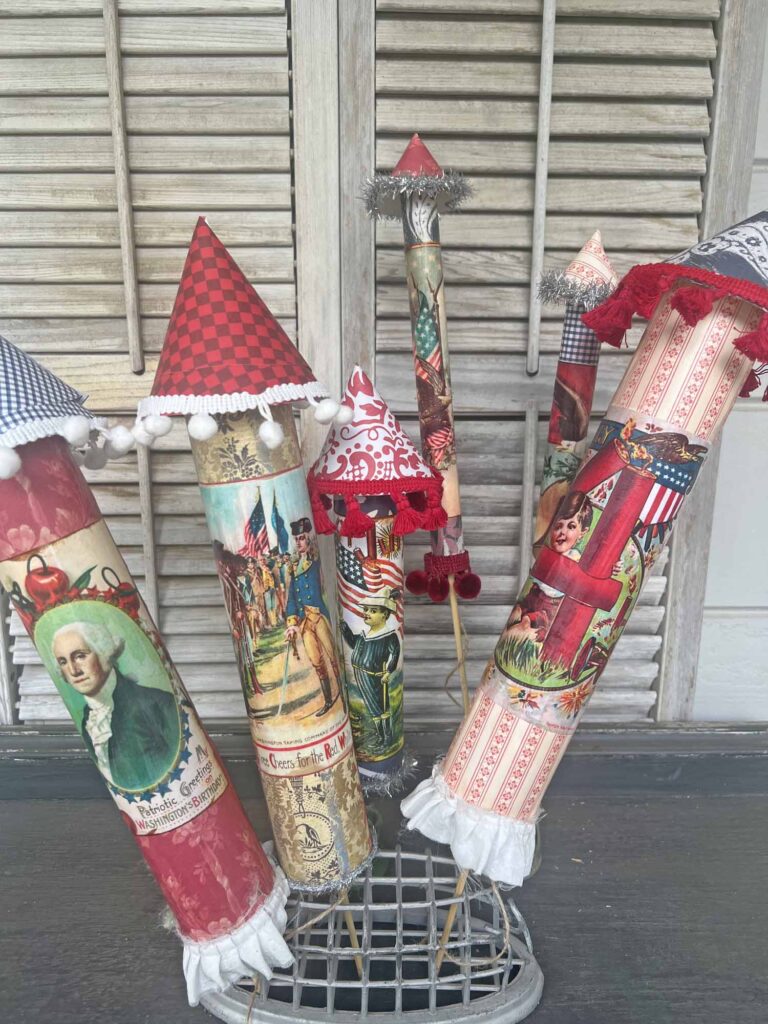
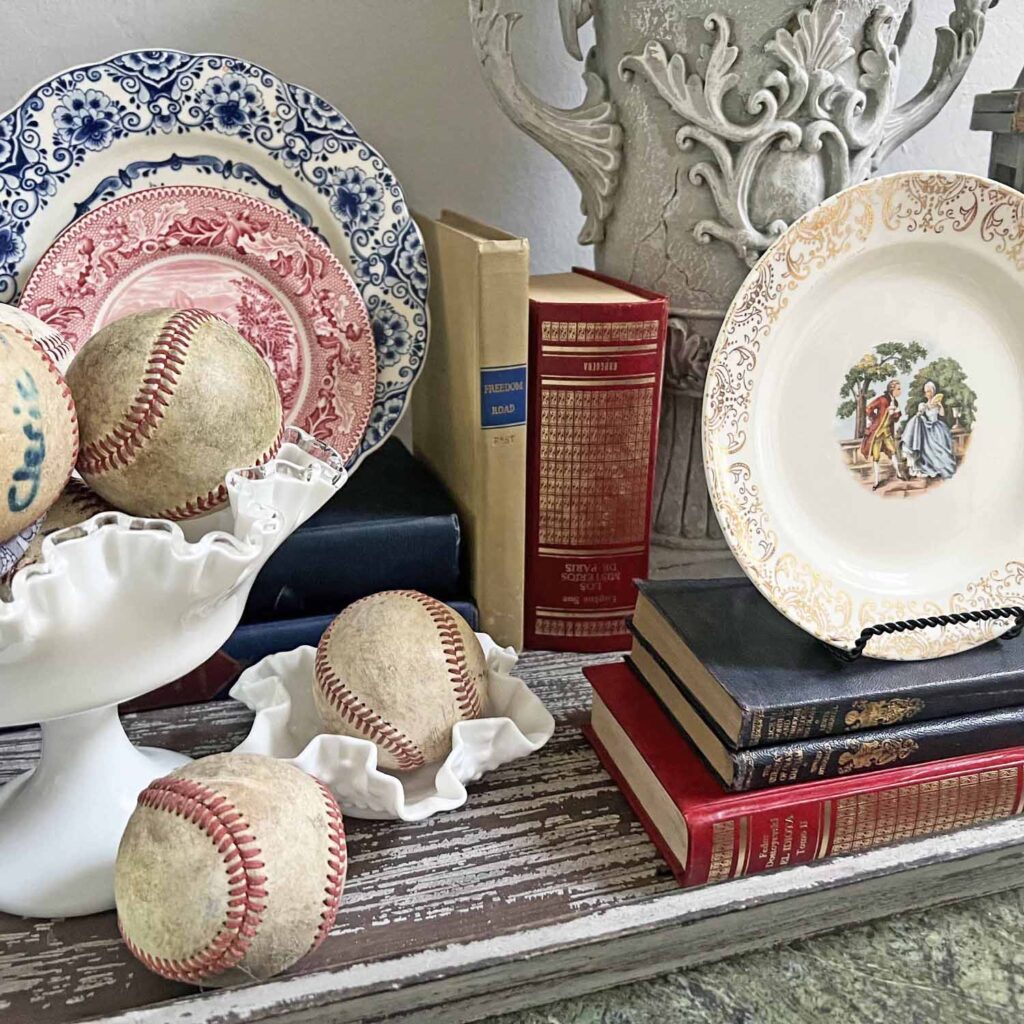
I love the look of bottle rocket and firecracker decor for Independence Day. I have seen many different ways to create the effect from wooden pieces to dried florals, tin sprays, pool noodles and more. I’ve pinned ideas, I’ve screenshot inspiration and I’ve watched a gazillion tutorials, I’ve ripped magazine pages out and so on. I finally decided to do something about it and here we are.
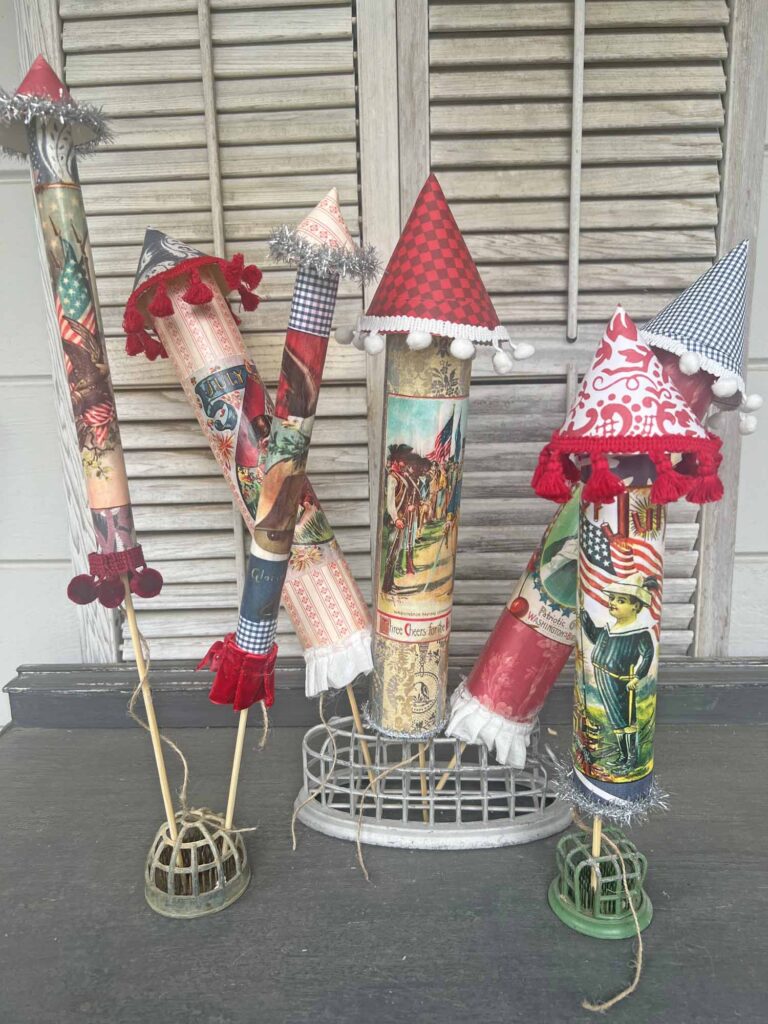
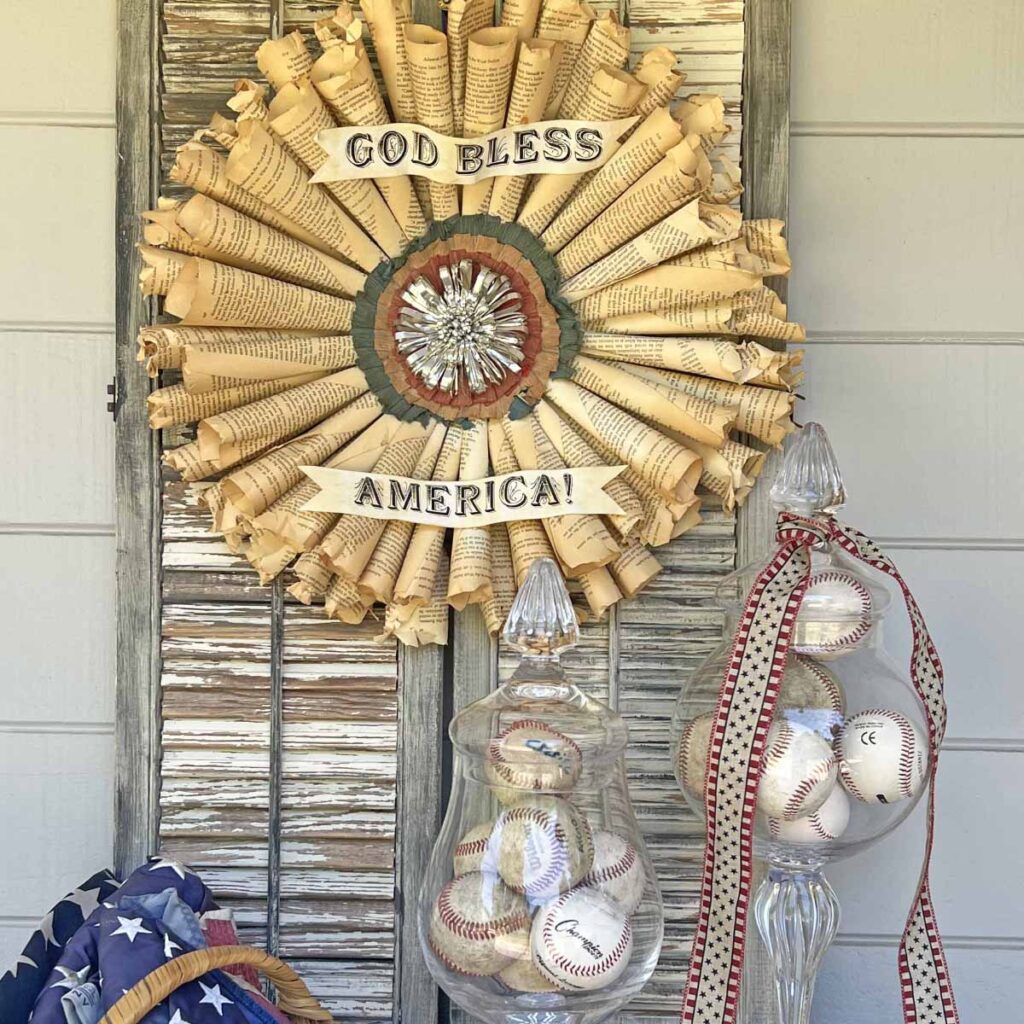
Today I am sharing my own process to create these super creative and unique pieces. The best part is you can adapt the rockets to your own personal style and decorate your home exactly the way you want for the 4th of July. Homespun seasonal decor is always unique and charming. If you want more red, white and blue craft inspiration, check out the article below by just clicking on the button.
How to DIY Patriotic Rockets Step-by-Step Guide
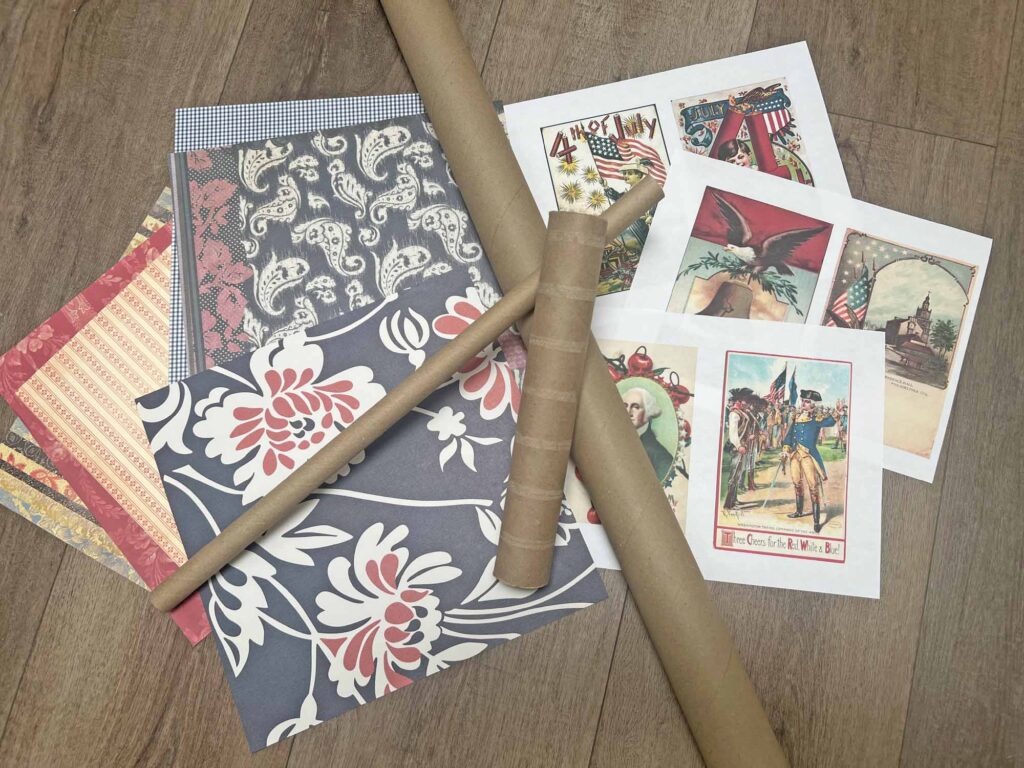
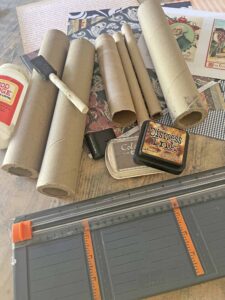
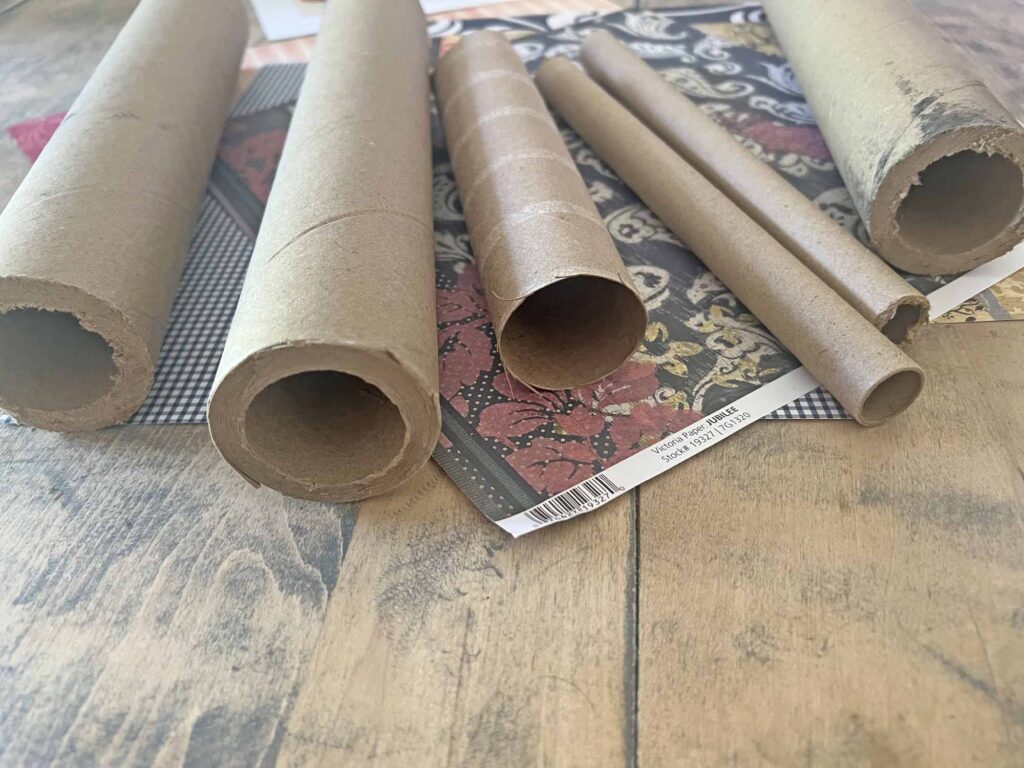
The foundational frame for these patriotic bottle rockets is cardboard tubing paired with pretty patterned paper and free printables. This creates an extremely affordable craft, but just because it’s inexpensive it doesn’t mean it’s cheap looking. I created rockets with a vintage and distressed feel but you can make yours with any style you wish, depending on the papers, printables and trims you select.


MJ Crafting Pro Tip:
Read all the instructions through once & then re-read everything again, familiarizing yourself with everything you need & know what to expect. Avoiding surprises during a project prevents unnecessary stress.


STEP-BY-STEP INSTRUCTIONS
Prep Project
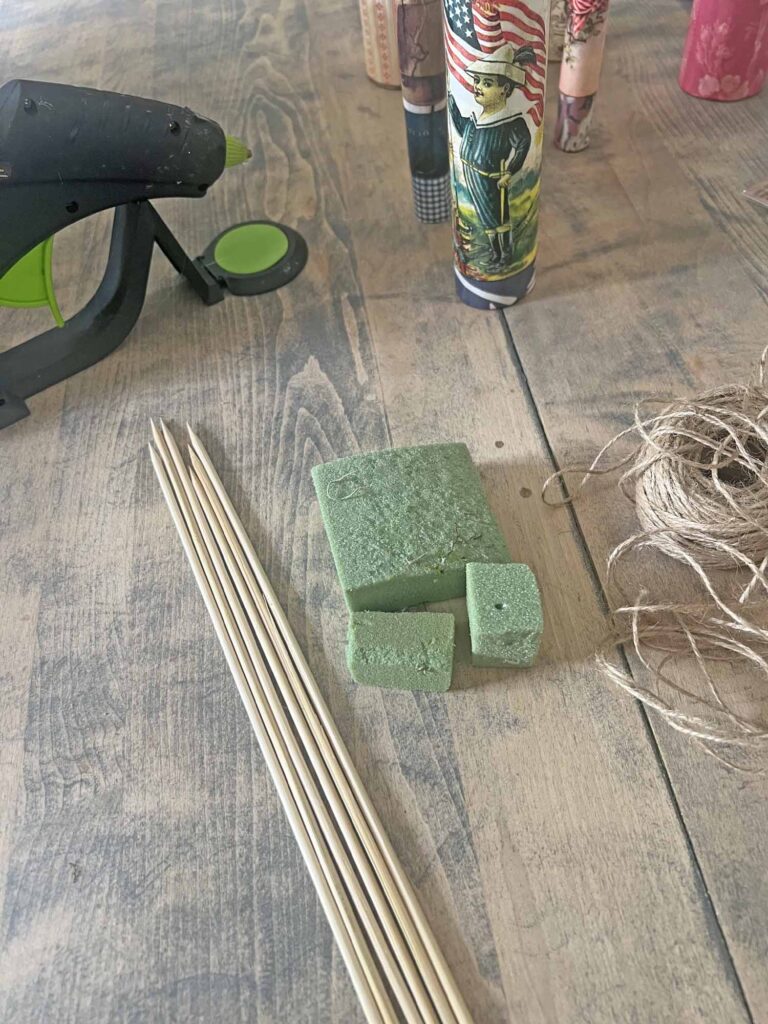
- Read instructions thoroughly and assemble all supplies & tools
- Remove all packaging, tags, stickers, etc. from supplies
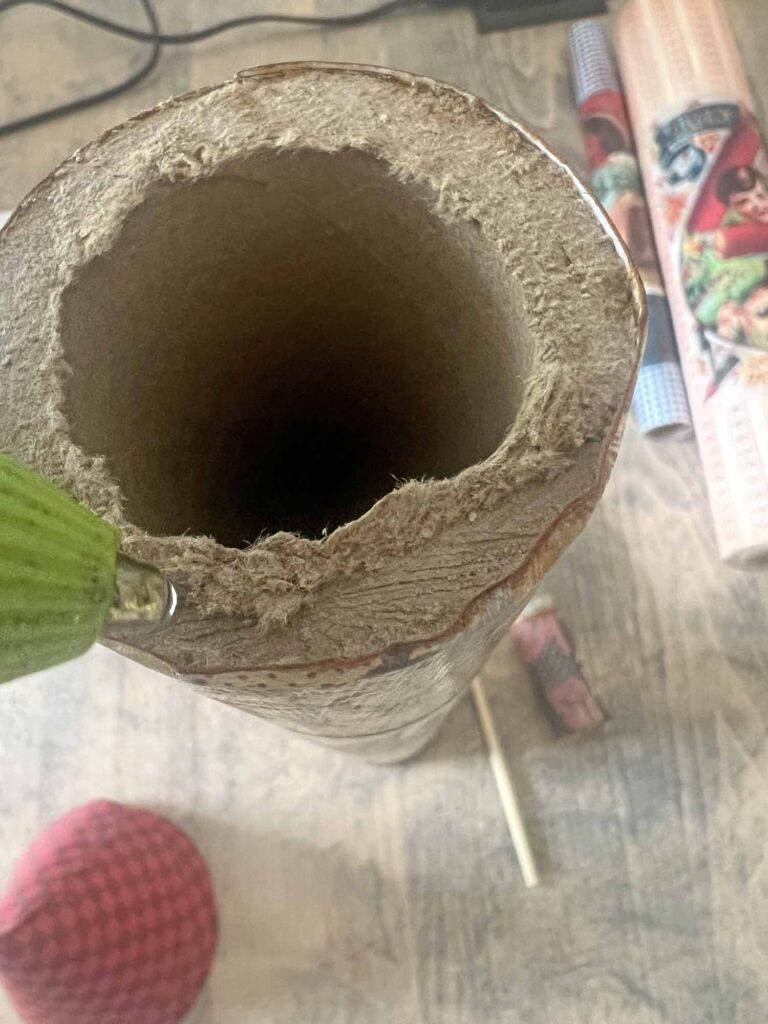
- Cut cardboard tubing to desired lengths (mine are 12-in, 10-in & 8-in)

Adhere Paper to Tubing
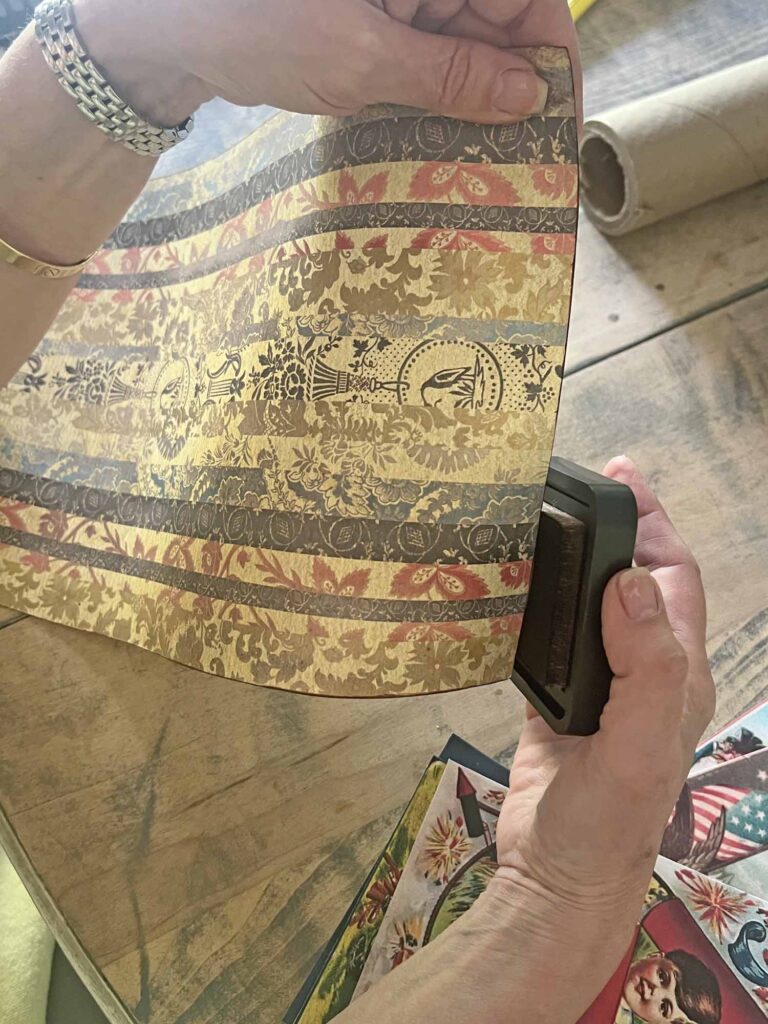
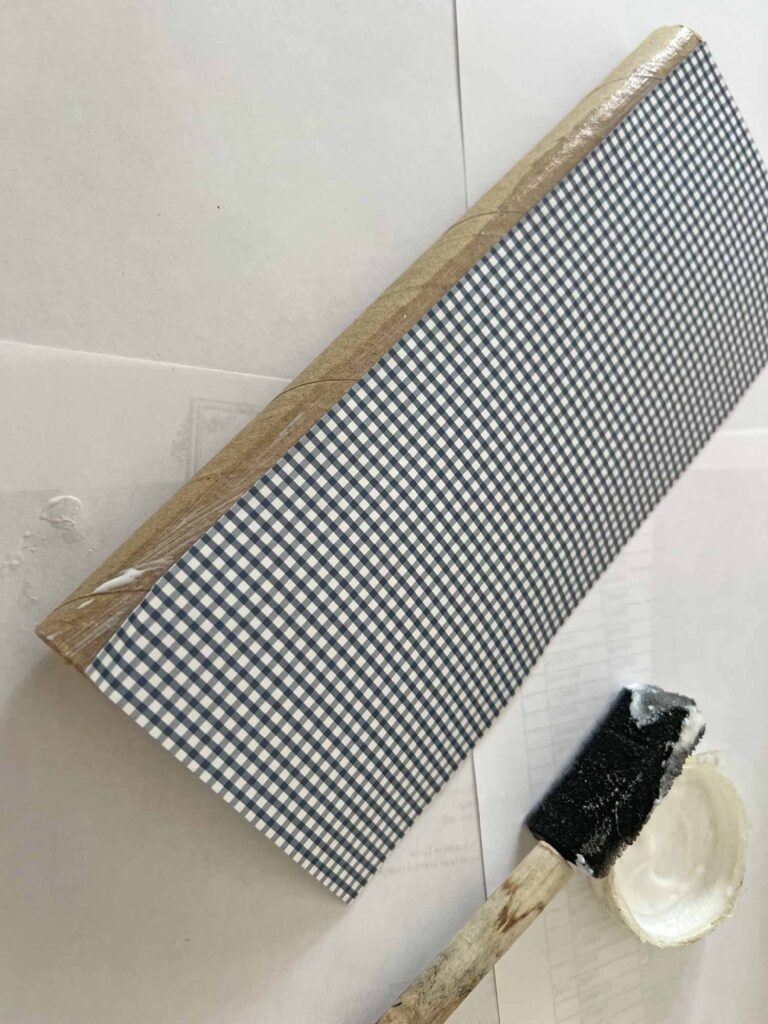
- Cut patterned paper to size of tubing- length should be flush to edges of tubing while the width should overlap slightly when wrapped around tubing
- Distress edges of cut down to size patterned paper with ink pad (optional – if you don’t like the grudge, distressed look- skip this step)
- Using foam brush apply decoupage medium on tubing and adhere paper, wrapping around entire tube, overlapping slightly where ends meet
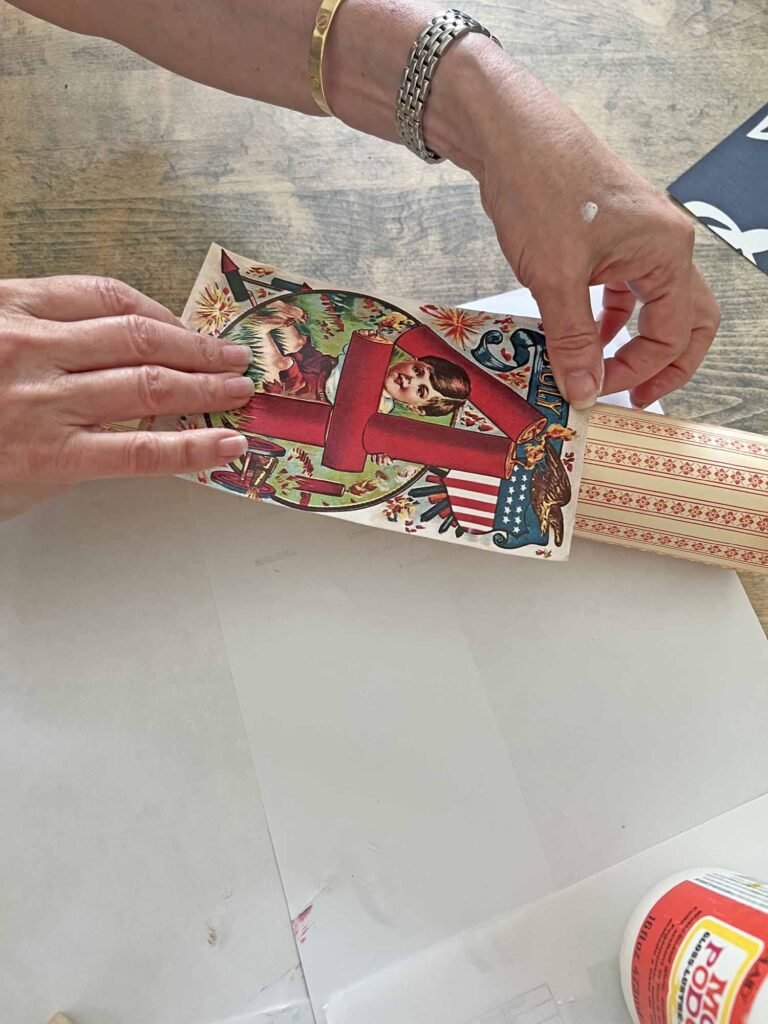
- Cut printable out to size
- Distress edges of printable with ink pad if desired
- Using foam brush apply decoupage medium on back of printable and adhere centered on top of patterned paper on the tubing
- Once all the papers are in place, apply a layer of decoupage medium all over piece to seal the body of the rocket
- Set bottle rockets aside for the decoupage medium to fully cure

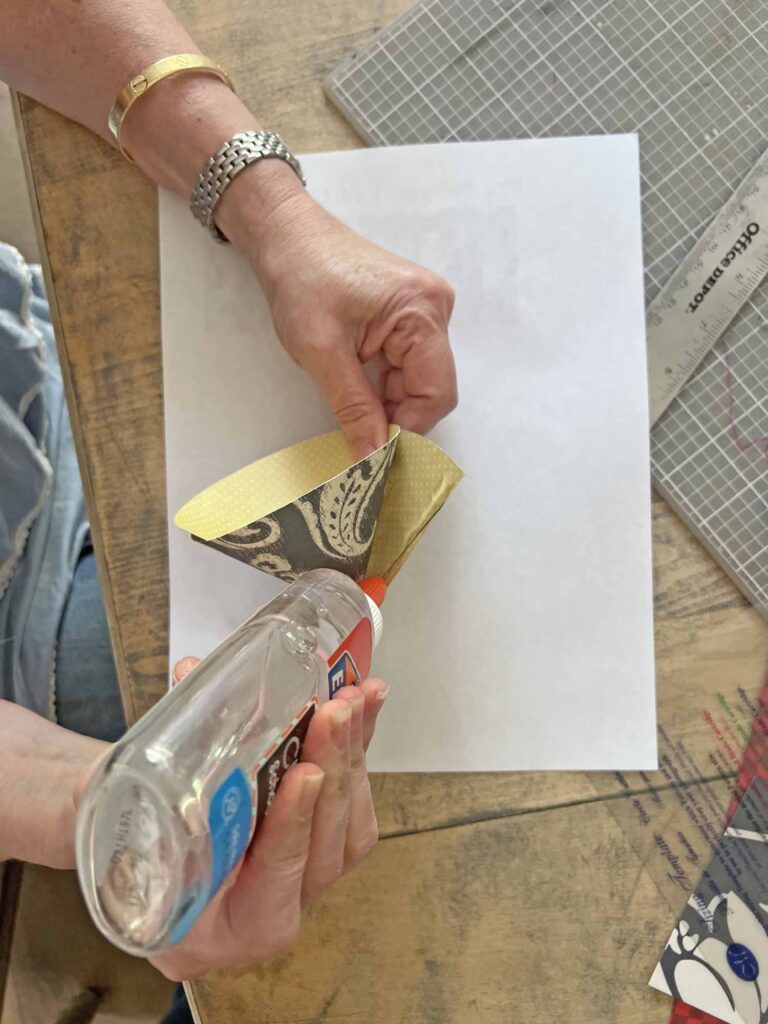
Create Rocket Heads
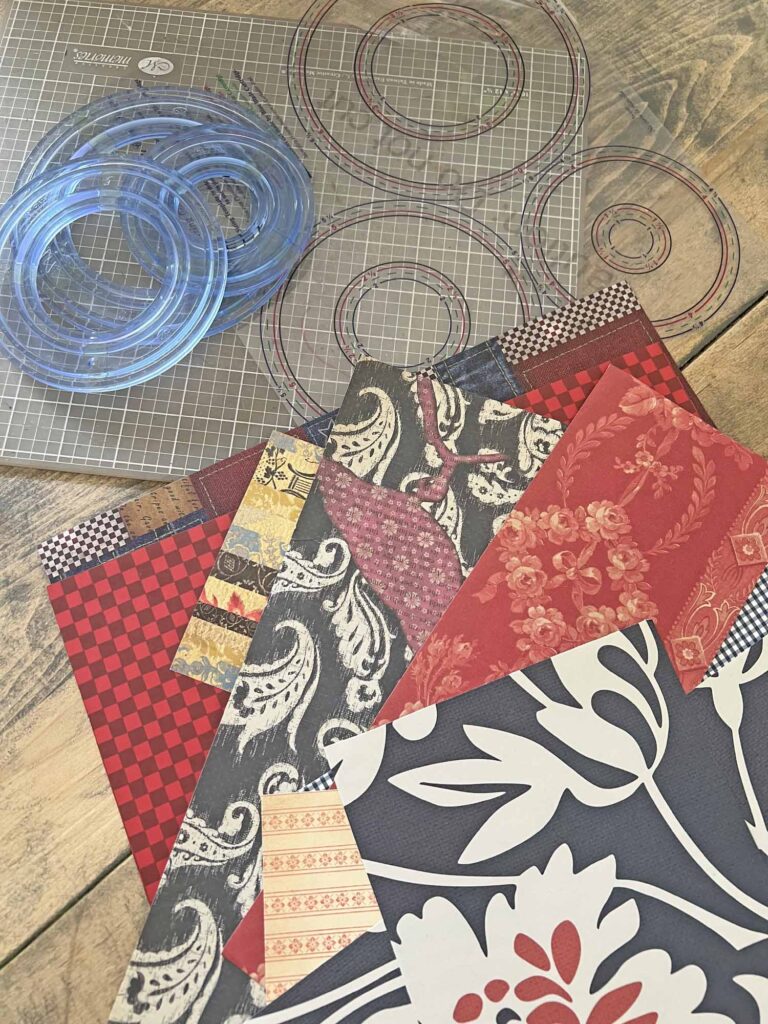
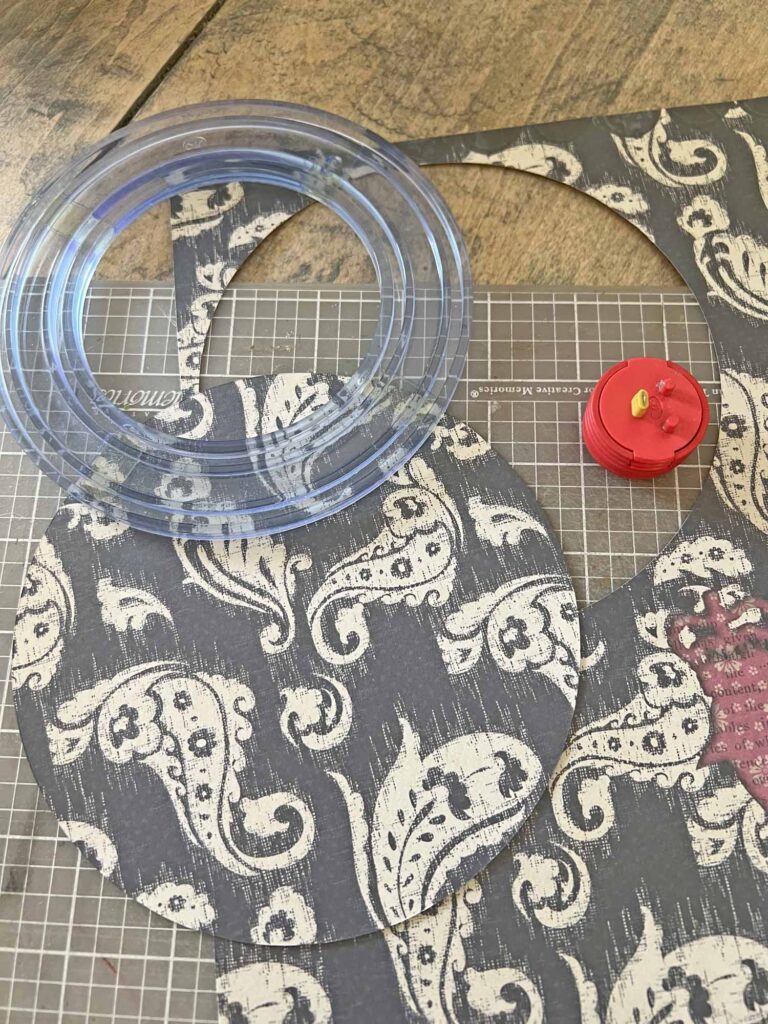
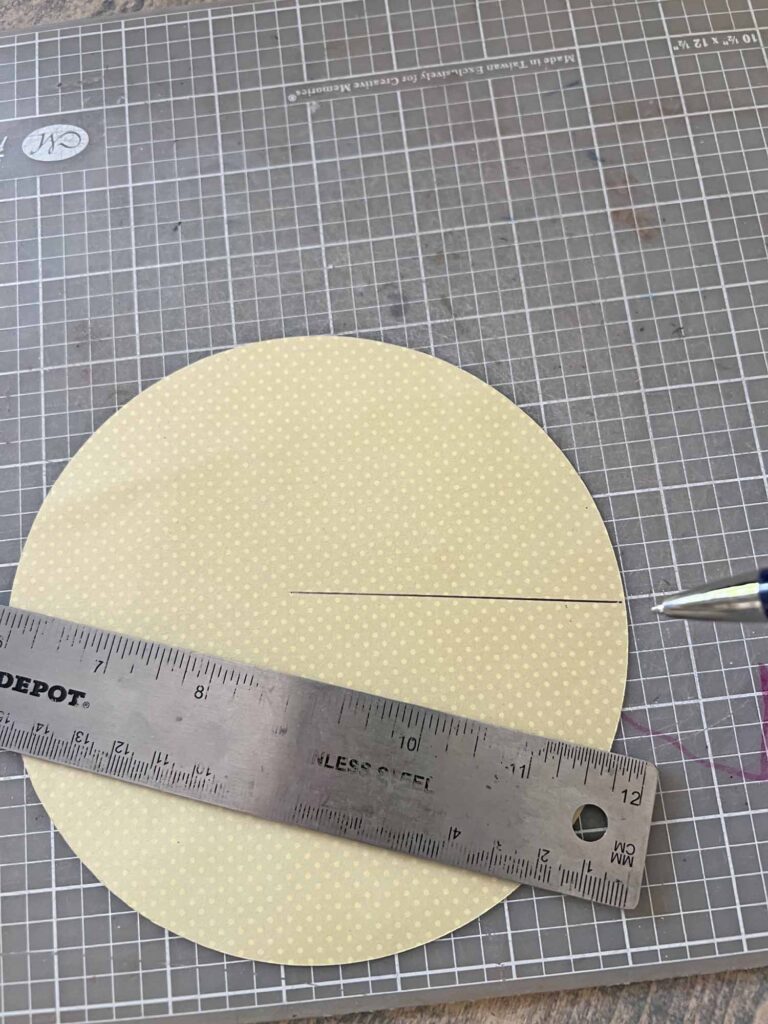
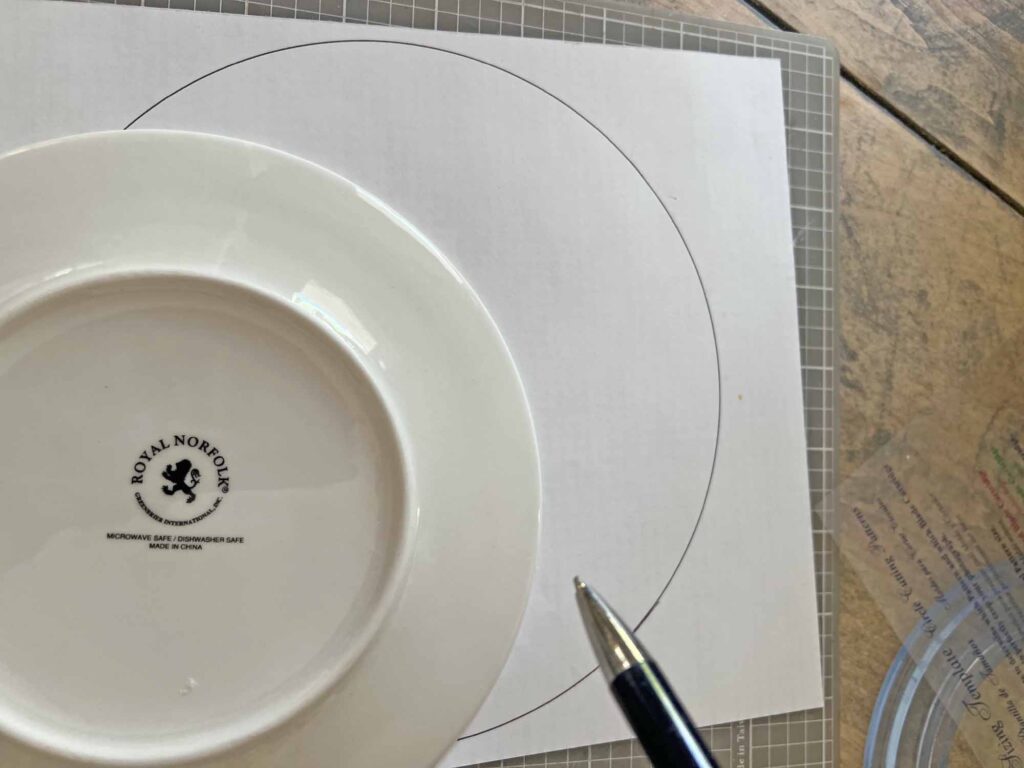
- Using circle cutter cut out a circle of patterned paper (my circles are 4-in, 6-in & and 7.5-in wide)
- Cut from one of edge of circle to the middle point, creating a slit
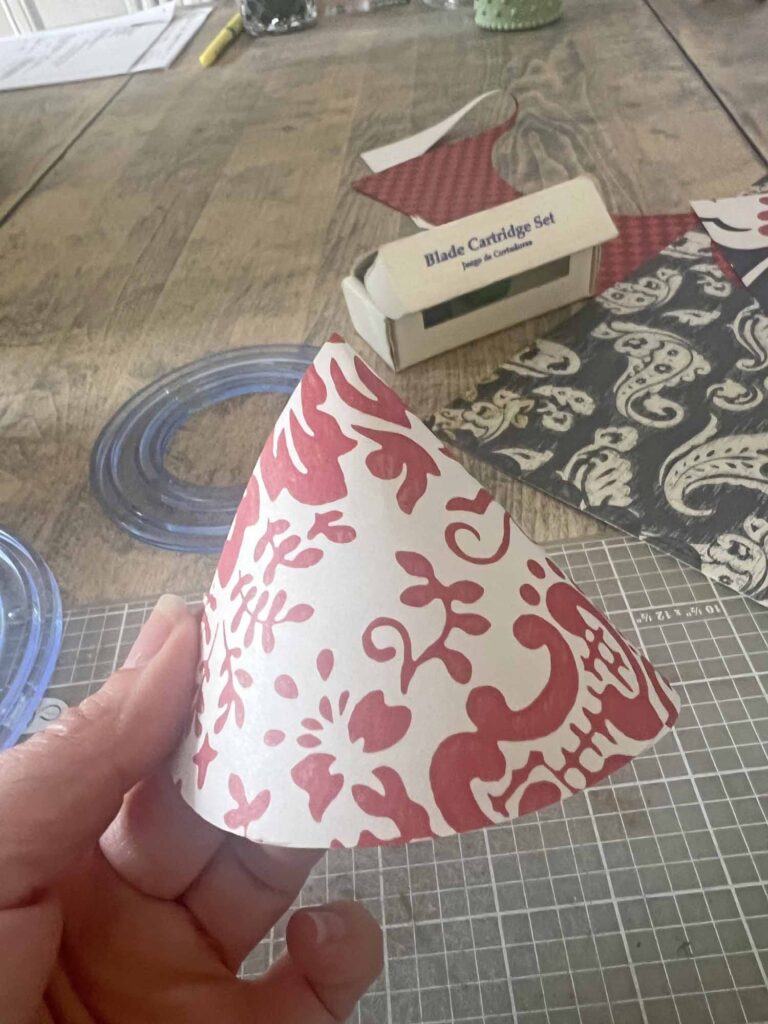
- Fold the circle paper around itself to create a cone shape
- Using regular school glue adhere paper in cone shape
- Hold cone shape in place until the glue is set and cone holds its form
- Plug in hot glue gun to warm up
- Apply a strip of hot glue around the top of the tube, place cone on glue to adhere
Incorporate Stake & Fuse Details
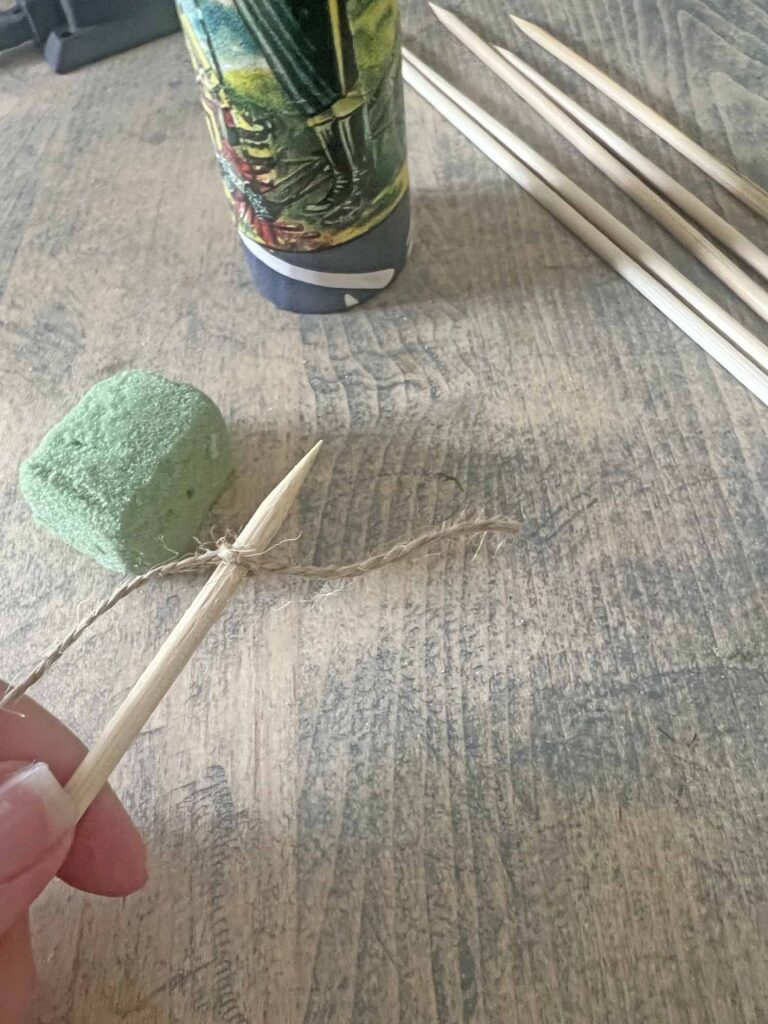
- Cut a piece of foam to fit inside of tube
- Measure from where the skewer meets the foam to the end of the skewer
- Cut a piece of twine approximately to the length above
- Tie twine on end of skewer to hold in place
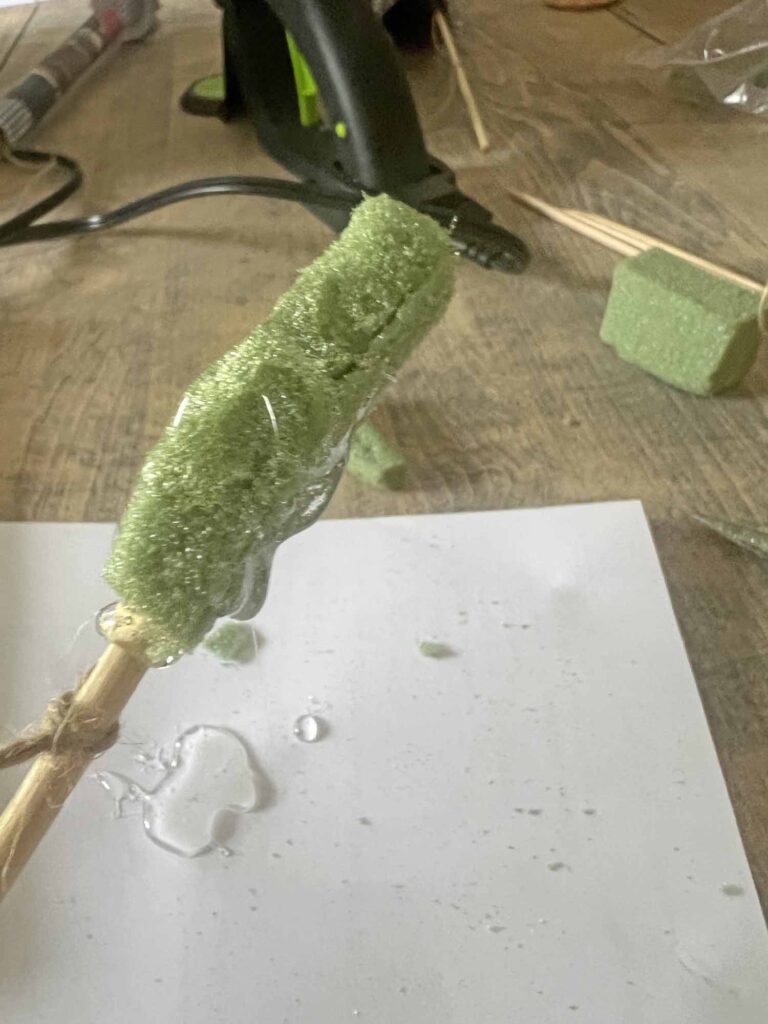
- Insert skewer into the foam
- Place the foam piece into tubing to gauge where you want it to set so skewer and twine hang out of bottom of rocket, creating a fuse effect
- Add hot glue around foam piece and insert into tubing at desired placement to adhere inside tube
Add Finishing Details
- Hot glue trims around the rocket head and bottom of rocket if desired
- Voila! Enjoy your new patriotic rockets (look down below for styling recommendations)
Tips & Recommendations for the Patriotic Rocket DIY
Cardboard Tubing
Next time you finish a roll of paper towels or wrapping paper, set it aside rather than tossing it in the garbage. It’s perfect for this project, creating a charming patriotic bottle rocket. Keep in mind all cardboard tubing is not created equal. Paper towel rolls have a very soft and pliable tube, which can be easily crushed. The other cardboard tubes I used were from textiles and heavy duty wrapping paper. These tubes are thick and super sturdy. I recommend using the latter if you can since they cannot be crushed or flattened, which also makes them safer to store since this is a seasonal accent. Also keep in mind the thicker tubing might require heavier tools. I was able to use my heavy duty craft scissor for the smaller rolls, but for the largest one I used a hand saw.
Paper Products
I used scrapbook paper with red, white and blue patterns to create these patriotic rockets, because I already had them in my craft stash. Feel free to use any papers you wish to create a patriotic look, including wrapping paper, gift bags, book pages and more. I always try to use what I already have on hand rather than buying something new. Plus I have an insane amount of scrapbooking supplies from when I taught classes.

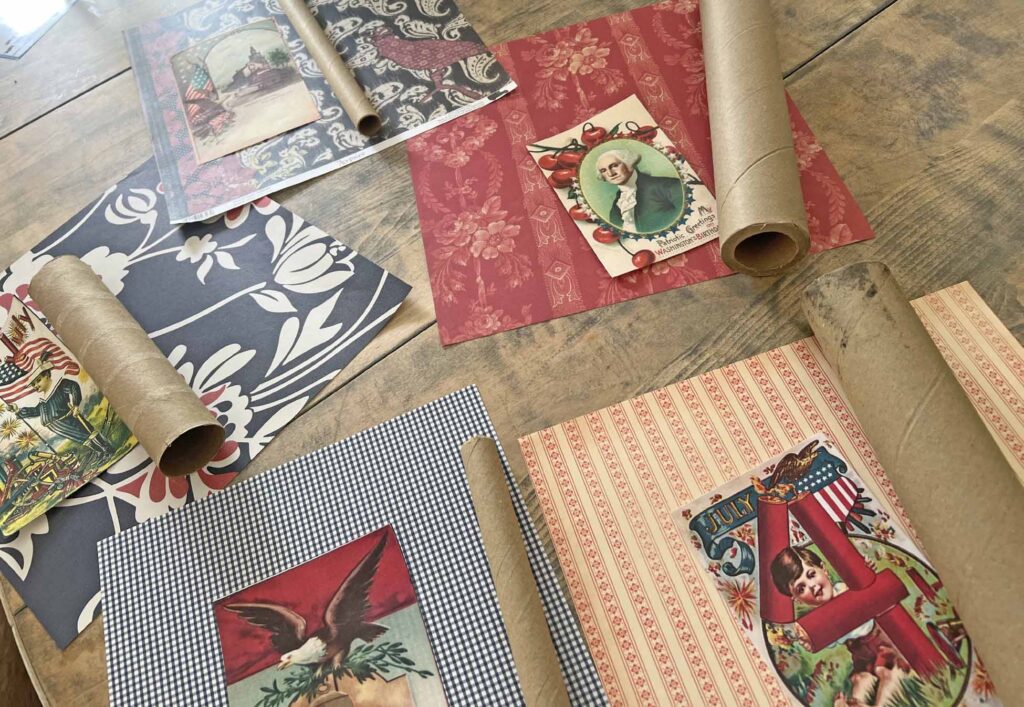
Paper also comes in different weights, which makes them thicker or thinner. The thinner papers wrap around the tubing for the rocket body easily since they are more pliable. For the rocket heads the heavier weight papers hold their shape better, since they are sturdier. Also keep in mind you can create these rockets simply with pretty papers and skip the patriotic printable all together.
Patriotic Printables
The printables I used on the project were all found for free on the internet. Unfortunately, I downloaded these years ago and I don’t have a source to cite. I have created a downloadable PDF for you to use if you want to recreate this for your personal use at home. Keep in mind these should only be used for personal use and not for sale.
MJ Crafting Pro Tip:
The amount of free printables available to us for our own personal use is fantastic. Lean into these resources for your projects. I use them all the time for seasonal home decor and share here on the blog whenever it’s appropriate. These free images should only be used for personal projects and never for monetary gain.
Rocket Heads
If you don’t own a circle cutter, there’s no need to go out and buy one simply for this project. You can use a plate, plant saucer, cloche or any round object around your house to create a circle on the back of the patterned paper and cut out with a scissor. If you’re not comfortable creating your own cone form circle for the rocket head, I have also seen many projects use cone party hats cut down to size. Dollar Tree usually carries them- just saying…
Design Aesthetic
I created rockets with a vintage and distressed feel since it’s my style preference, but you can make yours with any look you desire. You can use bold, primary colors for a more modern look or you can use stars and stripes patterns for a more traditional Americana look. You do you and make them yours.
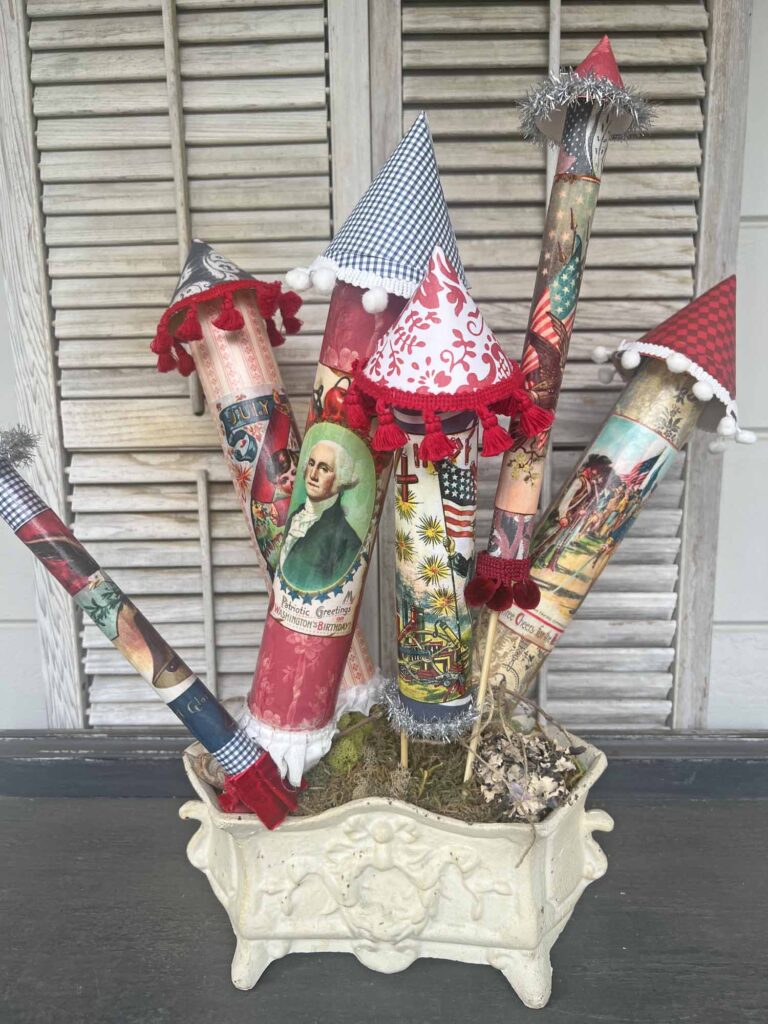
I included the trims on my bottle rockets for added texture and interest. This is totally not necessary and simply a design option. I love how the hanging trims create movement and dimension. Once again I had all l these elements in my crafting arsenal so I’m happy to put them to good use.
MJ Crafting Pro Tip:
Creativity improves our mental health by elevating our mood, lowering anxiety and reducing stress. By regulating our emotions through creative endeavors provides a sense of control and empowerment. Not only does it make us feel better, but it also makes our homes look amazing.


Grab a copy of my free
Vintage Home
Decor Guide
This guide provides 10 easy ideas to add timeless charm to your home with a free PDF full of images and inspiration.
How to Use and Style your Patriotic Bottle Rockets DIY
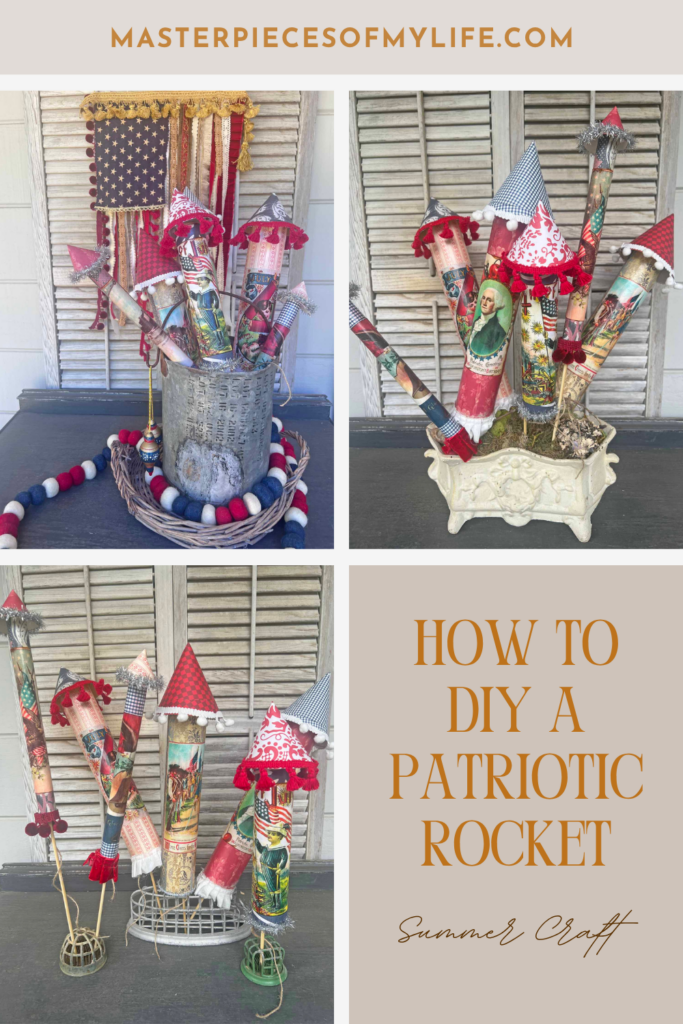
Be warned, these are addictive to make. Once you make one, you’ll want to make more. You can make them all identical for a matching look, or simply use the same patterns in alternating ways for a coordinated feel or make them random as I did for an eclectic vibe. Let the creative process guide you along with your personal style preferences.
…And the rockets’ red glare
The bombs bursting in air
Gave proof through the night
That our flag was still there…
Star Spangled Banner – Francis Scott Key
More Patriotic Posts


More Summer, garden and vintage decor is scheduled on the blog. If you don’t want to miss any new content, you might enjoy following along. Sign up and receive all new posts directly into your in-box. We would love to welcome you to the Masterpiece community.
Closing Thoughts ~ Conclusion on the Patriotic Rockets DIY
Do you have plans for the 4th of July holiday yet? If you’ll be hosting at home these rockets are perfect, unique and festive decor accents. If you will be attending a soiree at someone else’s home, these would be a fantastic, intentional and thoughtful hostess gift to bring. I hope this sparks (no pun intended) some patriotic creativity in your life.
Please don’t forget to visit Susan. You can also find Susan in her other spaces; give her a follow: Instagram || Pinterest || Facebook
Thanks for stopping by today, and I hope to see you again soon. It’s always lovely having you here.
Au revoir!


FAQs – Patriotic Rockets DIY
Q1. How can I make the rockets extra sparkly for the holiday?
A1. Go all out with the patriotic glam! Add red, white, and blue glitter, tinsel or press on metallic star stickers. The coat of Mod Podge over the finished rocket also adds a subtle shimmer and seals everything beautifully.
Q2. Where can I find red, white, and blue patterned paper for this project?
A2. Craft stores like Michaels & Hobby Lobby carry a great selection of patriotic scrapbooking paper. Look for red, white & blue patterns plus star prints, stripes, and flag patterns. Always try to use a discount coupon whenever possible. Around the 4th of July season you can also find options at stores like Target, Wal-Mart plus the Dollar Tree. You can also find festive options on Amazon and I’ve include selections below in the shopping section. Wrapping paper and tissue paper in patriotic colors work wonderfully too!
Q3. Can I make these rockets with my kids for a 4th of July party?
A3. These are a fantastic kids’ craft! Children aged 4 and up can help with wrapping, decorating, and sticking on star stickers or glitter, while adults handle cutting and hot glue. Set up a craft station at a party where kids can decorate their own rockets to take home as party favors!
Shop the Patriotic Rocket Look
- Cardboard Tubes – 12 Pack, 1.75 x 10 in, Brown
- Retro Patriotic Scrapbook Paper
- 4th of July Pattern Paper Set
- 12 Inch Paper Trimmer Slider
- Mod Podge Decoupage Starter Kit
- Circle Cutter, Circular Rotary Cutter for PaperCrafts
- Bamboo Skewers, 12 Inch Wooden Skewer
- Silver Metallic Tinsel
- Pom Pom Ball Fringe Trim
- July 4th Ball Fringe Trim
- Velvet Organza Ribbons
- Surebonder Cordless Hot Glue Gun
- Americana Glittered Rocket Stems
- Wood Firework Fourth of July Decorations

Don’t forget to Pin It and save for later. You never know when inspiration will strike!
For more inspiration follow me on Pinterest.
Most Recent Posts

From every mountainside, let freedom ring!”
Samuel Francis Smith – “My Country, ‘Tis of Thee”