


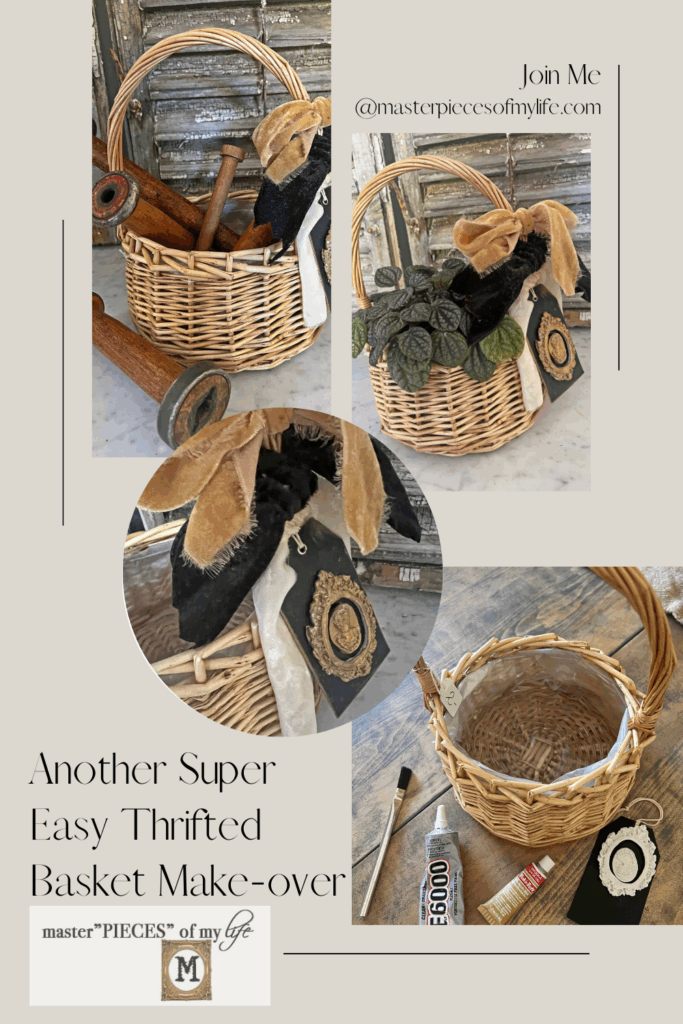
Hi friends! I’m here today to share another easy thrifted basket make-over. Just by adding some thoughtful accents the look of a plain handled basket immediately becomes charming, which can be disolayed in many ways to fit your personal style. A wide variety of baskets can be found at thrift stores and they usually only cost a few dollars.

You can take a drab or boring basket and turn it into a fabulous trend forward decor piece in a few easy steps. When I find baskets at thrift stores I always look at them for what they can become with some TLC instead what they actually look like on the shelf in the store. Let’s get crafty.
*Affiliate links might be included for your convenience. These affiliate links mean a small commission is earned if you make a purchase using these links at no extra cost to you. As an Amazon Associate qualifying purchases support this website. For more information: Full Disclosure Policy.
All About the Thrifted Basket
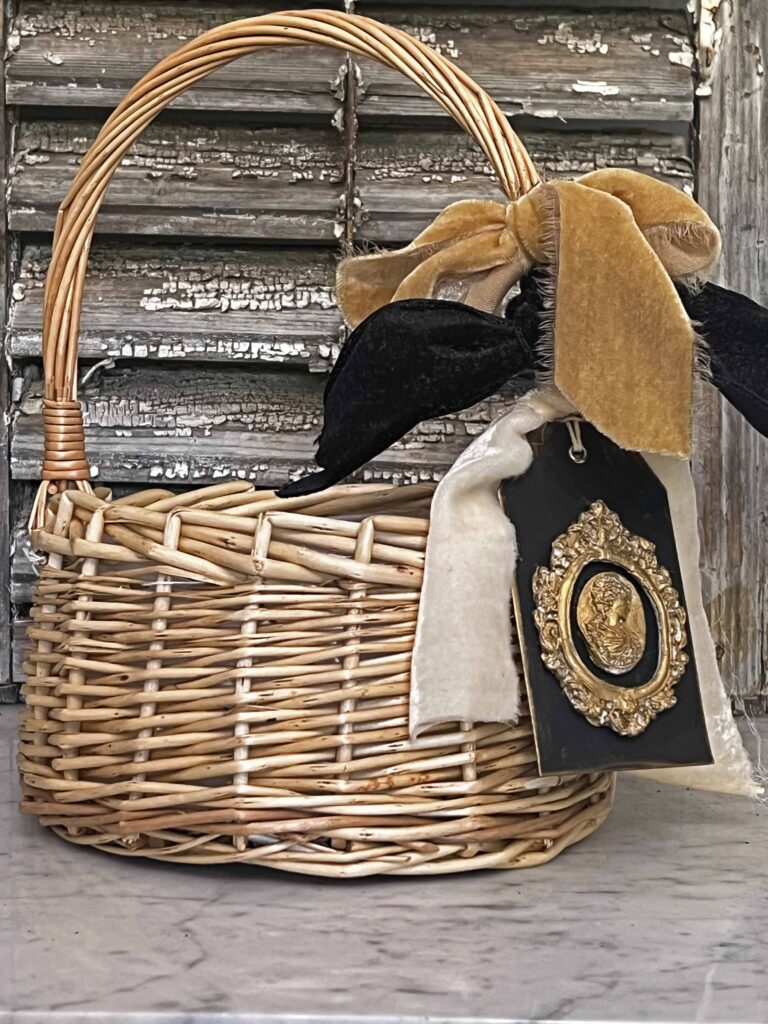
The Hospice thrift store in a neighboring town had moved to a new location with a bigger space and my daughter wanted to take me to it. Miss Masterpieces likes to thrift with me, which makes me so happy. I found this basket tagged at $2.00, which I thought was extremely reasonable. The basket is sturdy, has a great handle, is fully lined inside and the color doesn’t necessarily need altering with paint or anything.
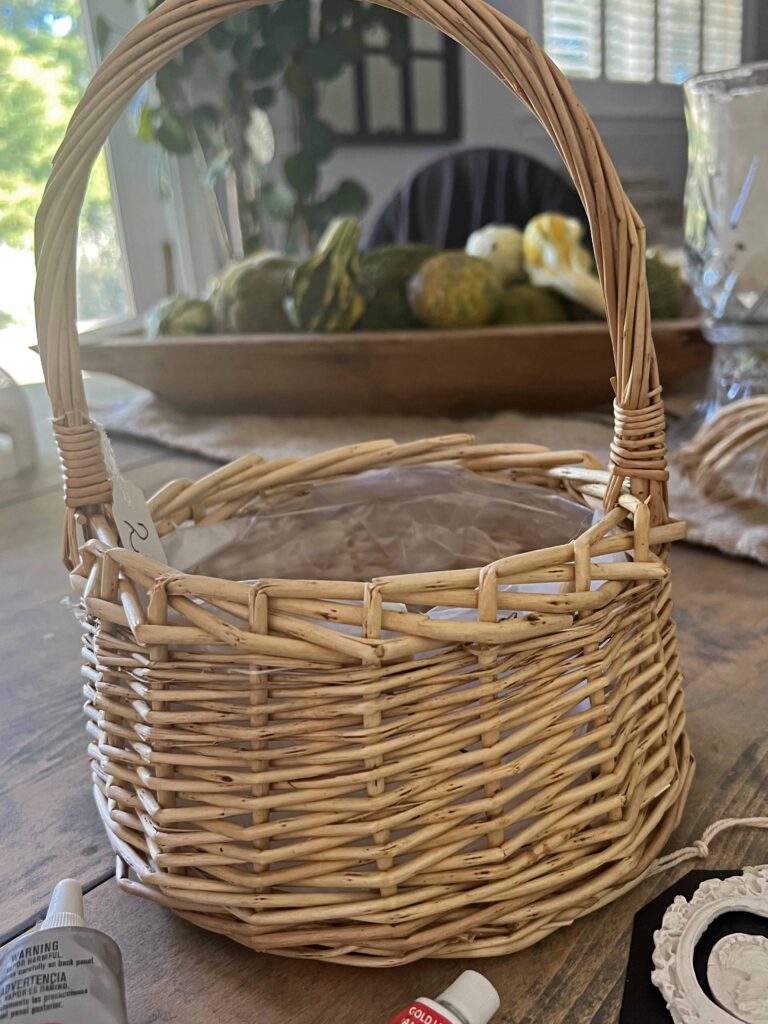
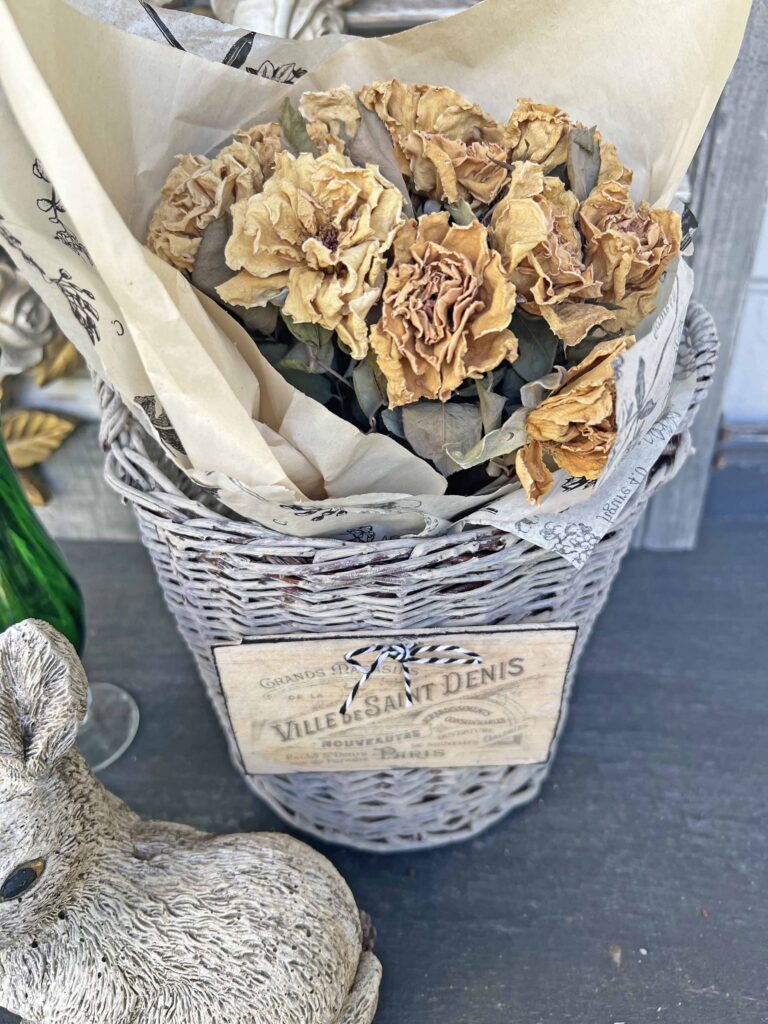
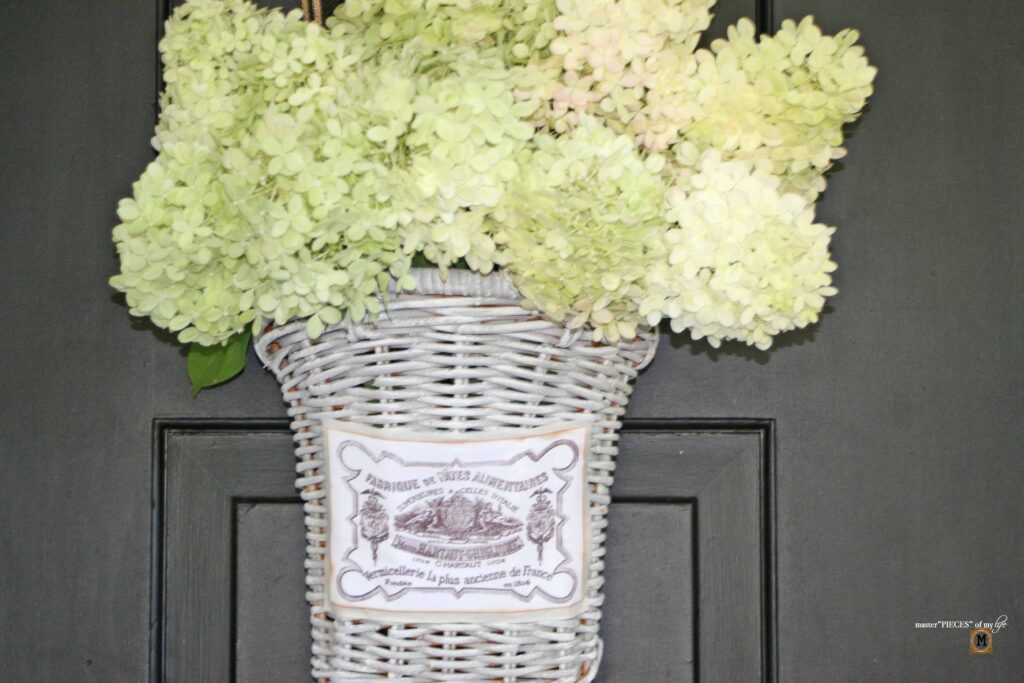
The color is similar to the chunky tray basket I shared here {thrifted basket finds – up-cycles & styling ideas}. I like the pale natural color in these pieces since they are easy to decorate with. This cute basket is also lined similarly to the basket I shared in the same post, which is always a bonus in my book. You can use these lined baskets with flowers and plants which gives a rich and cozy look.

A Super Easy Way to Make-over a Thrifted Basket
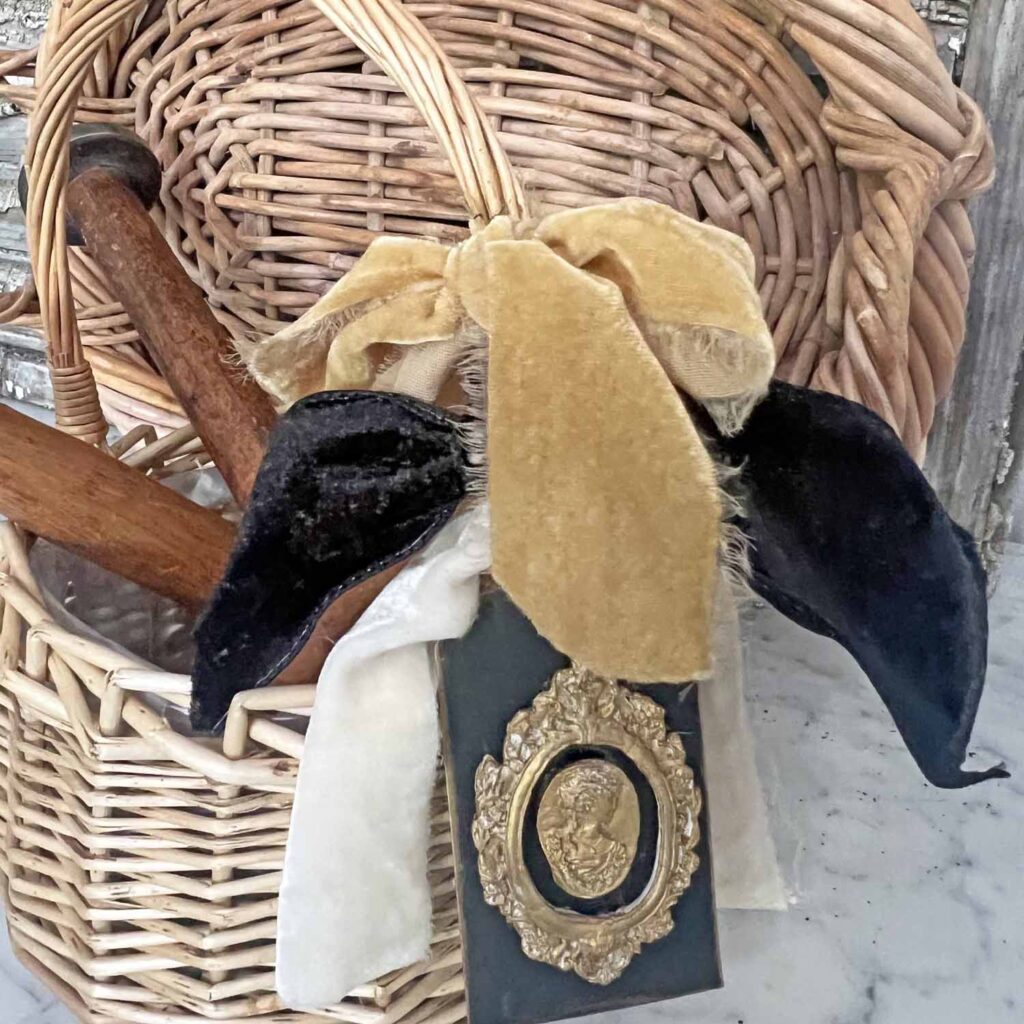
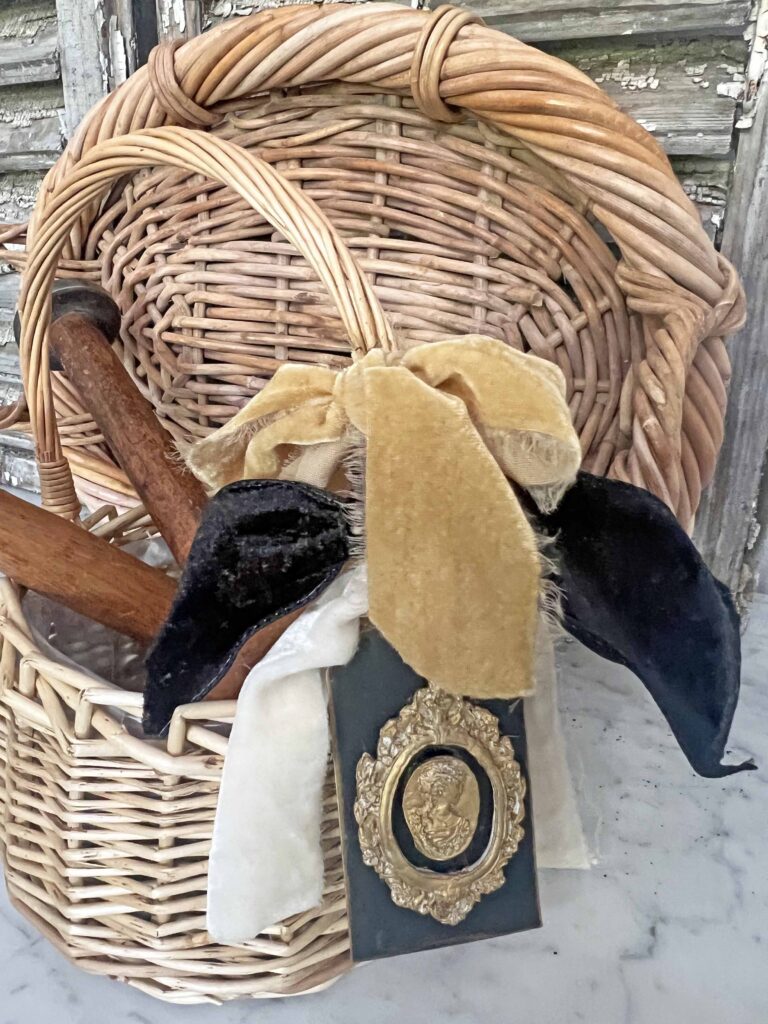
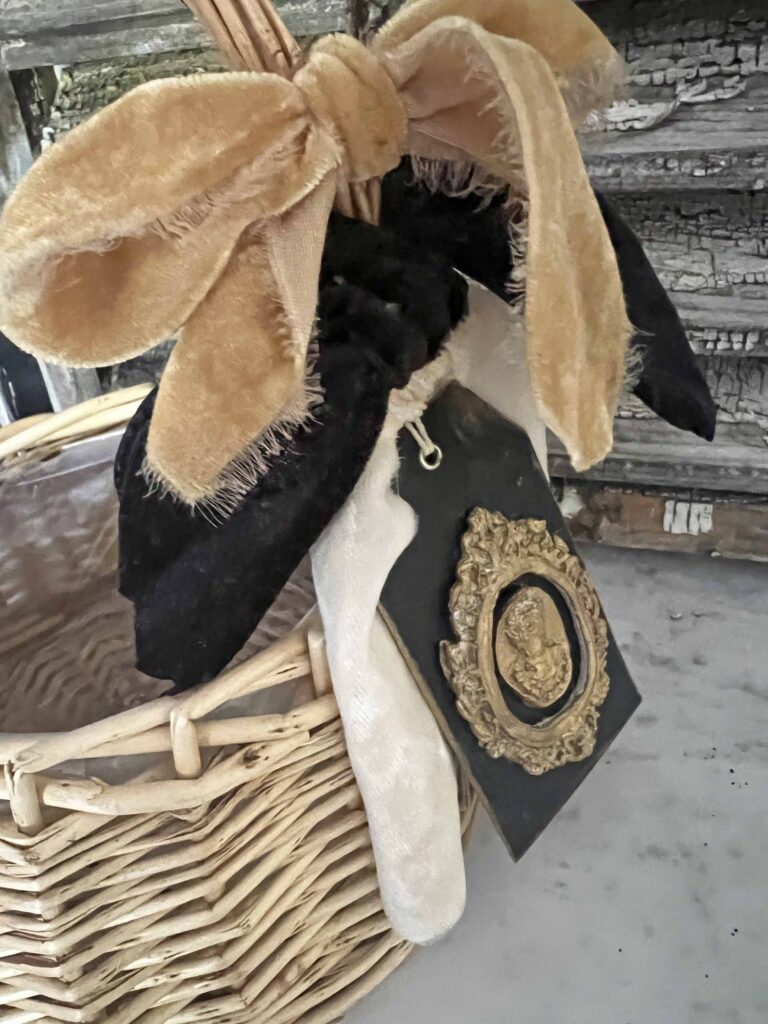
I usually use paint to update my baskets, but I didn’t find it necessary for this project. The basket has a nice natural color, which I like so I just wanted to jazz it up a bit since it was just plain and boring. With a cameo tag and some velvet ribbons the ordinary basket immediately is injected with personality and brings more interest to whatever you put in the basket. Let me show you how easy this is.
Supplies
- Thrifted Basket with Handle
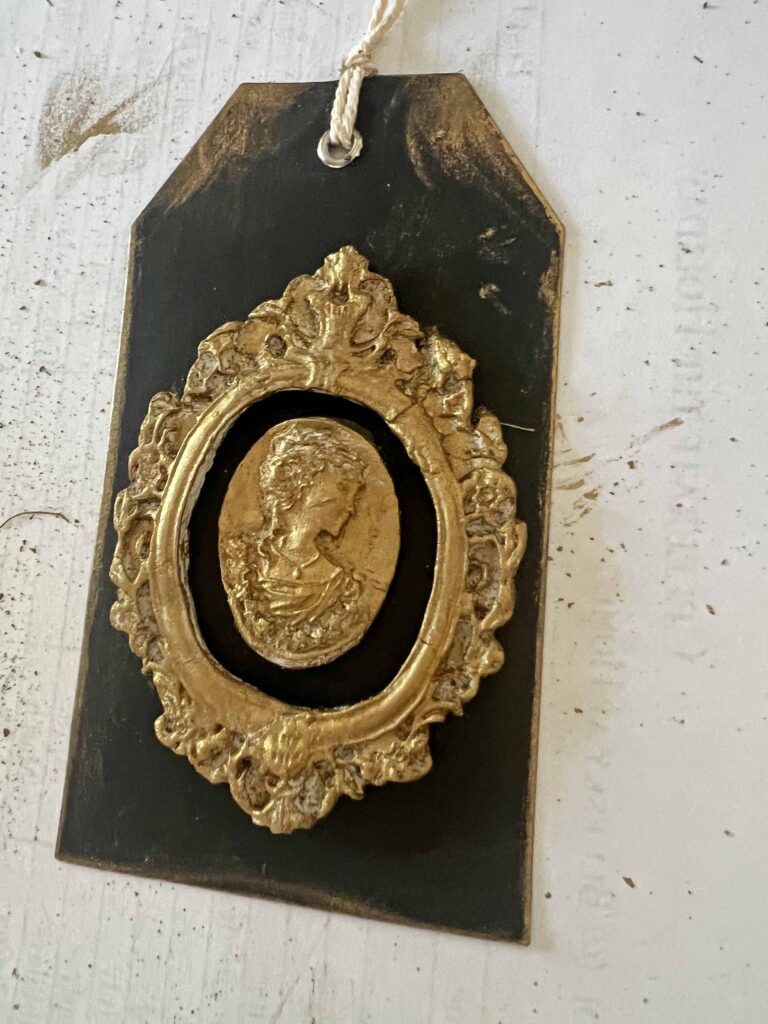
- Black Tag
- Air Dry Clay Cameo and Frame Pieces**
- Gold Leaf Rub-n-Buff
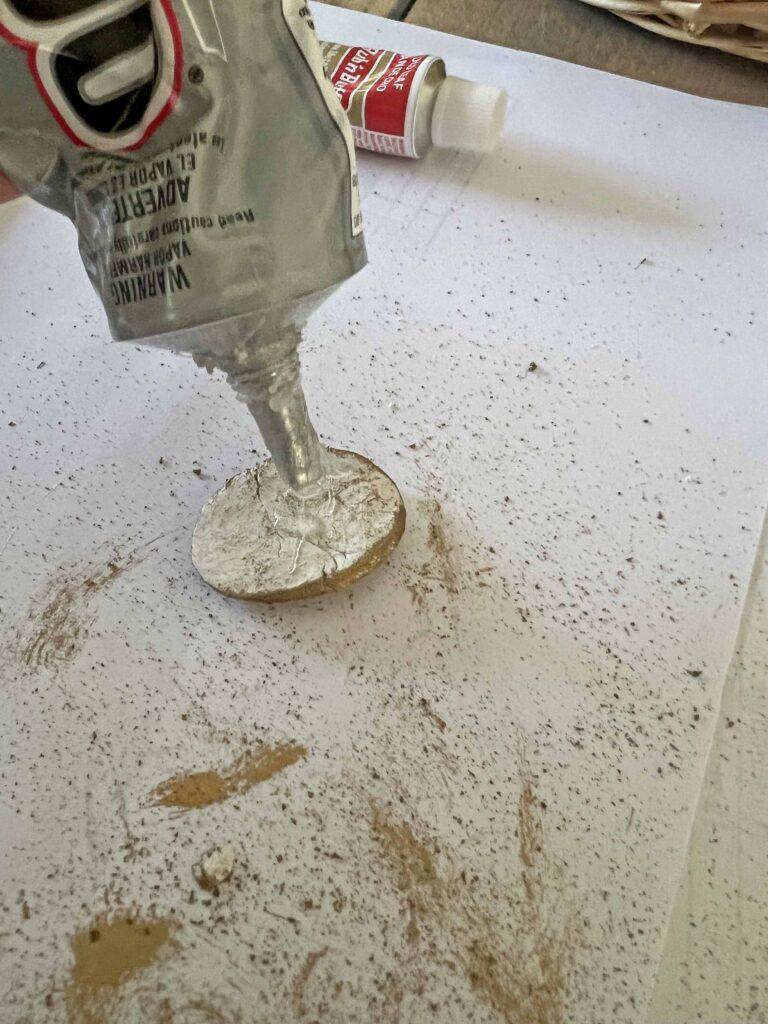
- E6000 Adhesive
- Assorted Ribbons
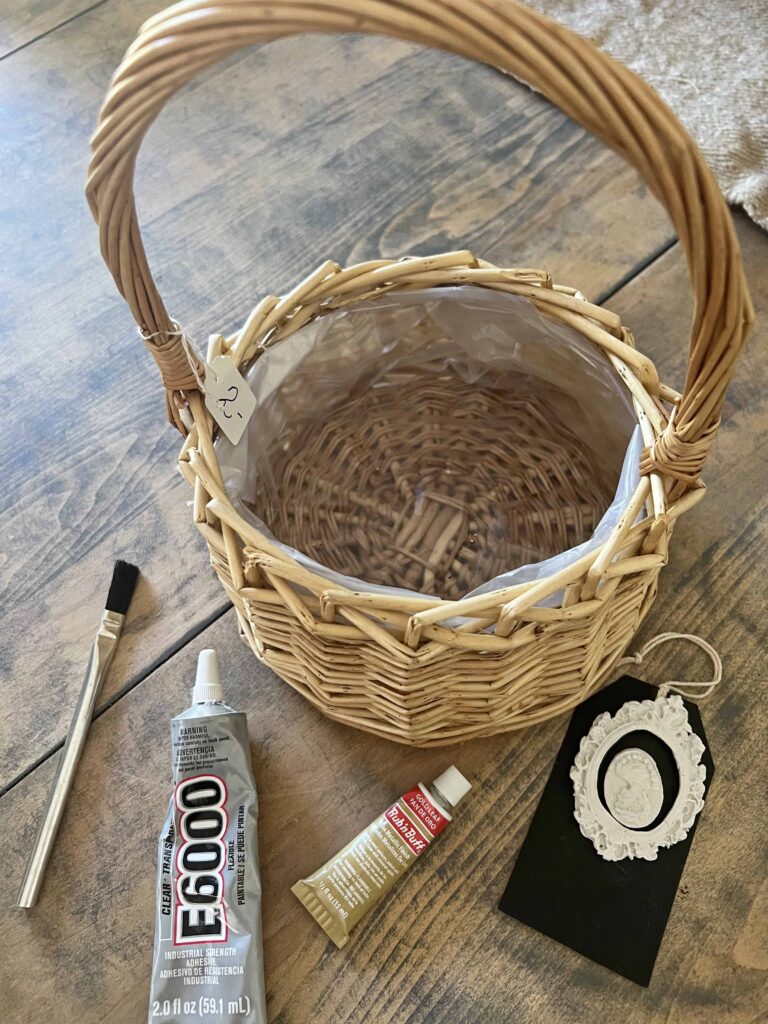
Tools
- Small Crafting Brush
- Scissors
Crafting Pro Tip: As I recommend with all my projects, read all the instructions through once and then re-read everything again. This way, you are familiar with everything you need, including supplies and tools, plus you know what to expect.
Instructions
- Read all the instructions and assemble all necessary supplies & tools
- **Create Air Dry Clay Pieces – Instructions here {How to Create Faux Green Wedgwood Jasperware Planters}
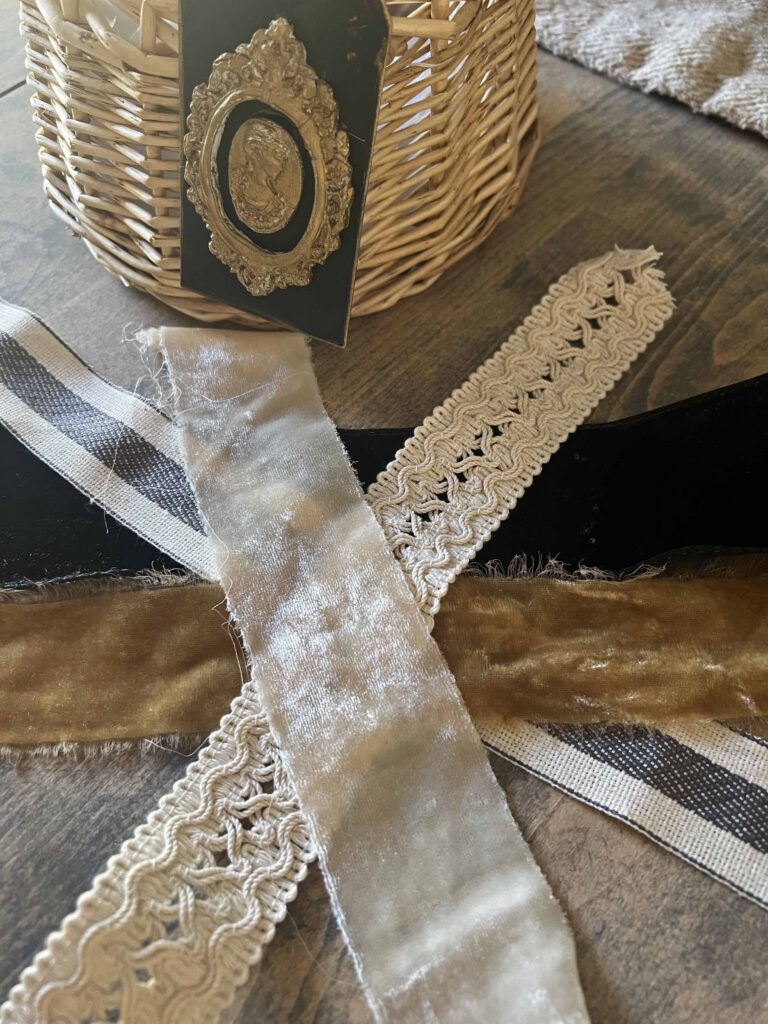
- Apply Rub-n-Buff on air dry clay pieces using small craft brush
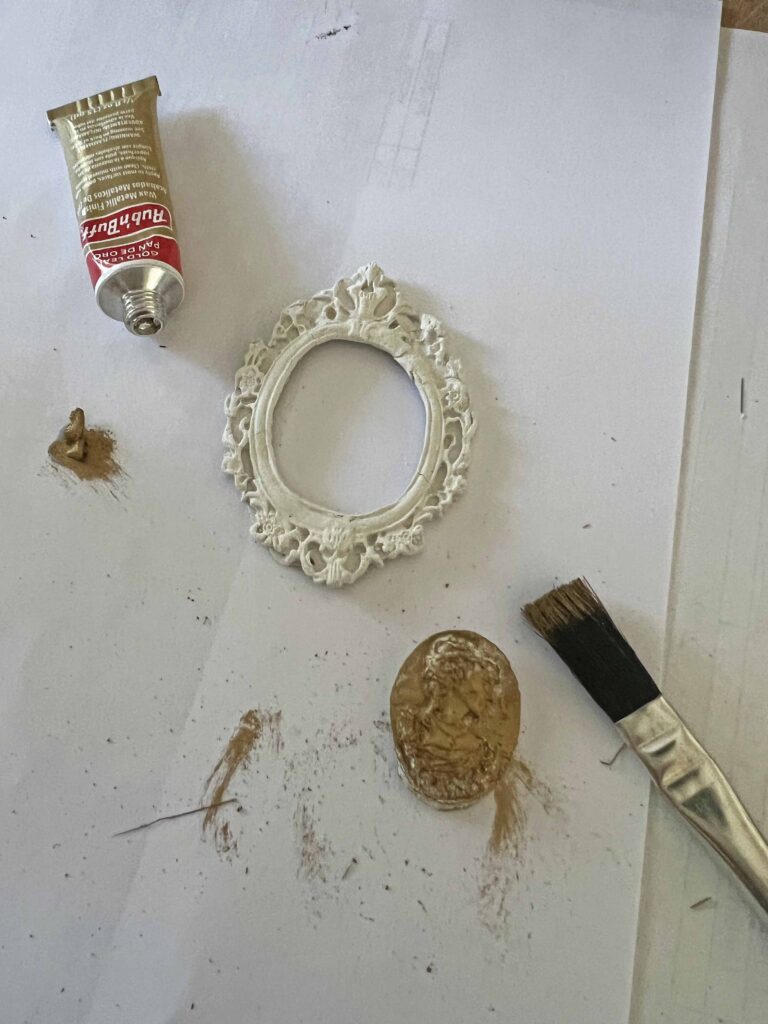
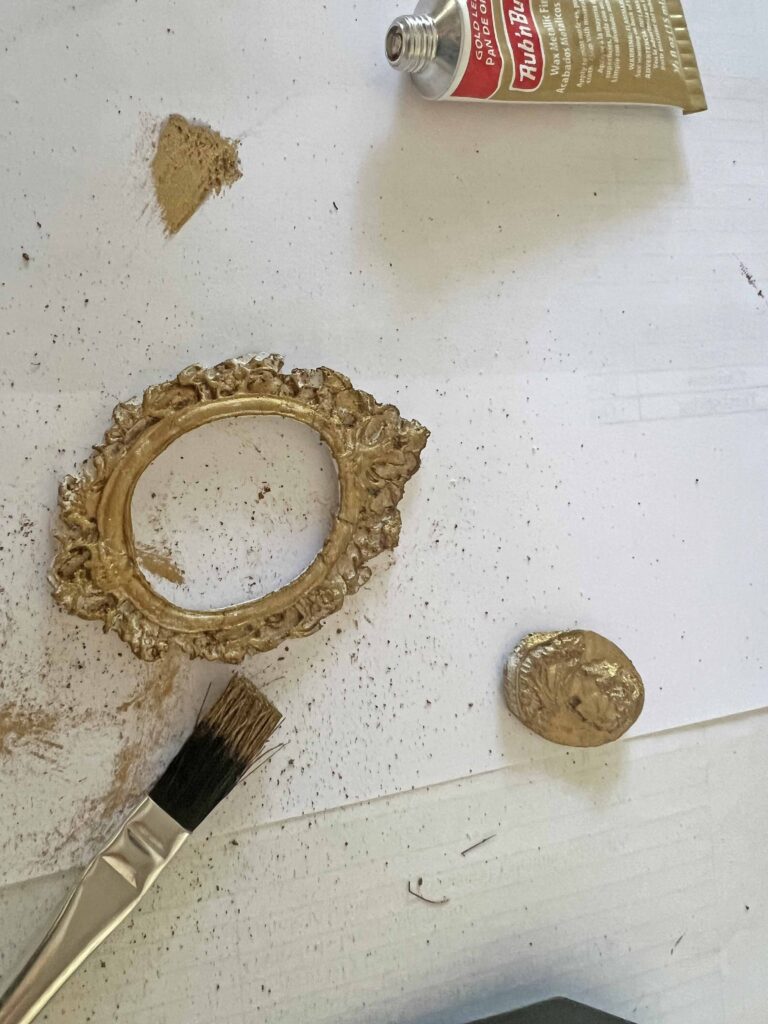
- Apply the Rub-n-Buff around edges of black tag to give it a distressed appearance and meld with gold clay details

- Using E6000 adhesive adhere air dry clay pieces centered on tag
- Allow glue to dry and cure thoroughly to secure bond
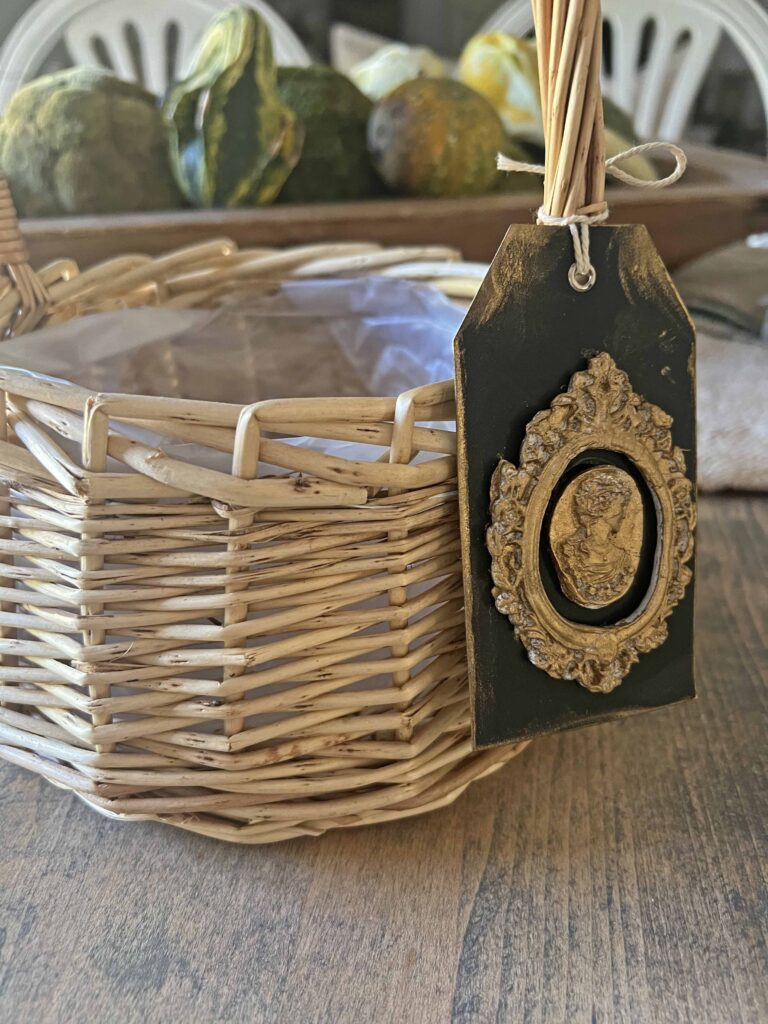
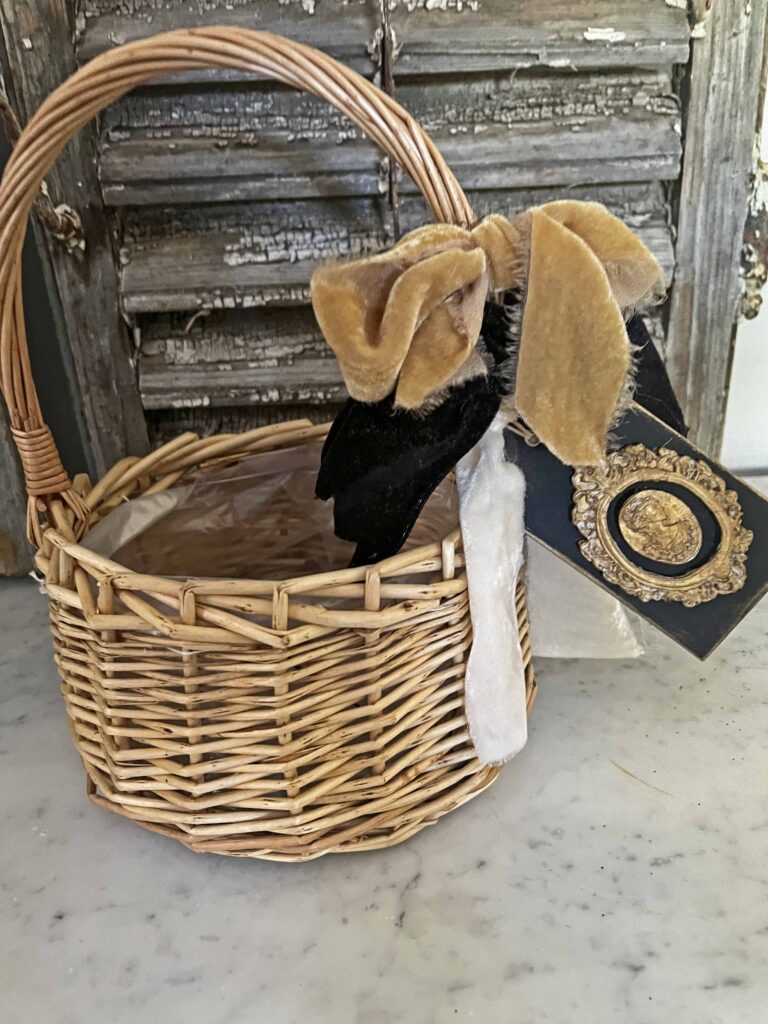
- Tie tag to one side of handle
- Select ribbons and tie on handle above tag using a bow or knot
- Voila! Decorate and enjoy your knew charming basket!

Tips & Tricks About the Super Easy Thrifted Basket Make-over
About the Rub-n-Buff
I used the Gold Leaf color of Rub-n-Buff, although they’re a few different gold color variations. I would recommend looking at the different color options and select the best one for your decor aesthetic. If gold doesn’t work for you, Rub-n-Buff also has silver and copper options. I found a small craft brush is the best way to apply the rub-n-buff to the air-dry clay pieces, since the bristles can get into all the crooks and crannies. When applying the gold detail to the tag though using your fingers is best. I got a bit messy with my gold on the tag so just start slowly.

About the Air Dry Clay
Since I created my air dry clay pieces when I worked on my faux Jasperware project, it streamlined the clay process. It was helpful to batch the clay process. Although allowing the air dry clay to dry on its own on a flat surface caused the pieces to warp a bit. They weren’t totally flat when I adhered them to the tag here, which made the process more challenging. In the future I would place something on the clay while it’s curing to prevent it from buckling. Keep in mind not to place anything too heavy on the clay though, which will flatten it and remove any of the detail.
About the Ribbons
When choosing your ribbon selections, I would recommend using an odd number. I chose to use velvet ribbons since I thought it complimented the luxe look of the gold framed cameo. I looked at a few different options, but ended on selecting ivory, black and gold velvet ribbons. The gold and ivory ribbons are some of my favorite to use in my decor, and I’ve included them in the shopping section below. The black velvet ribbon is from the Dollar Tree. Choose ribbon that compliments your style and decor.
About the Tag
On the same token, you can use different motifs on the tag. If you don’t want to create an air dry clay piece you can print an image that speaks to you and adhere it to the tag. Also a store bought tag with an image or message can also be used. You can stamp on a tag as well or adhere stickers. There are many options to create a similar look. Make it yours!
How to Style the Up-cycled Thrifted Basket
Plain & Simple
Sometimes less is more, and the basket can be displayed on its own with the pretty accents. The plain basket before the make-over might have not been all that to sit on a shelf by itself. Now with the pretty adornments, it can sit all alone with confidence.
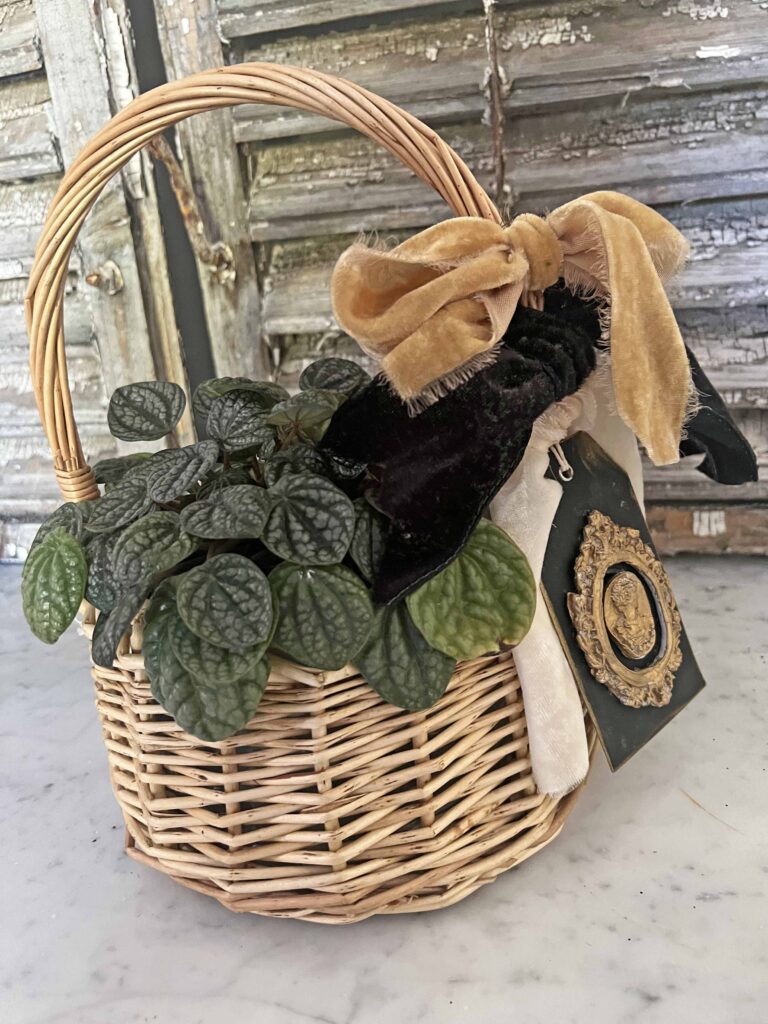
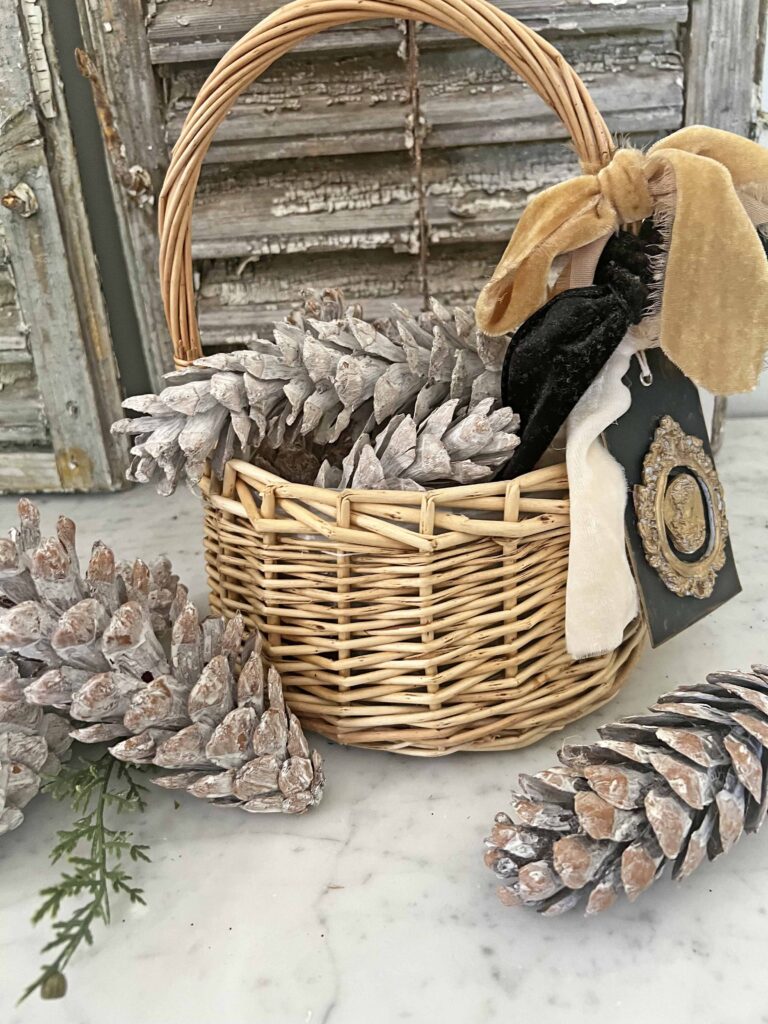
Plants & Flowers
Houseplants and fresh florals is an easy choice, since the basket is properly lined. You can always line a basket on your own, but when it’s already done for you at $2 dollars, it can’t be beat. Another option is to add a plastic saucer at the bottom of the basket if you want to include a plant, but a built in liner is easy and clean.
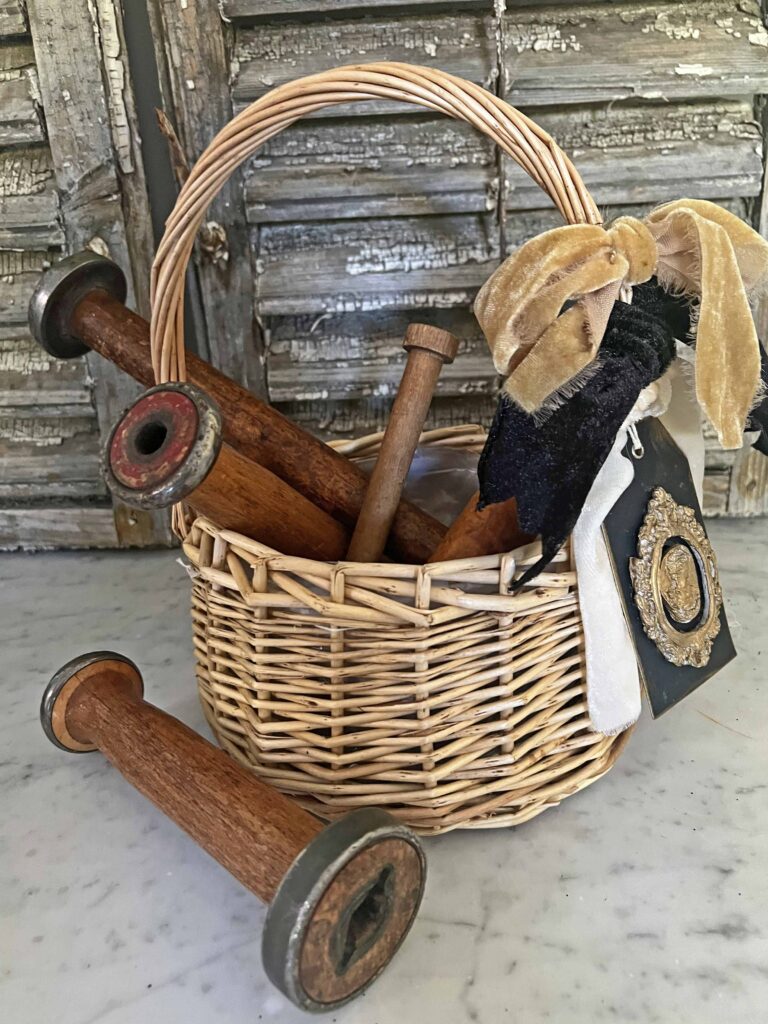
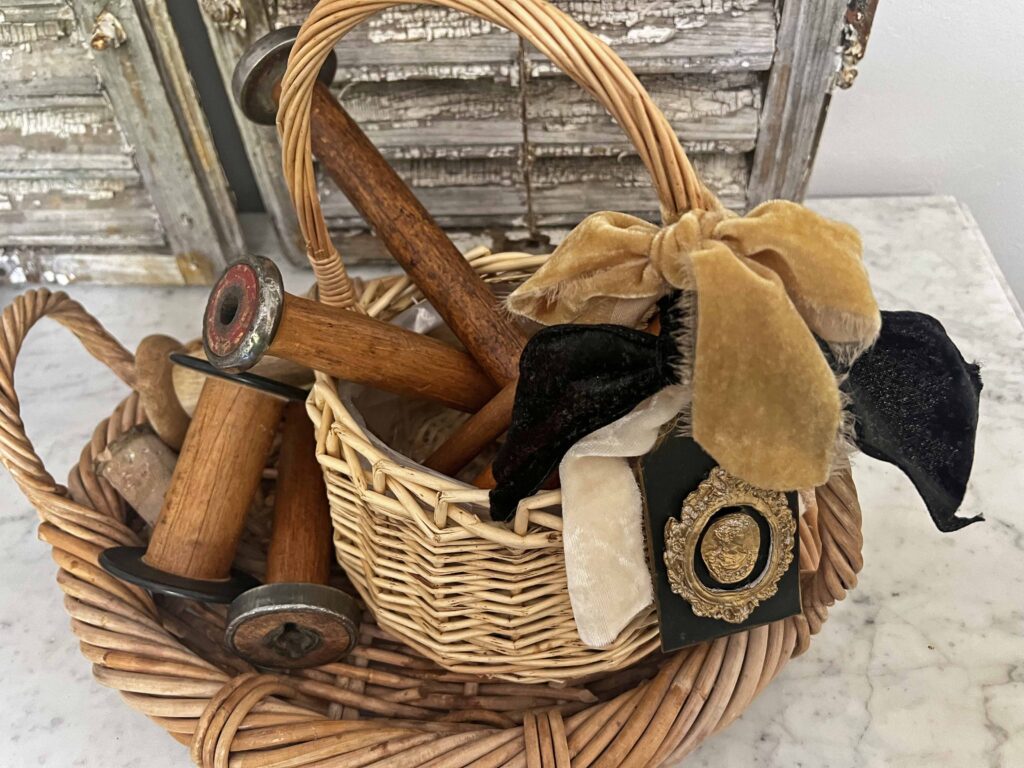
Display Collections
A basket is always a great option to hold collections and like items together. Here is a display of vintage spools, which I recently discovered while working on another project. I had totally forgotten I had these, which is a sign that maybe I own too many collections. Anyway, I like to display the spools with themed and seasonal ribbons. I’m planning a ribbon spool styling for fall, or wait, is it Halloween? Maybe it’s both; stay tuned…..
Closing Thoughts
I love how this super easy make-over makes this thrifted basket have that extra oomph. All the embellishments are simply tied to the handle, which can easily be removed. If I decide in the future to further alter the basket with paint or stain it’s easy to disassemble. When I glue something onto a basket or attach it more permanently, I always make sure it’s how I want the basket to stay. Although I’m pretty happy how this basket looks and it’ll stay like this for now.

Next time you’re at a thrift store or garage sale look for baskets that could use some TLC. It’s such a great deal and baskets always add great texture and character to interior spaces. Baskets fill a space with a humble and cozy vibe when they are styled and displayed well.
Baskets are fantastic pieces to use with holiday decor, and I can’t wait to dress this basket make-over for Christmas. Yes, Christmas is creeping up, and I hope you join me for all the seasonal goodness coming to the blog.


Shop for the Thrifted Basket Make-over Look
- Lined Flower Girl Basket
- Set of Lined Wicker Baskets
- Rattan Lined Basket
- Small Woodchip Basket
- Black Tags
- Gold Leaf Rub-n-Buff
- Air Dry Clay
- Cameo and Frame Silicone Molds
- E6000 Adhesive
- Gold Velvet Ribbon
- Ivory Velvet Ribbon
- Black Velvet Ribbon with Gold Wire


More Related Posts

Most Recent Posts
Love of beauty is taste. The creation of beauty is art.”
Ralph Waldo Emerson