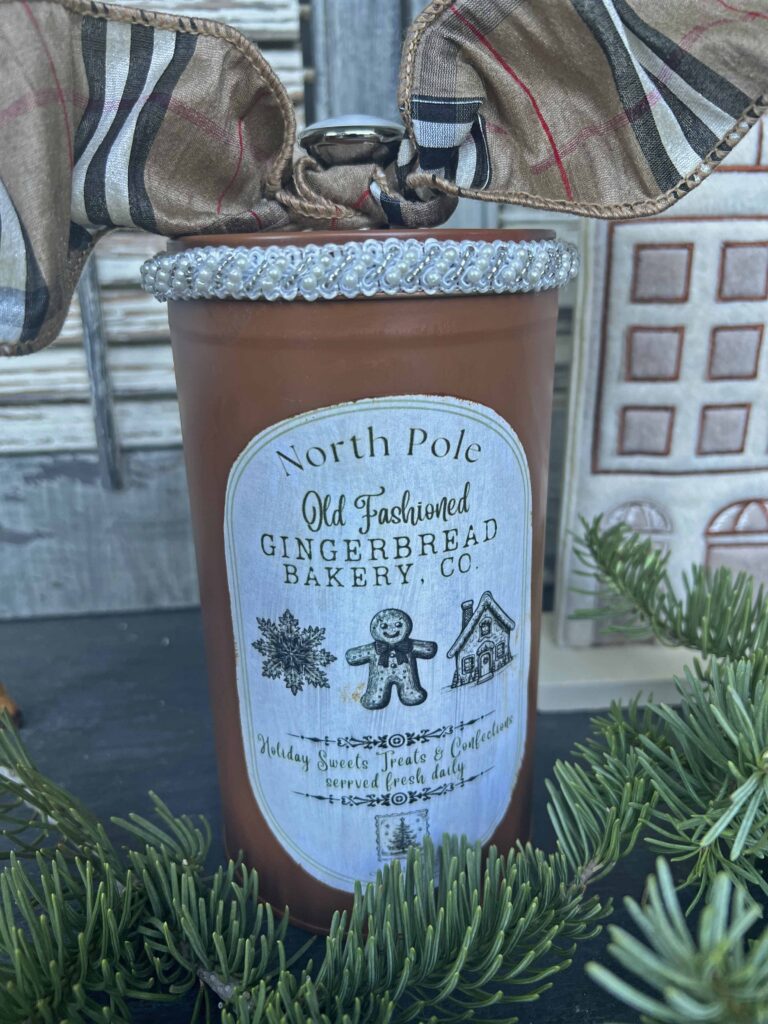
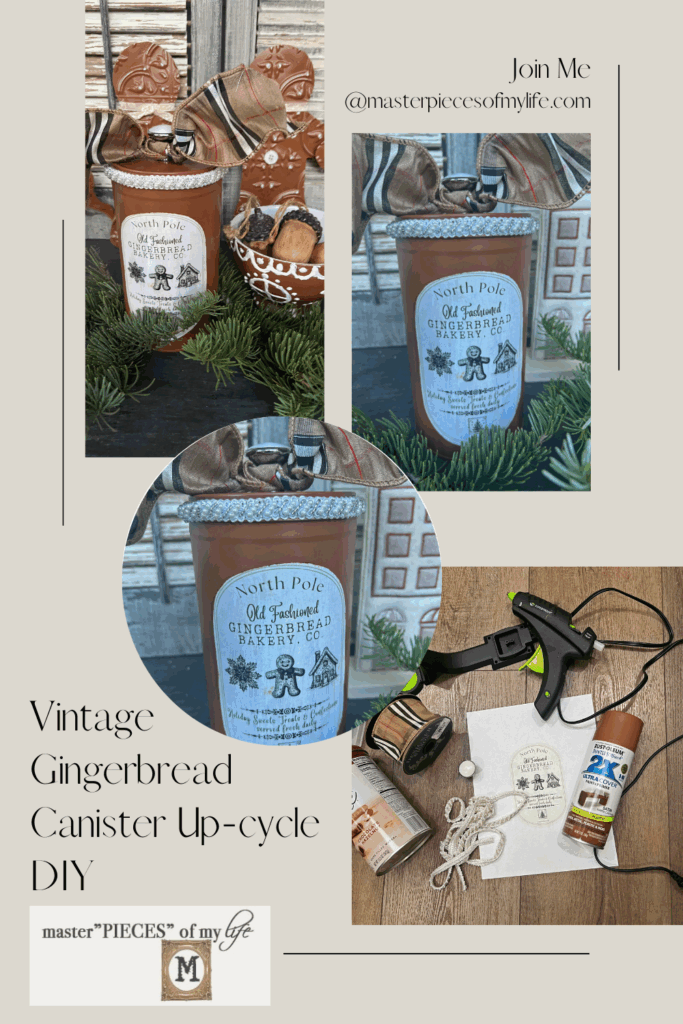
Vintage Gingerbread Canister Up-cycle DIY
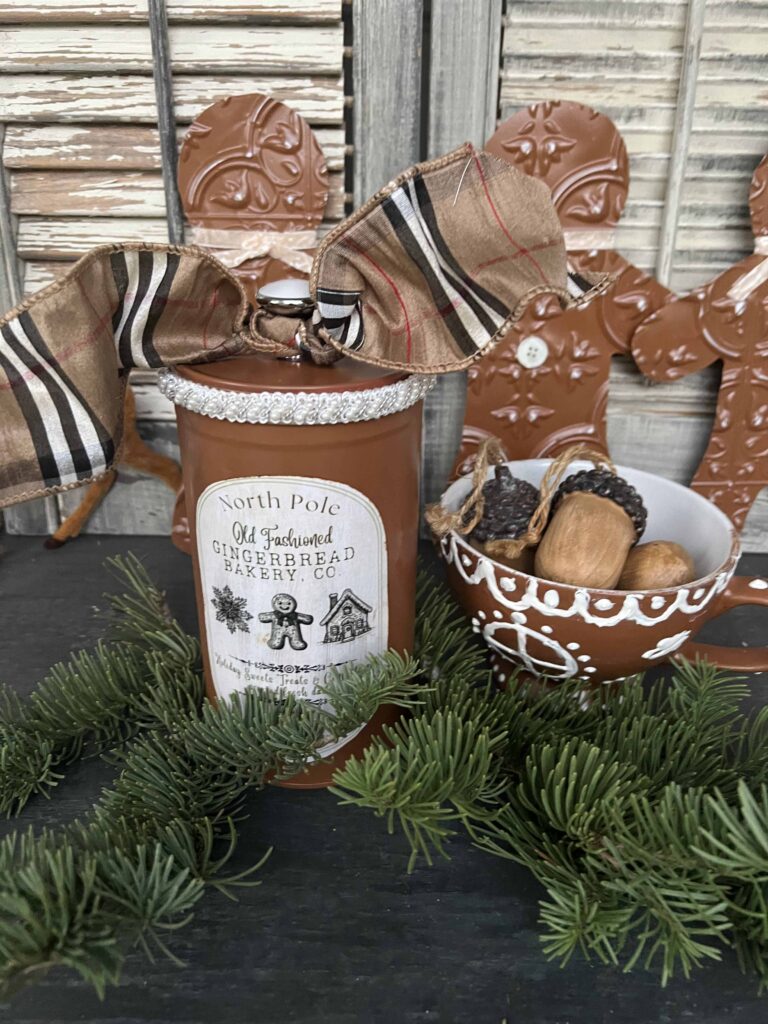
Are you loving all the gingerbread inspired decor right now? Today I am sharing how you can create an old fashioned inspired gingerbread canister from a recycle piece. I rescued an old cookie tin from heading to the landfill, and transformed it into a gingerbread door accent. Join me as we create a vintage inspired gingerbread canister up-cycle DIY.
*Affiliate links might be included for your convenience. These affiliate links mean a small commission is earned if you make a purchase using these links at no extra cost to you. As an Amazon Associate qualifying purchases support this website. For more information: Full Disclosure Policy.
Inspiration for the Gingerbread Up-cycle Canister DIY
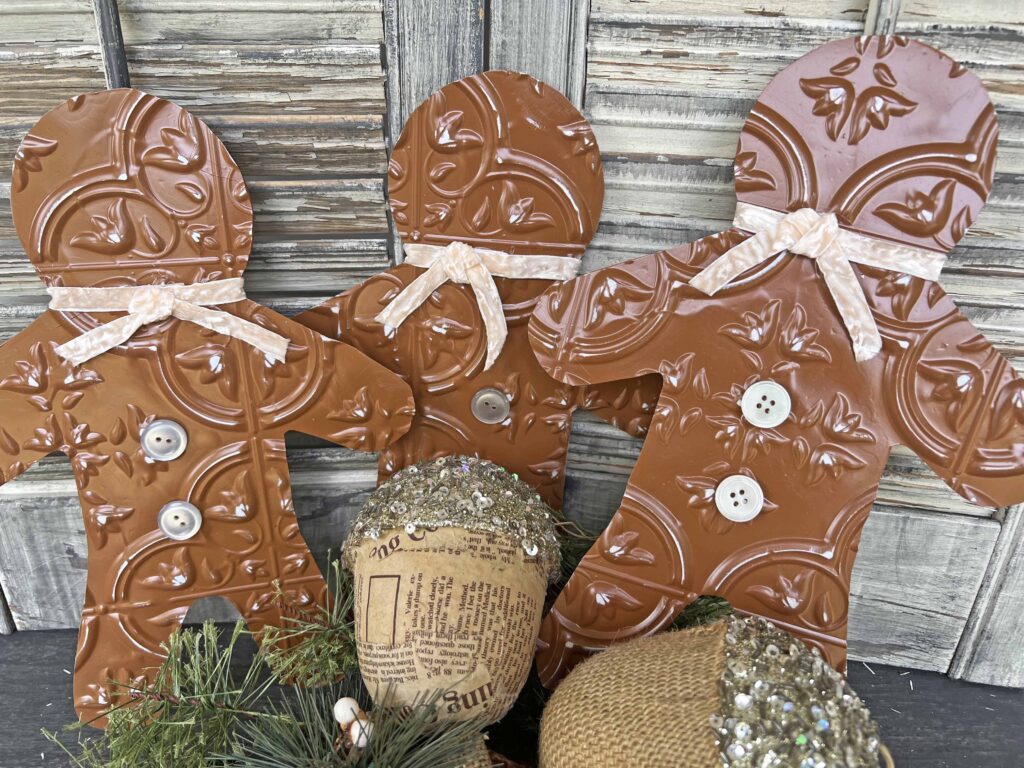
As I’ve mentioned before, I’ve been loving all the gingerbread decor for the holidays the last few years. I’ve created a few projects, which I share at the end of this post, and this is the latest creation. I enjoy creating my own seasonal decor since it tends to be more affordable and incredibly gratifying. Using a recycled item for the project also makes it environmentally conscious.

In a virtual decorating group I belong to someone posted a gingerbread styling which included a similar gingerbread tin. I immediately loved it and from the comments I was able discern it was a Michaels purchase from a previous season. All my searches to find the gingerbread tin produced nothing. What’s a girl to do? Create her own, that’s what. And here we are.
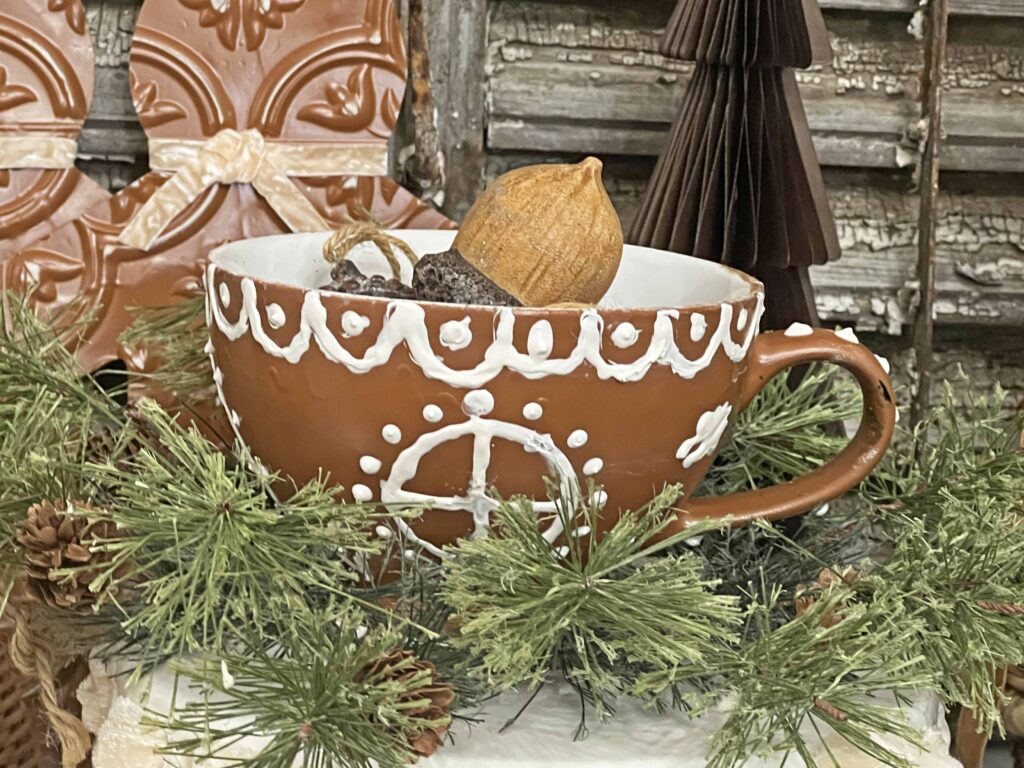
How To Create a Faux Gingerbread Tin
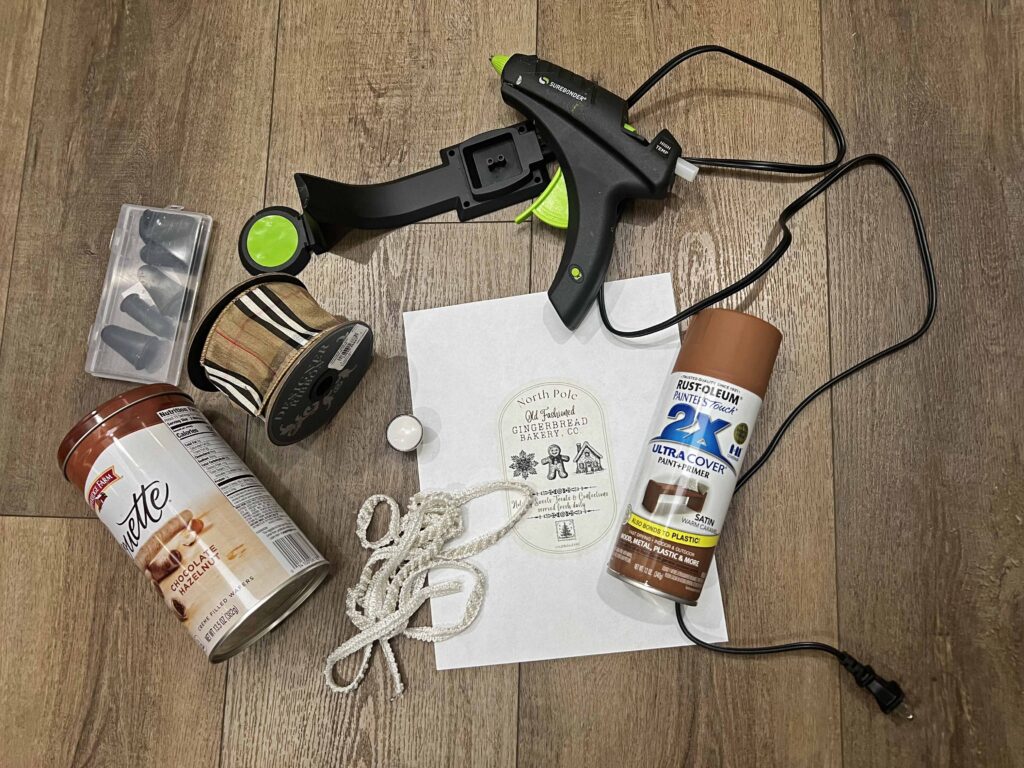
Supplies
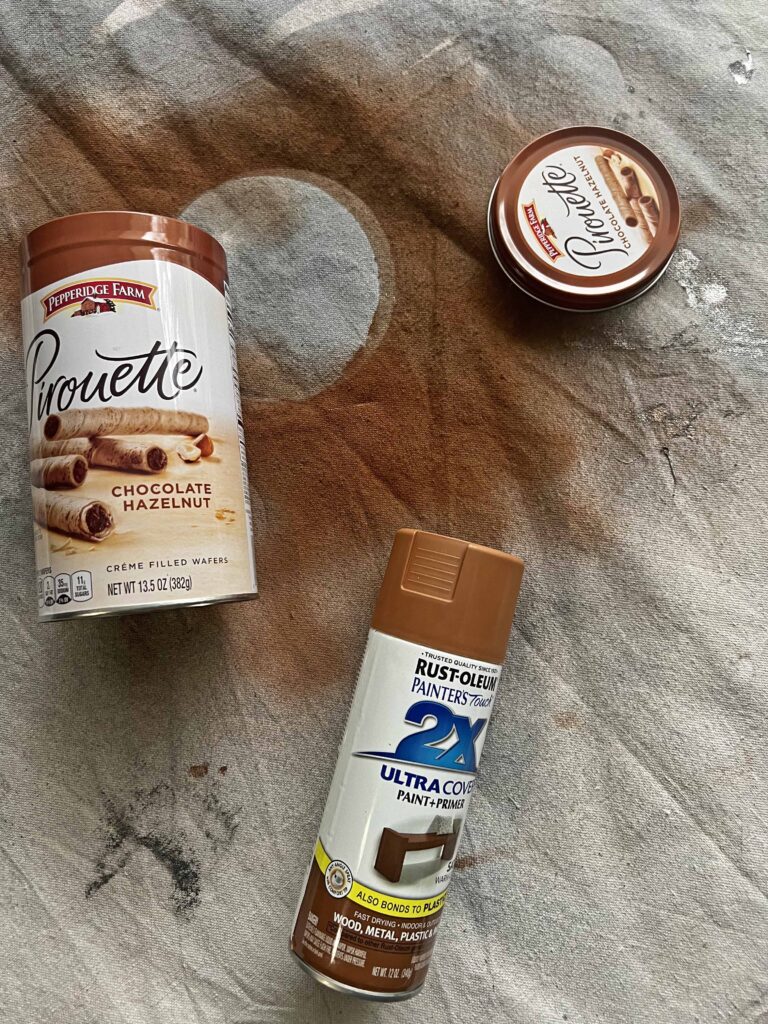
- Empty Canister (I used a Pirouette Cookies Tin)
- Warm Caramel Spray Paint
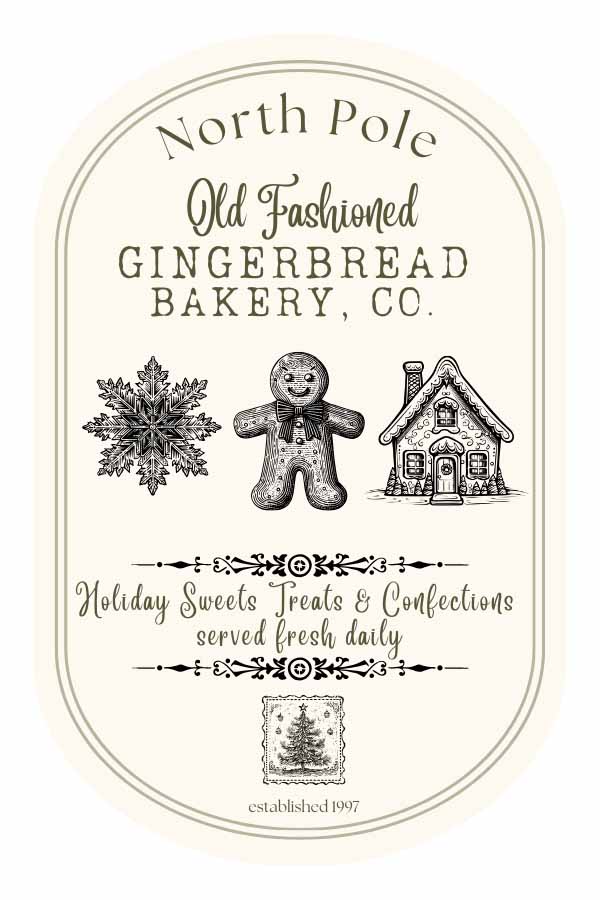
- Graphics Label
- Decoupage Medium
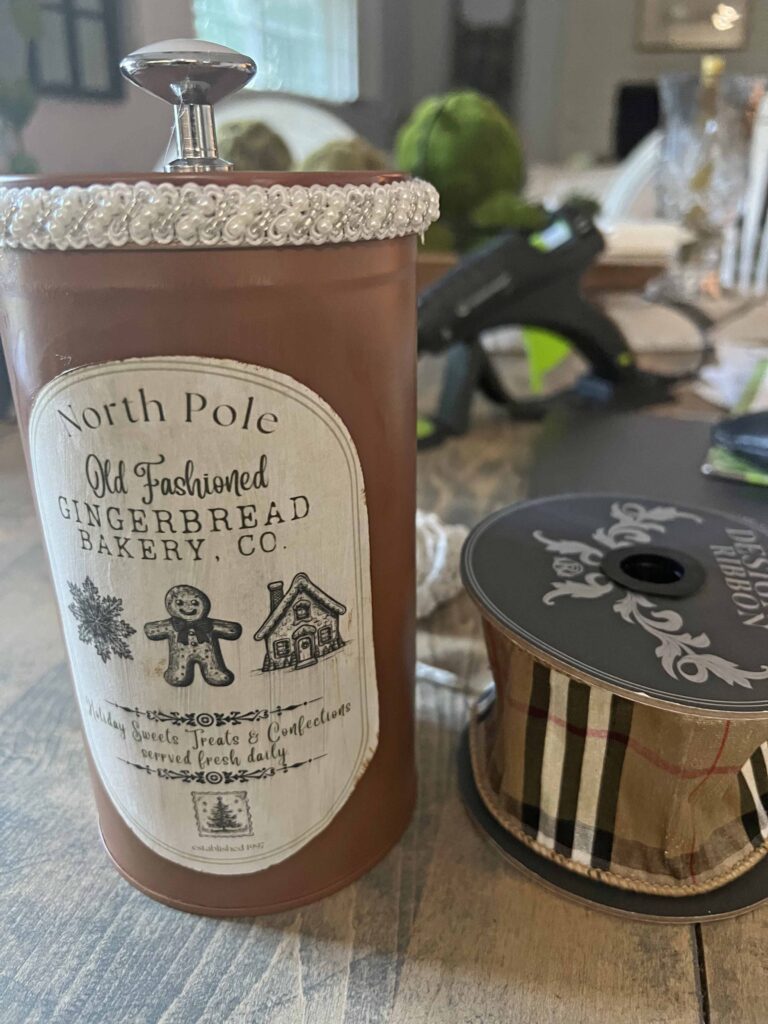
- Plaid Wire Ribbon
- Pearl Ribbon Trim
- Knob
Tools
- Hot glue Gun & Glue Sticks
- Silicone Finger Protectors
- Scissors
- Foam Brush
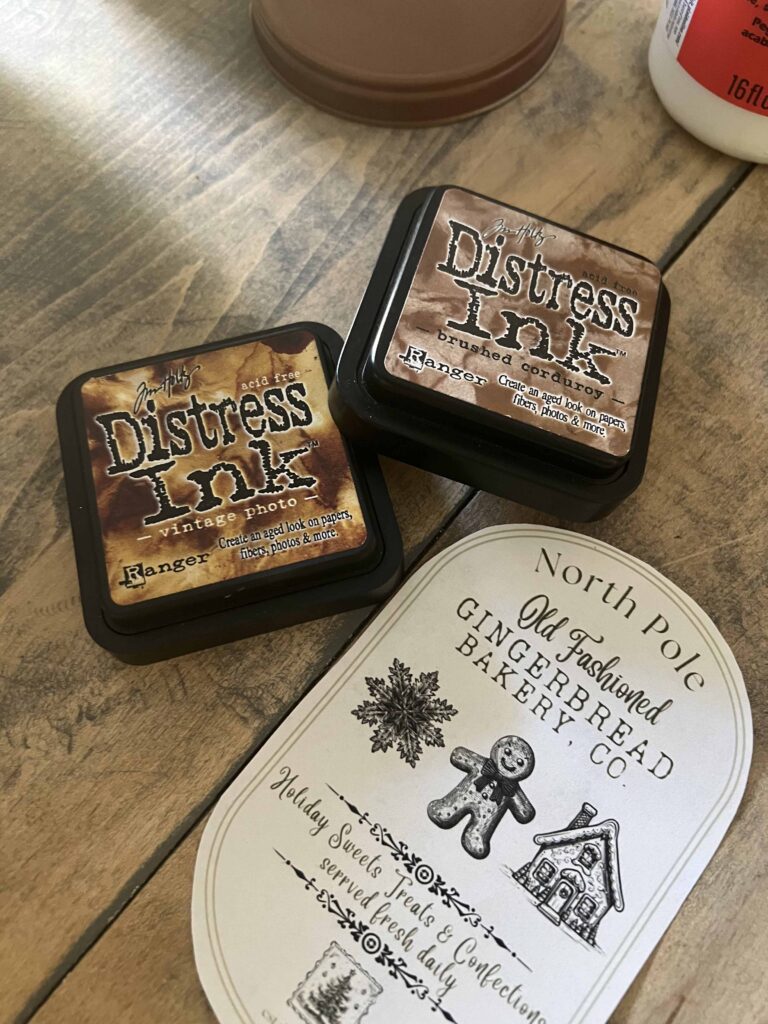
- Brown Ink Pad (optional)
Crafting Pro Tip: As I recommend with all my projects, read all the instructions through once and then re-read everything again. This way, you are familiar with everything you need and know what to expect.
Instructions
- Read instructions thoroughly and assemble all supplies & tools
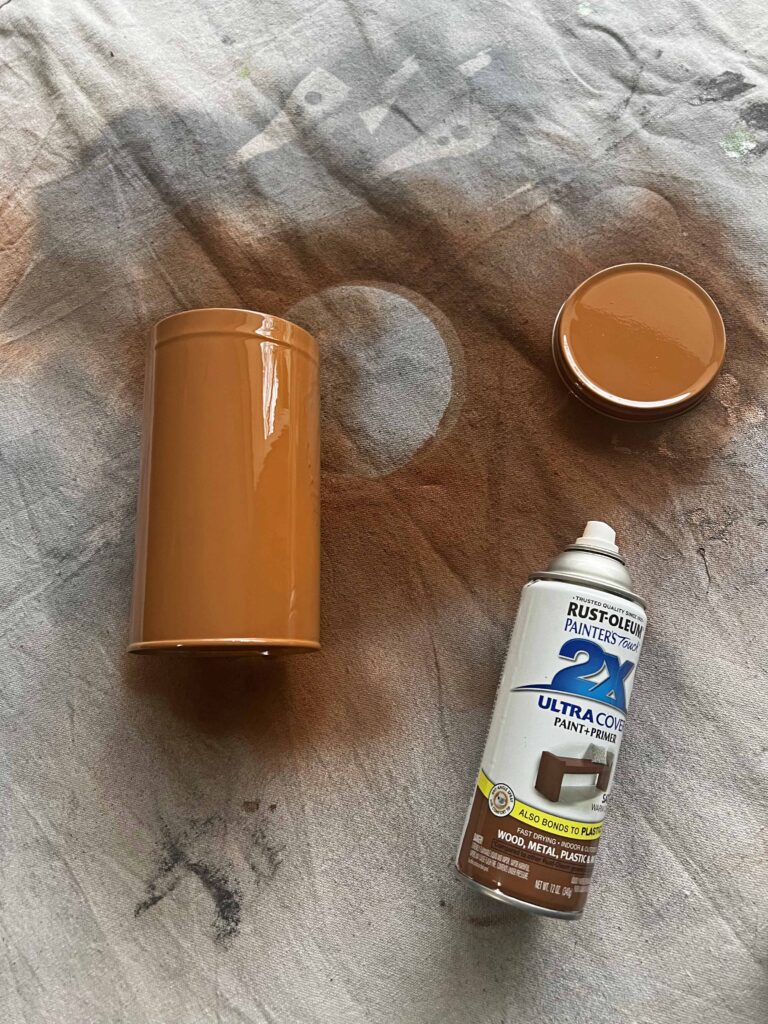
- Spray canister on all sides liberally (I only used one coat)
- Allow canister to dry fully (I recommend allowing it to dry overnight)
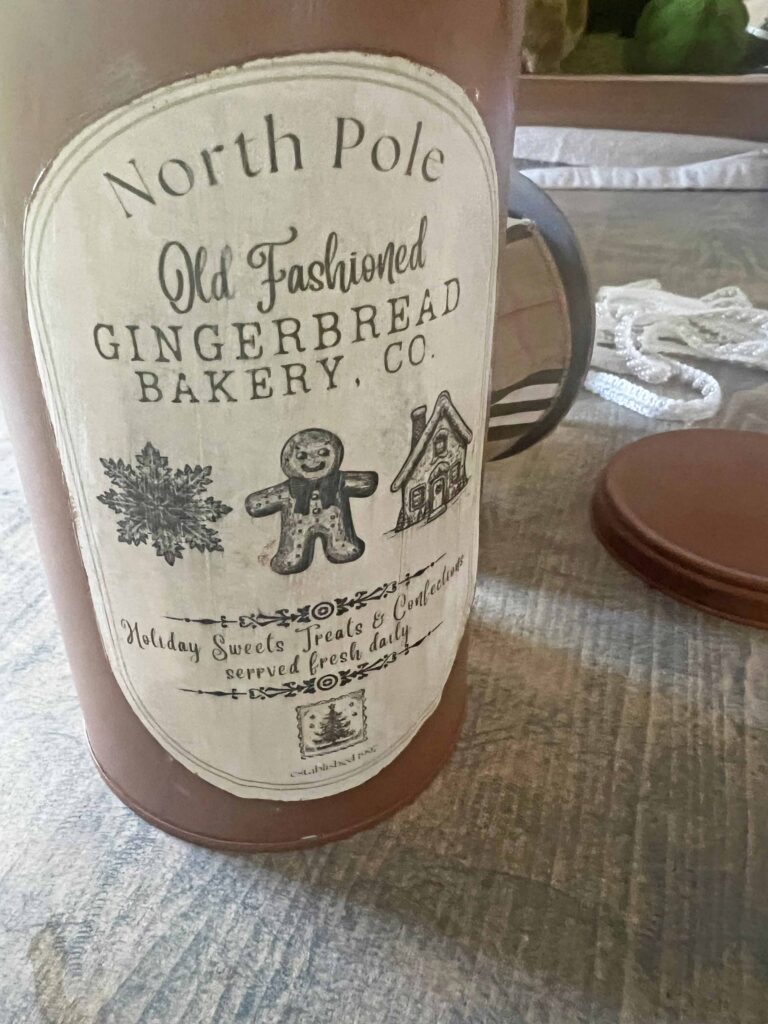
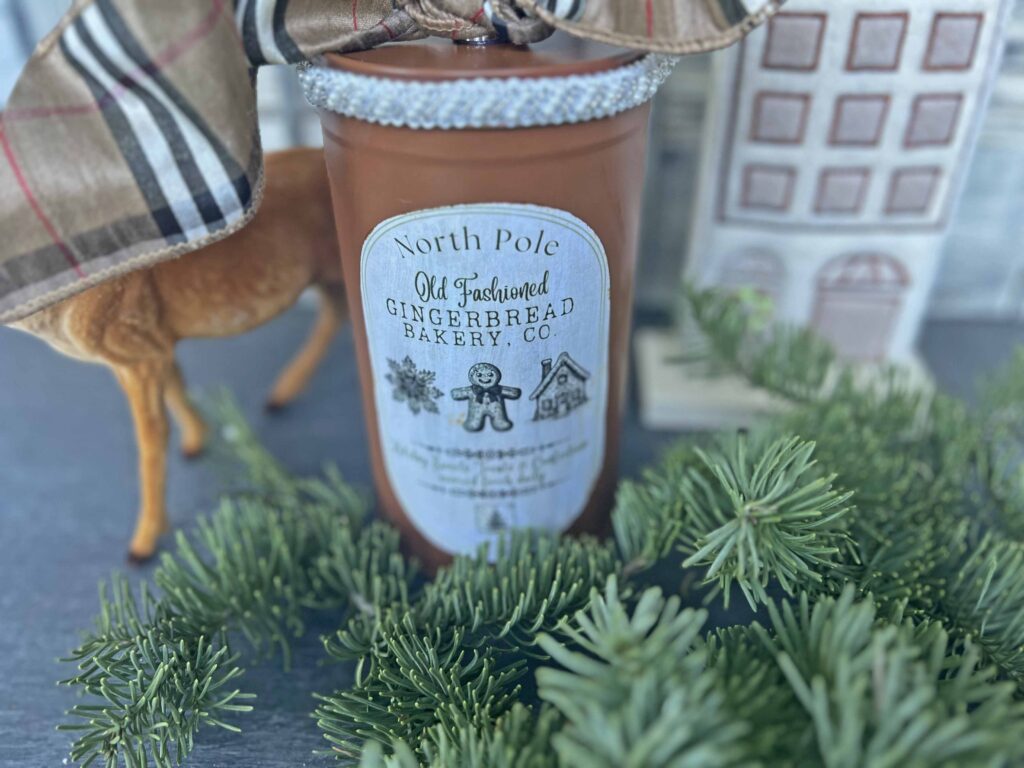
- Cut label to size
- Ink the edges of label to distress (this step is optional depending on your preference)
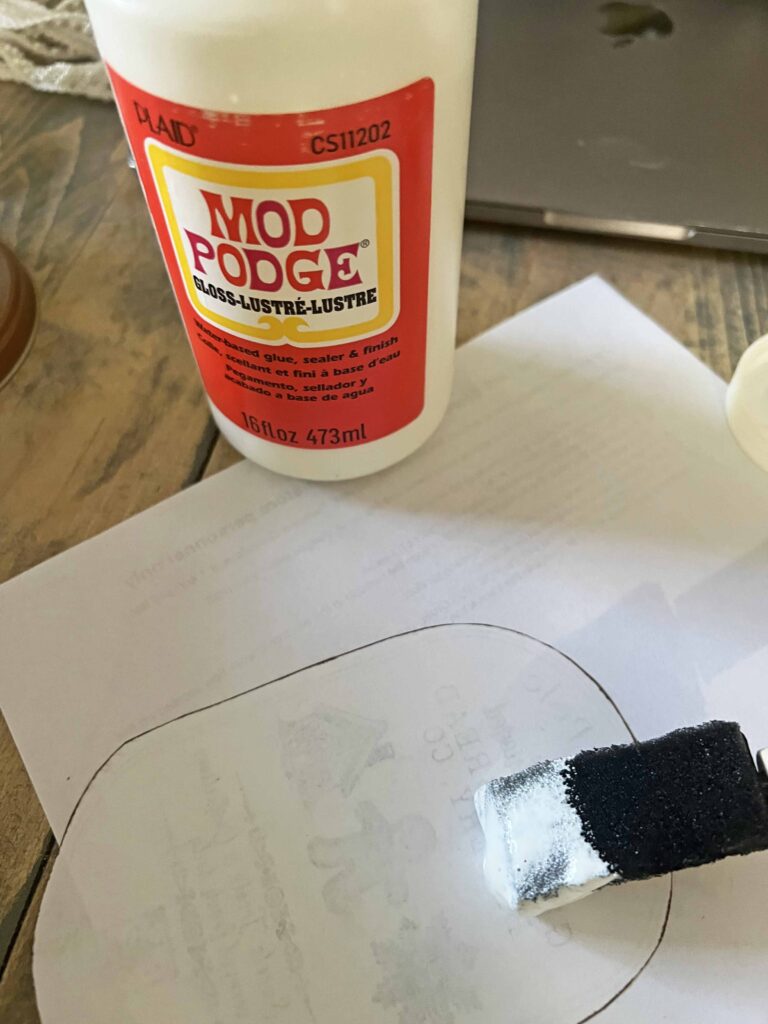
- Using decoupage medium adhere label to canister
- Apply coat of decoupage medium over label to seal
- Allow label to dry fully on canister
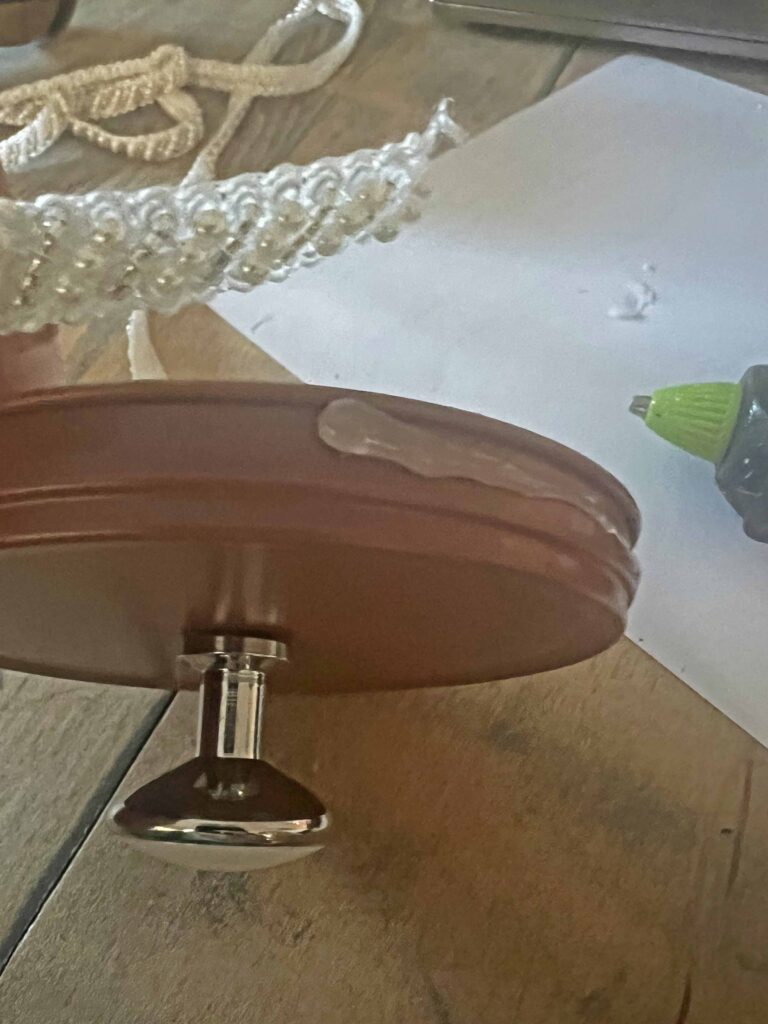
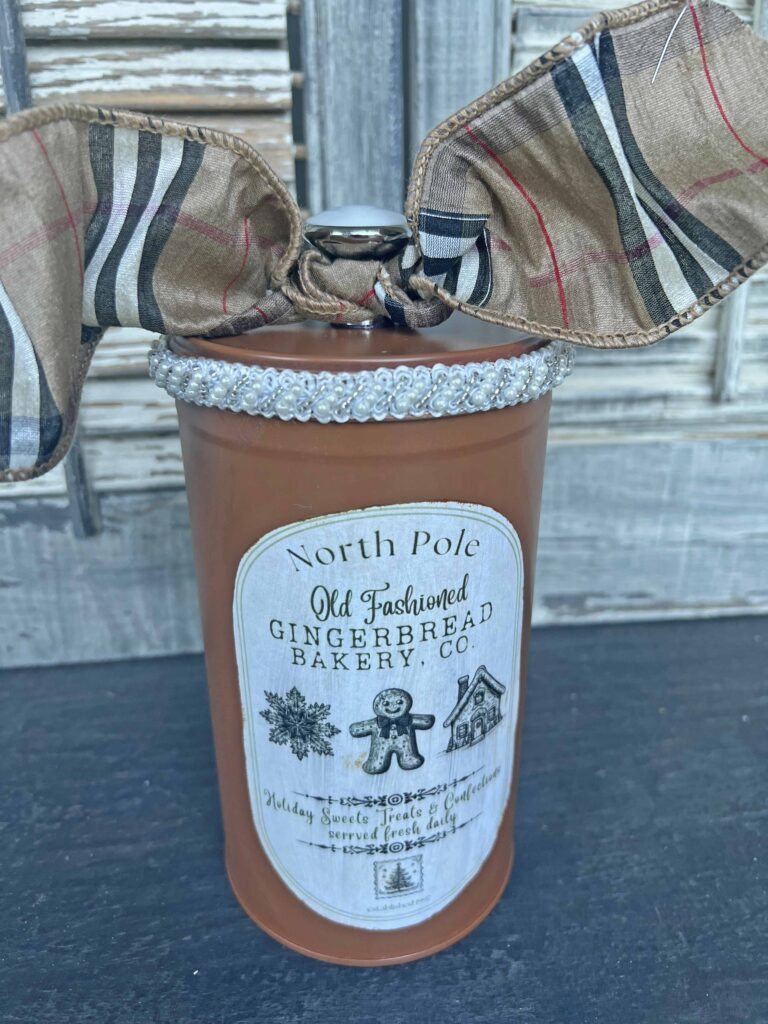
- Adhere decorative ribbon trim on edge of canister top using hot glue gun
- Adhere knob on canister top also using hot glue gun
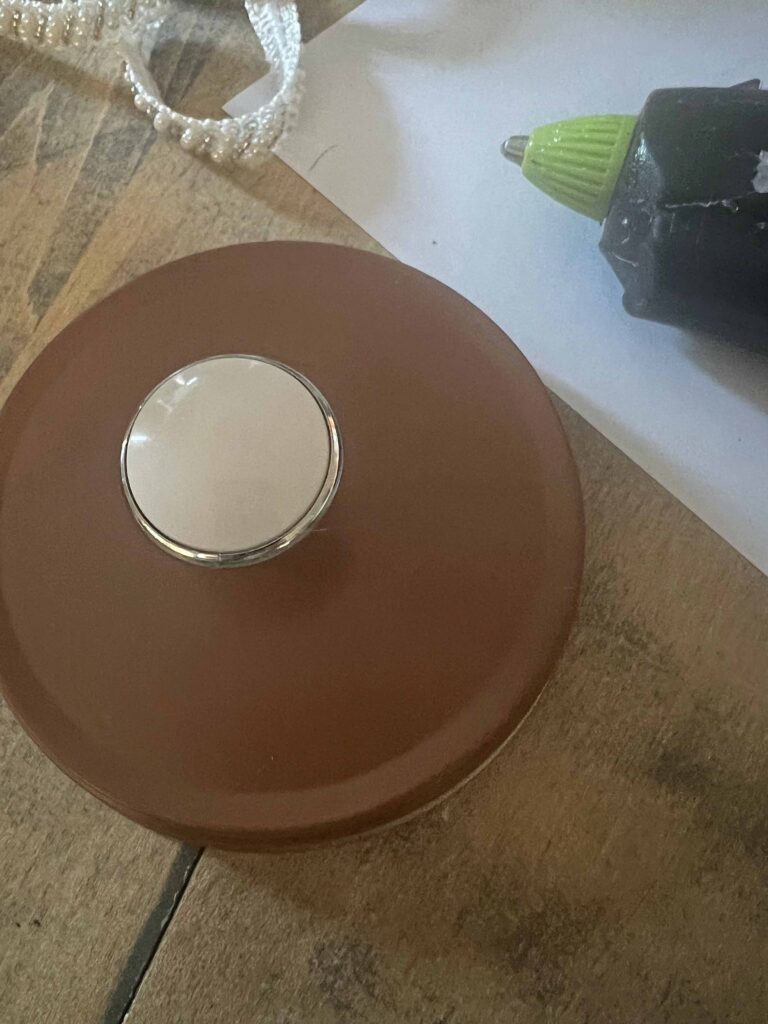
- Tie ribbon around knob
- Voila! Style and enjoy your new vintage inspired gingerbread tin with your Holiday decor
Tips & Tricks in Making a Gingerbread Up-cycle Tin
I saved my tin from the recycle bin, but you can find tons of tin varieties at thrift stores. If you are looking for the exact tin I used, I included the cookies in the shopping section for your convenience.
I created my own label for my gingerbread canister. If you would like to use the same one, I’m including it here for you to download. It’s fairly simple and neutral, which is my preference. You could always create a colorful version with gum drops and candy canes. Make the piece yours and make it work with your personal signature style.
The decoupage medium caused the printed label to run a bit. I use an inkjet printer at home so keep this in mind. Images printed on a laser printer would probably not have the same reaction. Personally I do not mind since it makes it look weathered and aged. I prefer distressed and grunge pieces so this is right up my alley.
I love how this turned out. Such a simple concept and extremely inexpensive. The accent pieces were left over from other projects. The pearl trim is from these ornaments which I will share soon on our green themed tree, and the plaid ribbon is from this bow. The new gingerbread canister plays nice with my other gingerbread DIYs, and a gingerbread styling in the kitchen hutch is coming your way soon.
Closing Thoughts
Thanksgiving was amazing, and it was so good to have our daughter home from college for the week. It was lovely to have the whole family together sharing meals, watching movies and enjoying family traditions. We actually deep fried our turkey for the first time and it was a huge success. Once again I use the term “we” loosely, since all I did was order the turkey, order the deep fryer from Amazon and take pictures. lol. In my defense though I took care of all the sides with the help of my sous chef. She headed back to school yesterday, and I’m already missing her.
We were able to get the Christmas tree decorated before Lexi, aka Miss M left. I’m continuing to deck the halls around here, and the projects which are done make me super happy, but all around them is a bit of chaos at the moment. I hope to have all the decorating done by the end of the week, and I will keep you posted along the way. Thanks for stopping by and I will see you next time.

Shopping the DIY Gingerbread Canister Look
- Pirouette Cookies Tin
- Warm Caramel Spray Paint
- Mod Podge Decoupage Medium
- Craft Foam Brushes
- Plaid Ribbon
- Pearl Trim

More Related Posts

Most Recent Posts
Christmas is like candy; it slowly melts in your mouth sweetening every taste bud, making you wish it could last forever.”
RICHELLE E. GOODRICH
Super cute! Love all of your gingerbread decor!
Thanks Susan. And there’s more coming. ? XO- MJ
This is such a cute and creative upcycle, MaryJo! I love how you left the ink running a bit. It totally gives it a vintage vibe and that loved over time feel. It’s fabulous! My Mom has a collection of gingerbread in her kitchen so I’m excited to try this idea too. It’s so sweet you guys were able to spend lots of time together as a family for Thanksgiving. I can’t believe you fried a turkey – that is so brave. It’s something else I’ve always to try but there are so many “gone wild” videos it makes me pause every single time 🙂 Now that yours has worked out I’m might give it a second chance. Sending you lots of hugs and hoping your holiday season is a special one, CoCo
Oh! Thanks so much CoCo. I love the time worn look as well. I am so happy it’s appreciated. As far as the turkey goes, the trick is to turn off the heat when you are submurging the turkey. After that it’s smooth sailing and fairly quick. My husband did a bunch of research on line since we’ve heard and seen all this horror stories. lol. Anyway, wishing you the best holiday season sweet friend. XO- MJ