No Sew Laurel Wreath Pillow DIY
Laurel wreaths symbolize honor, achievement, and status. I love laurel wreaths and my eye is always drawn to them. They have been around for thousands of years dating back to ancient times. I have been wanting to create this no sew laurel wreath pillow for awhile now, and I wish I had done it sooner. It was so easy and it looks totally boujee. Come on in and let me share how to make this for your own home.
*Affiliate links might be included for your convenience. These affiliate links mean a small commission is earned if you make a purchase using these links at no extra cost to you. As an Amazon Associate qualifying purchases support this website. For more information: Full Disclosure Policy.
Inspiration for the Laurel Wreath Pillow Design
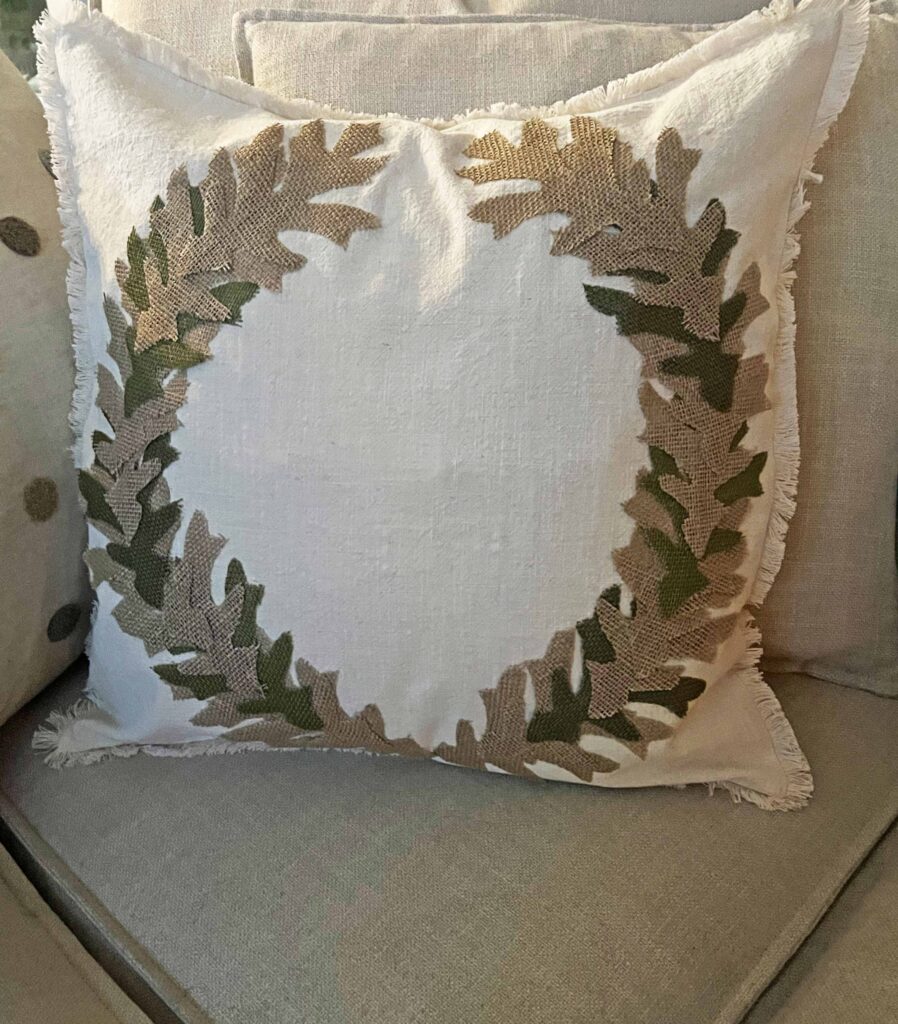
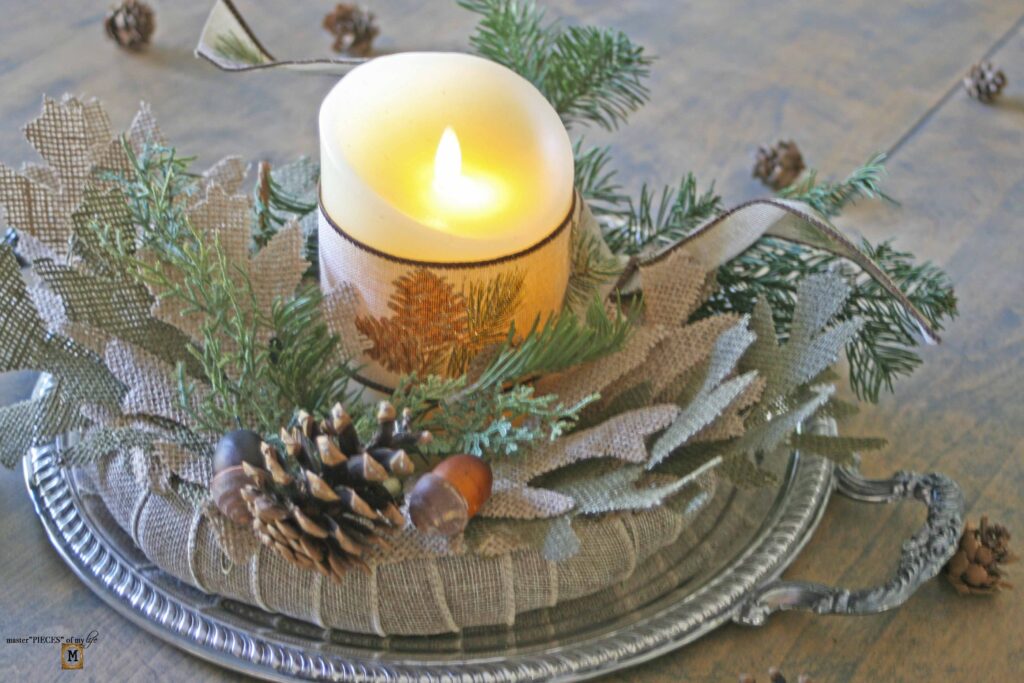
Although a laurel wreath traditionally consists of laurel leaves (hence the name), I used a little bit of creative license here and used what I believe are oak leaves. I’ve seen many laurels with different designs so I am not alone here. Anyway these burlap leaves from the Dollar Tree are fabulous and wonderful to use for many projects. You can see how I used them here {holiday candle ring from a fall burlap leaf wreath} and here {Toile Decoupaged Dollar Tree Pumpkin Sign Craft}. But I really wanted to make them shine as the star of the show and here we are.
How To Make a No Sew Laurel Wreath Pillow
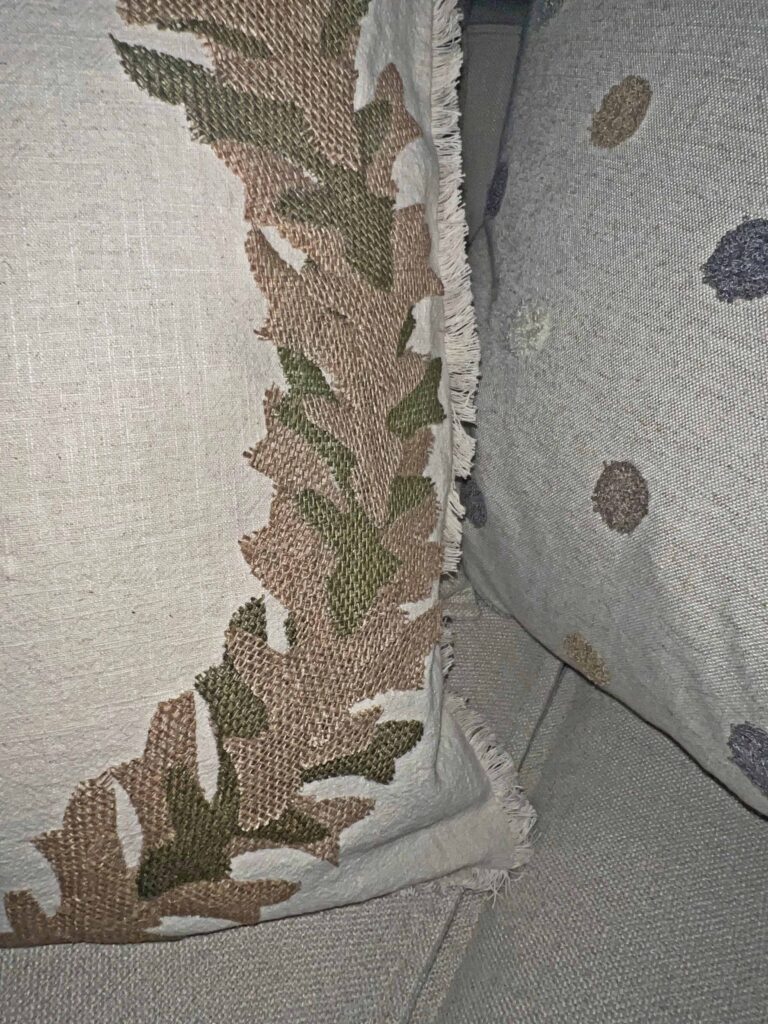
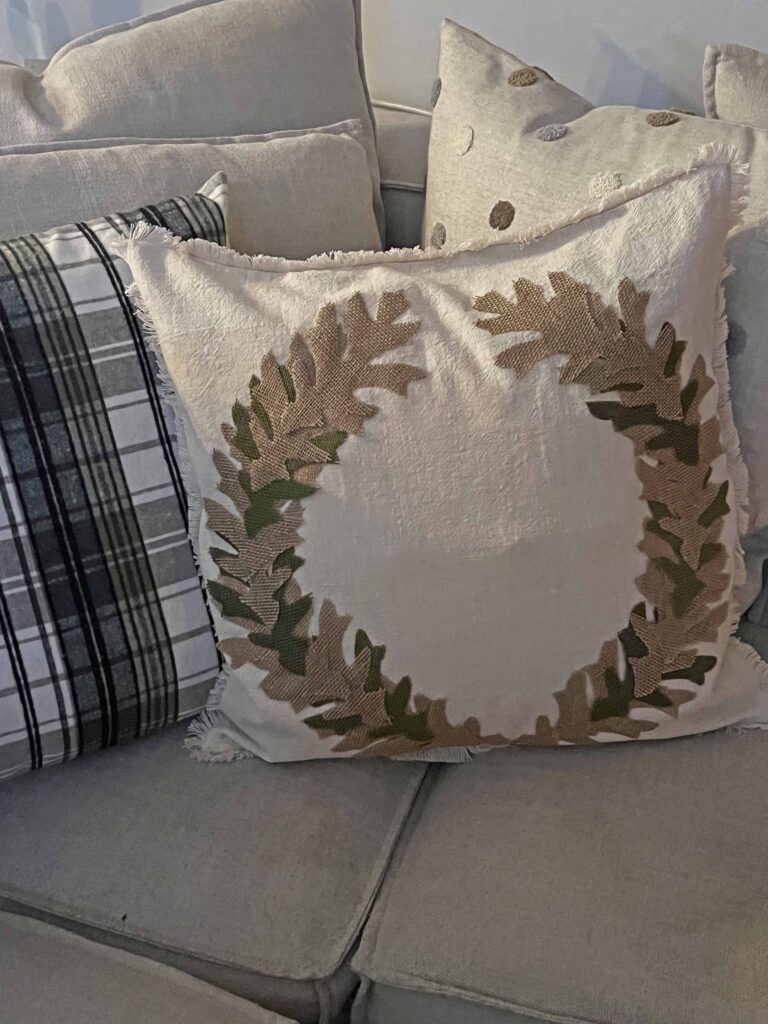
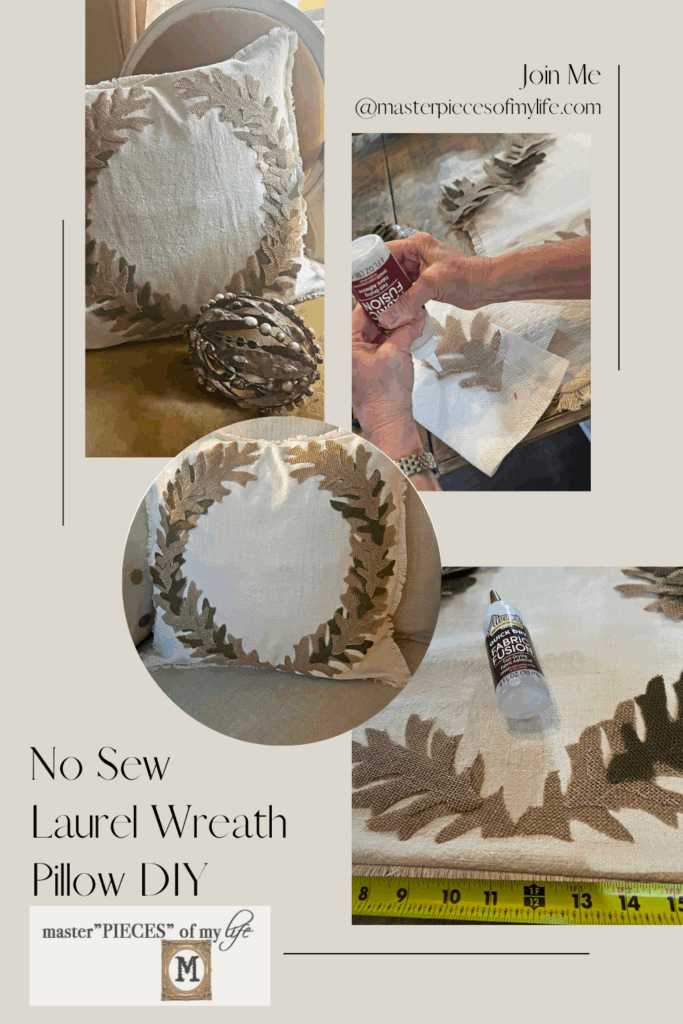
This no sew laurel wreath pillow is fairly simple to put together with an already made pillow cover and some burlap leaves used as appliqués. The most important detail is to layout and keep your leaves balanced as you adhere them to the pillow cover in the laurel shape.
Supplies
- Pillow Cover
- Burlap Leaves (I used 22 leaves)
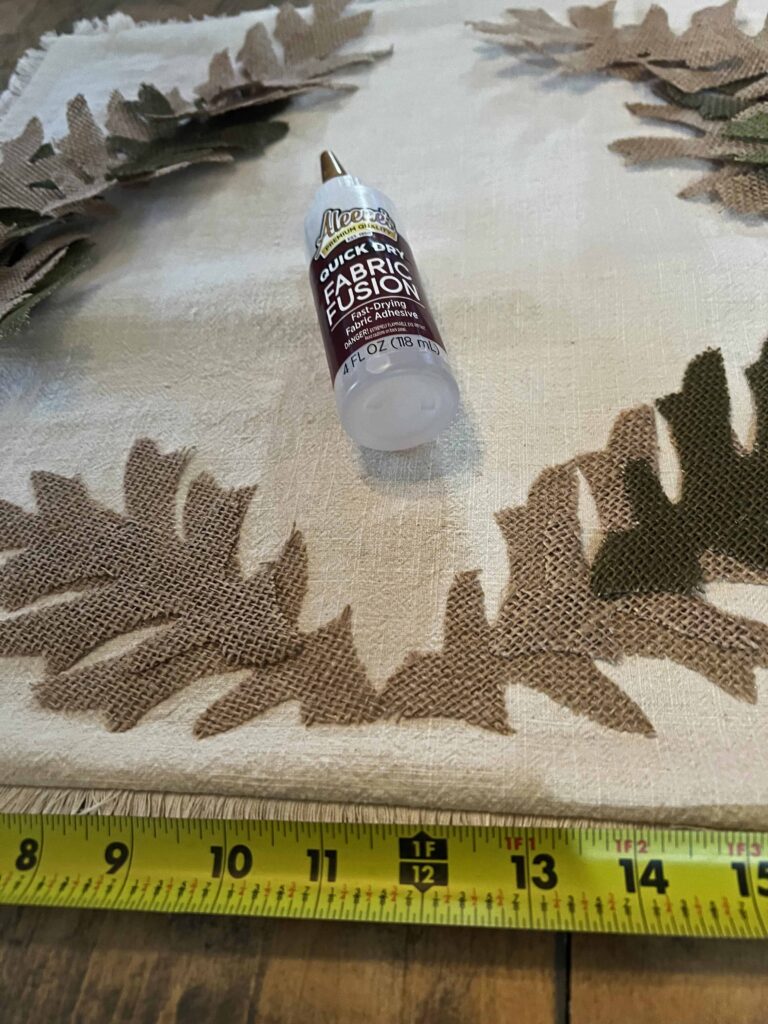
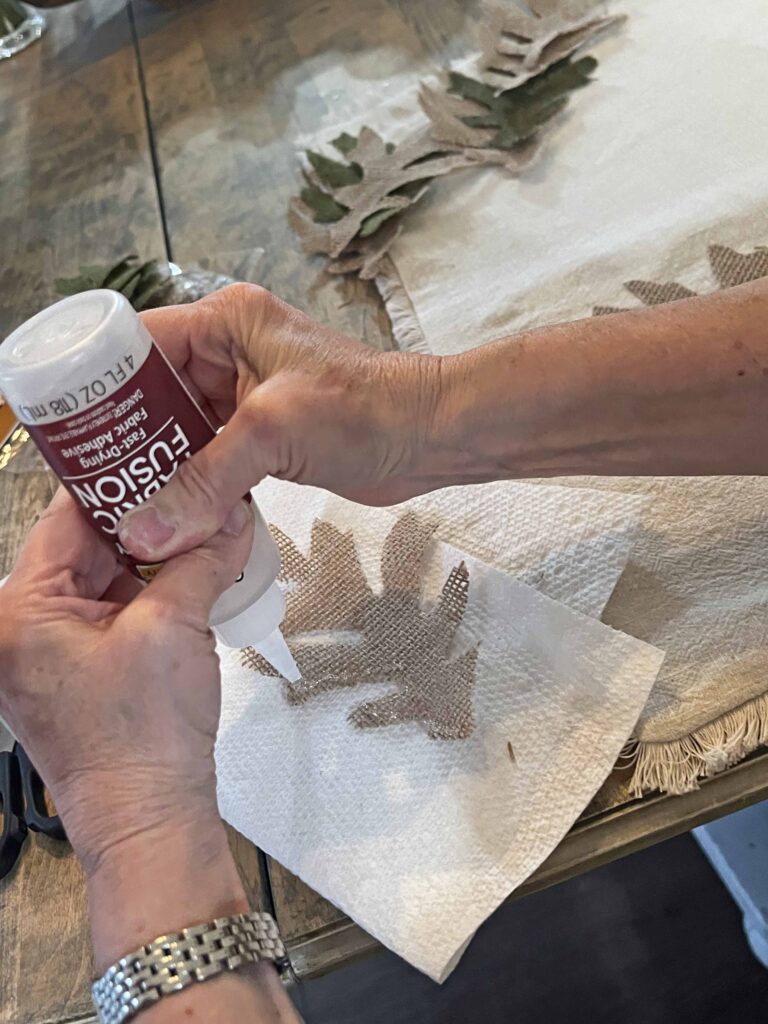
- Fabric Fusion Permanent Adhesive
Tools
- Iron
- Tape measure or ruler
Crafting Pro Tip: As I recommend with all my projects, read all the instructions through once and then re-read everything again. This way, you are familiar with everything you need and know what to expect.
Instructions
- Read instructions thoroughly and assemble all supplies & tools
- Iron pillow cover to remove all wrinkles and make fabric as smooth as possible
- Remove wires from burlap leaves
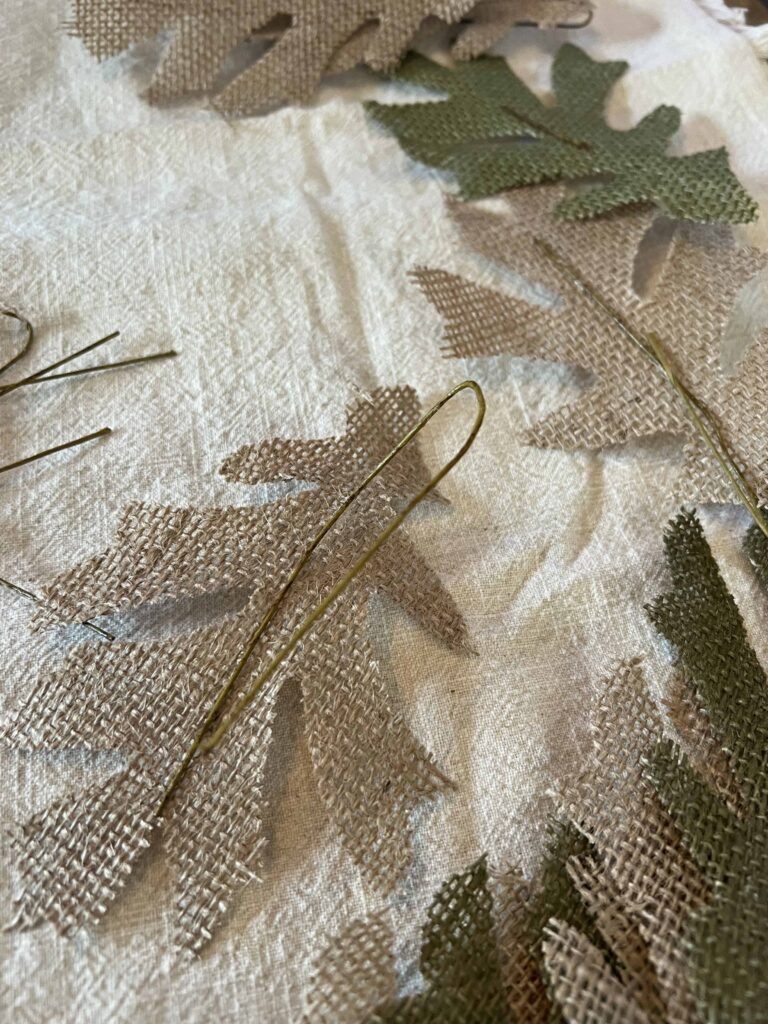
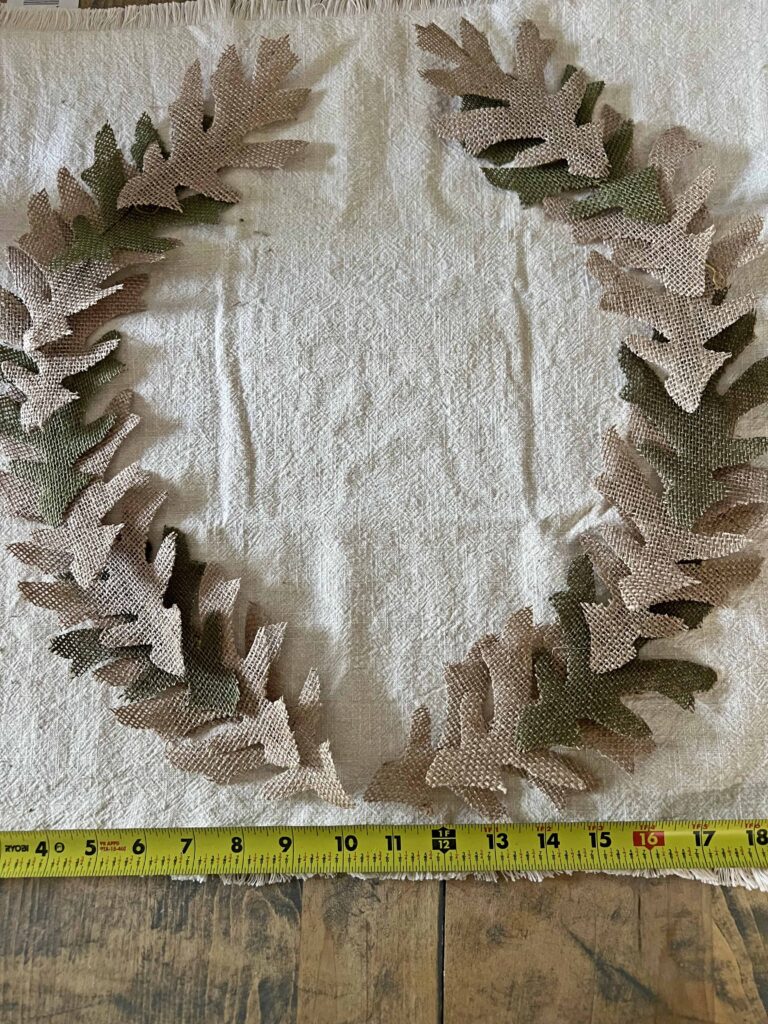
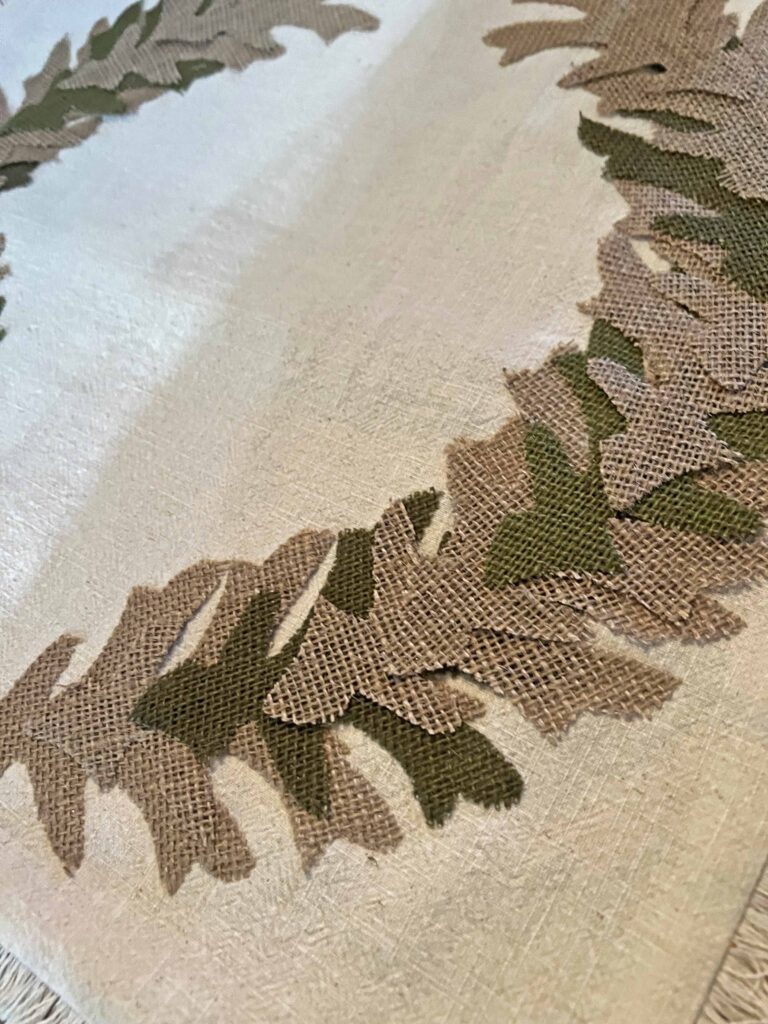
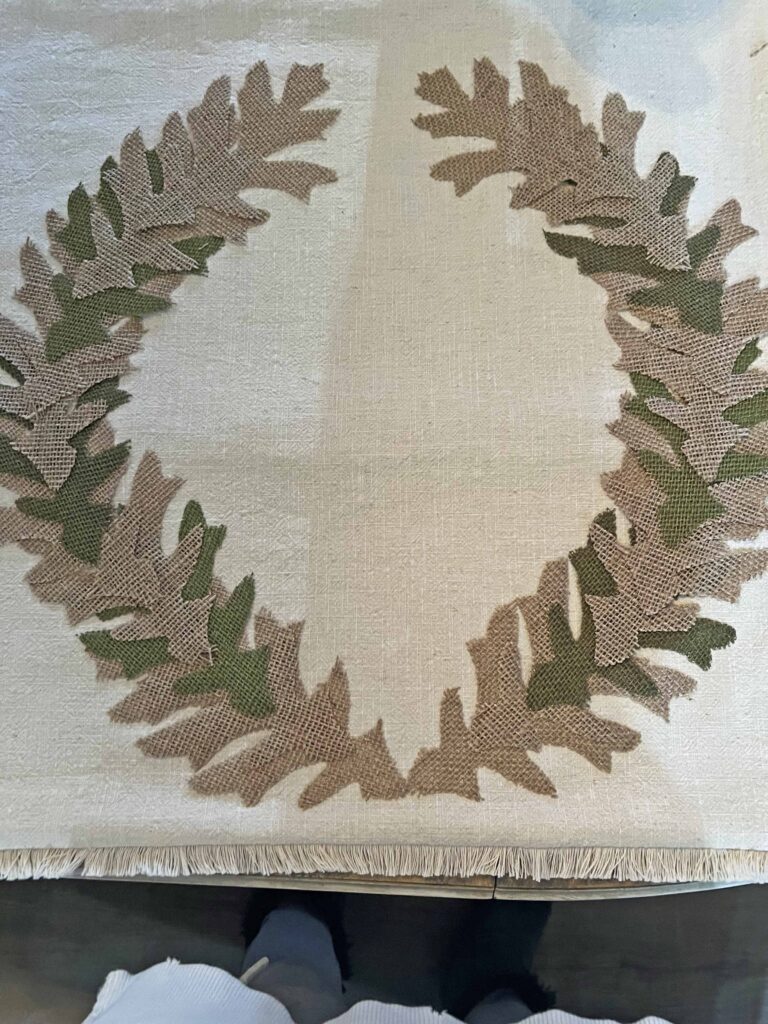
- Lay pillow cover on flat surface and arrange burlap leaves forming wreath shape to serve as a guide
- Use ruler or tape measure to make sure you center wreath on pillow cover
- Note: the picture below is before I had ironed the pillow cover.
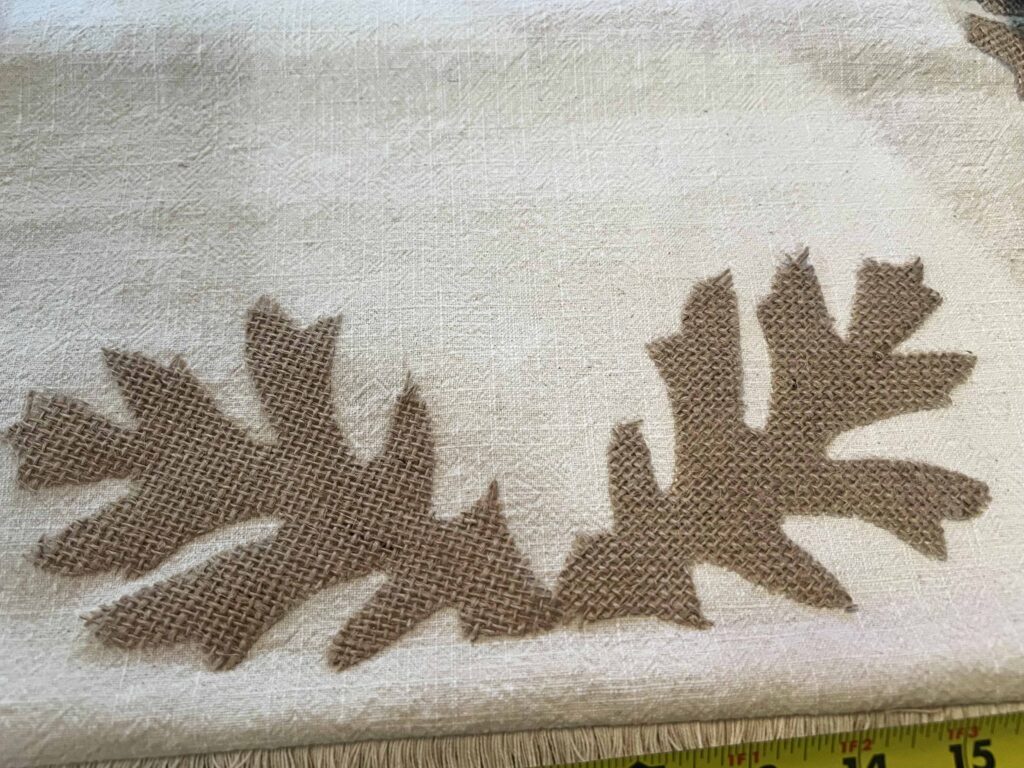
- Apply glue around the entire edge of the back of the leaf and a line down the middle to adhere securely to pillow cover
- Starting in the center at the bottom of pillow glue a leaf on one side facing outwards
- Glue another leaf using same technique on the other side meeting in the center of the pillow
- Continue to adhere leaves overlapping on each other, alternating from one side to the other to stay even on both side
- Continue all the way to the top, making sure to leave the wreath open ended at the top
- Insert a pillow form into your new no sew laurel wreath pillow cover (I prefer down pillow inserts)
- Voila! Enjoy your new pillow decor on your favorite chair or sofa
Tips & Tricks
This is a pretty easy and straight forward DIY. That being said the main goal is to center the wreath and balance both sides of the wreath equally. Use the ruler or tape measure as you glue the leaves, alternating from side to side to keep it even. Make sure the leaves are equidistant on all sides.
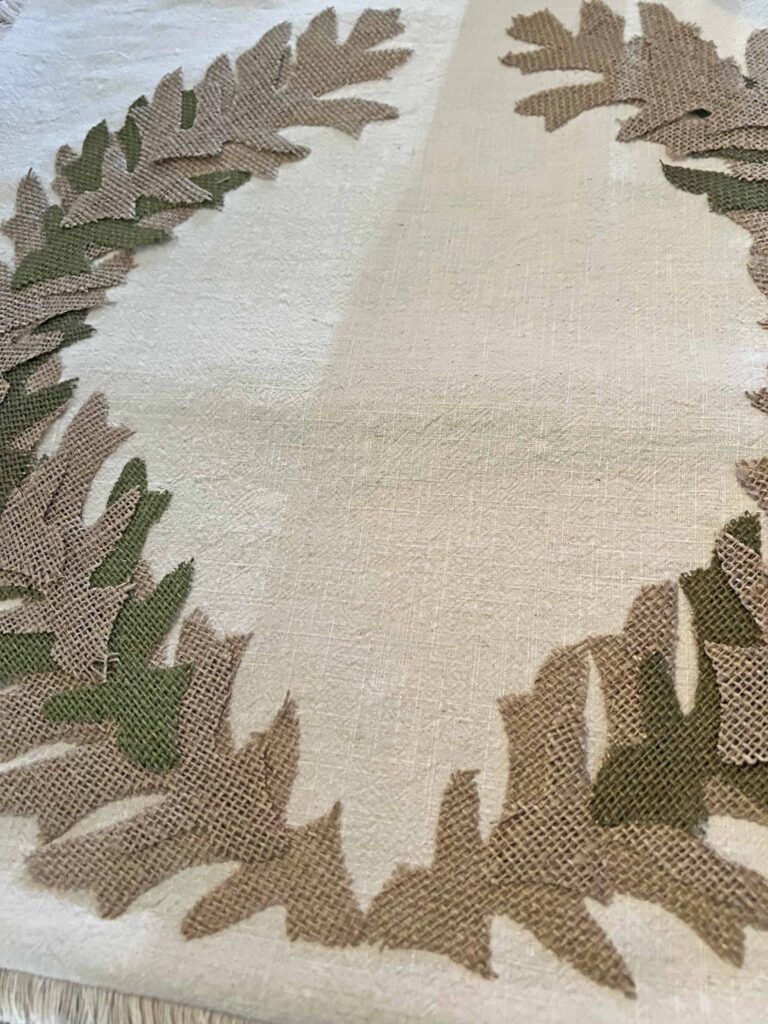
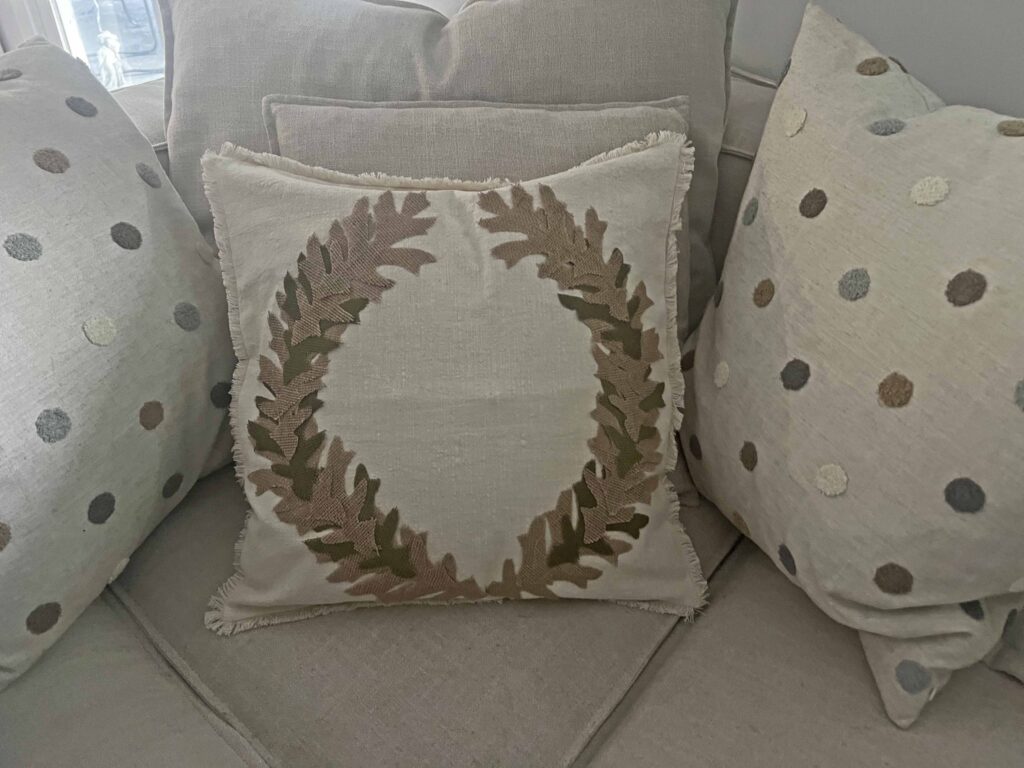
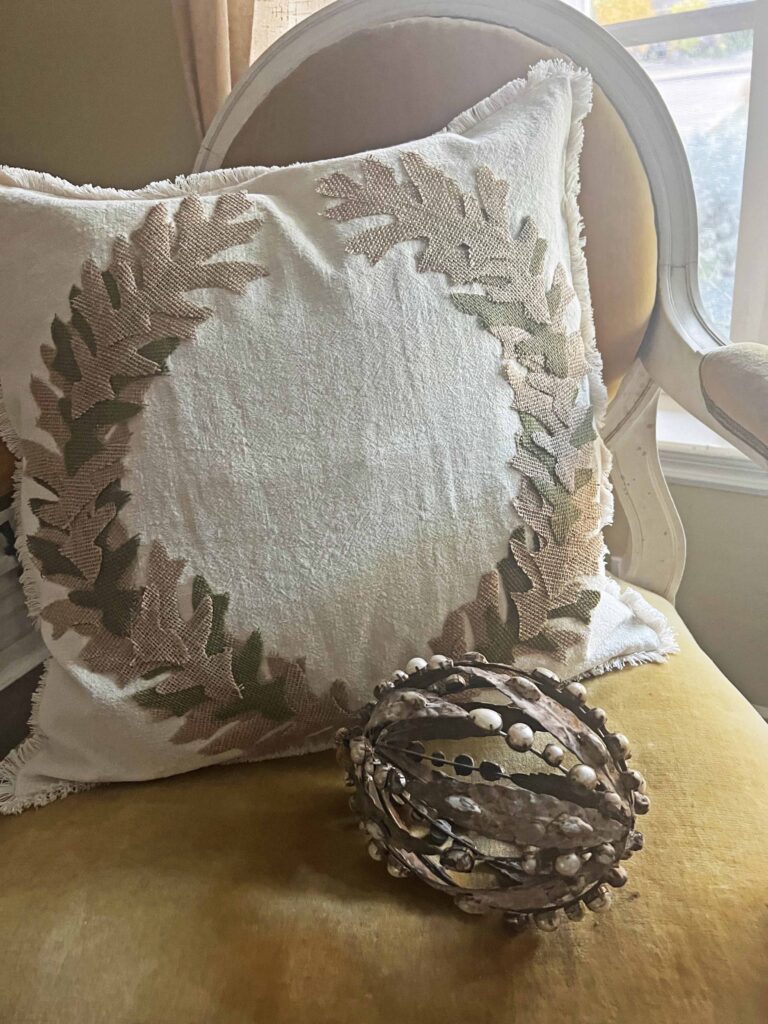
I chose to use burlap leaves in two colors, alternating between two tan leaves to one green leaf. I wanted the pillow to be pretty neutral with a slight pop of color. Feel free to use whatever color speaks to you and matches your decor aesthetic. Also the leaves don’t have to be burlap but you can use other materials as well. Make the pillow yours. I love the laurel wreath pattern, which excludes an air of sophistication but the burlap leaves and fringed edges adds rustic tones. You know, the corner of rustic and refined is where I like to hang out.
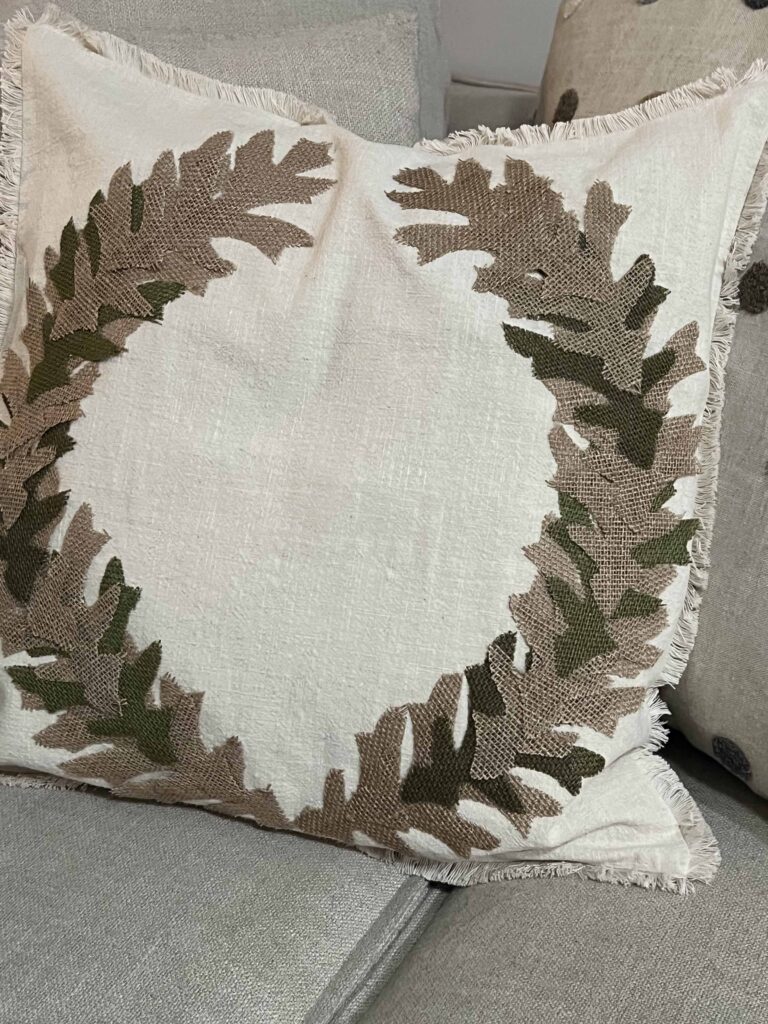
The neutral look of the pillow design coordinates with our everyday sectional in the family room. It looks great with our fall decor and can fall right into step with Christmas. I will share how it looks with our Christmas decor soon when I decorate the house for the holidays.
Closing Thoughts
I really wish sewing was one of my super powers. There’s so much you can create for your own home, but this fabric fusion adhesive is a game changer. It made this project so easy and amazing. I highly recommend it if you’re not a sewer either. It’s easy to use with no fumes and has a super strong bond. I included it in the shopping section for your convenience.
Are you a laurel fan like myself? I hope this simple pillow DIY inspires you to create an appliqué pillow of some sort for your home. It comes together super fast and provides a ton of texture and interest. I am looking forward to using it with Christmas decor but it will really be right at home any time of year. Have you started decorating for Christmas? I haven’t, and I feel like I’m a bit behind watching everyone else decking the halls. I might do a bit of decorating to surprise miss M when she comes home in a few days. ‘Tis the season…

Shopping the No Sew Laurel Wreath Pillow Look
- 20×20 Fringed Linen Pillow Cover
- Aleen’s Fusion Fabric Permanent Adhesive
- Burlap Leaves
- Tape Measure
- Iron

More Related Posts
Most Recent Posts
There is no wrong way to make pretty things.”
Anon
I love this idea! The glue is a clever hack – I initially assumed you used fusible webbing. Sewing them on would have taken WAY too long anyway! 🙂
Thanks! ? I thought the same thing about sewing them on but I still want to learn. 2025 goals. ?. XO- MJ
Hi MaryJo! I adore no sew projects and this turned out fabulous! I’m drawn to laurel wreaths as well! It’s so pretty! Pinning now, so I can try it sometime! Thanks for the inspiration!
Thanks Donna! I know, we are always drawn to the same things. You have good taste. lol. XO- MJ