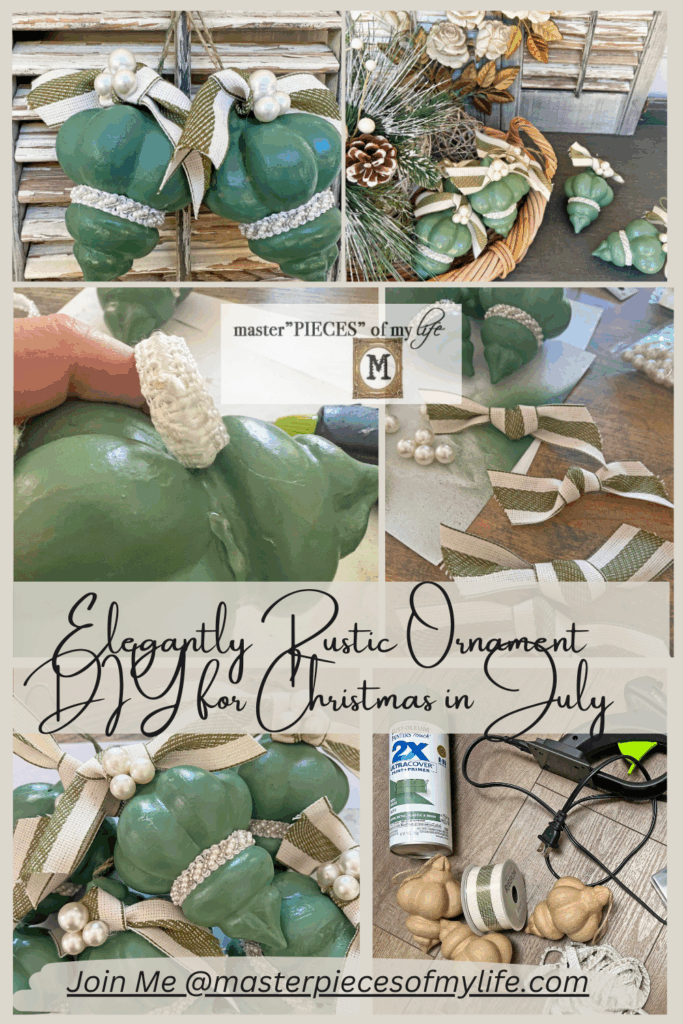
Elegantly Rustic Ornament DIY for Christmas in July
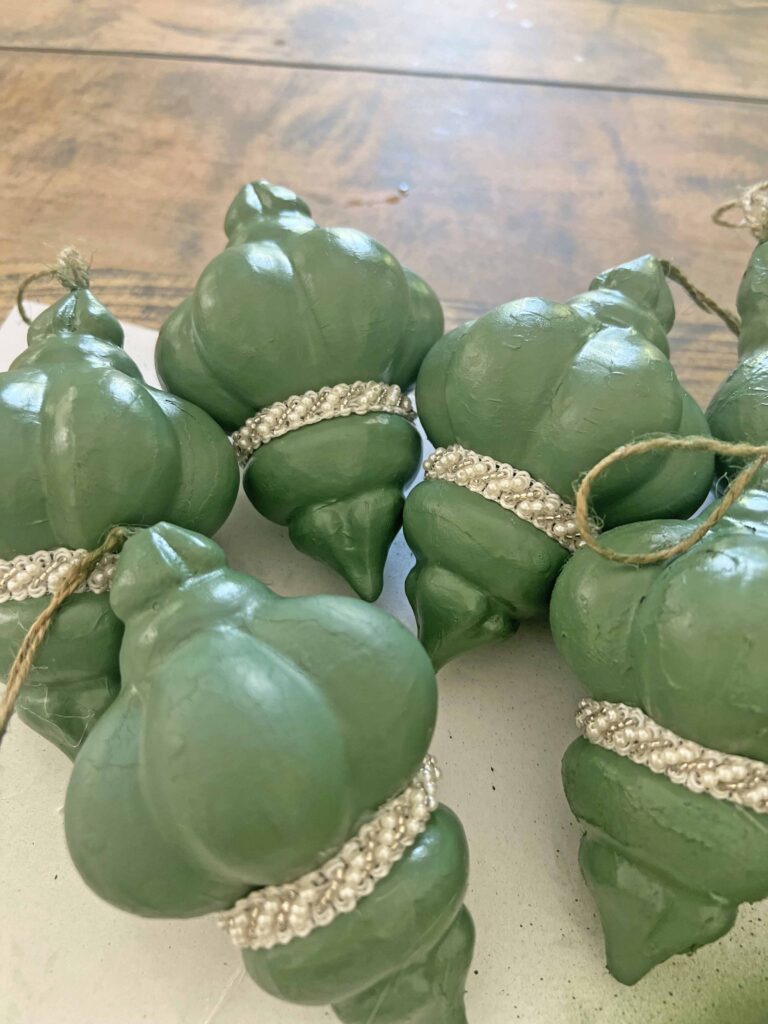
Do you like to create your own decor and seasonal decorations? If you do, I have some inspiration for you today. Starting Christmas crafting now, in July, is smart and helps relieve stress during the hectic holiday months. Today I am sharing a new Christmas craft you can make now. This elegantly rustic ornament DIY with pearl details has all the pretty vintage vibes.
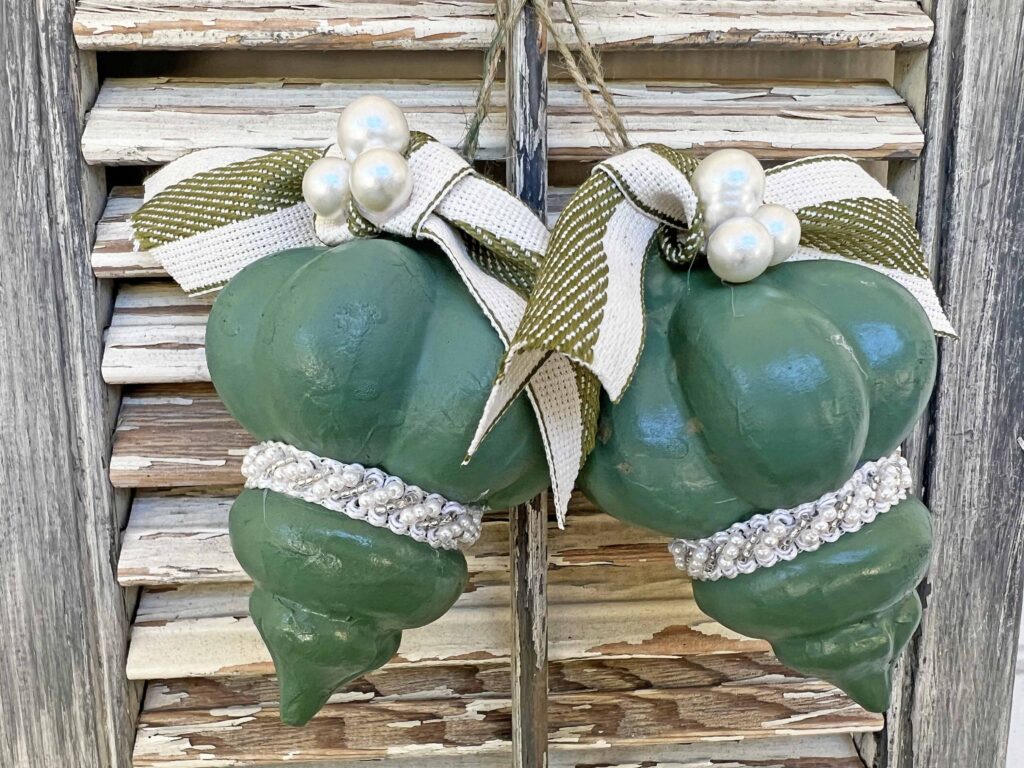
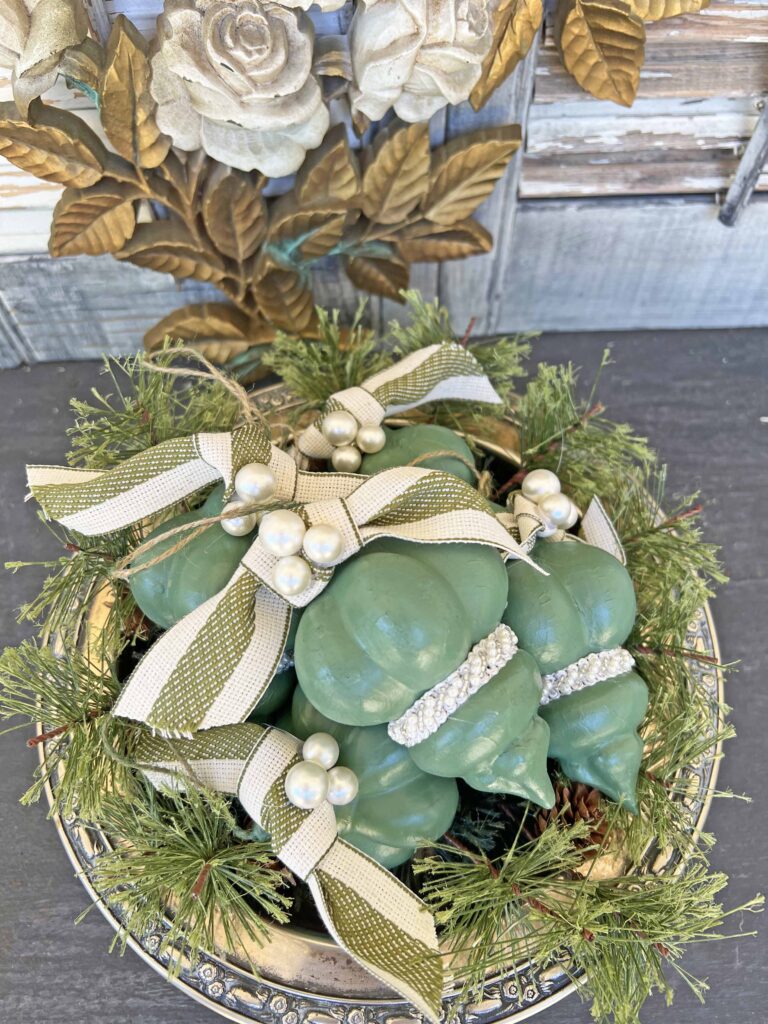
Paper mache ornaments are transformed with green paint and pearl accents. I selected green paint since I am planning on a green themed tree for the family room this year, but you can choose any color you wish. Make them yours and coordinate with you decor.
*Affiliate links might be included for your convenience. These affiliate links mean a small commission is earned if you make a purchase using these links at no extra cost to you. As an Amazon Associate I earn from qualifying purchases which support this website. For more information: Full Disclosure Policy.
Why Christmas in July is a Good Idea
Starting Christmas preparations in July allows for plenty of time and energy for the holidays. This a good way to prevent stress during the hectic holiday season and allows you to enjoy and be more present during the festive times. There are many things you can do now, including the ideas provided below.
- Shop for holiday decor and accents for your home
- Shop for gift giving
- Create crafts for your home
- Create crafts to give as gifts
- Plan menus
- Organize activities
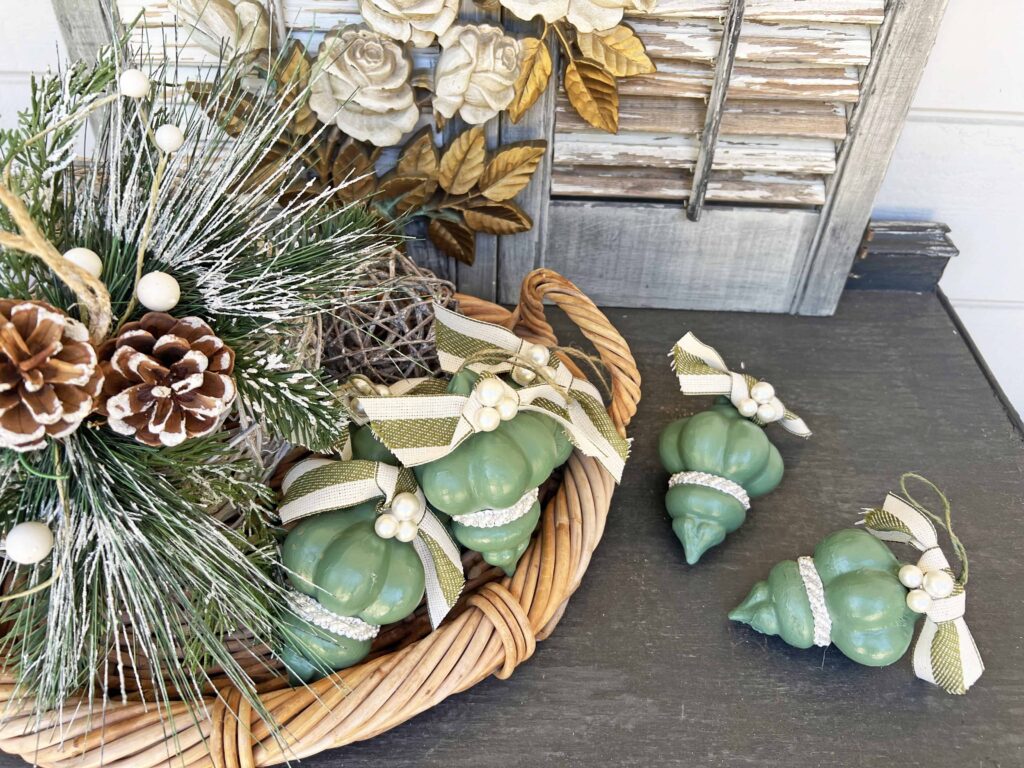
In the beginning of July I shared a post with 12 crafting projects which you can read here {Christmas in July with 12 Crafting Projects}. Since I already know I am planning a green themed tree for our family room this year, these elegantly rustic ornaments will be a perfect addition. I am so happy these are done and ready to go when we start decorating for Christmas. Come on in and let’s get started.
How to Make Elegantly Rustic Paper Mache Ornaments
Supplies
- 6 Paper Mache Ornament Forms
- Green Spray Paint
- Pearl Trim
- Ribbon
- Pearl Accents
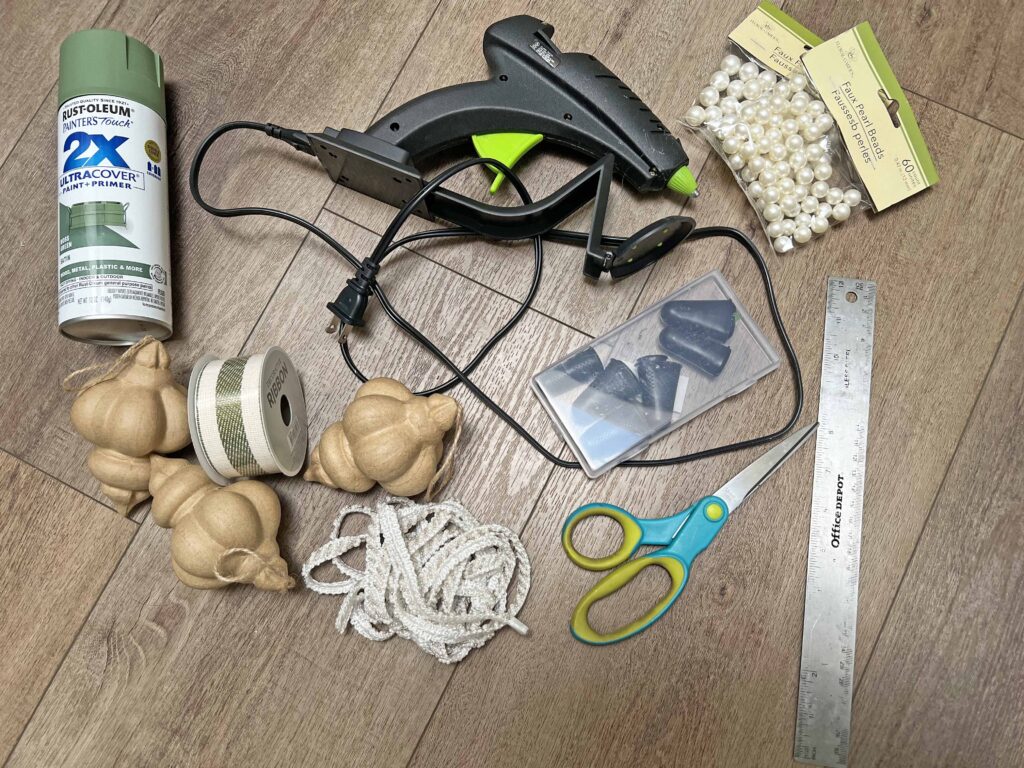
Tools
- Scissors
- Ruler
- Hot Glue Gun
- Silicone Finger Tips
Instructions
- Assemble all your supplies and tools
- Unwrap and open all your packaging, removing all tags
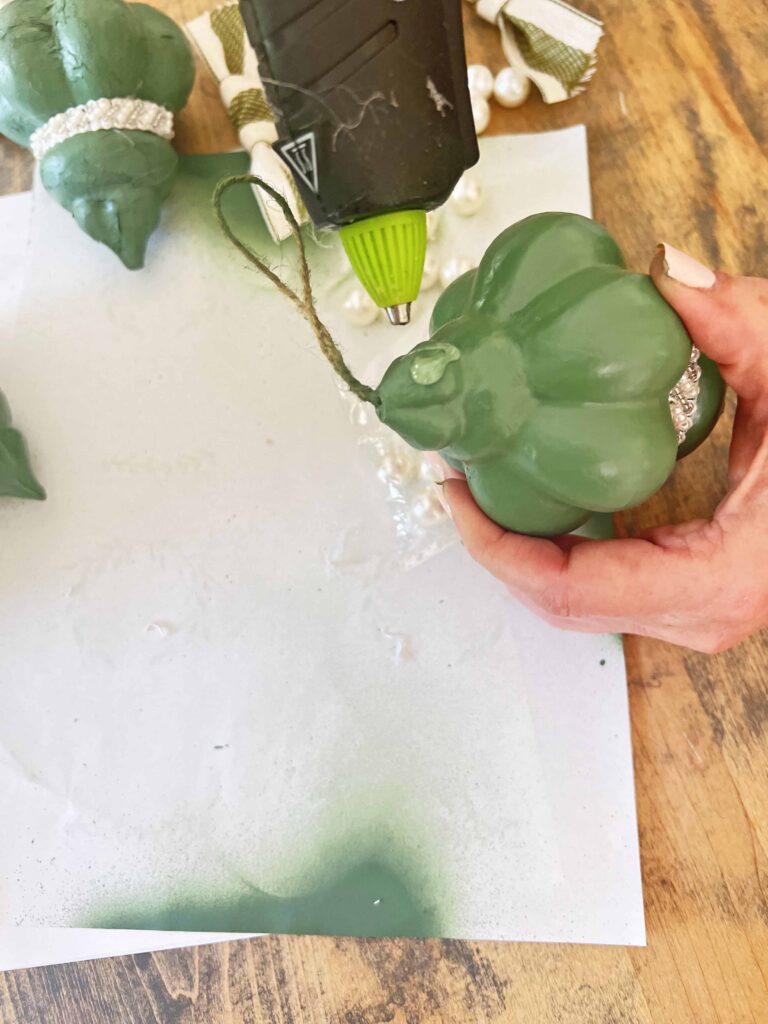
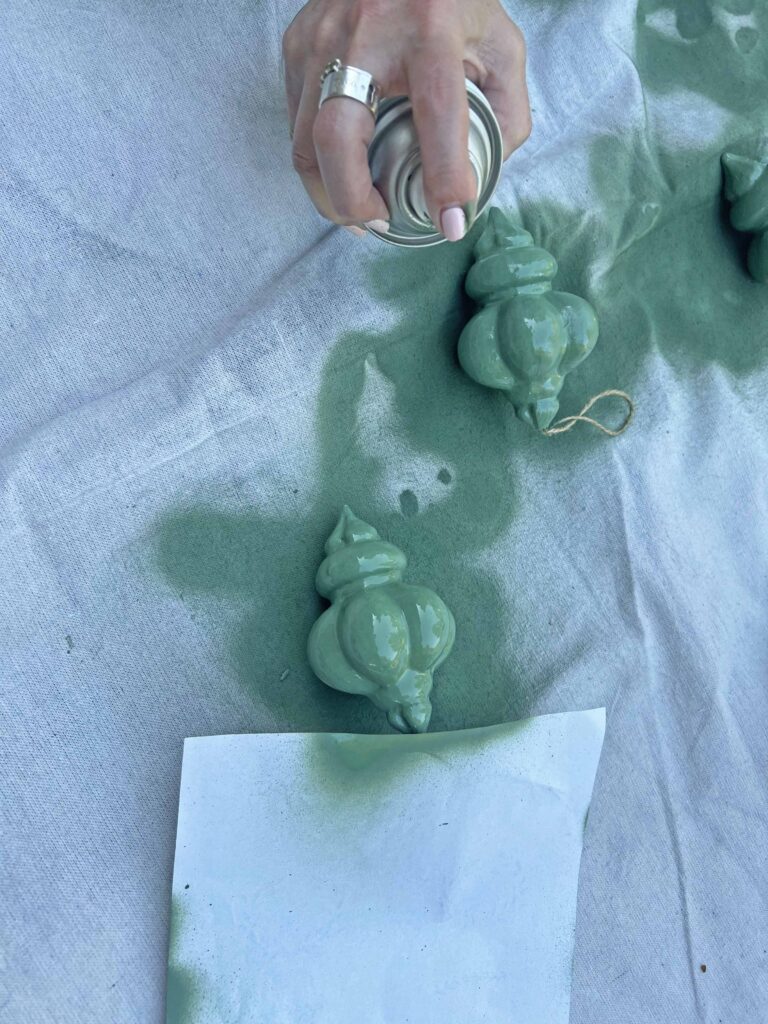
- Spray paint your ornaments on one side in a well ventilated area (I spray paint outside)
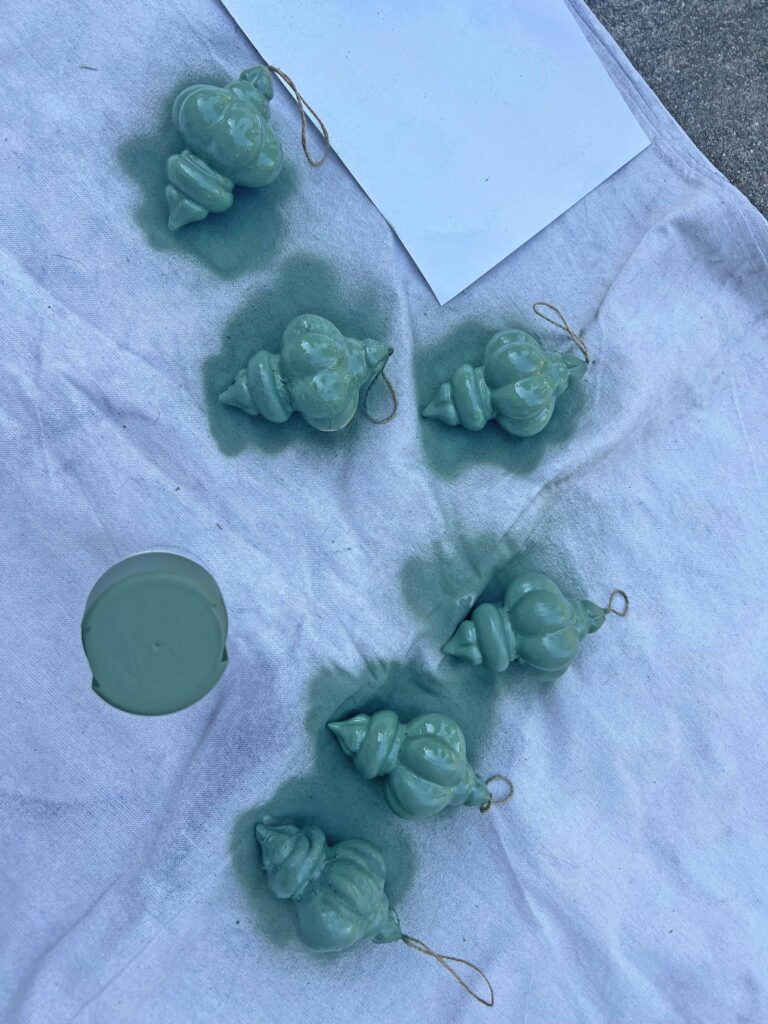
- Once first side is thoroughly dry, flip over and spray underside
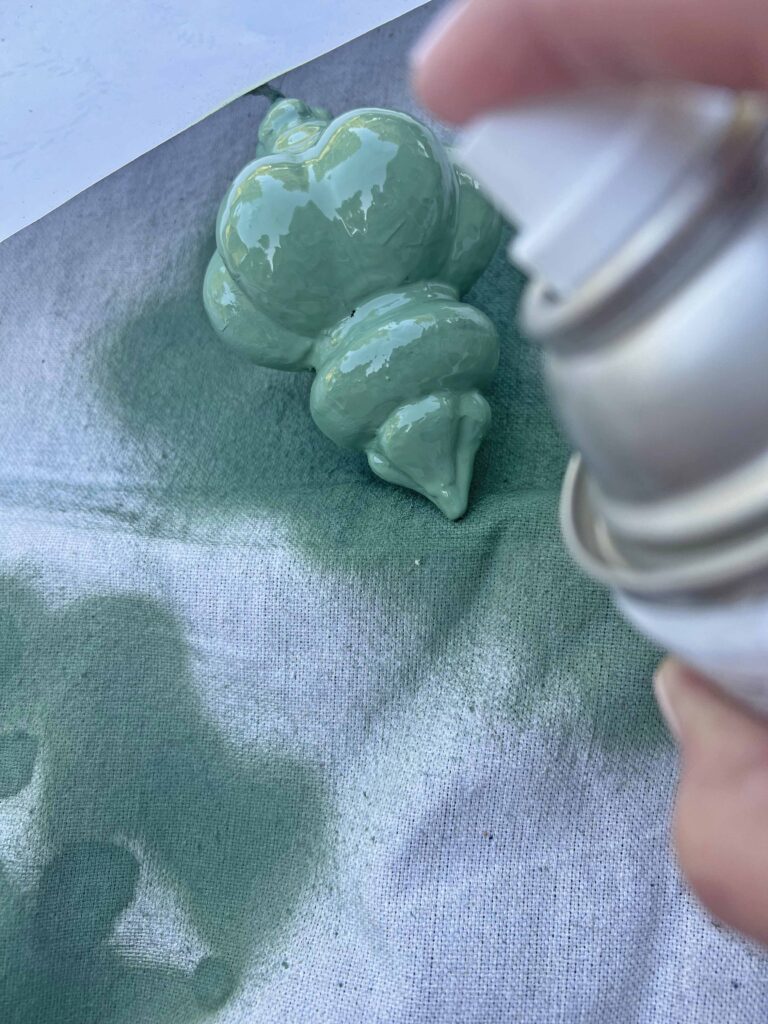
- Add a second coat of paint all over ornament using the same technique as above
- Once ornaments are fully painted allow enough time to dry thoroughly
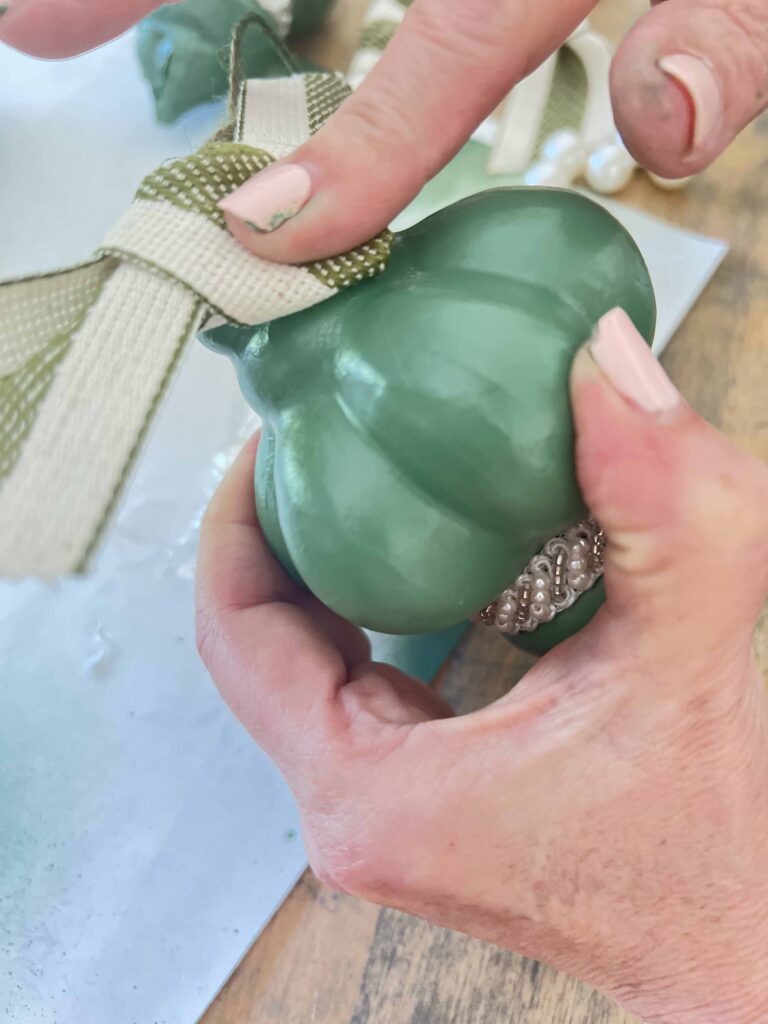
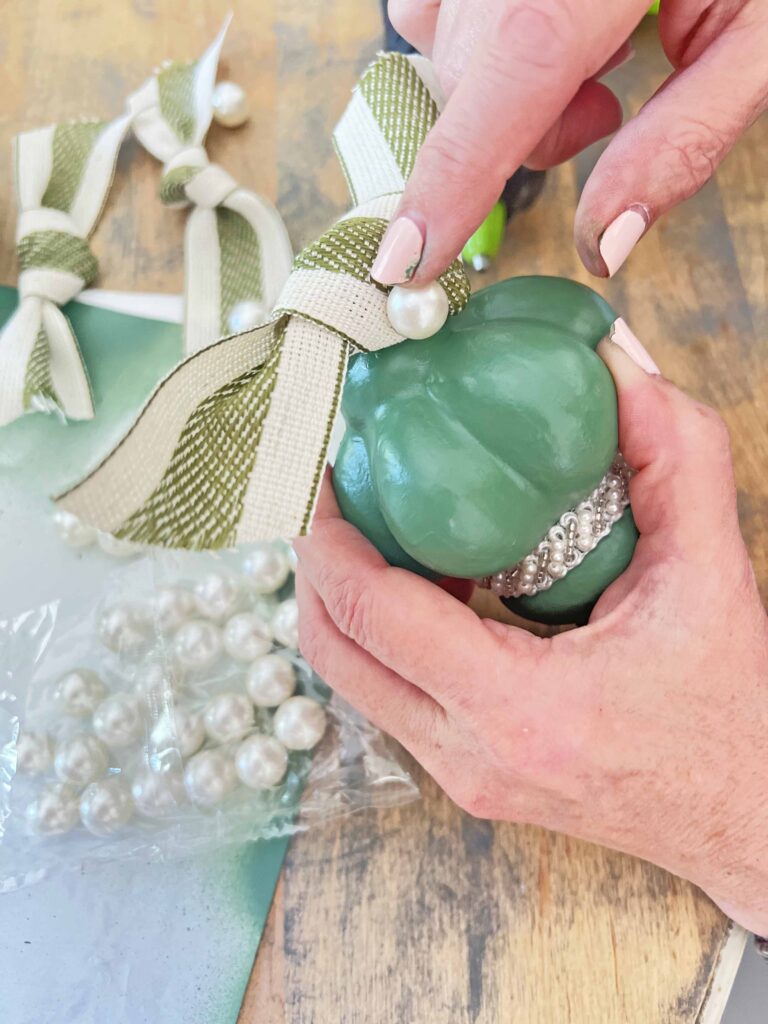
- Wrap ribbon trim around middle section where ornament indents, cutting a piece to go all the way around overlapping where ends meet
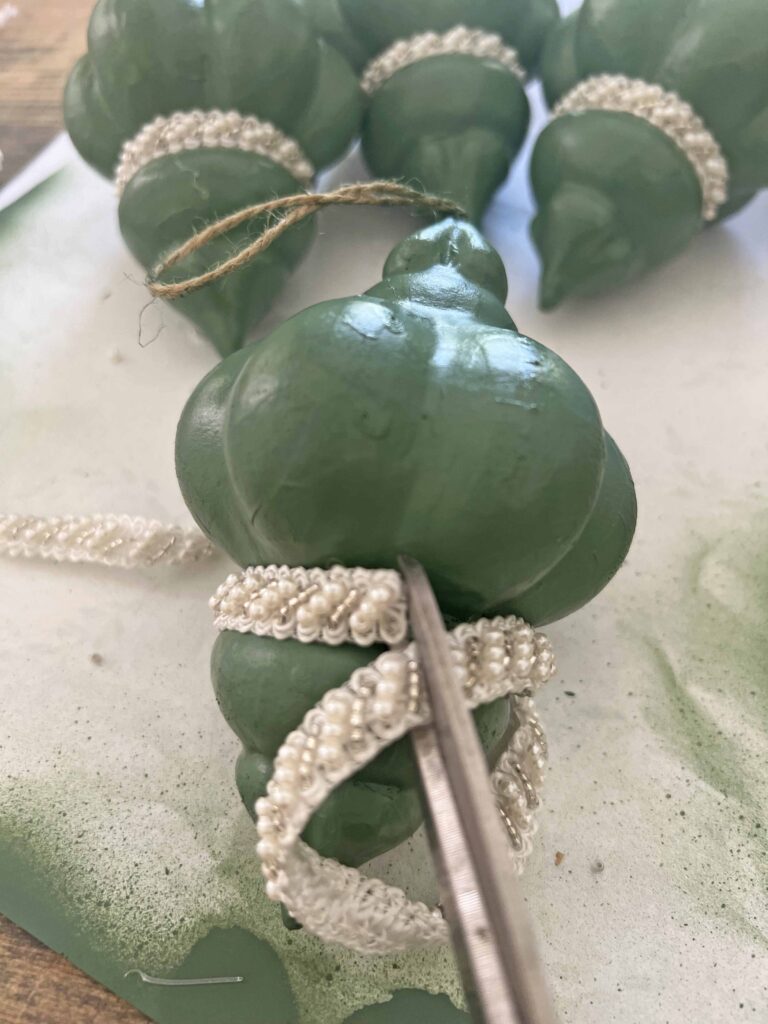
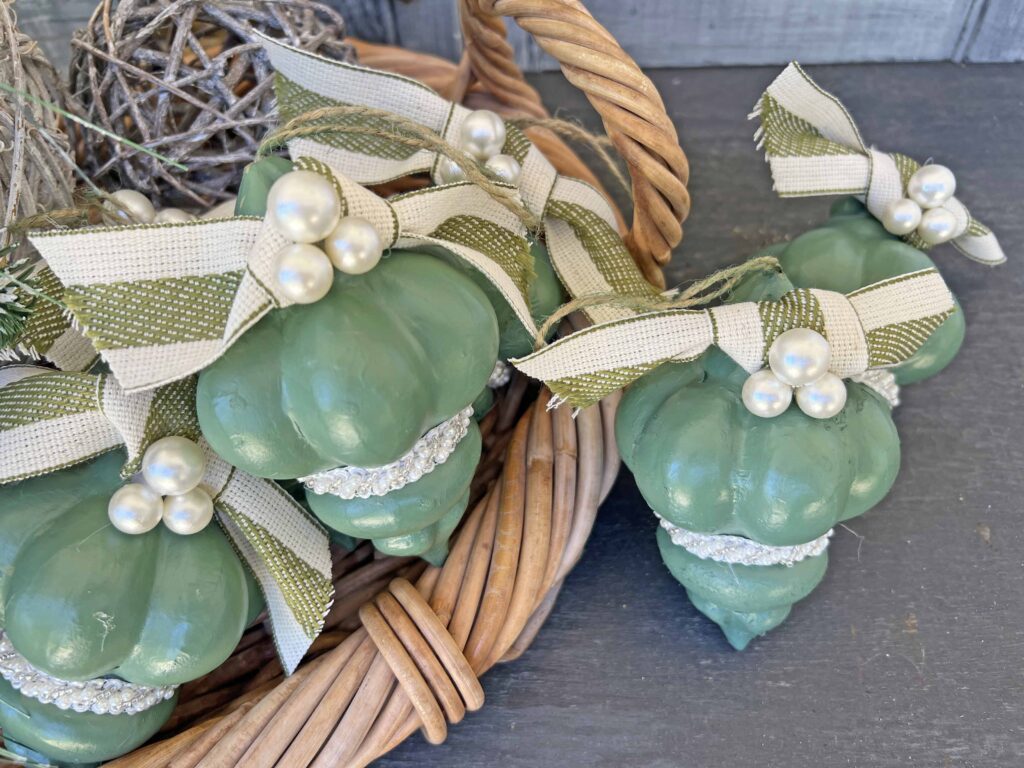
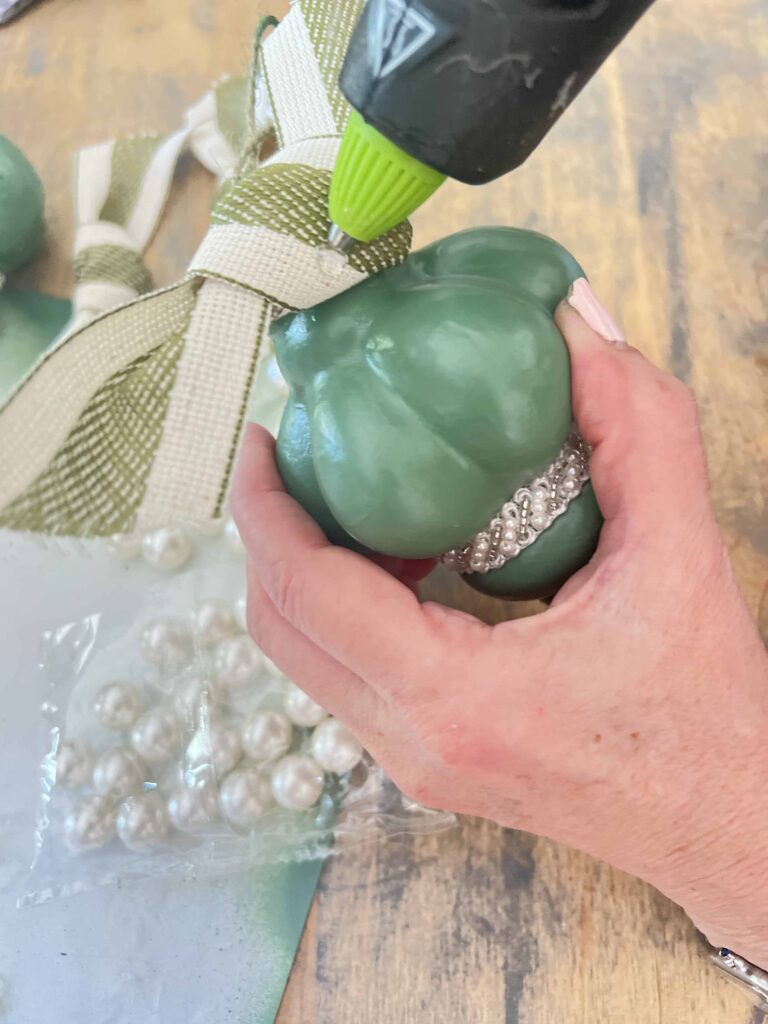
- Apply hot glue in the indented section and adhere pearl trim going all the way around ornament, overlapping ends
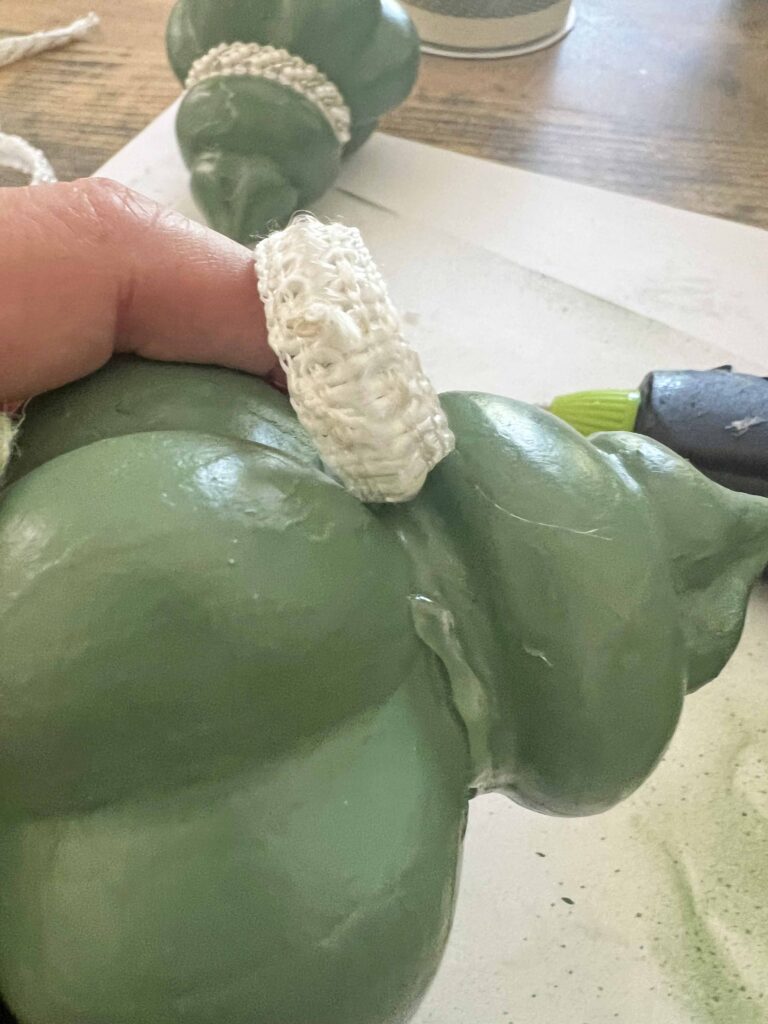
- Attached pearl trim to all 6 ornaments and set aside
- Cut six pieces of ribbon and create a bow knot (I cut mine around 8-1/2 inches long)


- Hot glue ribbon knot on top of ornament below the twine hanger
- Hot glue pearl accents on the bow knot on the ribbon
- Voila! You are ready for Christmas in July. It’s such a good feeling.
Tips & Tricks for Elegantly Rustic Paper Mache Ornaments
Make sure you use spray paint in a well ventilated space. I always spray paint outside, but a well ventilated garage or workspace is also great. I also protected the twine hangers with a piece of paper while I sprayed, since I wanted to keep the twine natural colored rather than turn them green.
Allowing the paint to dry and cure over night is always a good idea, but a few hours should be enough time. Keep in mind that the ambient temperature, whether outside or inside, will determine how long it takes for the paint to fully dry. I recommend testing the paint before fully handling the ornaments to add the trim and ribbon.
The pearl trim is my choice for the design, but there are many trim options out there. I love pearls. They have a classic elegance, which I liked for this project. Whatever trim you choose just make sure it’s the proper width for the channel in the paper mache form.
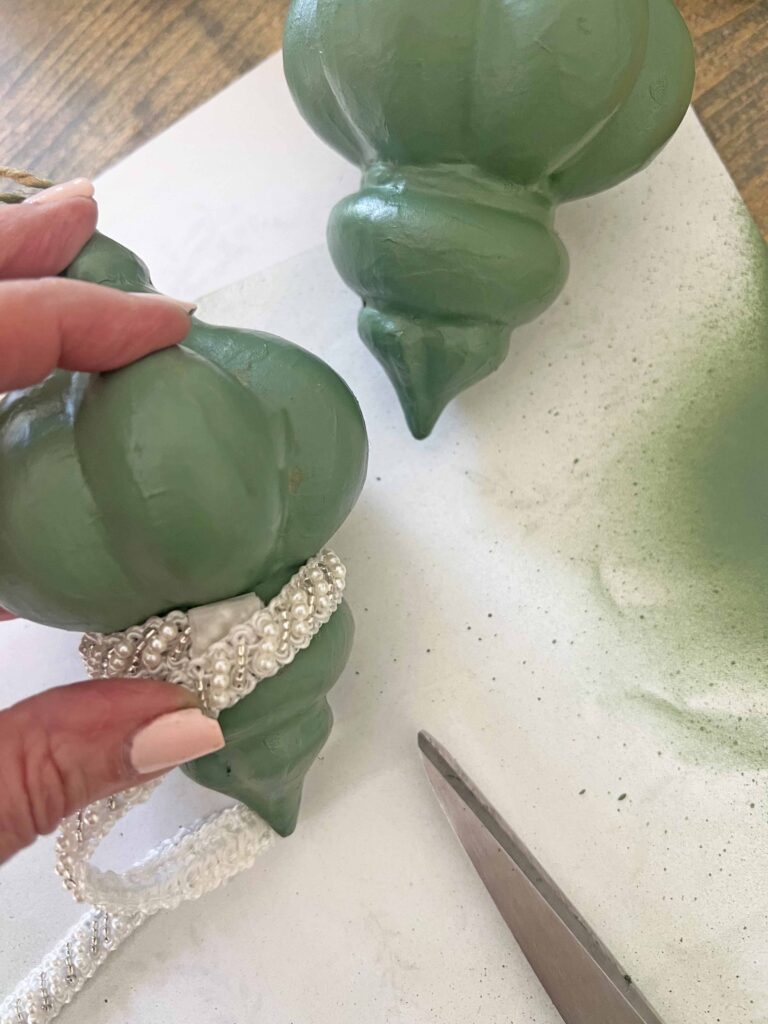
Also the little pearls on the trim I chose would come loose when I cut the ribbon so I didn’t cut 6 pieces and then glue. Instead I cut a piece and glued it immediately to seal the ends with the hot glue when it was adhered to the ornament. I tend to batch the steps like I did with the ribbon knots, but it’s an easy adjustment.
Closing Thoughts on the Elegantly Rustic Ornament DIY for Christmas in July
“Christmas in July” is a big thing now, so many promotions and sales for Christmas in the month of July can be found. Take advantage of these bargains early, allowing plenty of time to prepare without rushing and stressing later in the year.

This one little project makes me so happy! I am super excited to use these ornaments this year on our green themed tree. I will share all the details first here when I style the tree with these ornaments. Make sure to sign up to receive all new updates into your inbox so you don’t miss out.
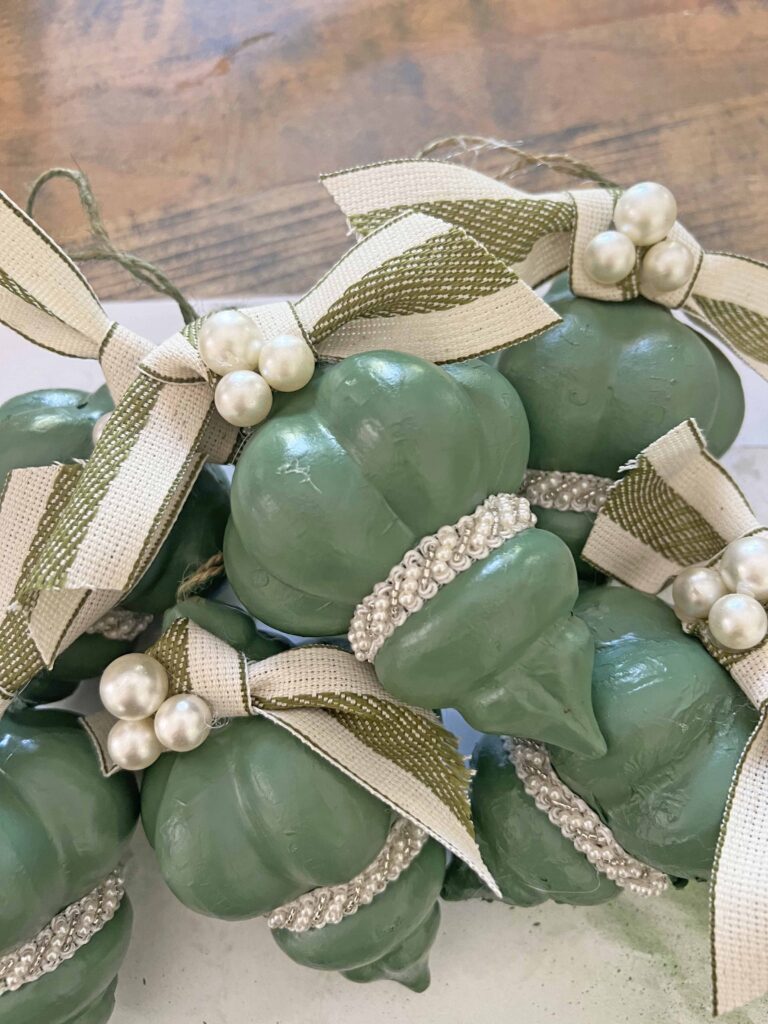
I love all the details of these ornaments. The decorative bulb profile and the pearl accents give the ornaments elegant vibes. The natural and green cotton ribbon has rustic feels. You know I love to hang out on the corner of rustic and refined. And here we are! Can you tell I love them? lol.

That’s one of the many reasons I love to make much of my seasonal decor. When you craft your own pieces you can adapt them to your signature style and make them truly yours. I hope this inspires you to craft something for the upcoming holiday season. I am all about Christmas crafting in July. If you make something please share, I would love to see it. Thanks for being here and see you next time!

Shopping for the Elegantly Rustic Paper Mache Ornament DIY
- Paper Mache Ornaments
- Green Spray Paint
- Pearl Trim
- Pearl Accents
- Craft Scissors
- Steel Rulers
- Glue gun
- Silicone Finger Protectors

More Related Posts
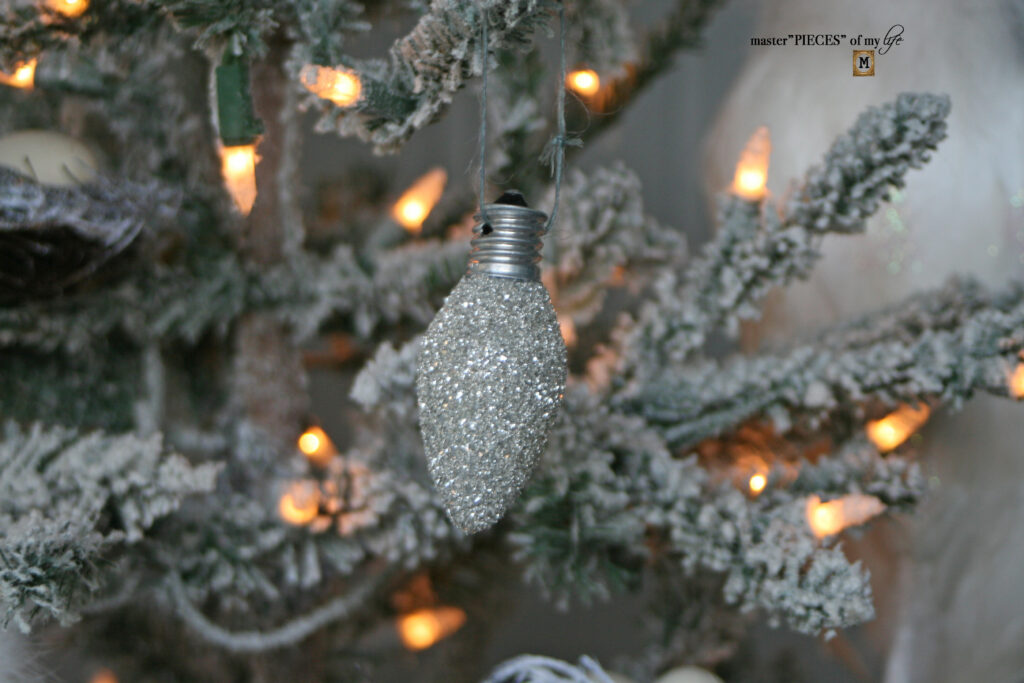
Glitter Old Fashioned Christmas Light Bulb Ornament DIY
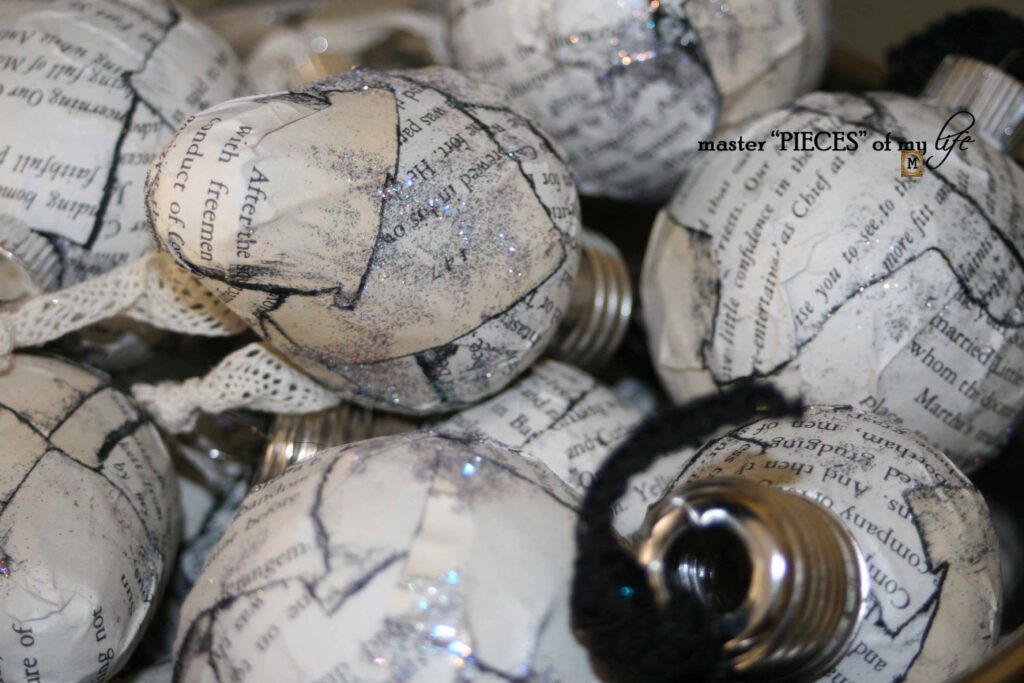
Bookprint Christmas Decor Ideas
Most Recent Posts
A Summer Foyer Styling with Thrifted Finds
The Best, Most Flavorful Burger Recipe Ever!
Christmas isn’t a season. It’s a feeling”
Edna Ferber
MaryJo,
Love this sweet ornament and I really like that color green that you chose….Thanks for sharing…Enjoy your weekend!!
Hugs,
Deb
Debbie-Dabble Blog
Thanks so much Deb. I know you’re a great crafter so I appreciate it. Thanks for stopping by. XO- MJ
These ornaments are amazing, MaryJo! I’m going to send them to my Mom ASAP because she would love a gray or white version for her winter wonderland themed tree this year. Christmas in July is one of my favorite weeks of the entire year so it’s fun to see you celebrating it too. This is such an inspiring idea! Hugs, CoCo
Oh! Thanks so much CoCo. I love the idea of white or gray. It’s perfect for a winter wonderland theme. XO- MJ