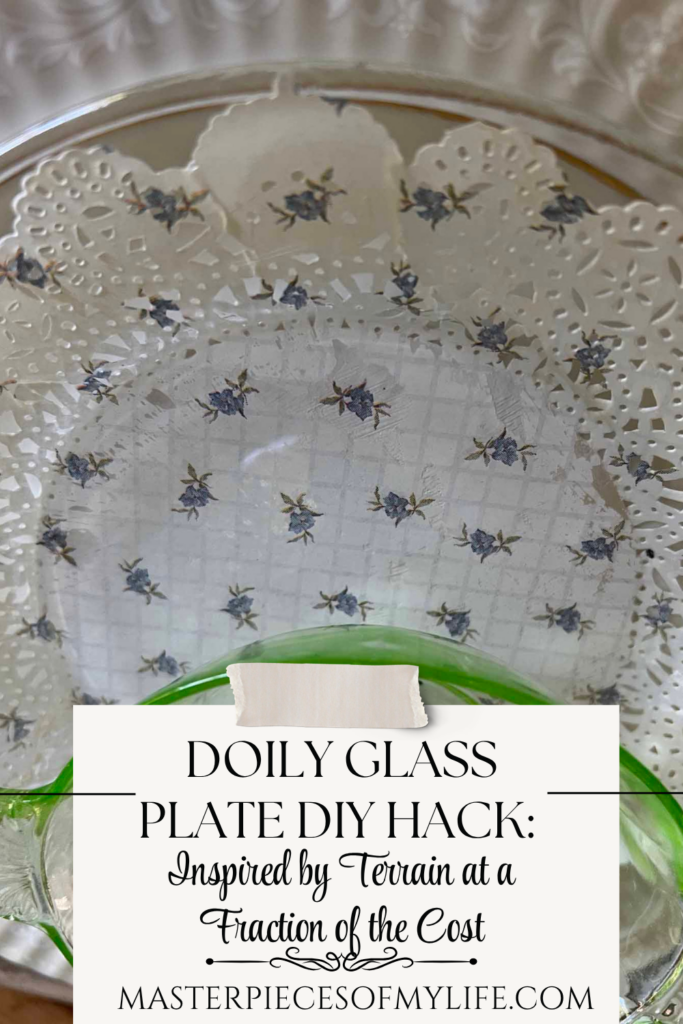
Doily Glass Plate DIY Hack: Get the Terrain Look for Less
Do you love to set seasonal table settings? Oh good! I do too. Without a doubt though, buying tons of seasonal china, and storing all the things can be expensive and exhausting. I have a solution for you today. This doily glass plate DIY hack is super easy; and the best part? It’s affordable and totally customizable. Whether you’re dressing up a dinner party, refreshing your everyday table, or making thoughtful handmade gifts, these plates deliver serious elegance without the splurge.
Like I said before, this is a super simple project, which is easy on the pocket book, not complicated to execute and full of limitless possibilities. These doily plates can be customized to the look you choose, and after you’re done with them you can repurpose them to plain glass again or use a new pattern and design for a totally new look. You get multiple looks from the same plate. No need to buy more dishes or store more plates.
*Affiliate links might be included for your convenience. These affiliate links mean a small commission is earned if you make a purchase using these links at no extra cost to you. As an Amazon Associate I earn from qualifying purchases which support this website. For more information: Full Disclosure Policy.
Inspiration for the Doily Plate DIY
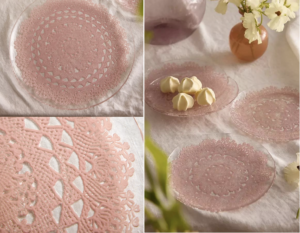
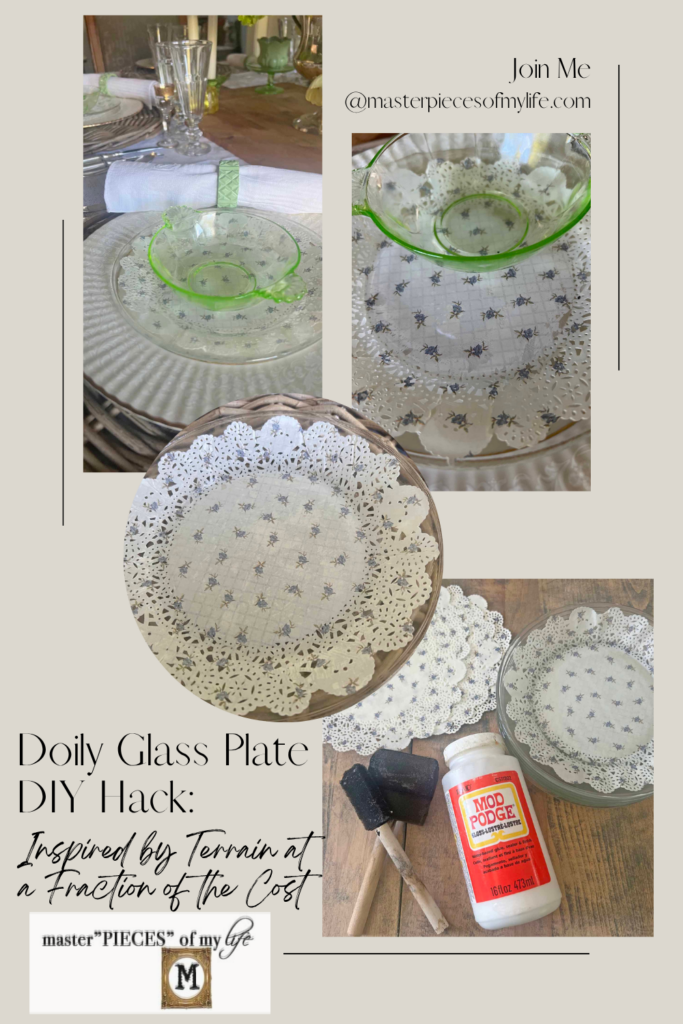
Have you seen these doily plates from Terrain? The delicate, scalloped doily pattern is the sweetest thing and so charming in an understated manner with a homie type of stylish way. Well, I loved the look when I saw them- I’m not a pink girl though, nor did I love the price tag. So… you know what went through my mind. “I can make that!” And here we are. (Sorry, I think they’re sold out. Don’t fret! You can make your own.)
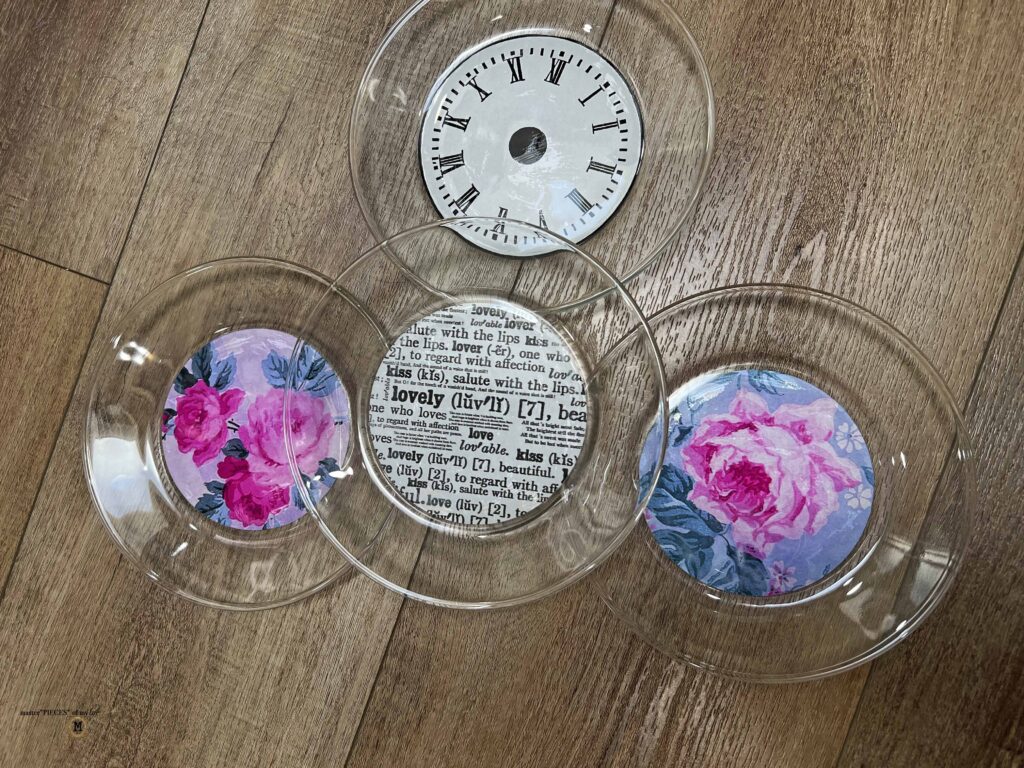
Using the same technique I used here {DIY glass plates for a custom look}, I created my own doily glass plates. I handcrafted these pretties with simple glass plates, charming paper doilies and good ole Modge Podge. Let me share how easy this is to do and how you can make some too.
How to DIY Doily Glass Plates a la Terrain Style
Good news! You don’t need to spend Terrain prices to get that look. With a handful of supplies you can find at the dollar store plus a little patience, you can create your own stunning doily glass plates that look like they cost five times more than they actually did. This is one of those DIYs that feels like a cheat code — once you see how simple it is, you’ll want to make a set for every season.
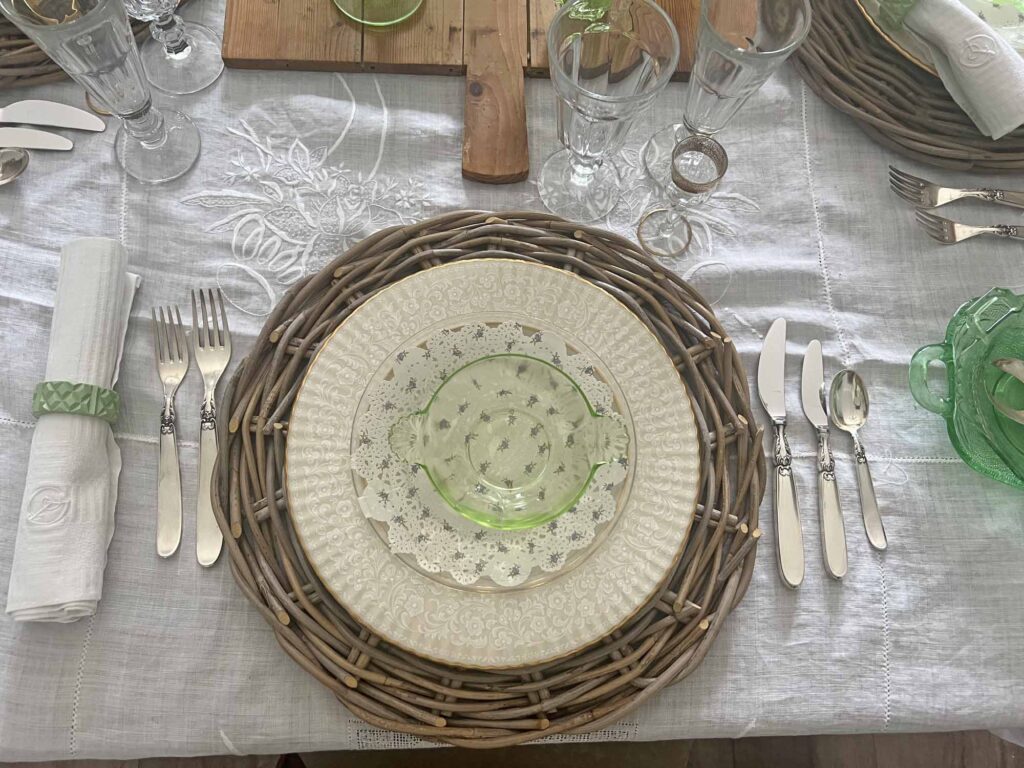
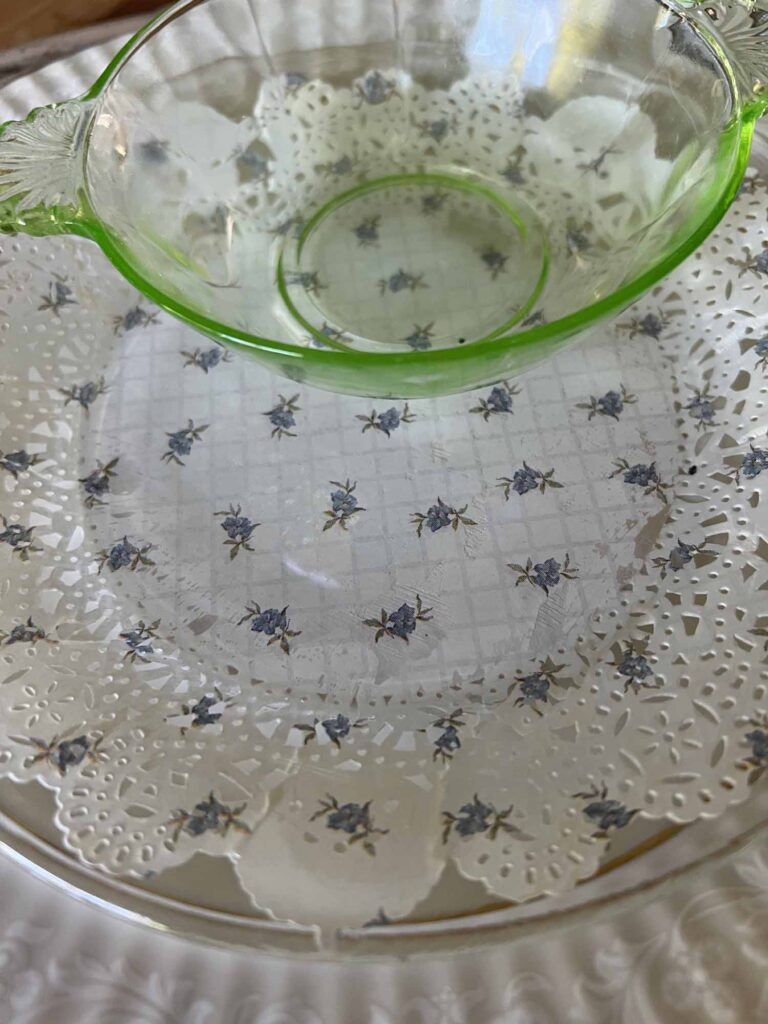
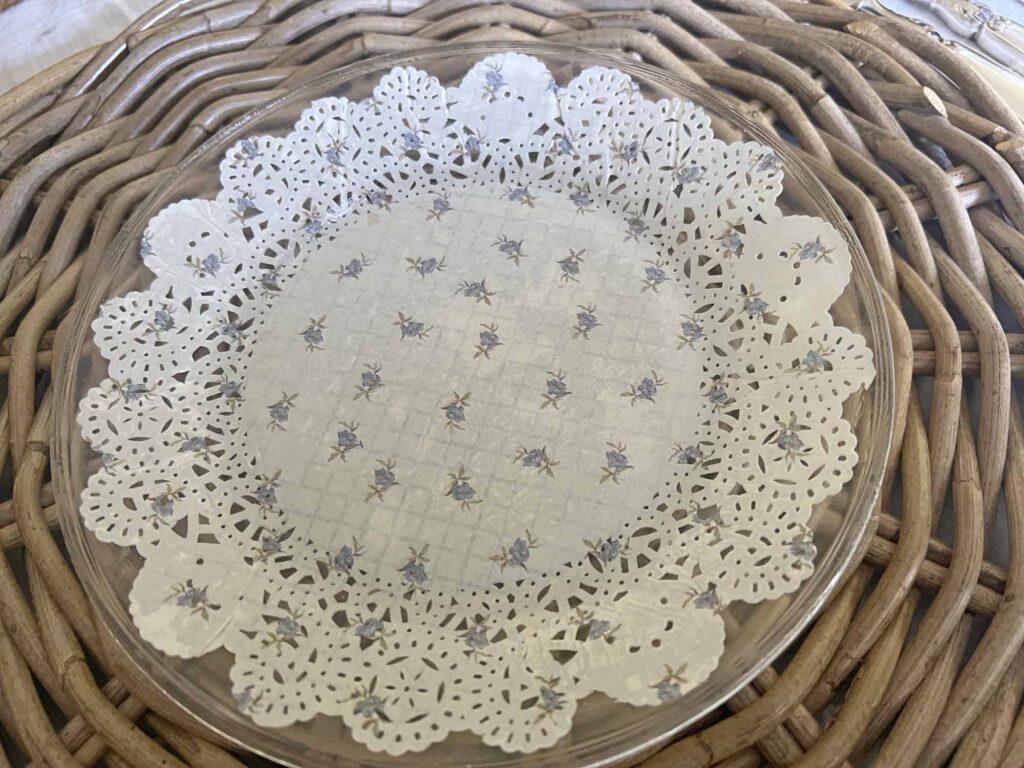
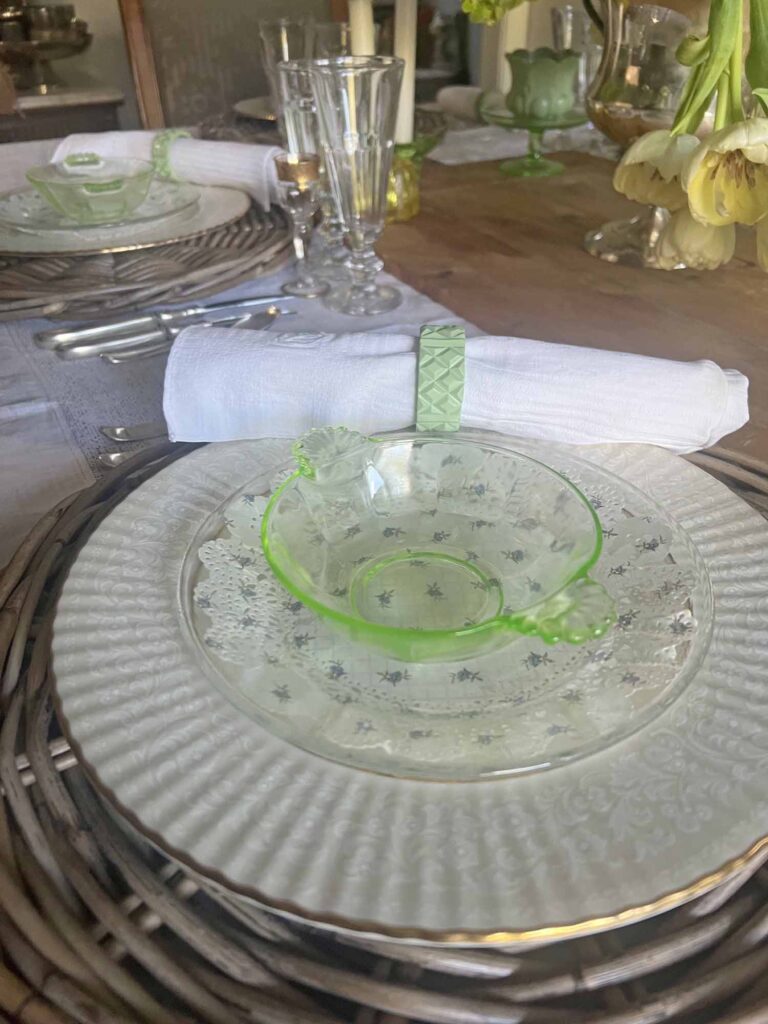
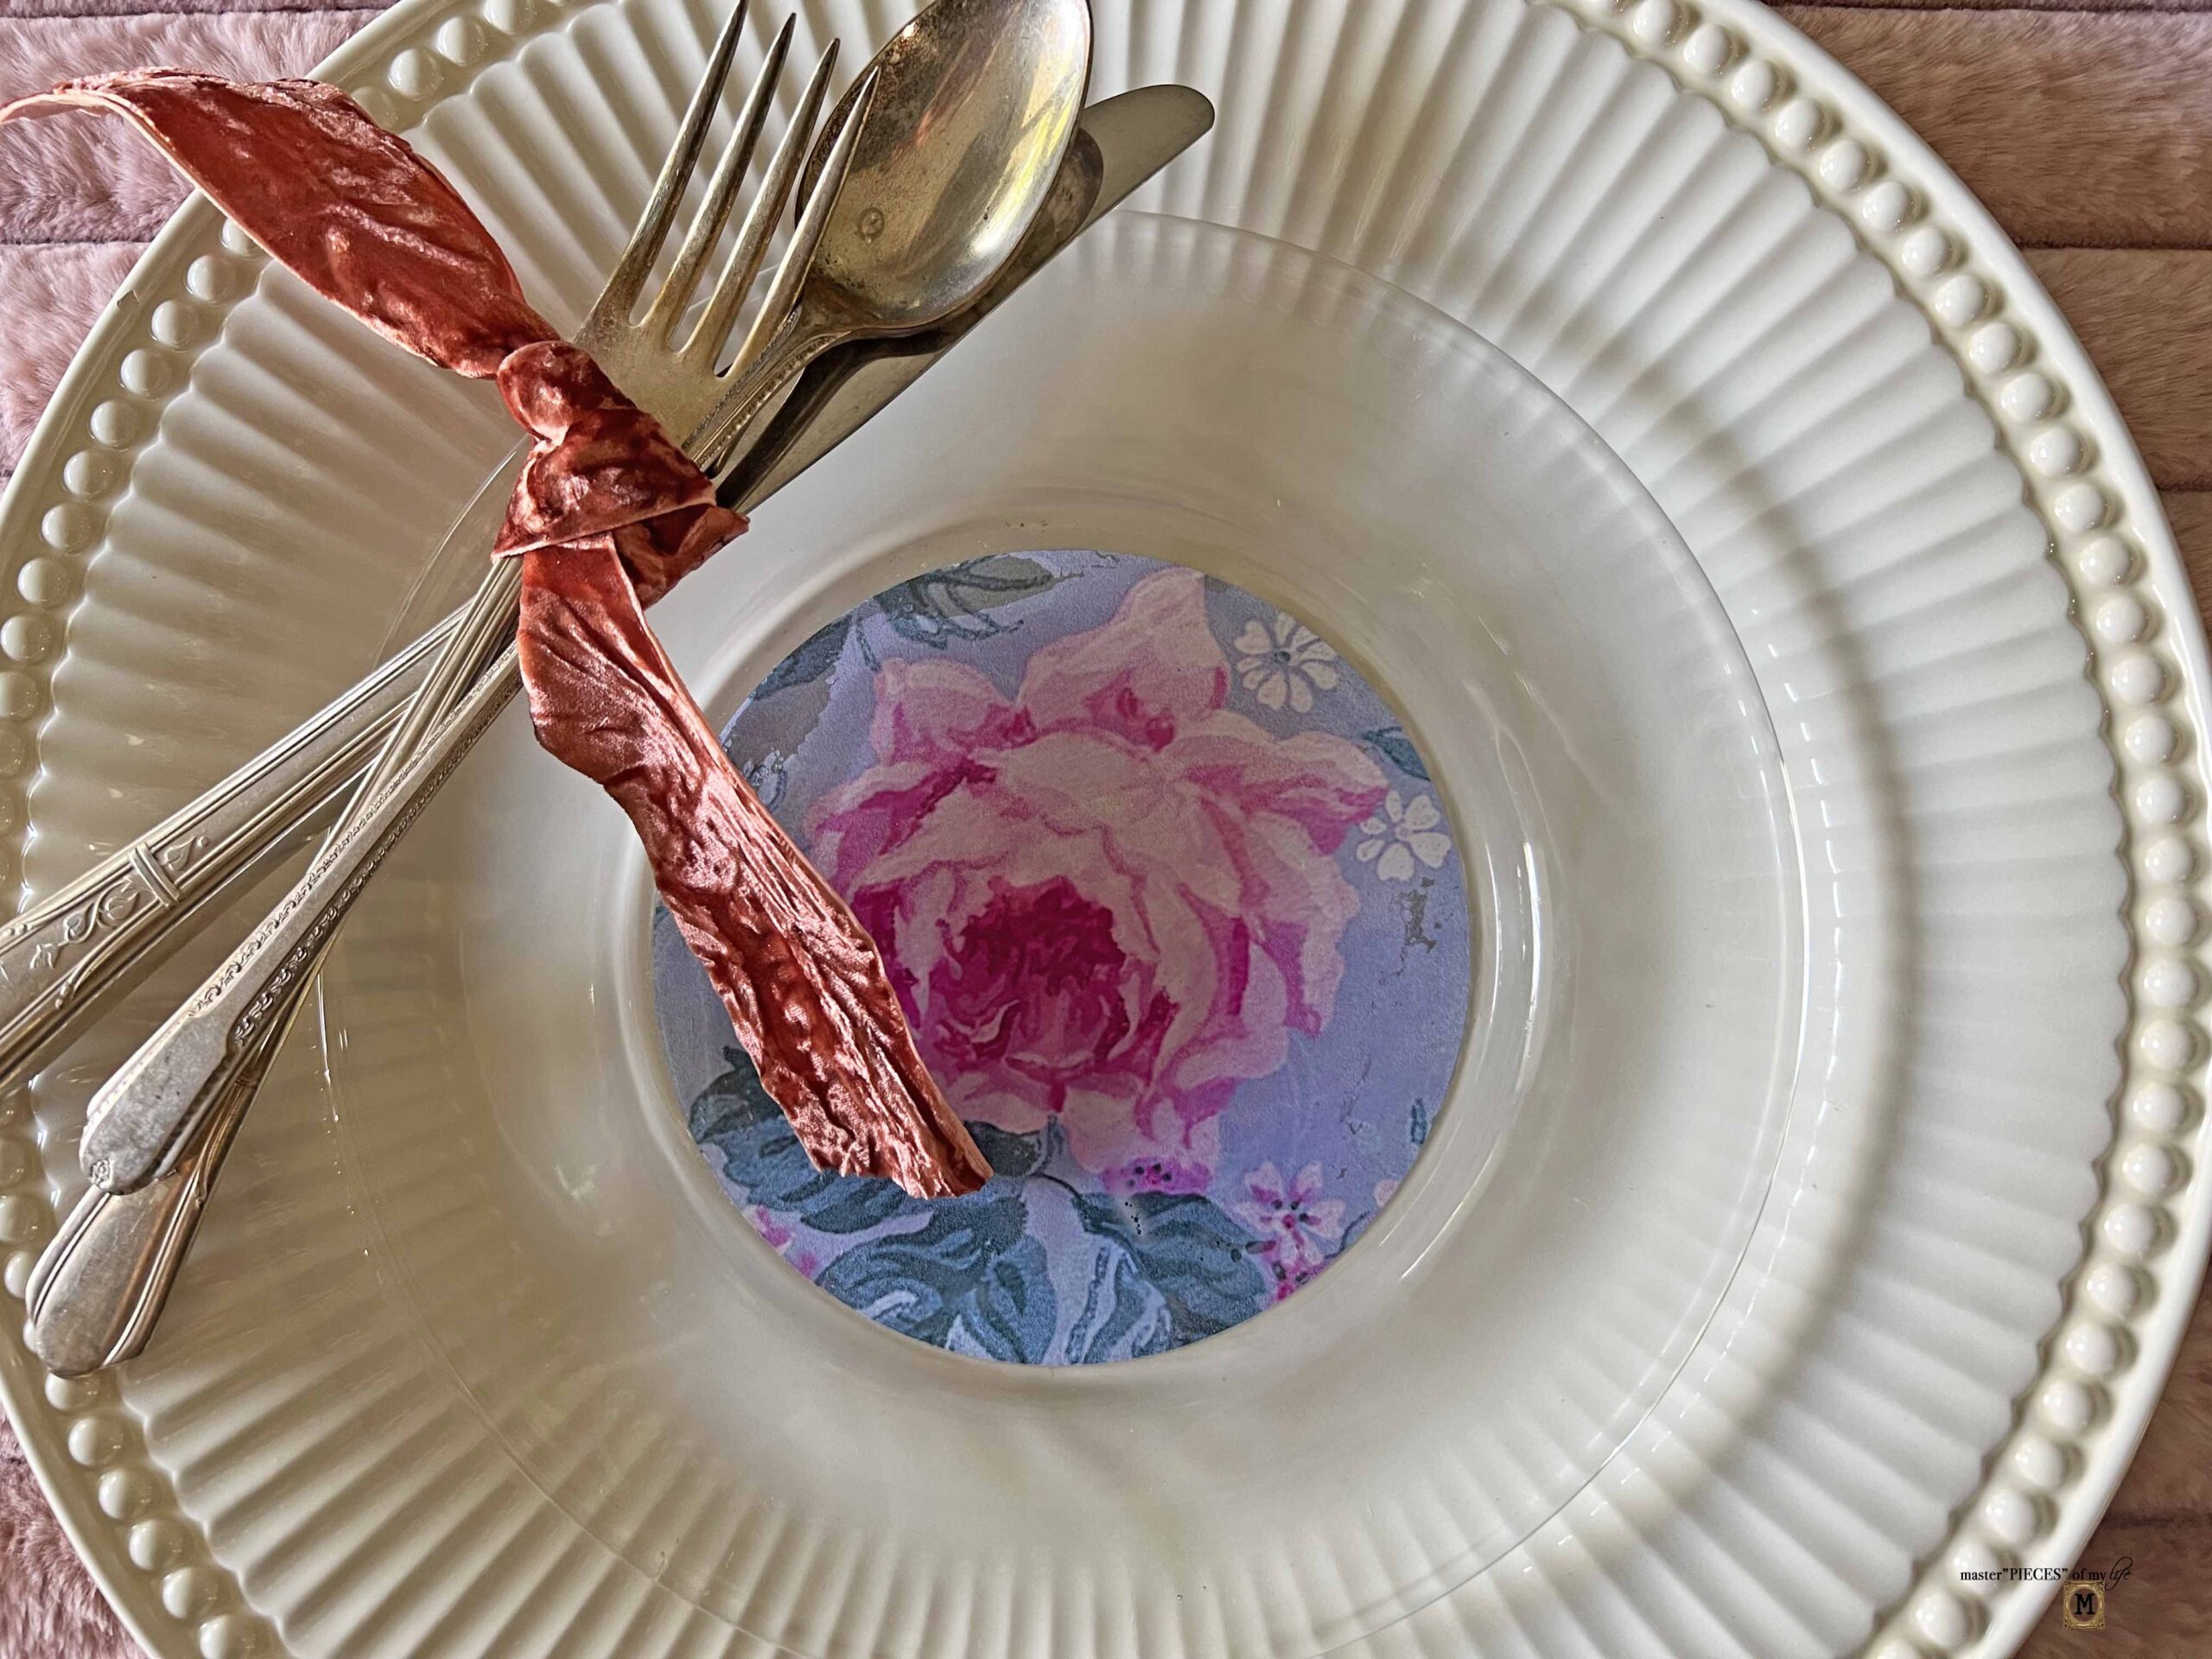
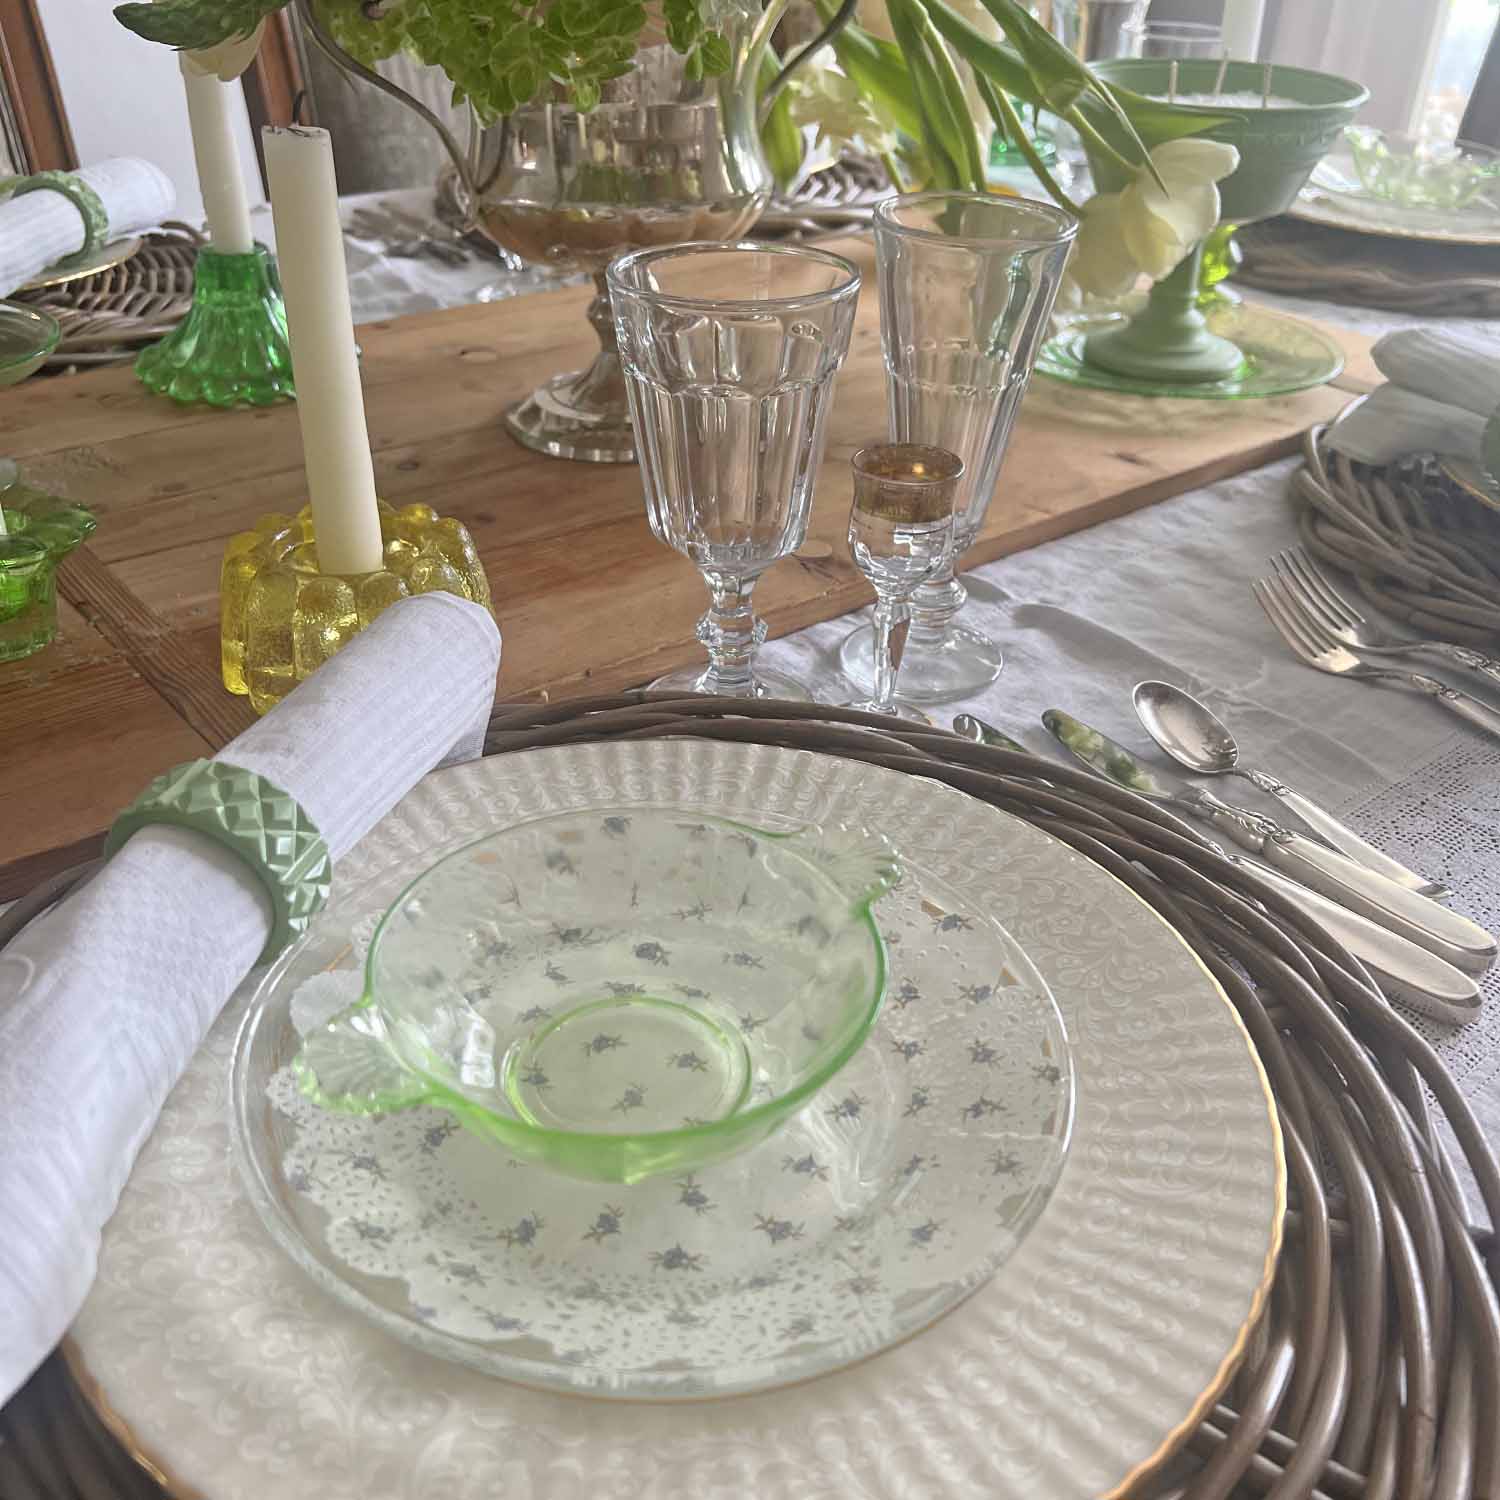
I found my glass plates at the Dollar Tree, which are 7.5-inches wide. This is a good size to use as an accent, salad or dessert plate. The doilies I stumbled upon at a local liquidation store. The doily pack came with three different designs in varied sizes. This is the middle sized doily and fit the plate perfectly.
MJ Insider Craft Pro Tip:
Read all the instructions through once & then re-read everything again, familiarizing yourself with everything you need & knowing what to expect.
Instructions
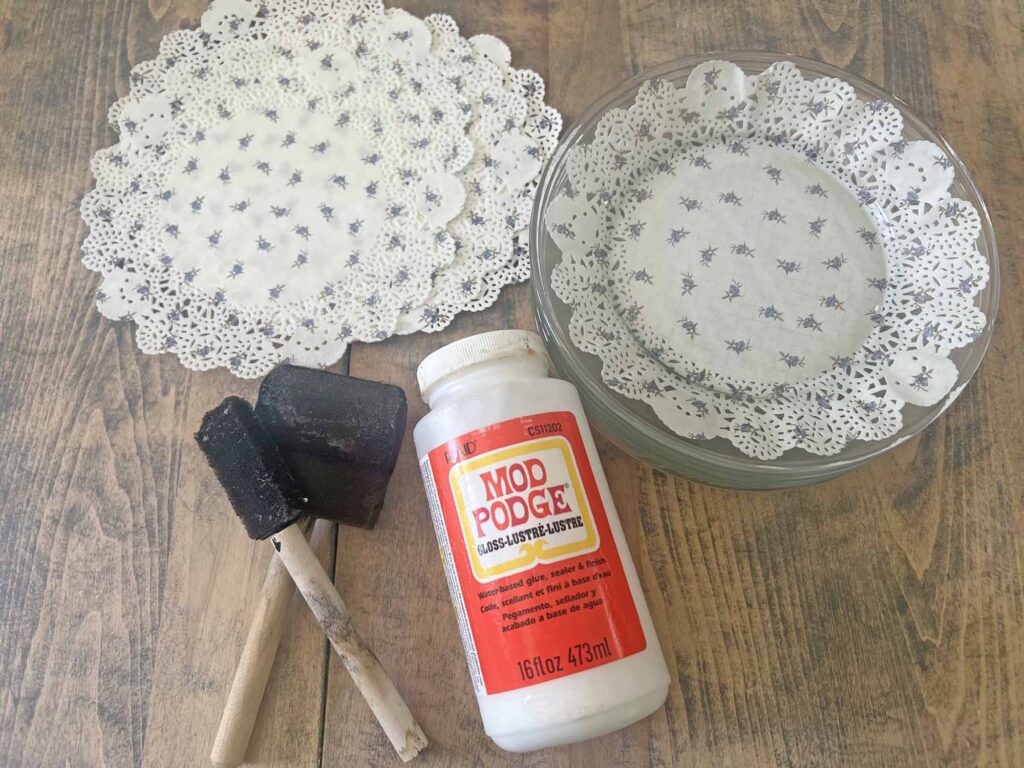
- Read instructions thoroughly and assemble all supplies & tools
- Make sure the surface of your glass plates are clean and dry
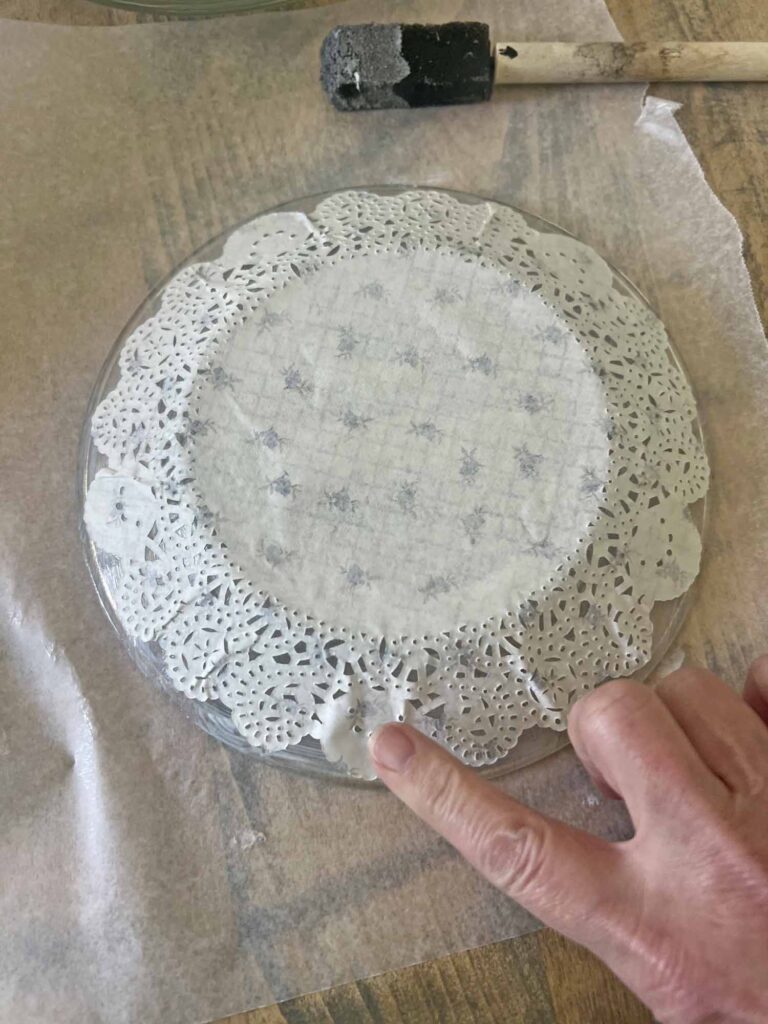
- Set a doily facing up and a glass plate facing down on piece of wax paper
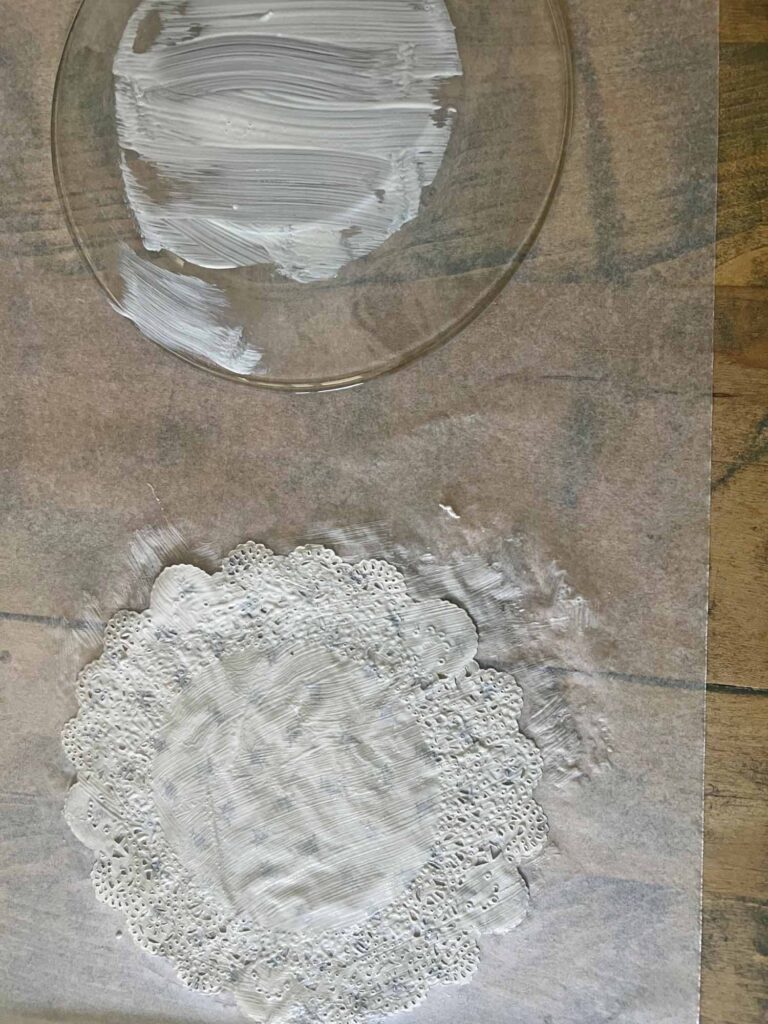
- Using foam brush gently apply decoupage medium covering entire surface of doily
- Using foam brush apply decoupage medium covering bottom of glass plate
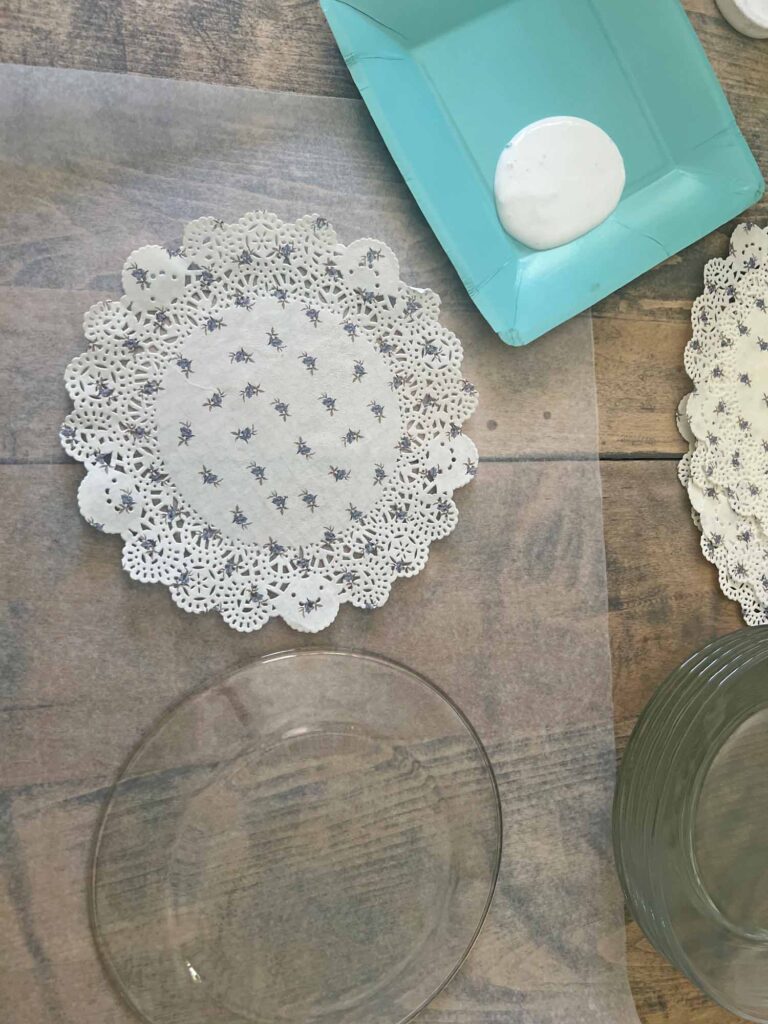
- Very carefully lift paper doily from wax paper and place on the bottom of glass plate making sure it’s centered and facing out
- Once doily is in place, use a finger to smooth out any creases or remove any air bubbles, using a gentle touch
- Allow plate(s) to cure until decoupage medium is fully dry
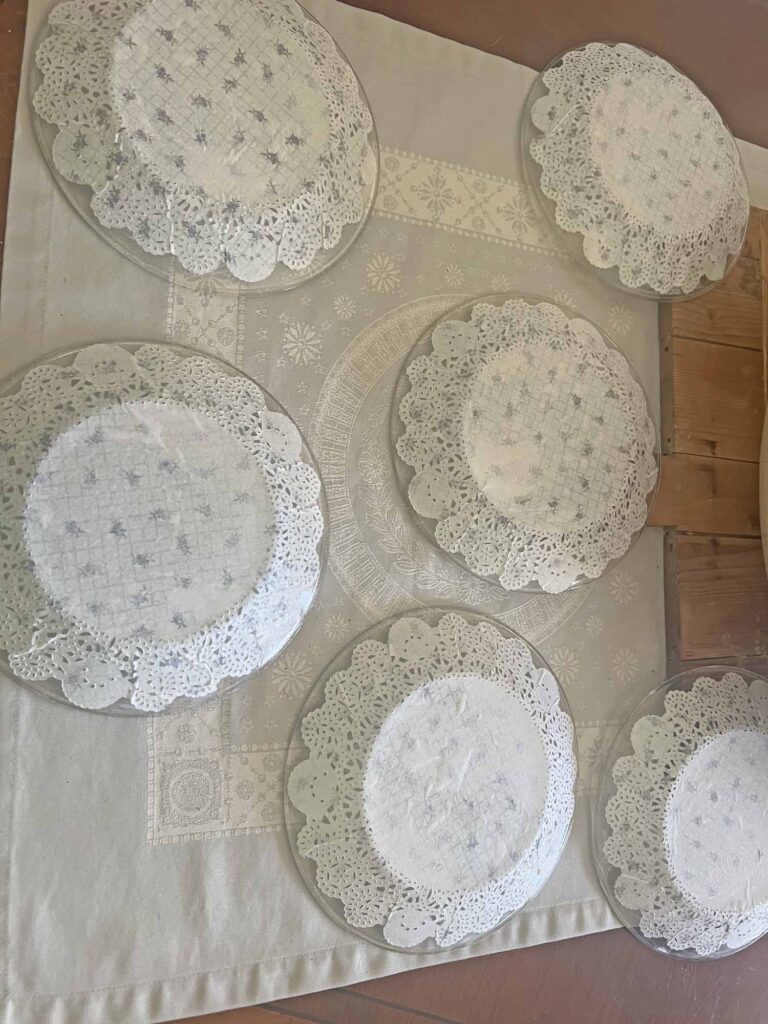
- Voila! Set the table with your new pretty doily glass plates
MJ Insider Craft Pro Tip:
Slow and steady wins the race here. Use a very gentle hand when handling the paper doily and make sure the design side is adhered facing out on the glass plate.
Tips & Recommendations to Keep In Mind
Use Protection
I recommend using a piece of wax paper as you apply the decoupage medium to the paper doily. This protects the surface you are working on and prevents the paper doily from adhering to said surface, since the glue will invariable seep through the delicate lacie details of the doily. This facilitates the process while minimizing damage.
Be Delicate
The paper doily becomes incredibly delicate when it is wet with the glue. Use a gentle hand when handling the doily, including lifting it from the wax paper and applying it to the back of glass plate. Once doily is in place use your finger very delicately to press creases out and remove any air bubbles.
Practice Patience
Allow the decoupage medium to cure and dry fully before inverting and setting the plate on anything. This way you don’t risk any tackiness sticking to something or ripping the paper. Overnight frying time is a good idea before handling and setting on the table.
Clean Excess
Do not panic if you have glue residual. Decoupage medium tends to dry clear, but should you have excess you wish to remove, a simple paper towel or cotton swap with water does the trick. Once again apply a gentle hand when cleaning up areas around the delicate lace pattern.
Know Limitations
Please be aware these are only intended for a one time use. Thoroughly washing the plates will remove the paper doily. If the plates are not super messy and you apply a very gently hand when you clean the plates, you might be able to get a few repeated uses. The paper is on the bottom of the plate and the food should only touch the top of the glass plate. Only use soap and water to clean the top and avoid the bottom.
MJ Insider Decor Pro Tip:
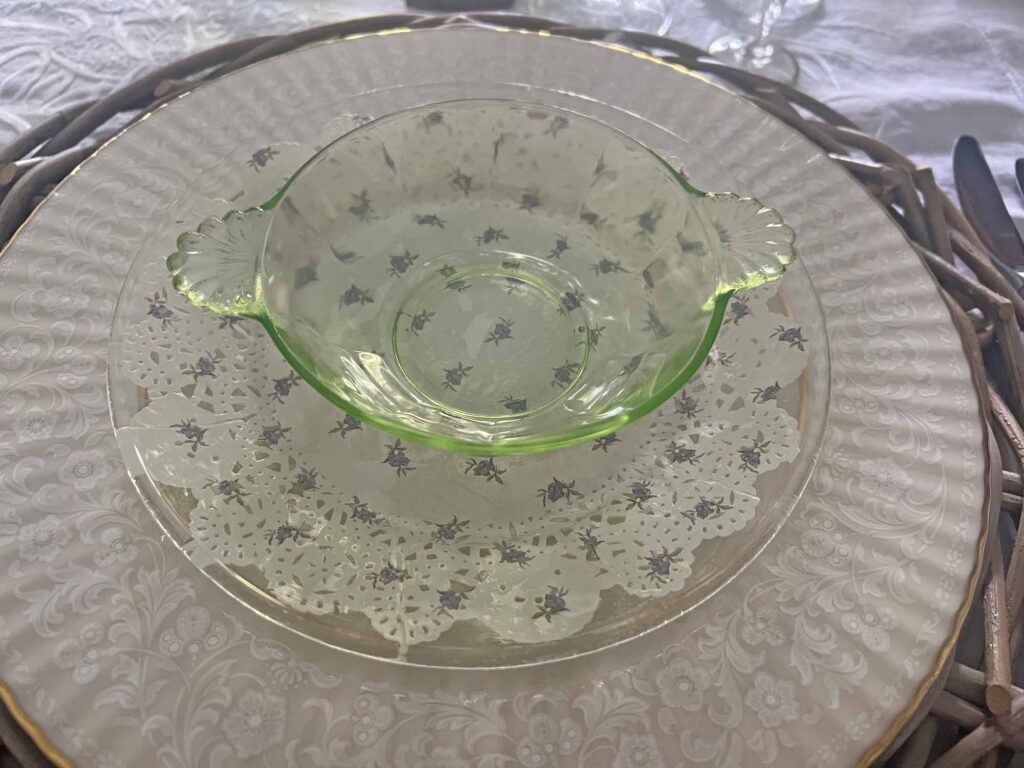
These DIY doily plates are easy and affordable, and should you wish to extend their use, you can:
1. Simply remove them from a place setting before the food is served.
2. Simply display them as decor in a china cabinet or hutch.
3. Simply use them to display decor as a candle base, plant holder or candy dish.
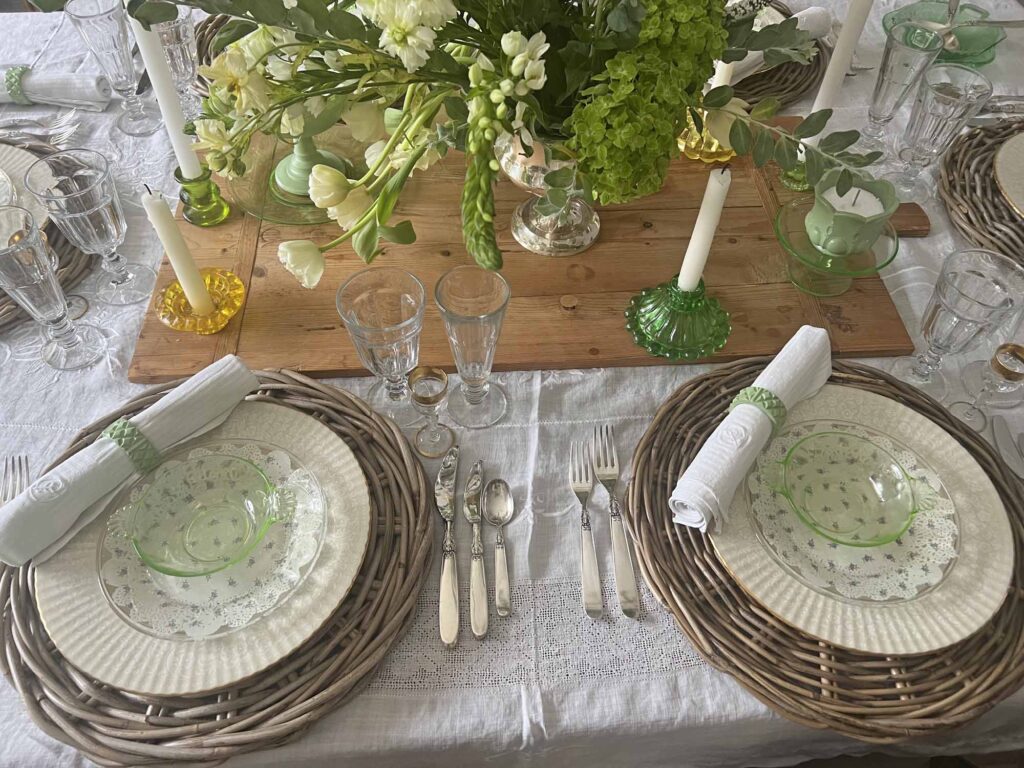
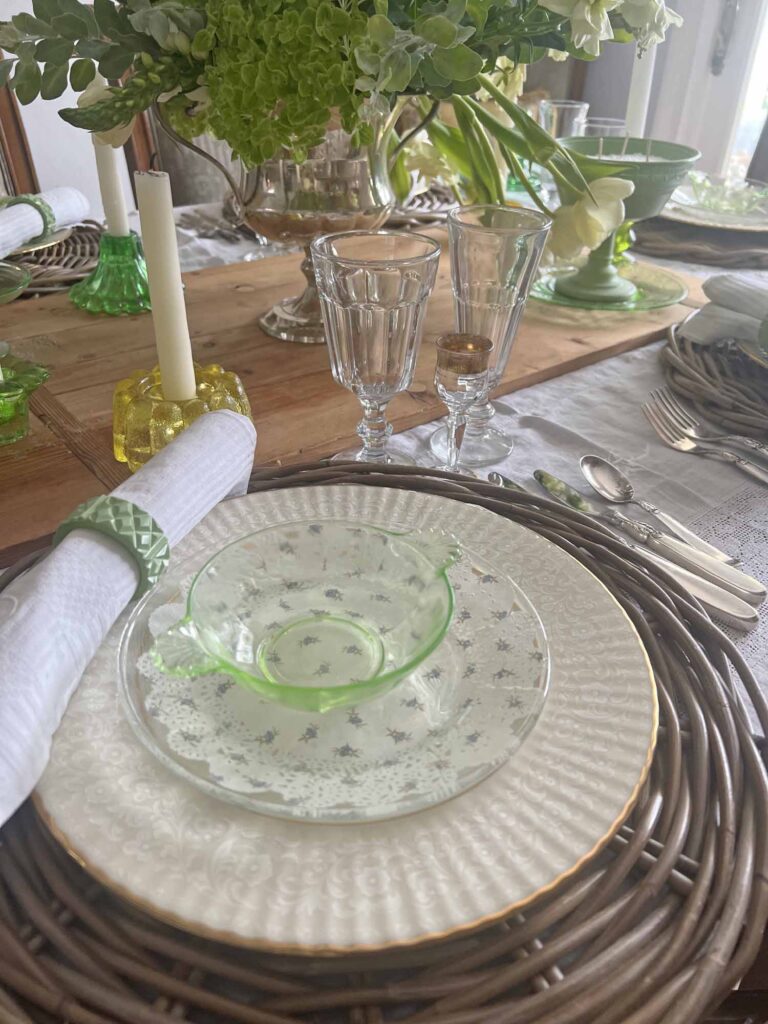
In case you missed it, I recently showcased these doily glass plates on a vintage inspire spring table design. The doily plates have this perfect blend of vintage charm and modern elegance that makes any tablescape feel special. The only catch? The price tag. This DIY hack fixes the problem!
More Related Posts

Grab a copy of my free
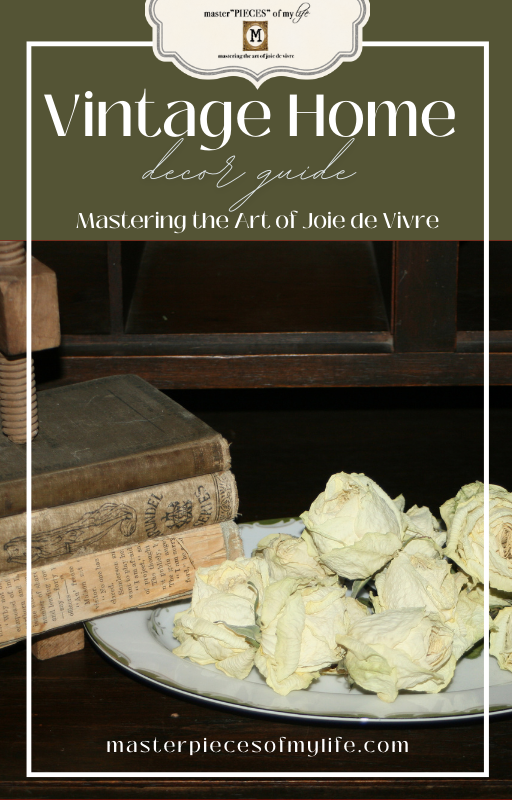
Vintage Home
Decor Guide
This guide provides 10 easy ideas to add timeless charm to your home with a free PDF full of images and inspiration.
We are always striving to master the art of joie de vivre around here. If you enjoy the good life and want a reflection of this in your home, please consider joining the Masterpiece community. Sign up you won’t miss any new content, receiving all new posts directly into your in-box.
Closing Thoughts ~ Conclusion
Terrain is one of my favorite retail destinations, but it is a spendy situation. Therefore when I can mimic the look at the fraction of the cost, I give it a go. What do you think of this doily plate DIY hack? A high end dupe is always a challenge, which makes it especially satisfying. Are you inspired to give this a try? Please share if you do. Personally, I’m obsessed with these gorgeous lace-embossed glass plates reproduction with a few affordable supplies.
Thanks for dropping by today and spending time with me. Looking forward to next time.
Au Revoir!


FAQs ~ Doily Plate Tutorial
1. How much does this DIY cost compared to Terrain’s plates?
Terrain’s decorative glass plates can run anywhere from $28 to $58+ per plate. This DIY version costs roughly $2–$5 per plate depending on where you source your supplies — that’s up to 95% savings for a nearly identical look.
2. Are these plates food-safe and dishwasher-safe?
The glue & doily is only applied to the underside of the plate, so the top surface you eat off remains untouched and food-safe. As for washing, hand washing the top of plates only is recommended to preserve the doily and keep the design looking its best — skip the dishwasher to extend the life of your plates.
3. Can I use any size or shape of plate?
Absolutely! This technique works on dinner plates, salad plates, chargers, and even glass bowls. Just make sure your doily is large enough to cover the area you want to imprint. Larger plates may need a bigger doily or overlapping sections for full coverage.

Don’t forget to Pin It and save for later. You never know when inspiration will strike!
For more inspiration follow me on Pinterest.
Most Recent Posts
How to Set a Vintage Inspired Spring Table
To accomplish great things we must not only act, but also dream; not only plan,
Anatole France
but also believe.”
This is so pretty, wow, love it
Thank you for sharing with us at SSPS 407. See you again soon
Thanks so much Esme. I’m so glad you like the plates. See ya at the next party. XO- MJ
Wow, MaryJo, what a gorgeous result! I’m all for DIY at a lower cost, too. So pretty. Thanks for sharing this post with us at the Will Blog for Comments #82 linkup.
Thanks Jennifer. Yes, such an easy hack at a fraction of the cost. Thanks for popping in- I appreciate you. XO- MJ
I am very happy to share your Terrain plate hack, MaryJo! Several of my friends in California used to make plates just like these for different holiday teas at their homes. I was always working at school so thinking that far ahead for setting a table rarely happened (only in summer!). Sharing at this week’s Share Your Style #496 for you. <3
Also, can you tell me how you make the colored text boxes here on your blog? Can I make them in WordPress, Canva? And if in Canva, if you know, how do you size the rectangle correctly?? I was experimenting earlier for a post coming up. 🙂
Thank you and I might have to pick up some glass plates and make some fun summertime plates!
Hugs,
Barb 🙂
Thanks so much Barb. I appreciate you! Where in CA did you live? I feel like we might have talked about this already. XO- MJ