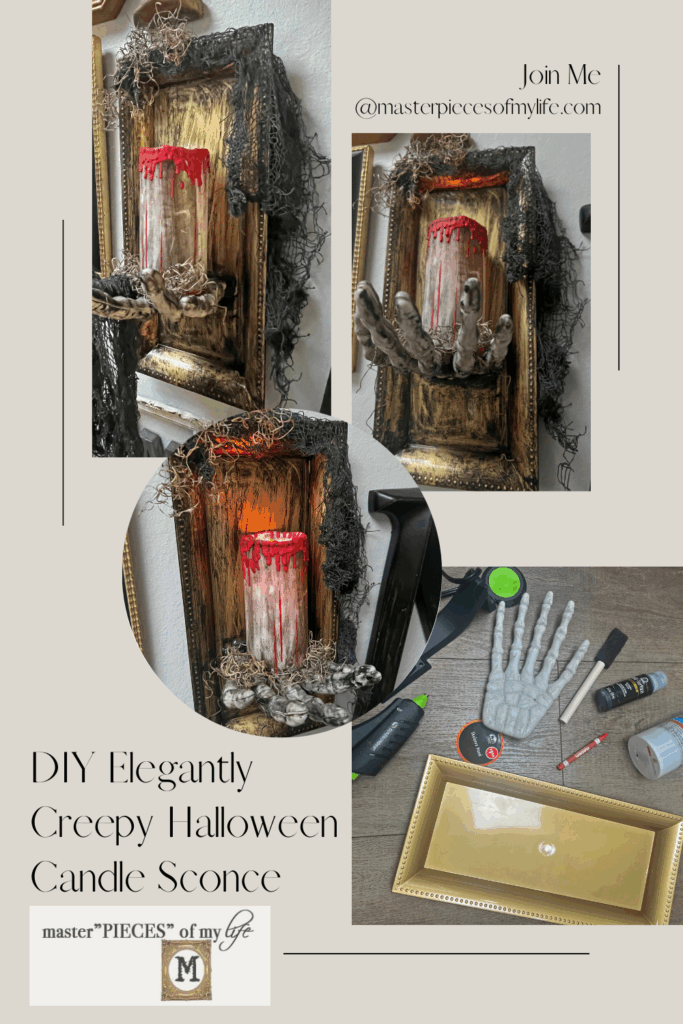
DIY Elegantly Creepy Halloween Candle Sconce
Hello friends! Today I have a fun DIY tutorial to create some Halloween ambiance in your home. Candles add all the great vibes for any occasion or season. This DIY Halloween Candle Sconce has the best balance of elegant and creepy. Come on in and let me share how easy and affordable this project is. Once again Dollar Tree for the win!

*Affiliate links might be included for your convenience. These affiliate links mean a small commission is earned if you make a purchase using these links at no extra cost to you. As an Amazon Associate qualifying purchases support this website. For more information: Full Disclosure Policy.
Inspiration of the Elegantly Creepy Halloween Candle Sconce
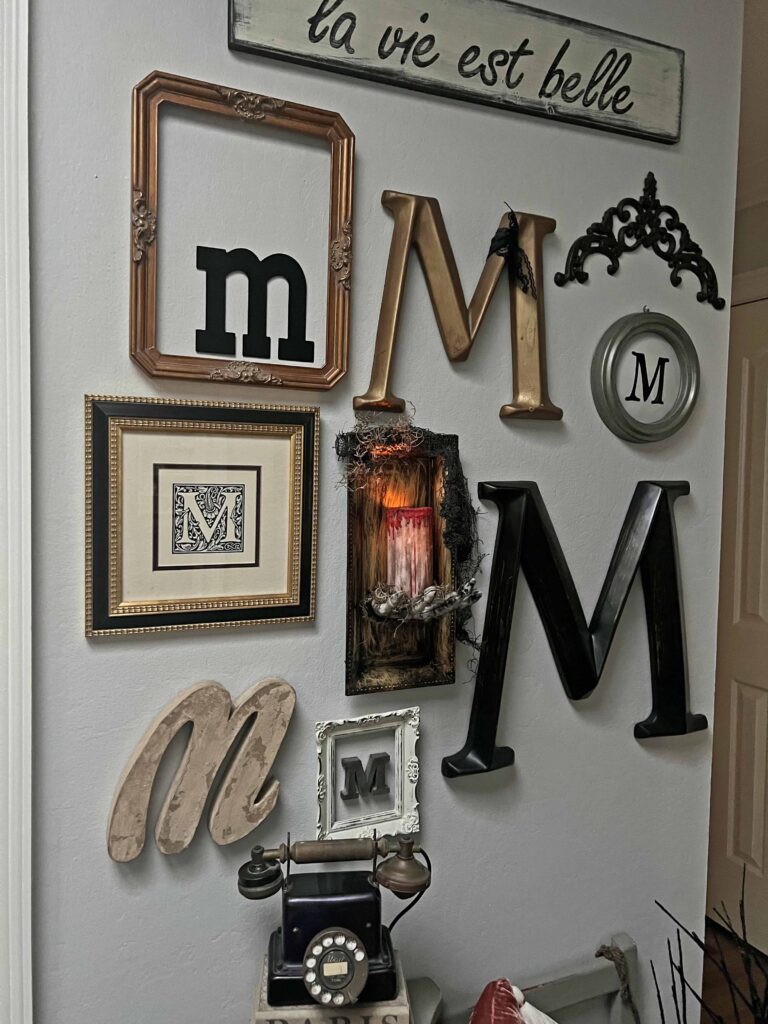
I take zero credit here since I got this idea from LivinwithMB. She has the best seasonal project ideas, and when I saw this one, I knew I had to make it for our monogram gallery wall in the foyer. It’s the greatest detail to greet our guests into our home during the Halloween season. I thought I would share it here since I don’t know if my readers also follow MB. If you don’t, you should since she’s a riot and super inspirational. You can find her here.
How to Create the Elegantly Creepy Halloween Candle Sconce
I pretty much followed MBs tutorial with 2 exceptions. I used a Dollar Tree candle, which I think I might have to change out since it doesn’t have enough oomph. MB used a Walmart battery operated candle and for a few dollars more, I think it’s totally worth it. Also the skeleton hand I found is not as cool as hers, lol. The fingers on mine are straighter, and I much prefer the curved fingers. I have a solution for that, which I share below in the tips and technique section.
Supplies
- Rectangular Gold Tray
- Skeleton Hand
- Battery Operated Candle
- Black Acrylic Paint
- Red Crayon
- Creepy cloth and | or Spanish Moss (if desired for styling purposes)

Tools
- Foam Brush
- Paper Towels
- E6000 Adhesive
- Hot Glue Gun
- Glue Gun Glue Sticks
- Silicone Finger Protectors
- Matches or Lighter
- Craft Knife
- Heavy Duty Scissors
Crafting Pro Tip: As I recommend with all my projects, read all the instructions through once and then re-read everything again. This way, you are familiar with everything you need, including supplies and tools, plus you know what to expect.
Instructions
- Read all the instructions and assemble all necessary supplies & tools
- Remove all tags and stickers from materials
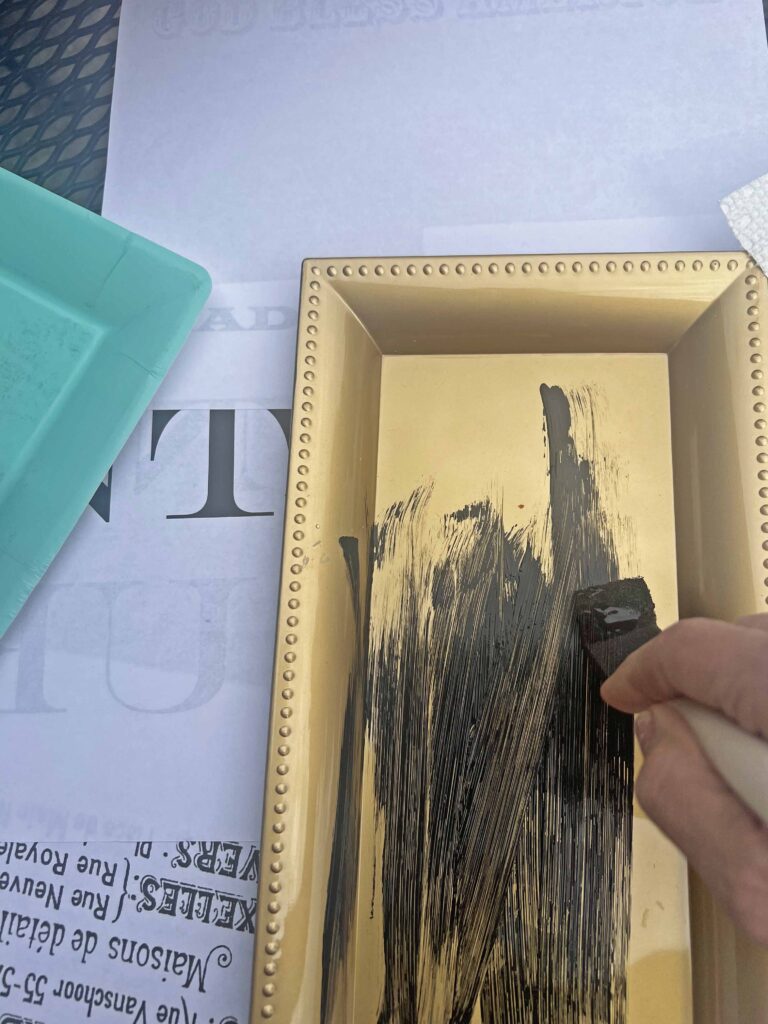
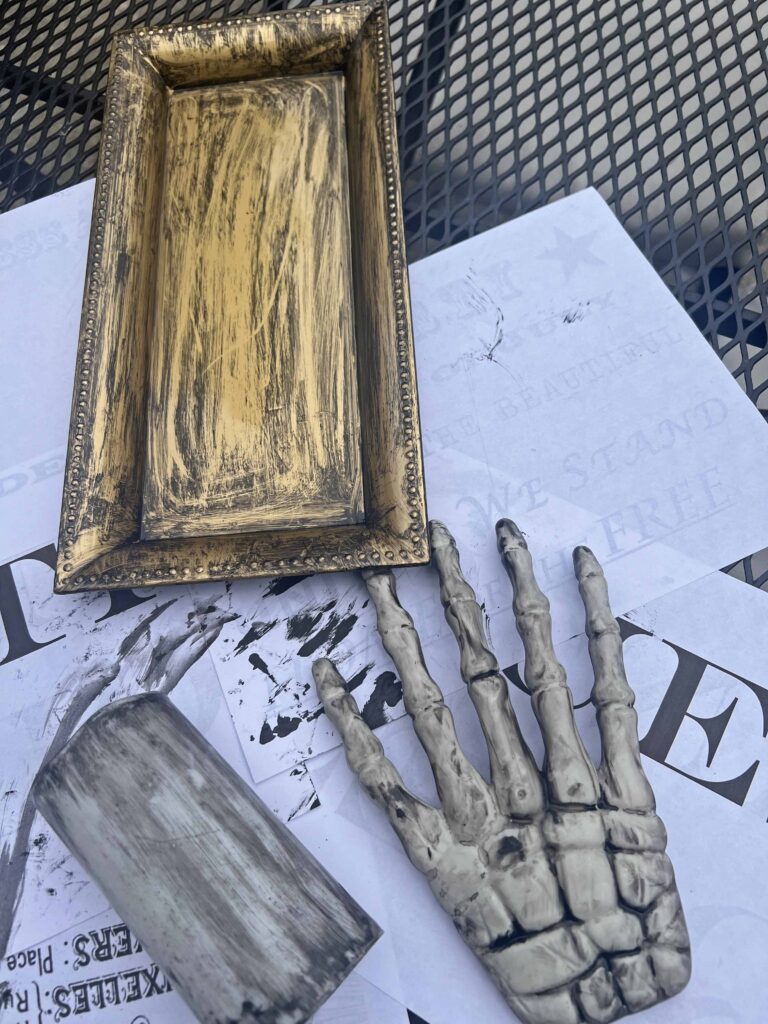
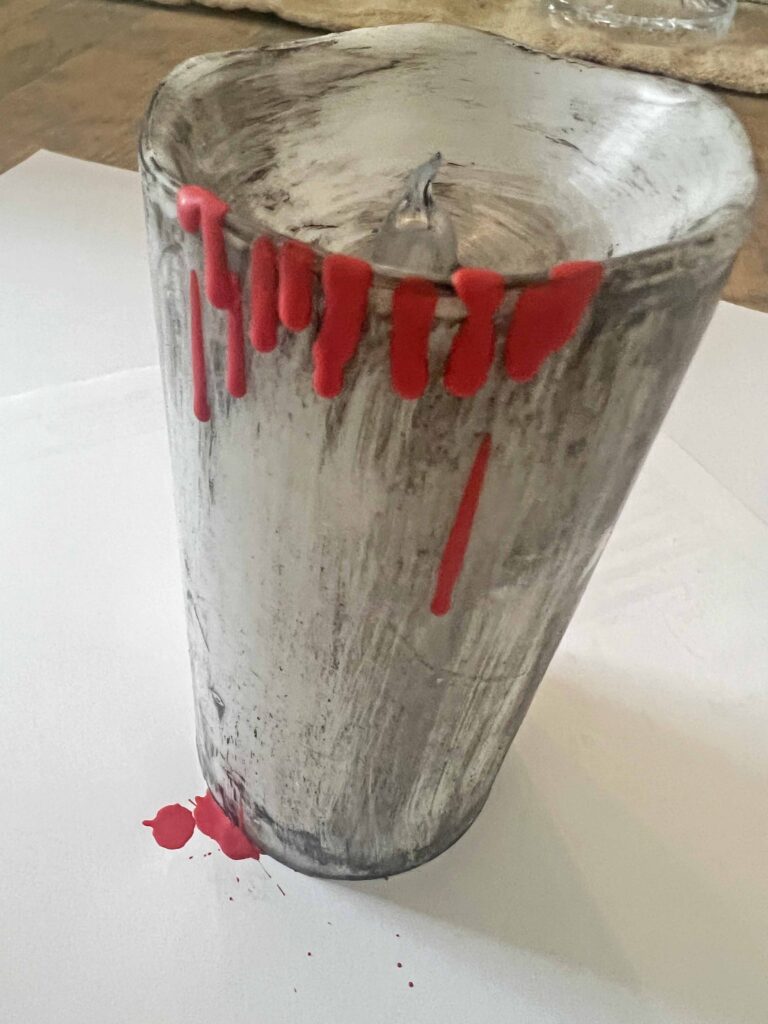
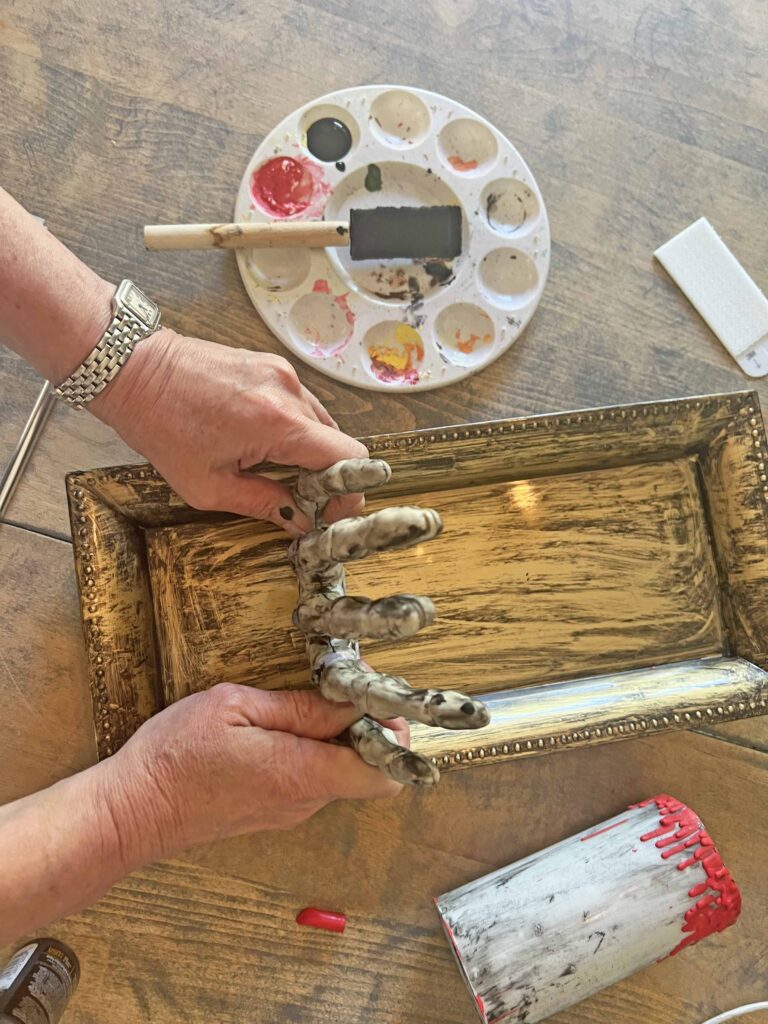
- Brush black acrylic paint liberally on gold tray and wipe down with dry & wet paper towels to create a grunge look

- Use same technique as above on skeleton hand and battery operated candle
- Set painted pieces aside
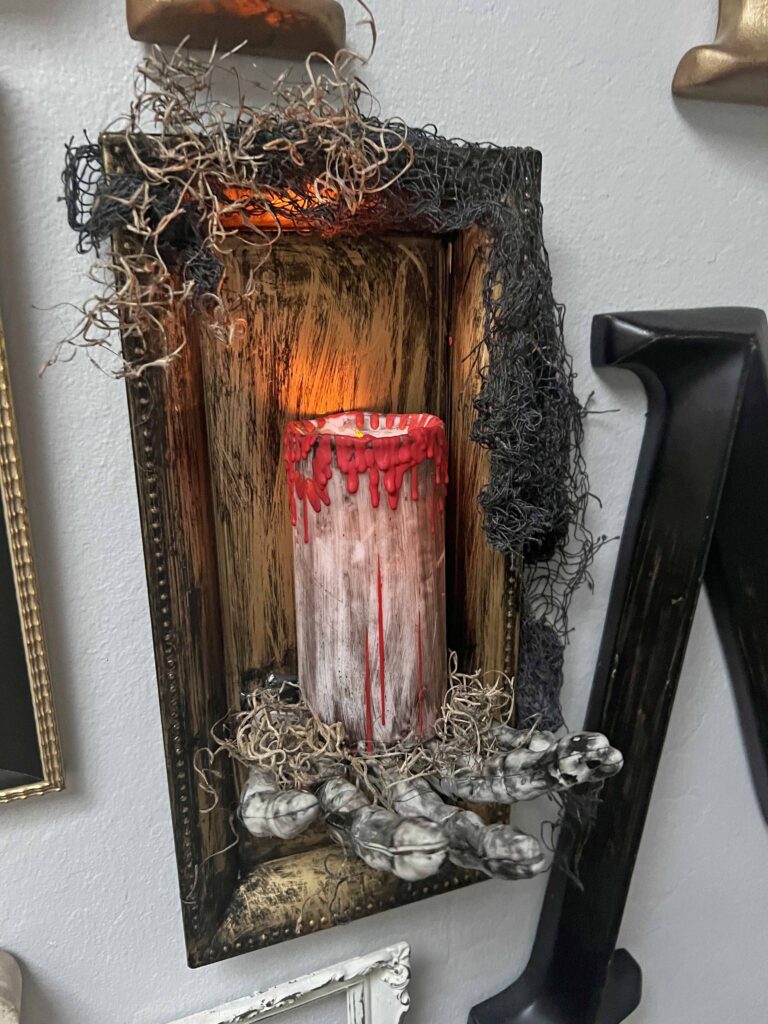
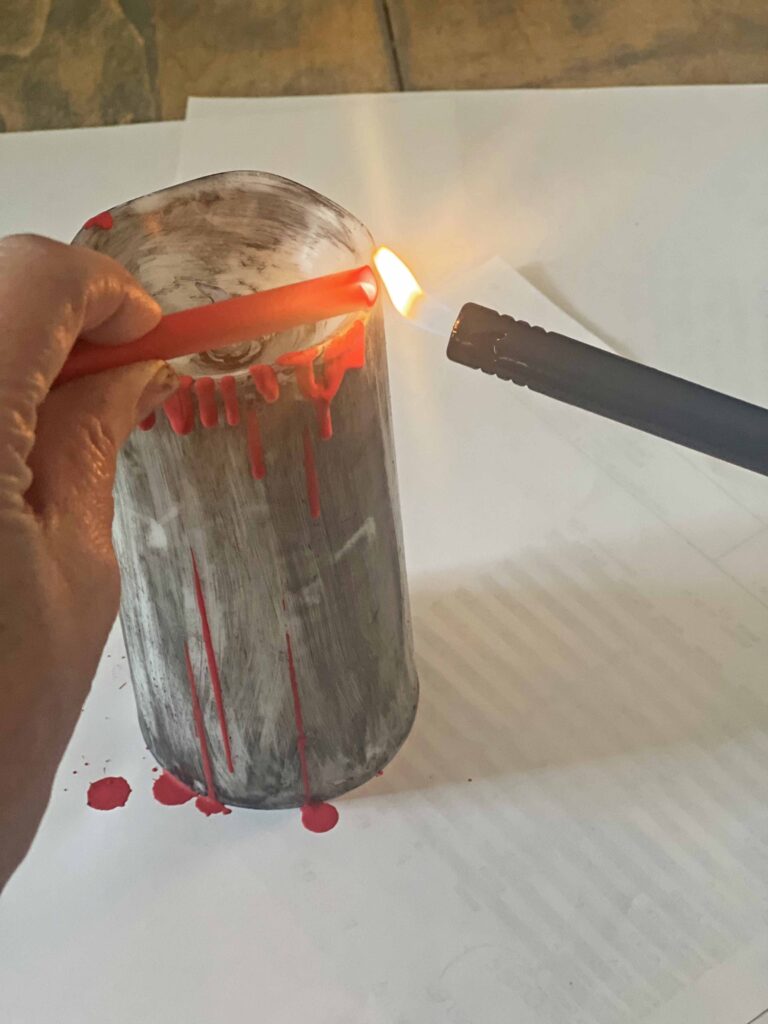
- When candle is fully dry, peel paper on red crayon and melt red wax on candle edge to create red streaks
- Plug hot glue gun in to warm up
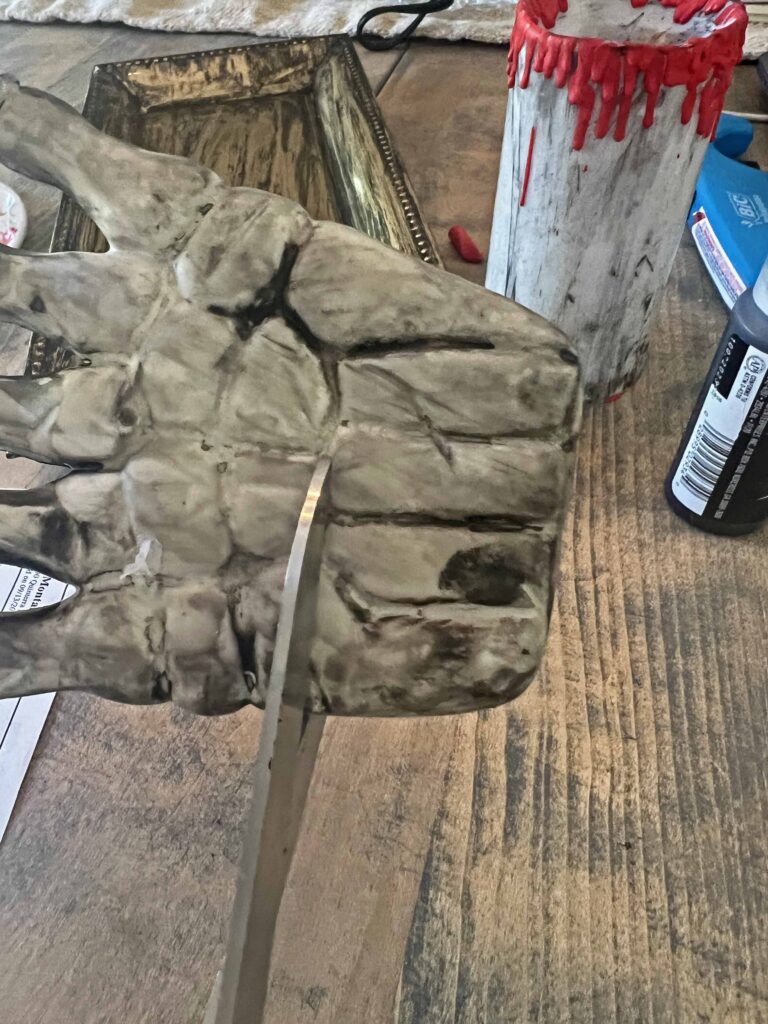
- Using heavy duty scissors cut edge of hand on wrist end about 2 inches to shorten length
- Using E6000 Adhesive attach wrist end of skeleton hand towards bottom of tray with hand facing up
- Hold in place while it adheres (this takes a bit of time please be patient)
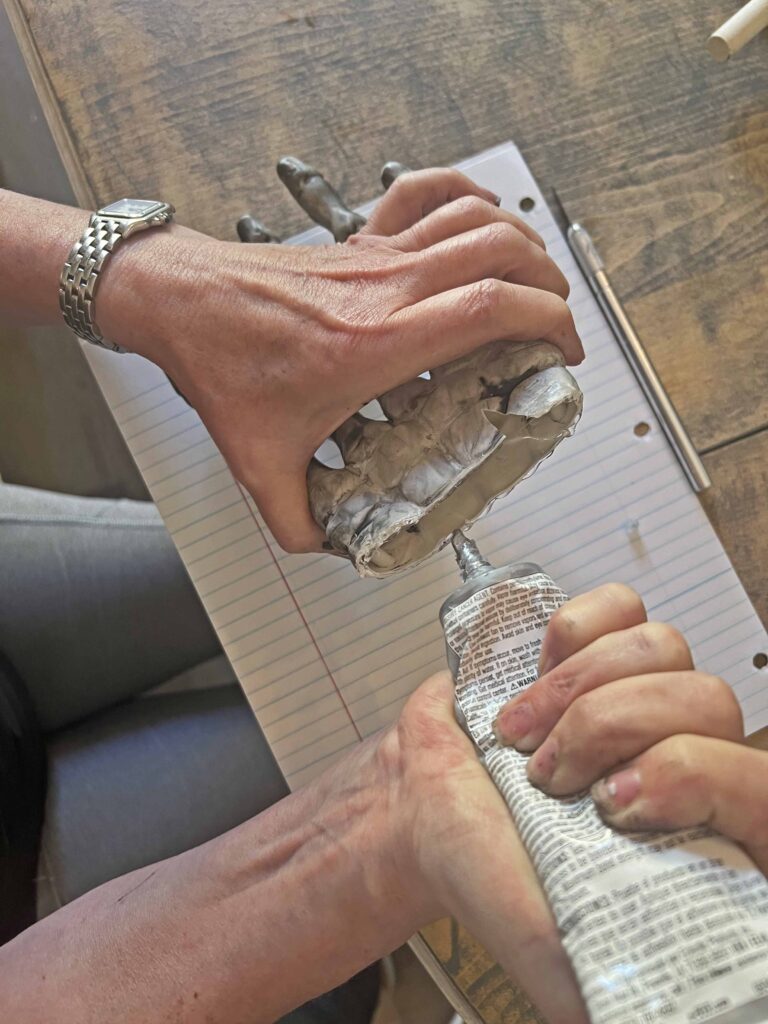
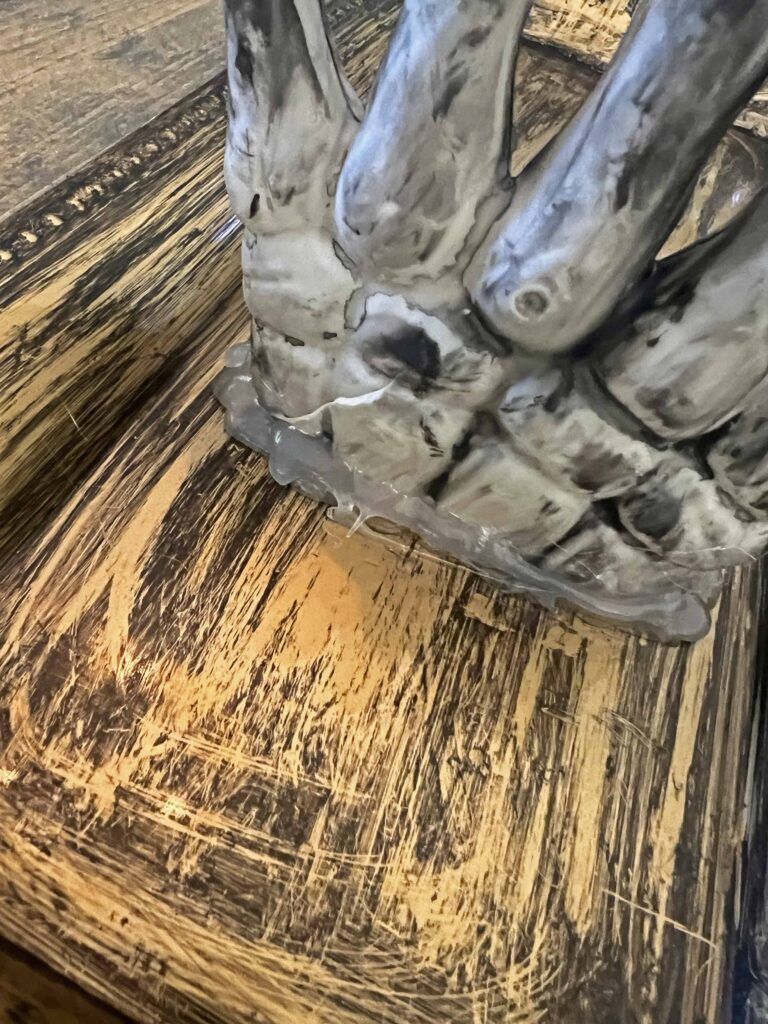
- Once the hand is set on the tray add a liberal amount of hot glue around hand where it meets the tray
- Allow hot glue to fully set and add another layer of hot glue
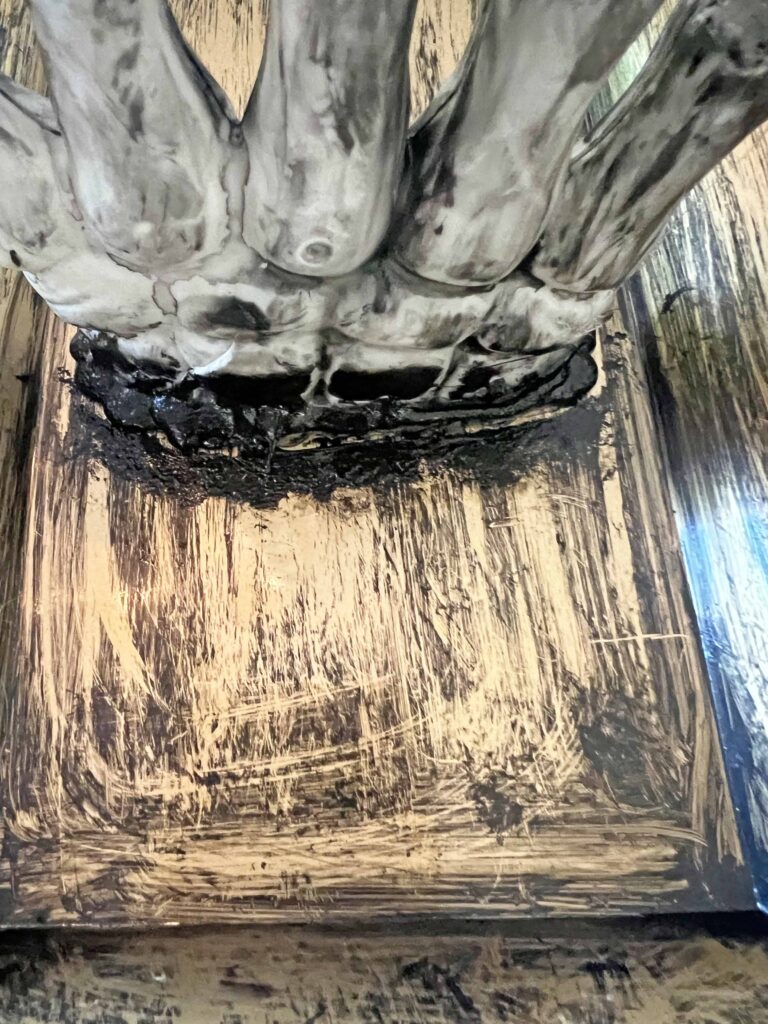
- Once the 2nd layer of glue is dry, add more black acrylic paint over all the glue to mask it and dab with wet & dry paper towels to blend
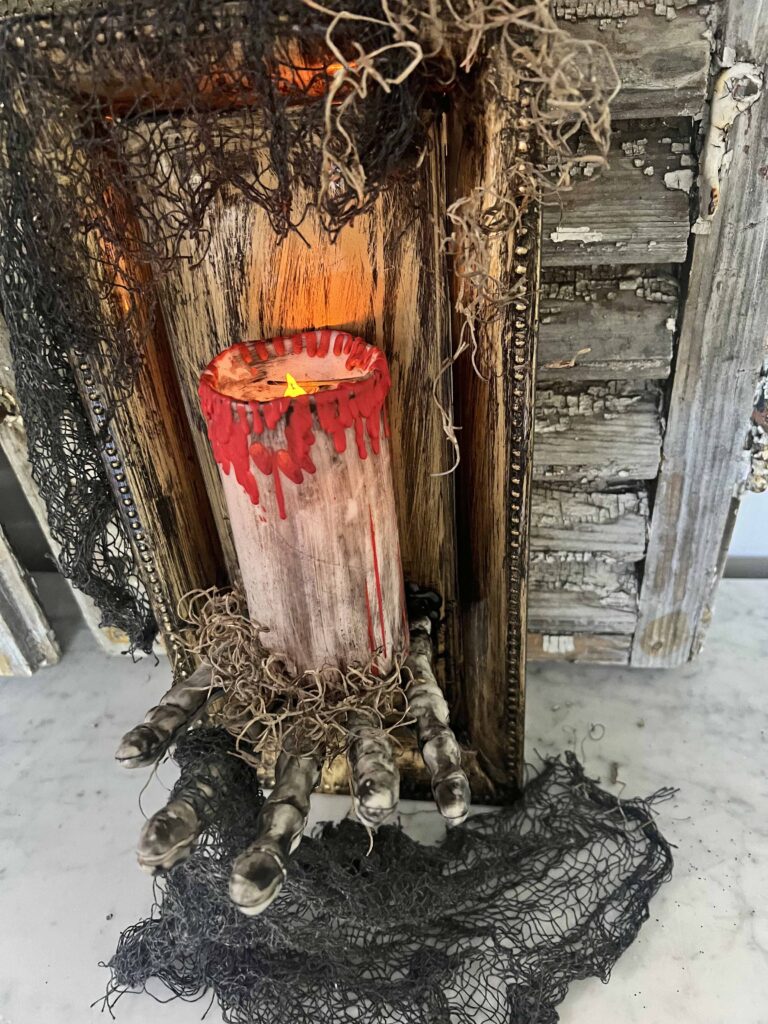
- You can display sconce on a wall using double sided tape or prop on a shelf, mantel, cabinet, etc., placing candle in open skeleton hand
- Style using Spanish moss and | or web cloth to amp up the creepy factor
- Voila! Enjoy your new elegantly, creepy Halloween candle sconce
Tips & Techniques for the Halloween Candle Sconce DIY
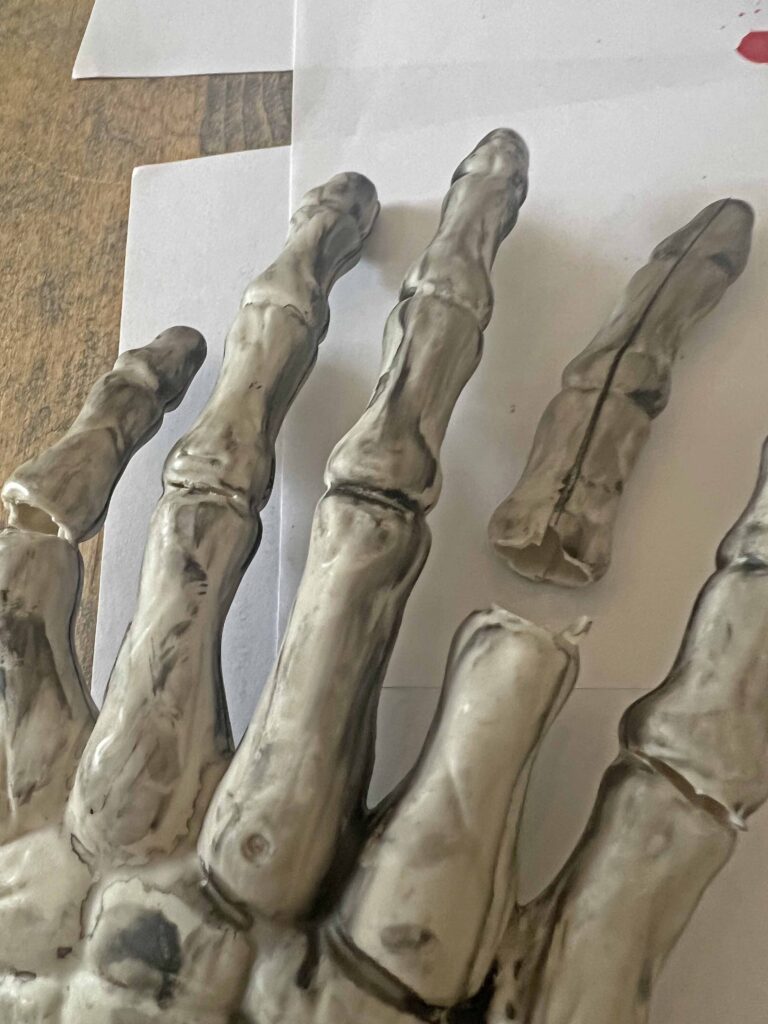
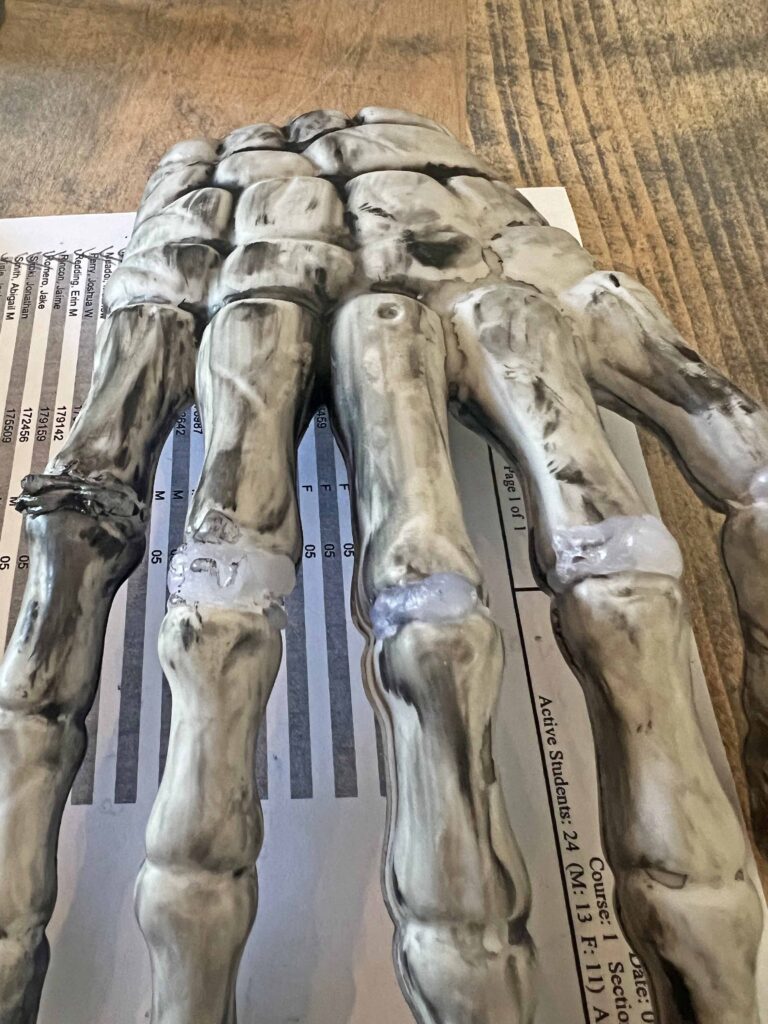
As I mentioned above my skeleton hand had fairly straight fingers, and I like the curved fingers around the candle look. I tried adding a bit of heat to the fingers to bend them, but the plastic is pretty brittle and not rubbery at all. Sooo, I cut the plastic around the top knuckle in order to bend the fingers a bit. I tried to be as gentle as possible, but of course I broke one of the fingers off. In order to keep the fingers in the bent position I had to add hot glue at the cut joints, so I simply hot glued the broken finger back on. I used the black paint to mask the glue at the joints. I prefer how the fingers bend a bit rather than straight.
Like I mentioned, the plastic is pretty brittle and the hand is hollow, which makes gluing the hand to the tray a bit of a challenge. Allowing the E6000 glue to adhere securely to the tray is critical. By adding the hot glue on top of E6000 once it sets and cures, it really helps seal and bond the hand to the tray. Don’t worry about the thick glue layer since the paint will disguise it.
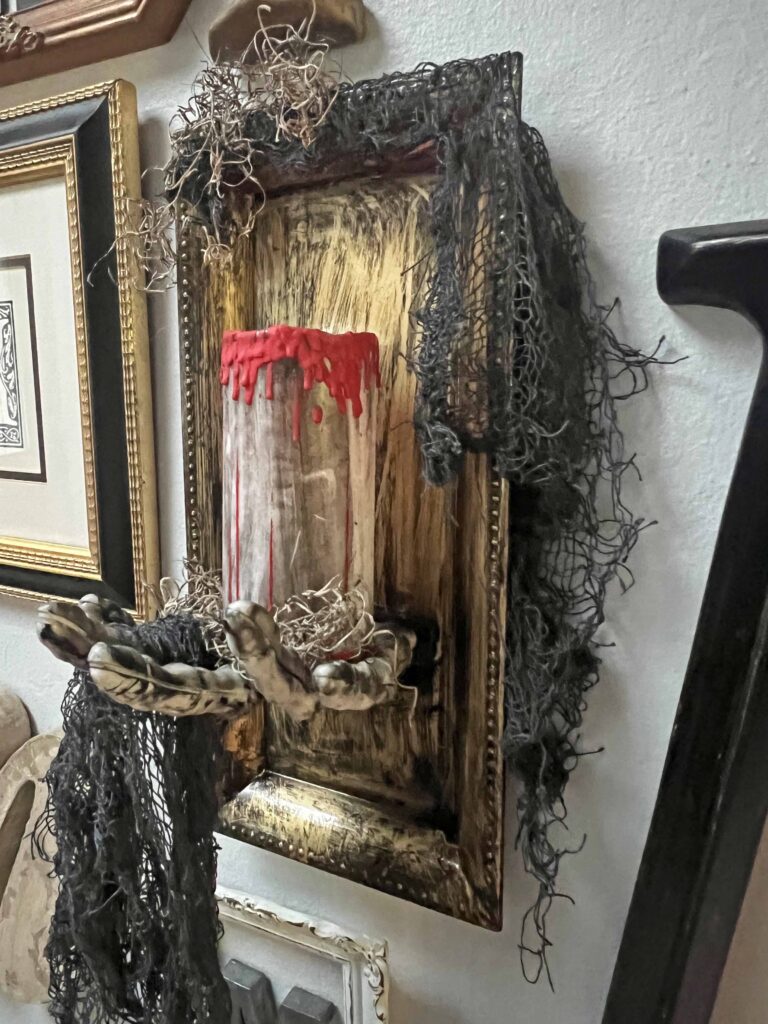
The DollarTree candle is not very powerful and only really shines when it’s super dark. I might trade it out so we can enjoy the candle sconce for a longer period of time during the day. If I get to it sooner rather than later, will share the update before Halloween. Either way, I absolutely love how it looks in the monogram gallery wall. What do you think about the DIY elegantly, creepy Halloween candle sconce?

Get the Elegantly Creepy Halloween Candle Sconce DIY Look
- Rectangular Plastic Tray
- Skeleton Hands
- Battery Operated Flameless Candle
- Hot Glue Gun
- Glue Gun Glue Sticks
- E6000 Adhesive
- Heavy Duty Scissors
- Black Acrylic Paint

More Related Posts

Most Recent Posts
The moon has awoken with the sleep of the sun, the light has been broken; the spell has begun.”
Midgard Morningstar
Great project! I don’t do scary Halloween decorations around my house, not because I have anything against it, I am usually just glad to get my Fall decorations up in time to enjoy them for a few weeks before putting up Christmas decorations. All that to say that I really like this project and think you did a great job on it. This post will be a feature this week. #HomeMattersParty
Thanks so much Donna. I know this time of year is a big balancing act. I have fall in one room, Halloween in another and Christmas is slowly creeping in. lol. XO- MJ
Wow. Wouldn’t like to come across this in the middle of the night.
Amalia
xo
lol. So true. Spooky fun!
This is so fun, so glad you are sharing it again. I am featuring this creepy project at Love Your Creativity.
Thanks so much Linda. It’s spooky fun for sure. Thanks for the feature. See ya at the party. XO- MJ
Elegantly creepy is a great description! 🙂 You are so creative. Thanks so much for sharing this post with us at the Will Blog for Comments #70 linkup.
Thanks Jennifer. Halloween is so fun. Lets us play a little more than other holidays. Thanks for the visit. XO- MJ