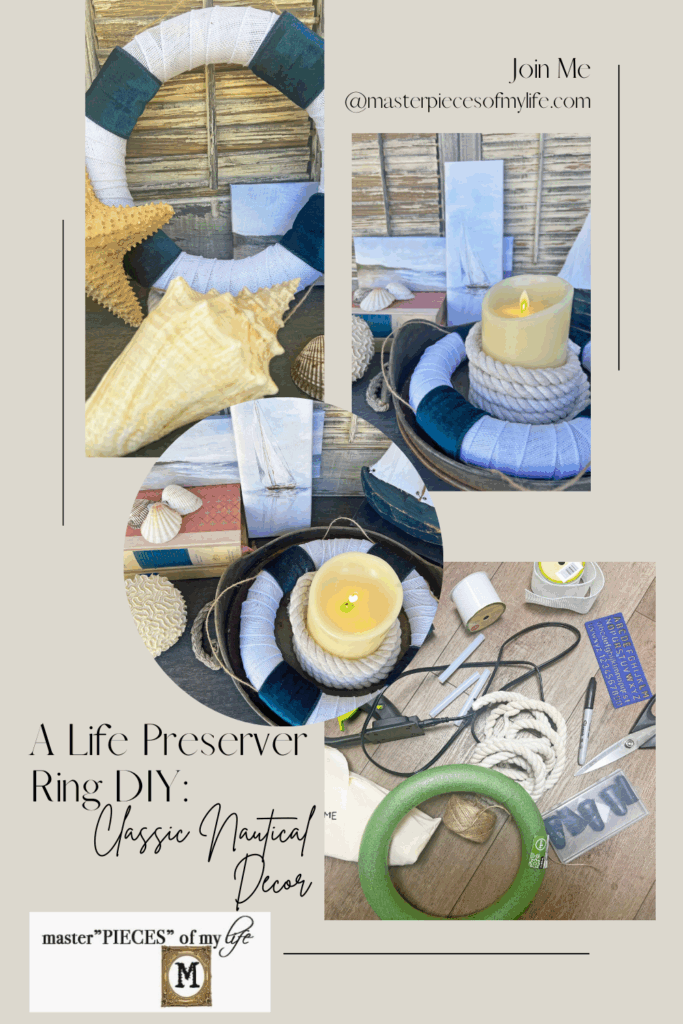
A Life Preserver Ring DIY: Classic Nautical Decor
Are you looking forward to summer? I have the perfect craft to get ready for all the coastal, nautical summertime vibes in your home. This is a super easy DIY to create a nautical life preserver ring, which is perfect for summer beachy decor.
Not only is this craft super easy to assemble, but you can find most of the supplies at the Dollar Tree. I’m all about easy and affordable seasonal decor. Creating your own decorations tends to be economical, unique and gratifying.
*Affiliate links might be included for your convenience. These affiliate links mean a small commission is earned if you make a purchase using these links at no extra cost to you. As an Amazon Associate qualifying purchases support this website. For more information: Full Disclosure Policy.
Welcome to Styled 2 Ways – Coastal Craft Edition
Styled 2 Ways is a collaboration between my blog, Master”pieces” of my Life, and the blog From the Bay to the Beach, penned by Susan. Susan splits her time between the San Fransisco Bay Area and the San Diego beaches. For the Styled 2 Ways series, two different point of views for a particular styling, project or concept are shared. Sometimes we invite a guest host to include another styling for triple the fun. Thank you for joining us; we’re happy to have you.
Although Susan and I both like many of the same things, we both have unique styles of our own, and we want to share how the same idea can be expressed in different ways. Both ways are equally as fantastic, and appreciating other unique takes on the same idea expands our own personal style.
You can find Susan in her other spaces:
When you are done here, please hop over and visit Susan. If you are here visiting from Susan’s place, welcome, I am so happy you are here. Leave me a comment down below; I would love to get to know you. Come on in, have a seat and enjoy!
Inspiration Behind the Nautical Life Preserver Ring DIY
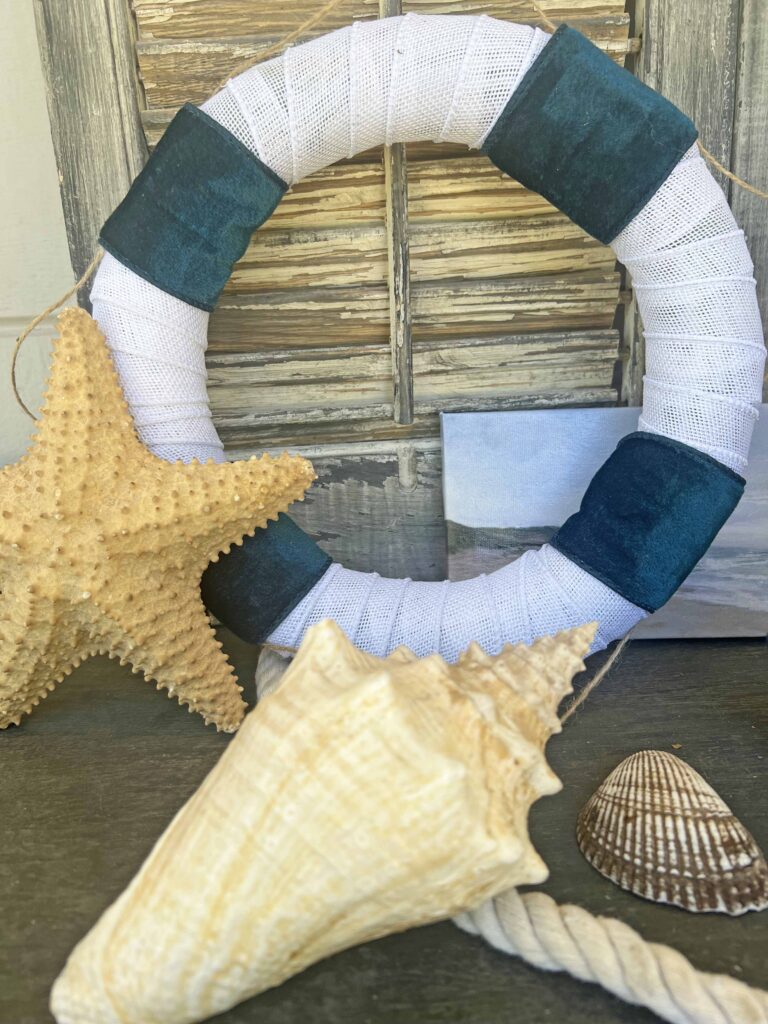
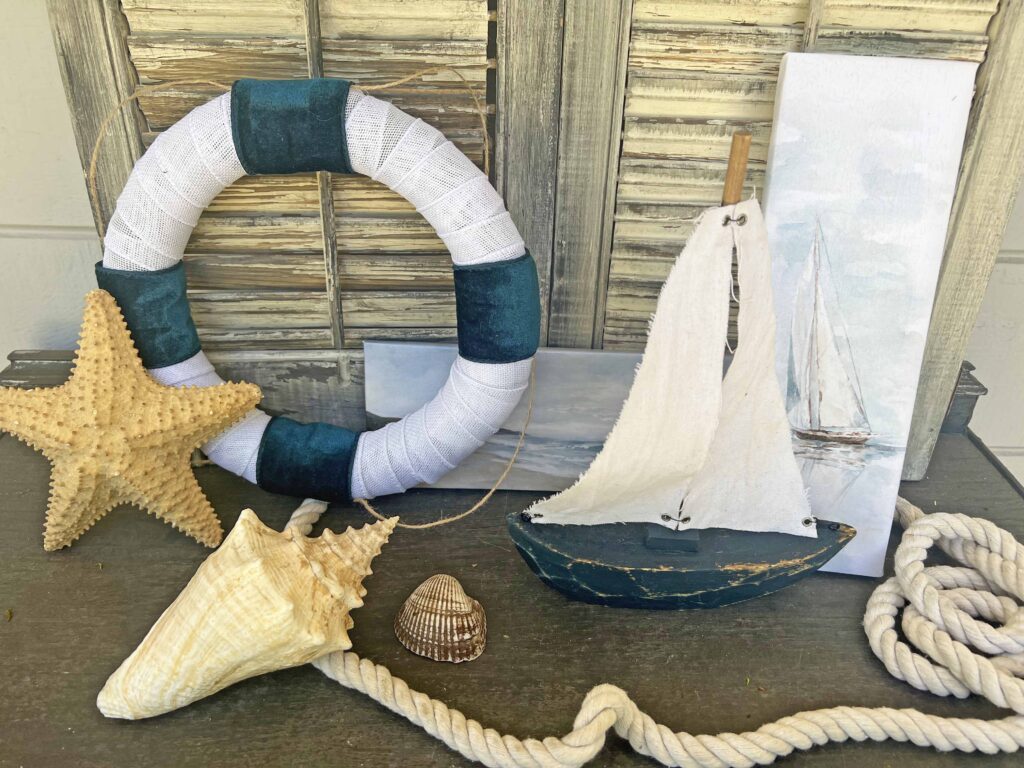
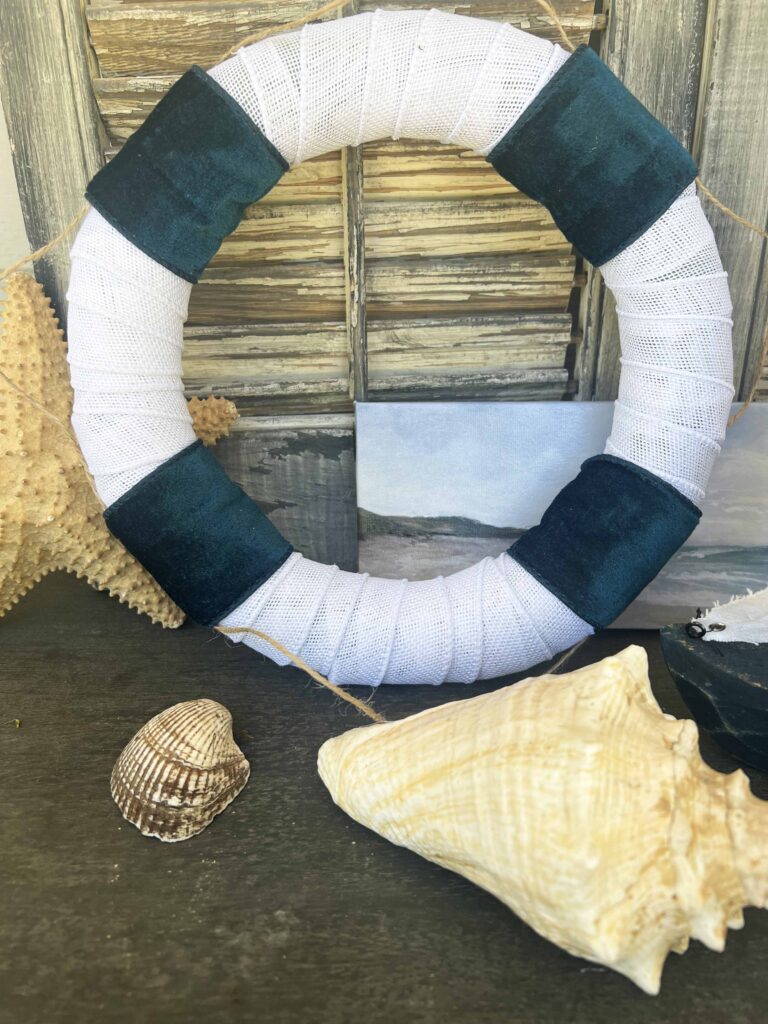
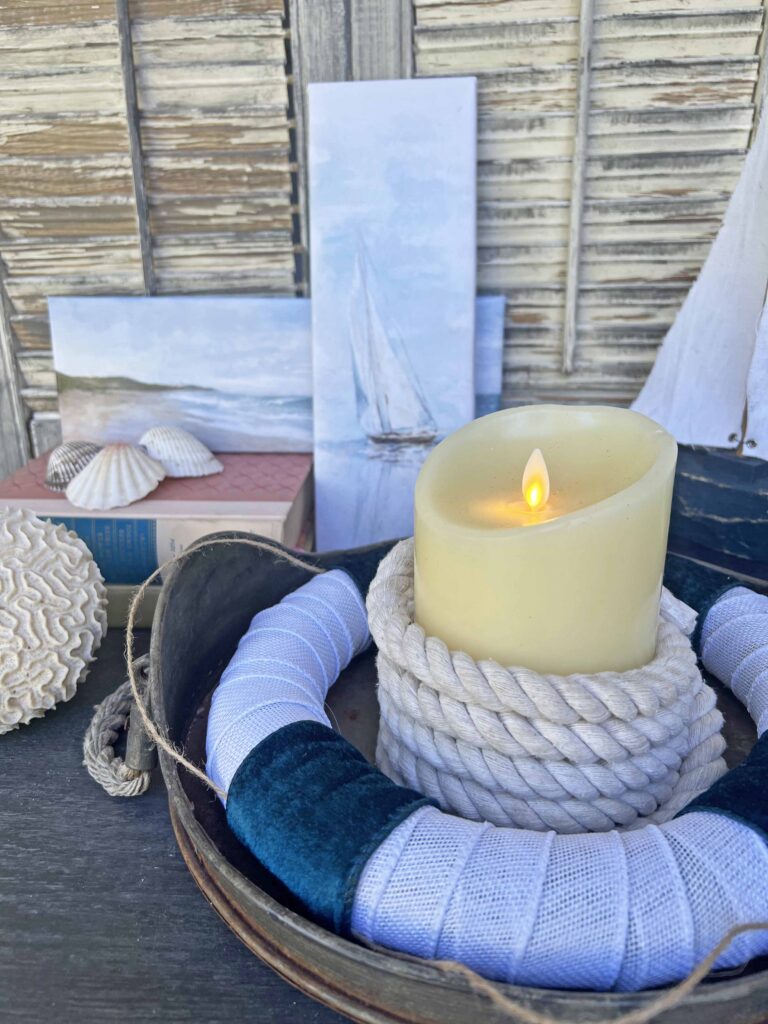
Summer time is sneaking up on us, and the summer months are perfect for coastal, nautical and beachy decor whether you live near the water or not. This life preserver | life buoy has all the classic feels of nautical decor. Nautical decor a la Ralph Lauren is classy and elegant, embracing all the warm season has to offer.
How to Make an Easy Nautical Life Preserver Ring DIY
I found all my supplies at the Dollar Tree, but I have also included other options in the shopping section below since I know everyone doesn’t necessarily have a Dollar Tree accessible. Plus some DT stores carry certain supplies while others don’t. Not only did the wreath cost about $5 to make, but it also comes together in less than an hour. You can’t beat that! Easy and economical for seasonal decor is the best! Yet, the final product does not look cheap, rather has a classic look. Let’s get crafting.
Supplies
- Small 10-inch Foam Wreath Form
- 2-inch White Burlap Ribbon
- 2-inch Blue Ribbon
- Jute Twine
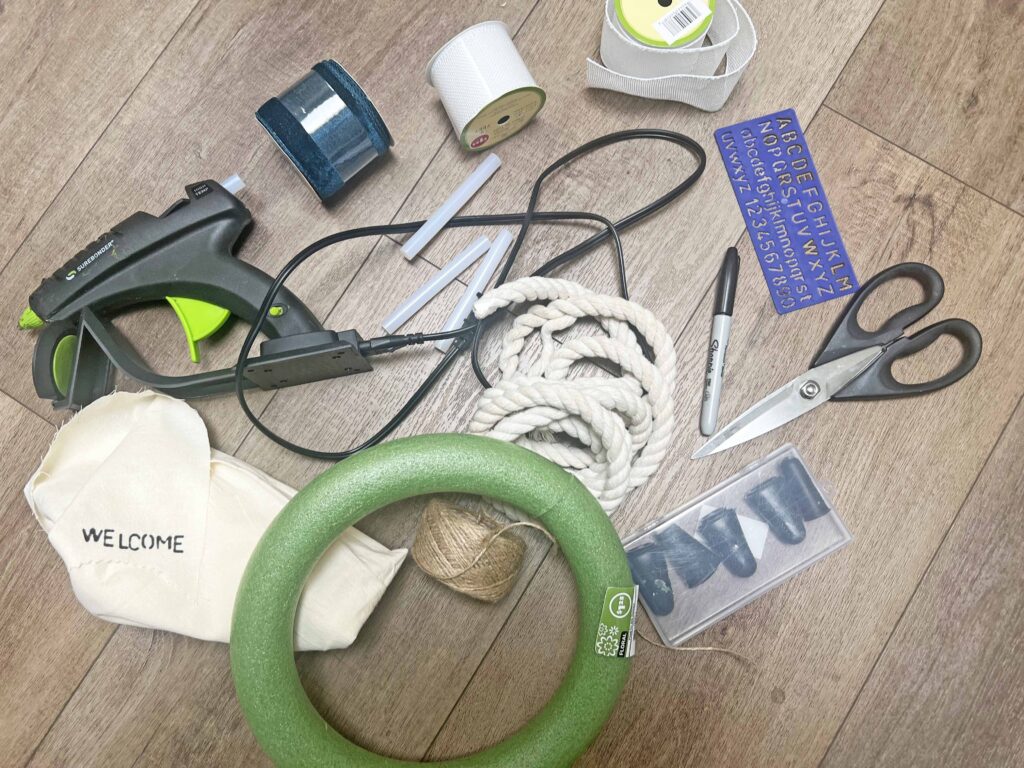
Tools
- Hot Glue Gun & Glue Gun Glue Sticks
- Silicone Finger Protectors
- Scissors
Crafting Pro Tip: Read all the instructions through once and then re-read everything again. This way, you are familiar with everything you need and know what to expect.
Instructions
- Assemble all supplies and tools
- Remove all stickers and tags from supplies
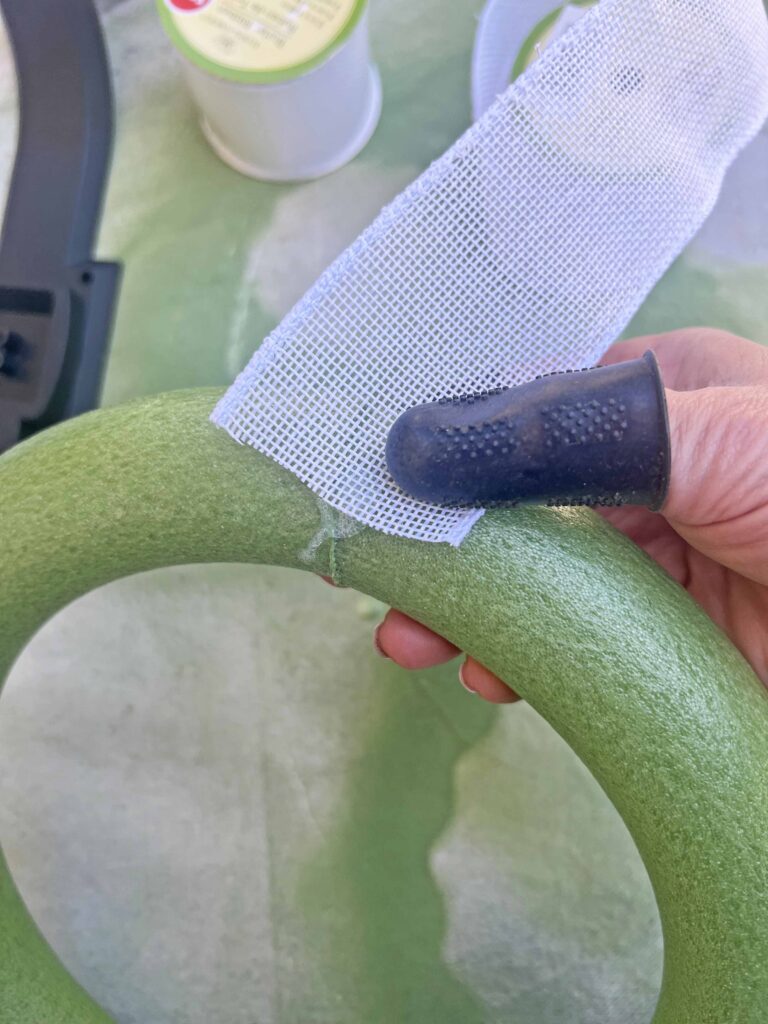
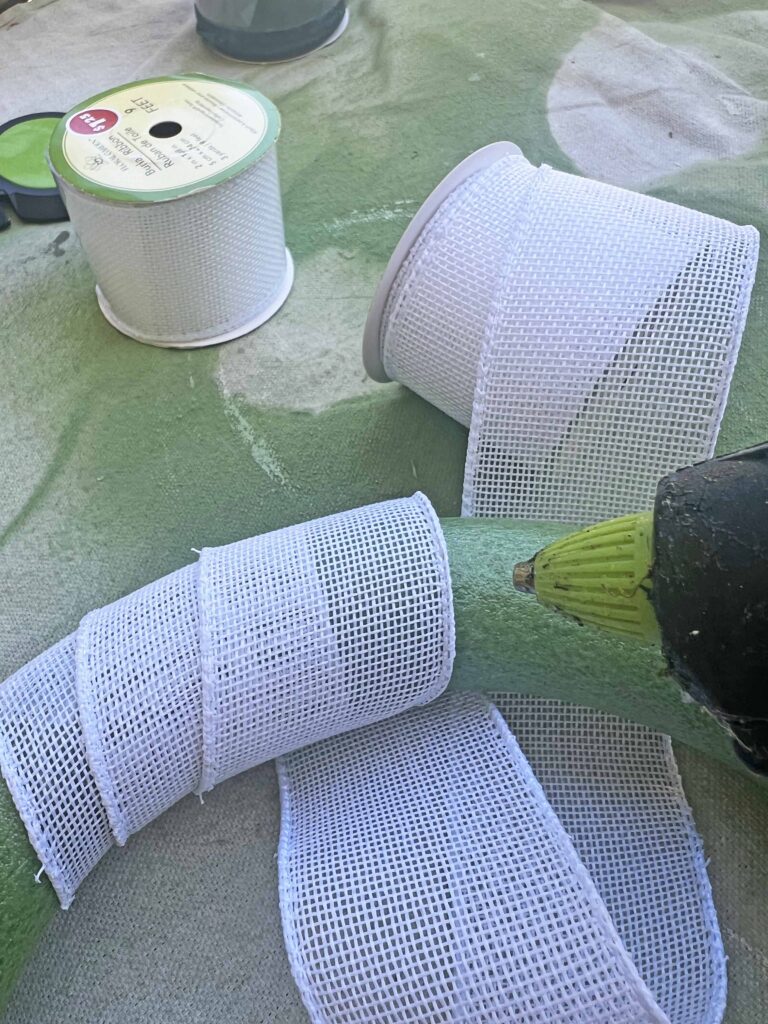
- Attach end of white burlap ribbon to wreath form with hot glue.
- Wrap white burlap ribbon around wreath form attaching with hot glue every few turns
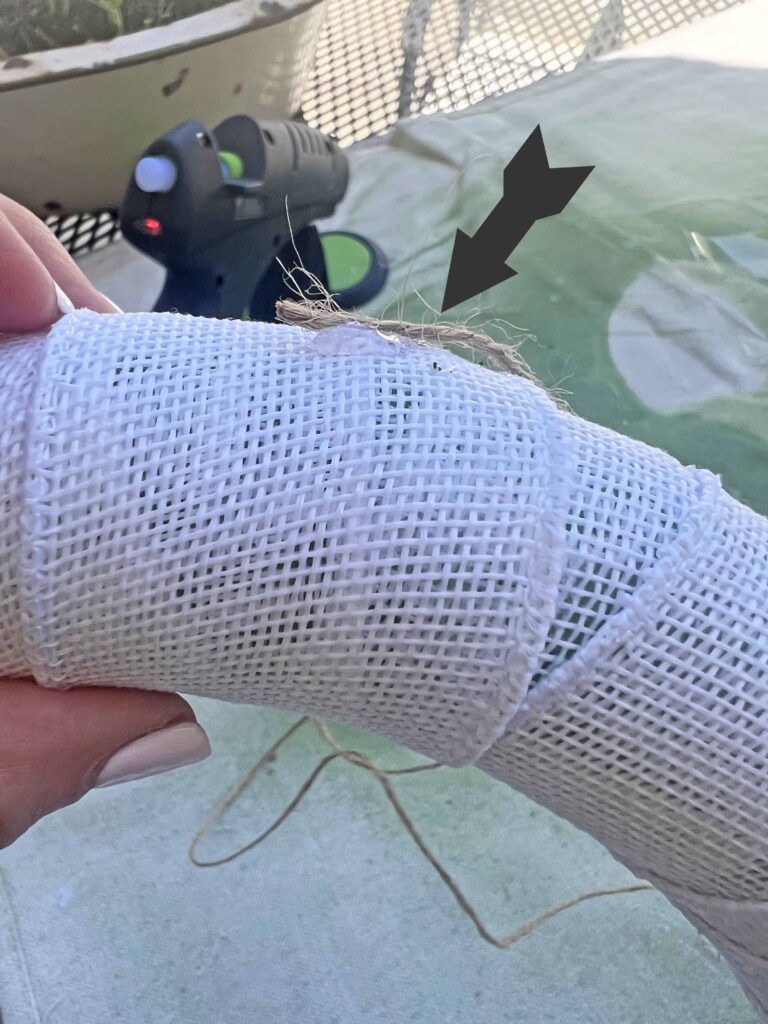
- Continue wrapping the ribbon until the entire wreath form is covered, making sure the end is on the same side of where the ribbon started since this will designate the back of the ring
- Measure a piece of the jute twine so it can go around the entire circumference of the ring loosely with ample length
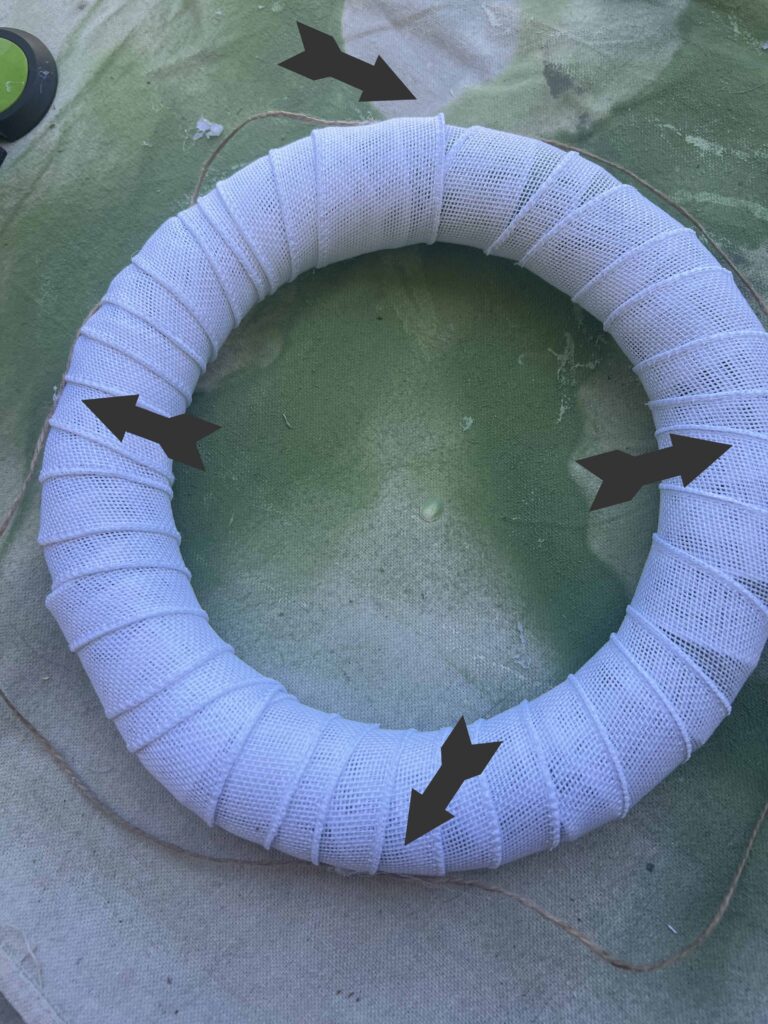
- Using hot glue gun adhere jute twine at each quadrant (12 o’clock, 3 o’clock, 6 o’clock, 9 o’clock), meeting jute ends at same spot, allowing twine to be loose between each quadrant
- Measure a piece of the blue ribbon so it can wrap around the wreath form once
- Repeat above step 3 more times so you have 4 equal size pieces
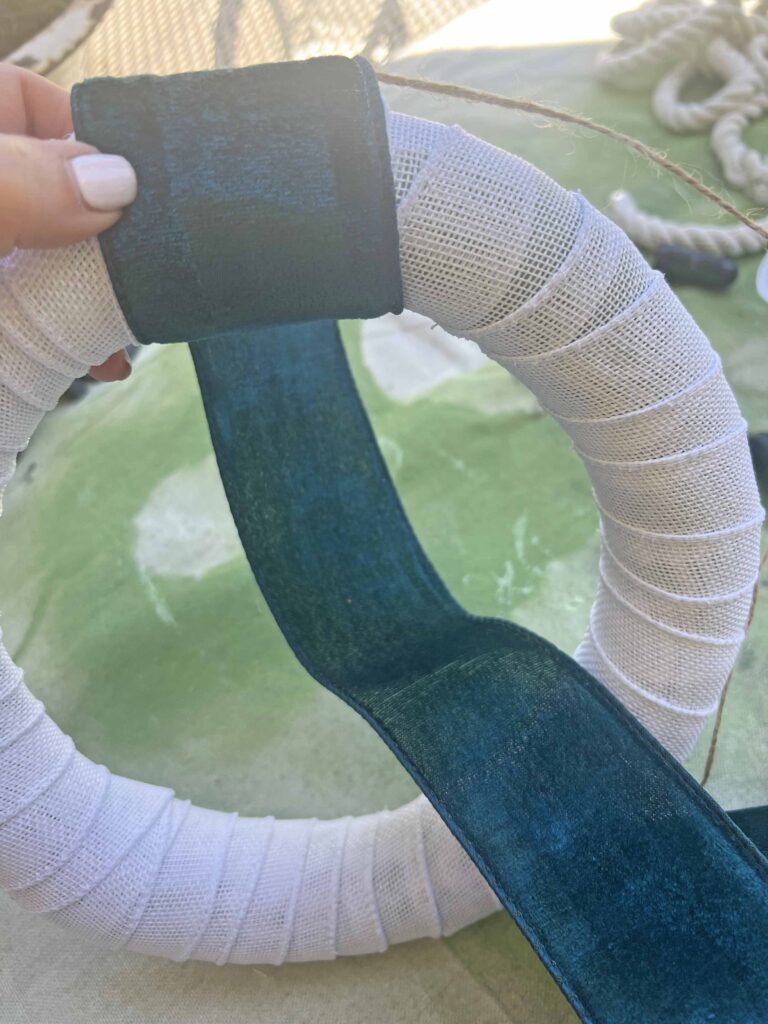
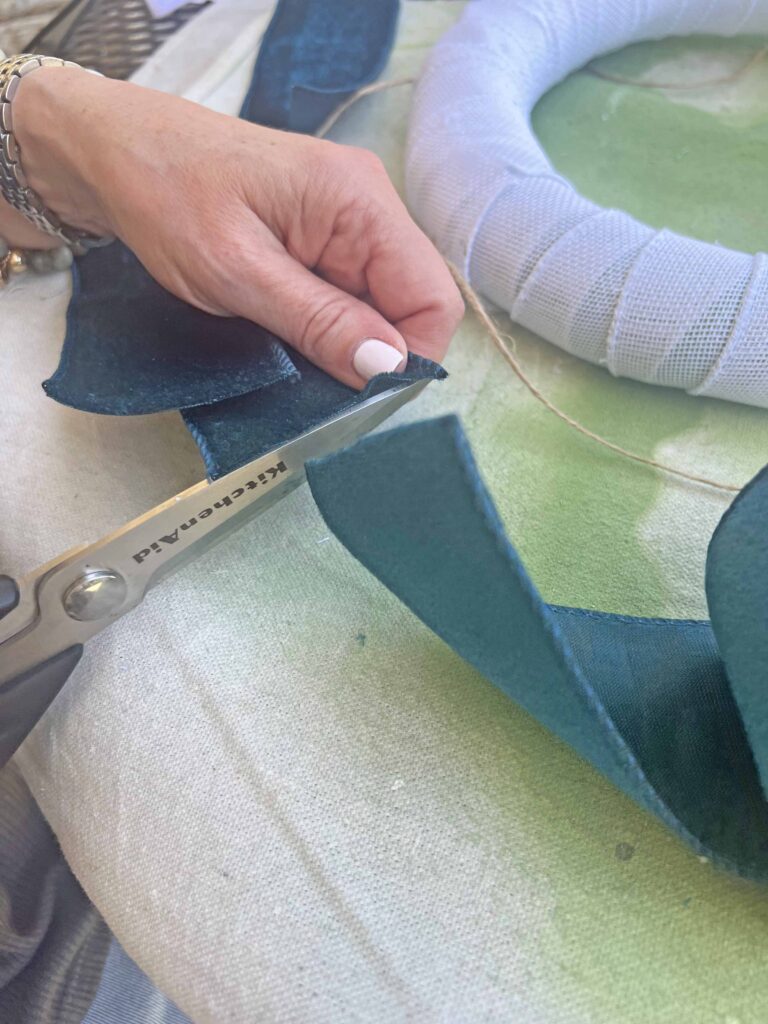
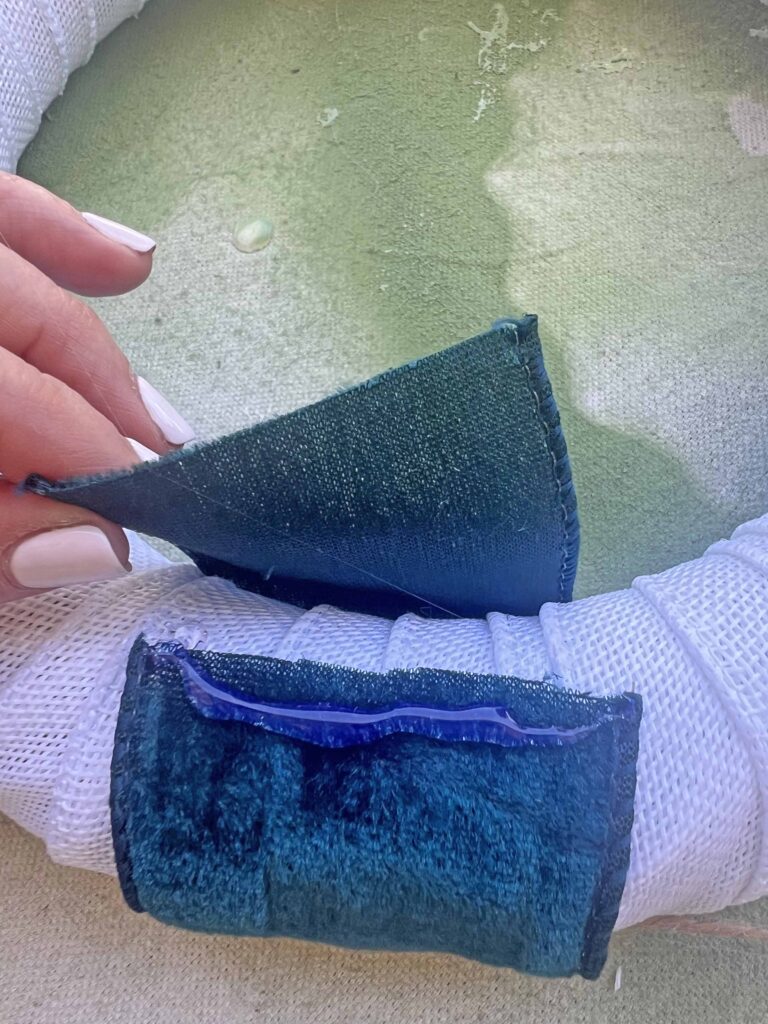
- Using hot glue gun adhere blue ribbon around wreath form at each spot jute twine is glued, hiding the mechanics of the glue, making sure seam on the blue ribbon is on the determined back of the wreath
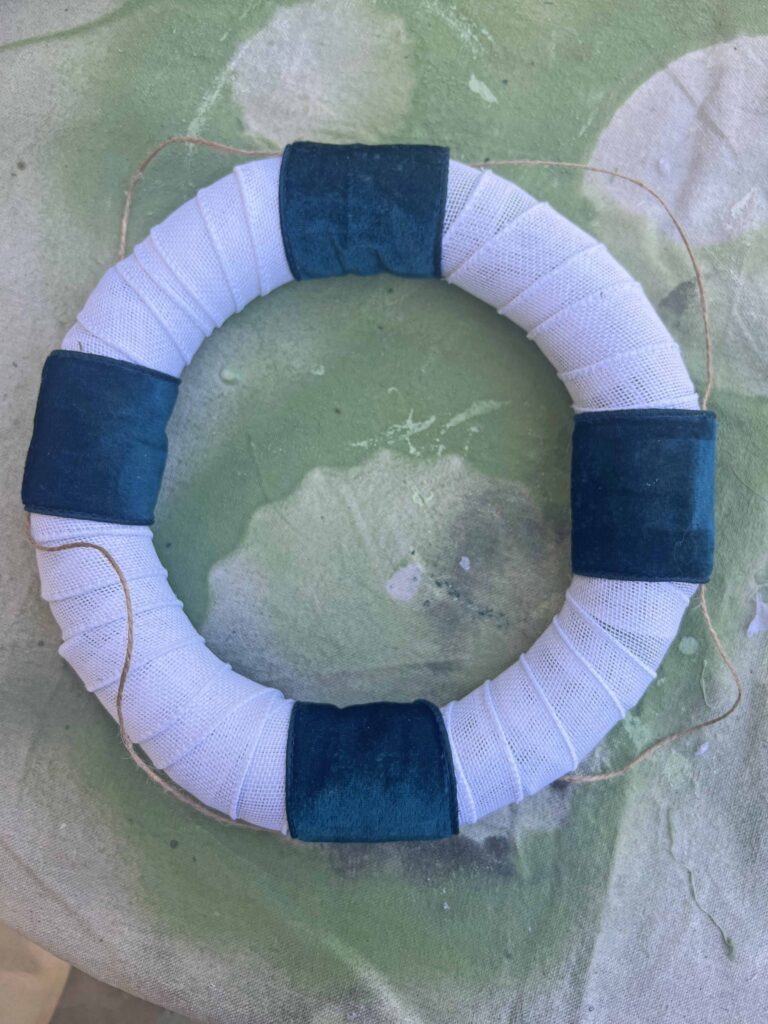
- Voila! Enjoy your new life preserver ring coastal decor accent
Warning: Please proceed with caution when handling a hot glue gun. Silicone finger protectors are highly recommended. Maintain personal discretion and responsibility at your own risk.
Tips & Recommendations for the Life Preserver Ring DIY
Life Preserver | Nautical Buoy Look
I recommend looking at various images of life preservers and buoys to get a feel for the look you would like to achieve. I was surprised at the wide variety of styles, plus some of the ideas in my head were not accurate, while some details I didn’t even think of.
Color Options
Originally I was planning on using the white burlap as the base and the nautical rope in each quadrant, but while digging in my craft stash in preparation for this project I discovered the spool of blue velvet ribbon. I picked it up last year, and I remember thinking it was the perfect blend for the vintage blue I prefer in coastal decor.
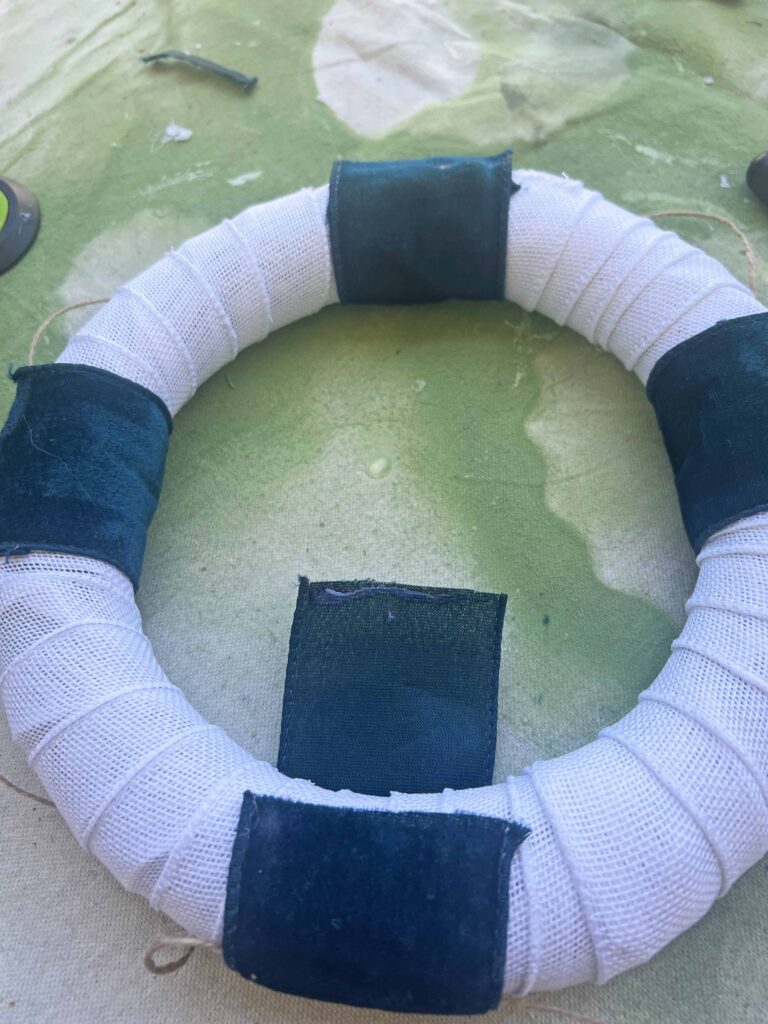
To Stencil or Not to Stencil
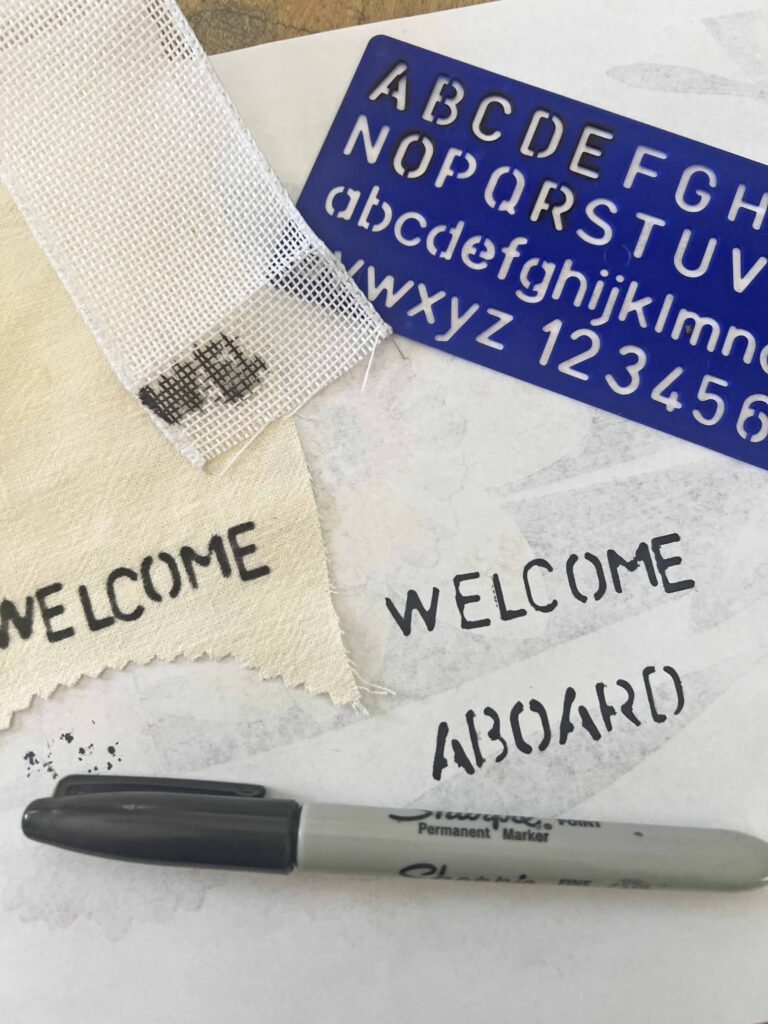
Originally I was going to stencil the words Welcome Aboard on the ring. I even tested it on paper to see how sharpie would work with the small letter stencil. That went well. Then I tested it on the white burlap and that was no bueno. Then I thought I could do it on a piece of muslin I had kicking around and attach it with fabric glue. And although the stenciling went well on the muslin ultimately I thought it might be too crowded. What do you think?
Size Matters
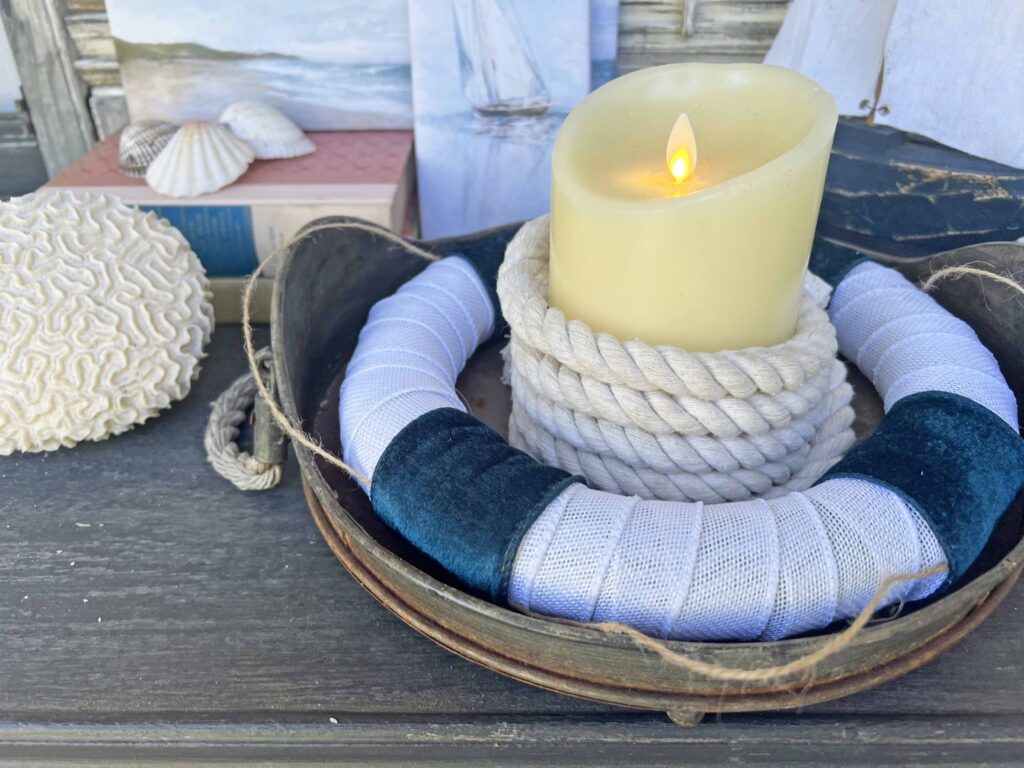
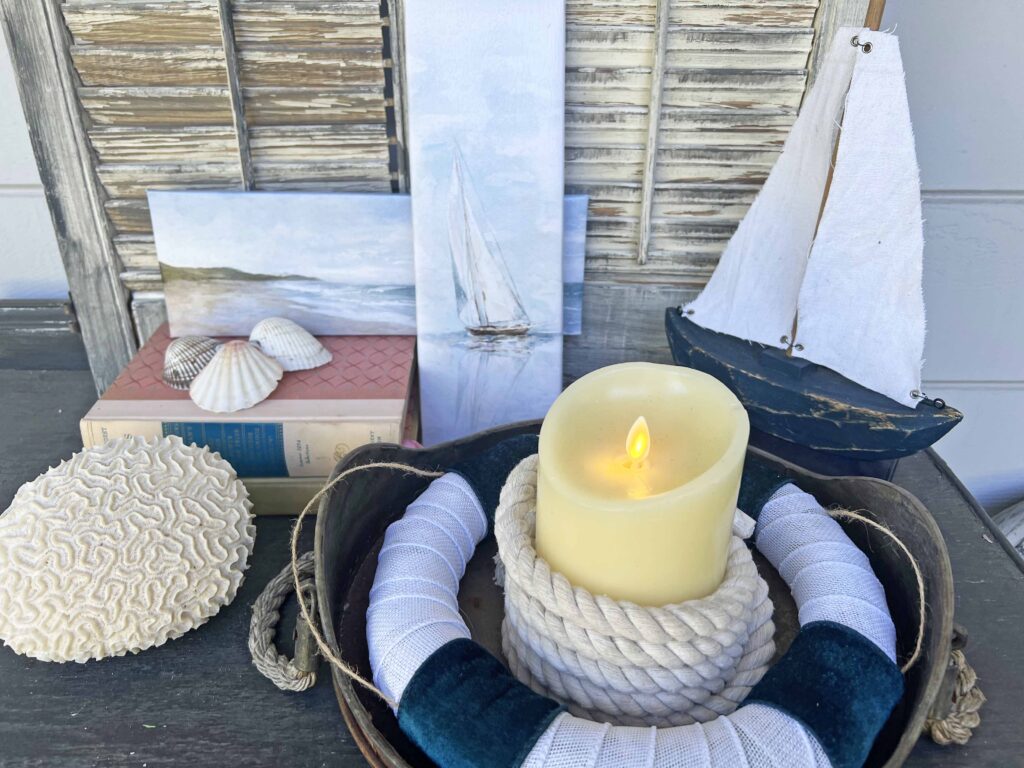
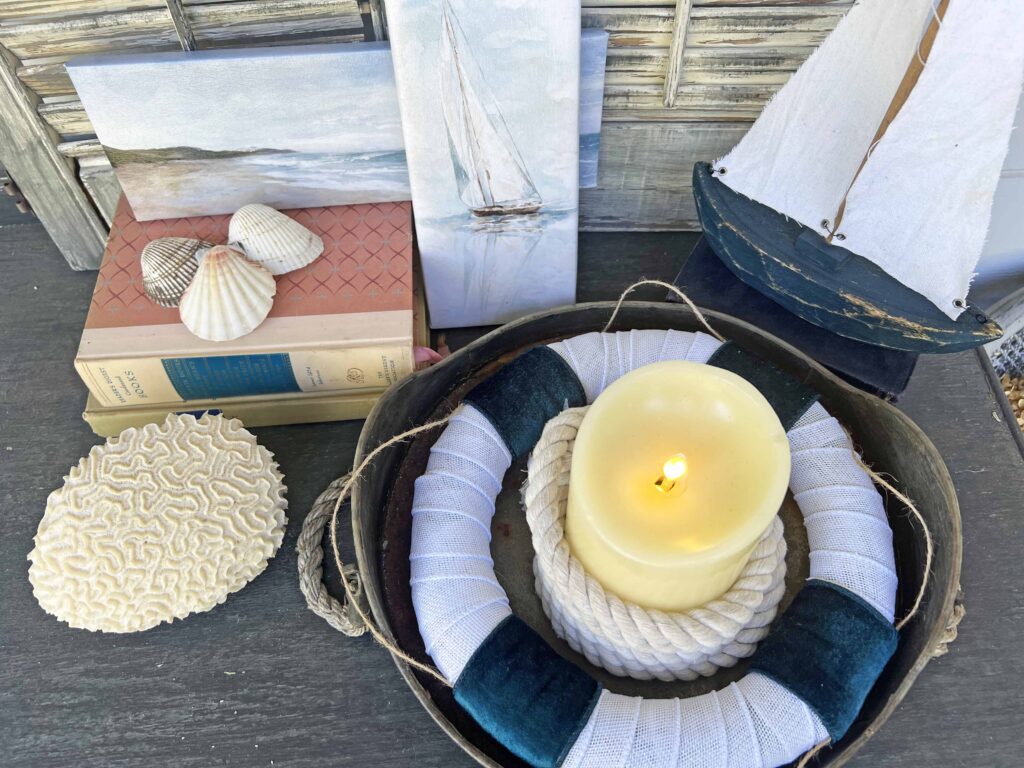
I created this with a small foam wreath form since I want to use it as a decor backdrop. You could also use it as a hanging wreath or even a candle ring for a coastal display. If you want a bigger impact for a door you could also create a bigger wreath following the same steps. Create something that fits your home and lifestyle so you can use it to its upmost potential.
This leaves me with left over nautical rope, which I’ll have to apply to another project. My wheels are turning and I have a couple of ideas. Stay tuned. If you don’t want miss new Master”pieces” of my Life content, make sure to sign up below. I would love to welcome you in the Masterpiece Community.
Closing Thoughts
This is a super easy and fun piece, which totally has me in the mood for summer. How about you? Is it heating up where you live? It’s been lovely weather around here, not too hot, but I believe the rain is done for the season.
Thank you for stopping by today and don’t forget to visit Susan , and I hope to see you again soon. It’s always lovely having you here.

Shopping for the Nautical Life Preserver Ring DIY
- 10-inch Foam Wreath Form
- 2-inch White Burlap Ribbon
- Ocean Blue Velvet Ribbon
- Island Blue Burlap Ribbon
- Jute Twine
- Hot Glue Gun
- Glue Gun Glue Sticks
- Silicone Finger Protectors

More Related Posts
Most Recent Posts
The sea, once it casts its spell, holds one in its net of wonder forever,”
Jacques Cousteau
Love the nautical vibe of this project MaryJo! Super creative and easy!
Thanks Susan. Fun sharing today! XO- MJ
LOVE this Dollar Tree DIY so much MaryJo!
Aww thanks so much Beth. High praise coming from you friend. XO- MJ
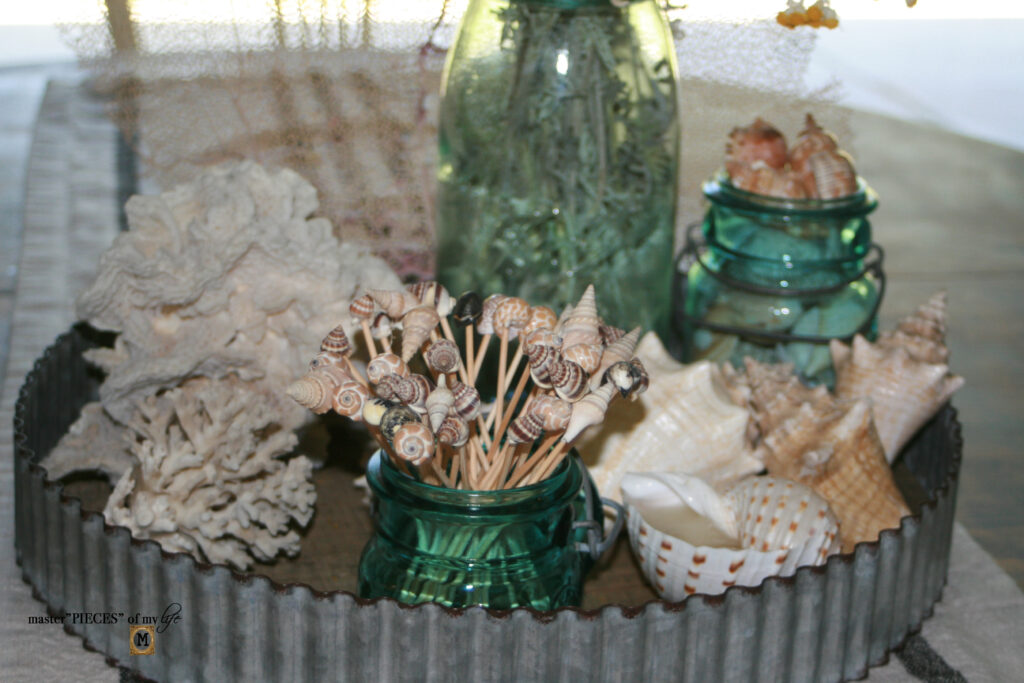
I love this sea motif. May I ask about the beautiful canvas pictures that you included? Thank you for sharing this fun project.
Thanks so much. The small canvas prints are from the Dollar Tree as well. Thanks for stopping by. XO- MJ
I’m so excited about adding coastal decor to my home for summer! This nautical wreath turned out so cute and I love how easy it is to make! Thanks and can’t wait to see more of your summer ideas!
Thanks Donna. It was super easy and cheap. Lol. Coastal decor is always classic. XO- MJ
Hi Mary Jo, I’m visiting from Julie’s My Wee Abode Tuesday Turn Around.. This is so cute! AND it looks simple and easy to do, not to mention economical. Thanks for sharing!
Hi Marilyn and welcome. Thanks for the visit and I’m so glad you liked this DIY. Yes super easy and affordable! The best. XO- MJ
Great post! I’ve also created a quick guide on this topic that might help others too – check it out here: Leather Jacket
What a great idea. It turned out beautifully. I’m a big beach/seashore fan, so I just love this. Thank you for sharing this with us at the Will Blog for Comments #62 linkup. We hope you’ll share more at #63 which opens next Monday morning.
Thanks Jennifer. It was an easy & fun one. Have a great day! XO- MJ