


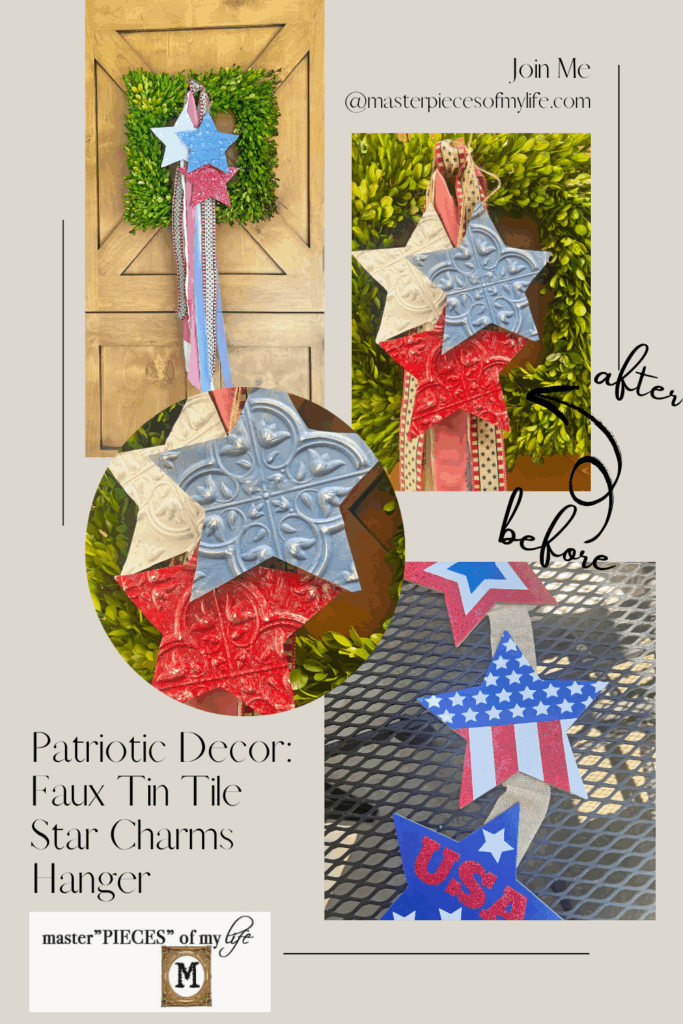
Are you ready for the 4th of July holiday? Independence Day is fast approaching and if you need a quick, easy and affordable decoration, I’ve got you. This patriotic DIY starts as an inexpensive Dollar Tree hanging decor piece and ends up as rustic red, white and blue faux tin tile star charms. It’s a fantastic transformation which can be personalized to your own style.

This project is perfect to add patriotic vibes for the front door wreath, but the stars charm hanger can be added to many spots in your home to inject all the festive patriotic vibes.

*Affiliate links might be included for your convenience. These affiliate links mean a small commission is earned if you make a purchase using these links at no extra cost to you. As an Amazon Associate qualifying purchases support this website. For more information: Full Disclosure Policy.
Inspiration for the Patriotic Faux Tin Tile Star Charms
Seasonal decor can become spendy if you change it out for every season and holiday during the year. With that, I prefer to create much of my seasonal decor. Not only is it incredibly affordable, but you can also adapt it to your own personal style. I good Dollar Tree hack into trend forward decor is a favorite around here.
The embossed tin wall tile is one of my favorite mediums to work with from the Dollar Tree. It’s a plastic tile with the look of tin tile, which gives many projects major vintage vibes. By distressing the faux tin tile a rustic vintage look is easily achieved. If you like the look, you can see how I used this wall tile before on these projects:
There are more projects scheduled on the blog using the faux tile look. If this appeals to you make sure to visit regularly or feel free to sign-up to receive all new content directly to your in-box. We would love to welcome you to the Masterpieces community.
How to Create Faux Tin Tile Star Charms
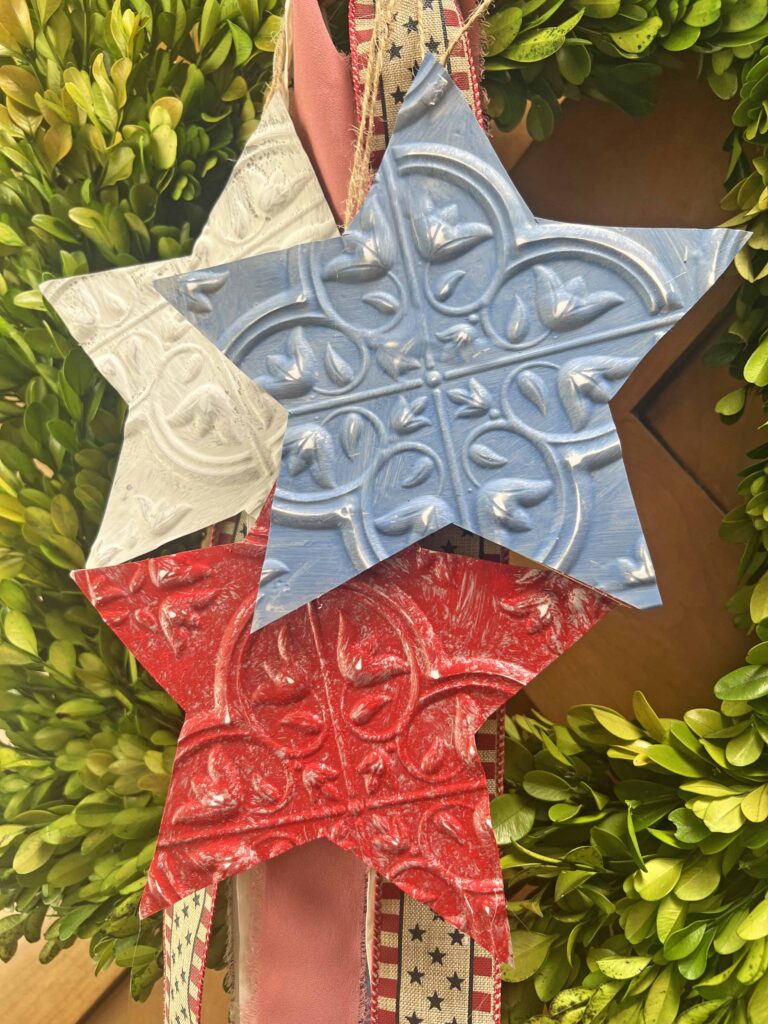
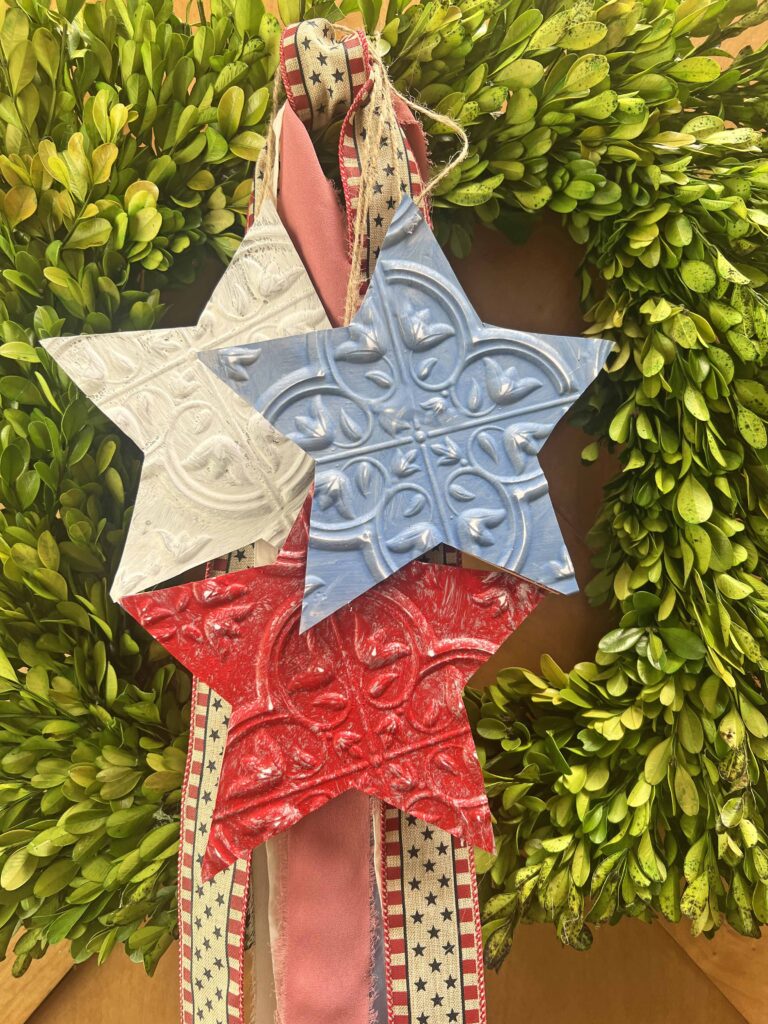
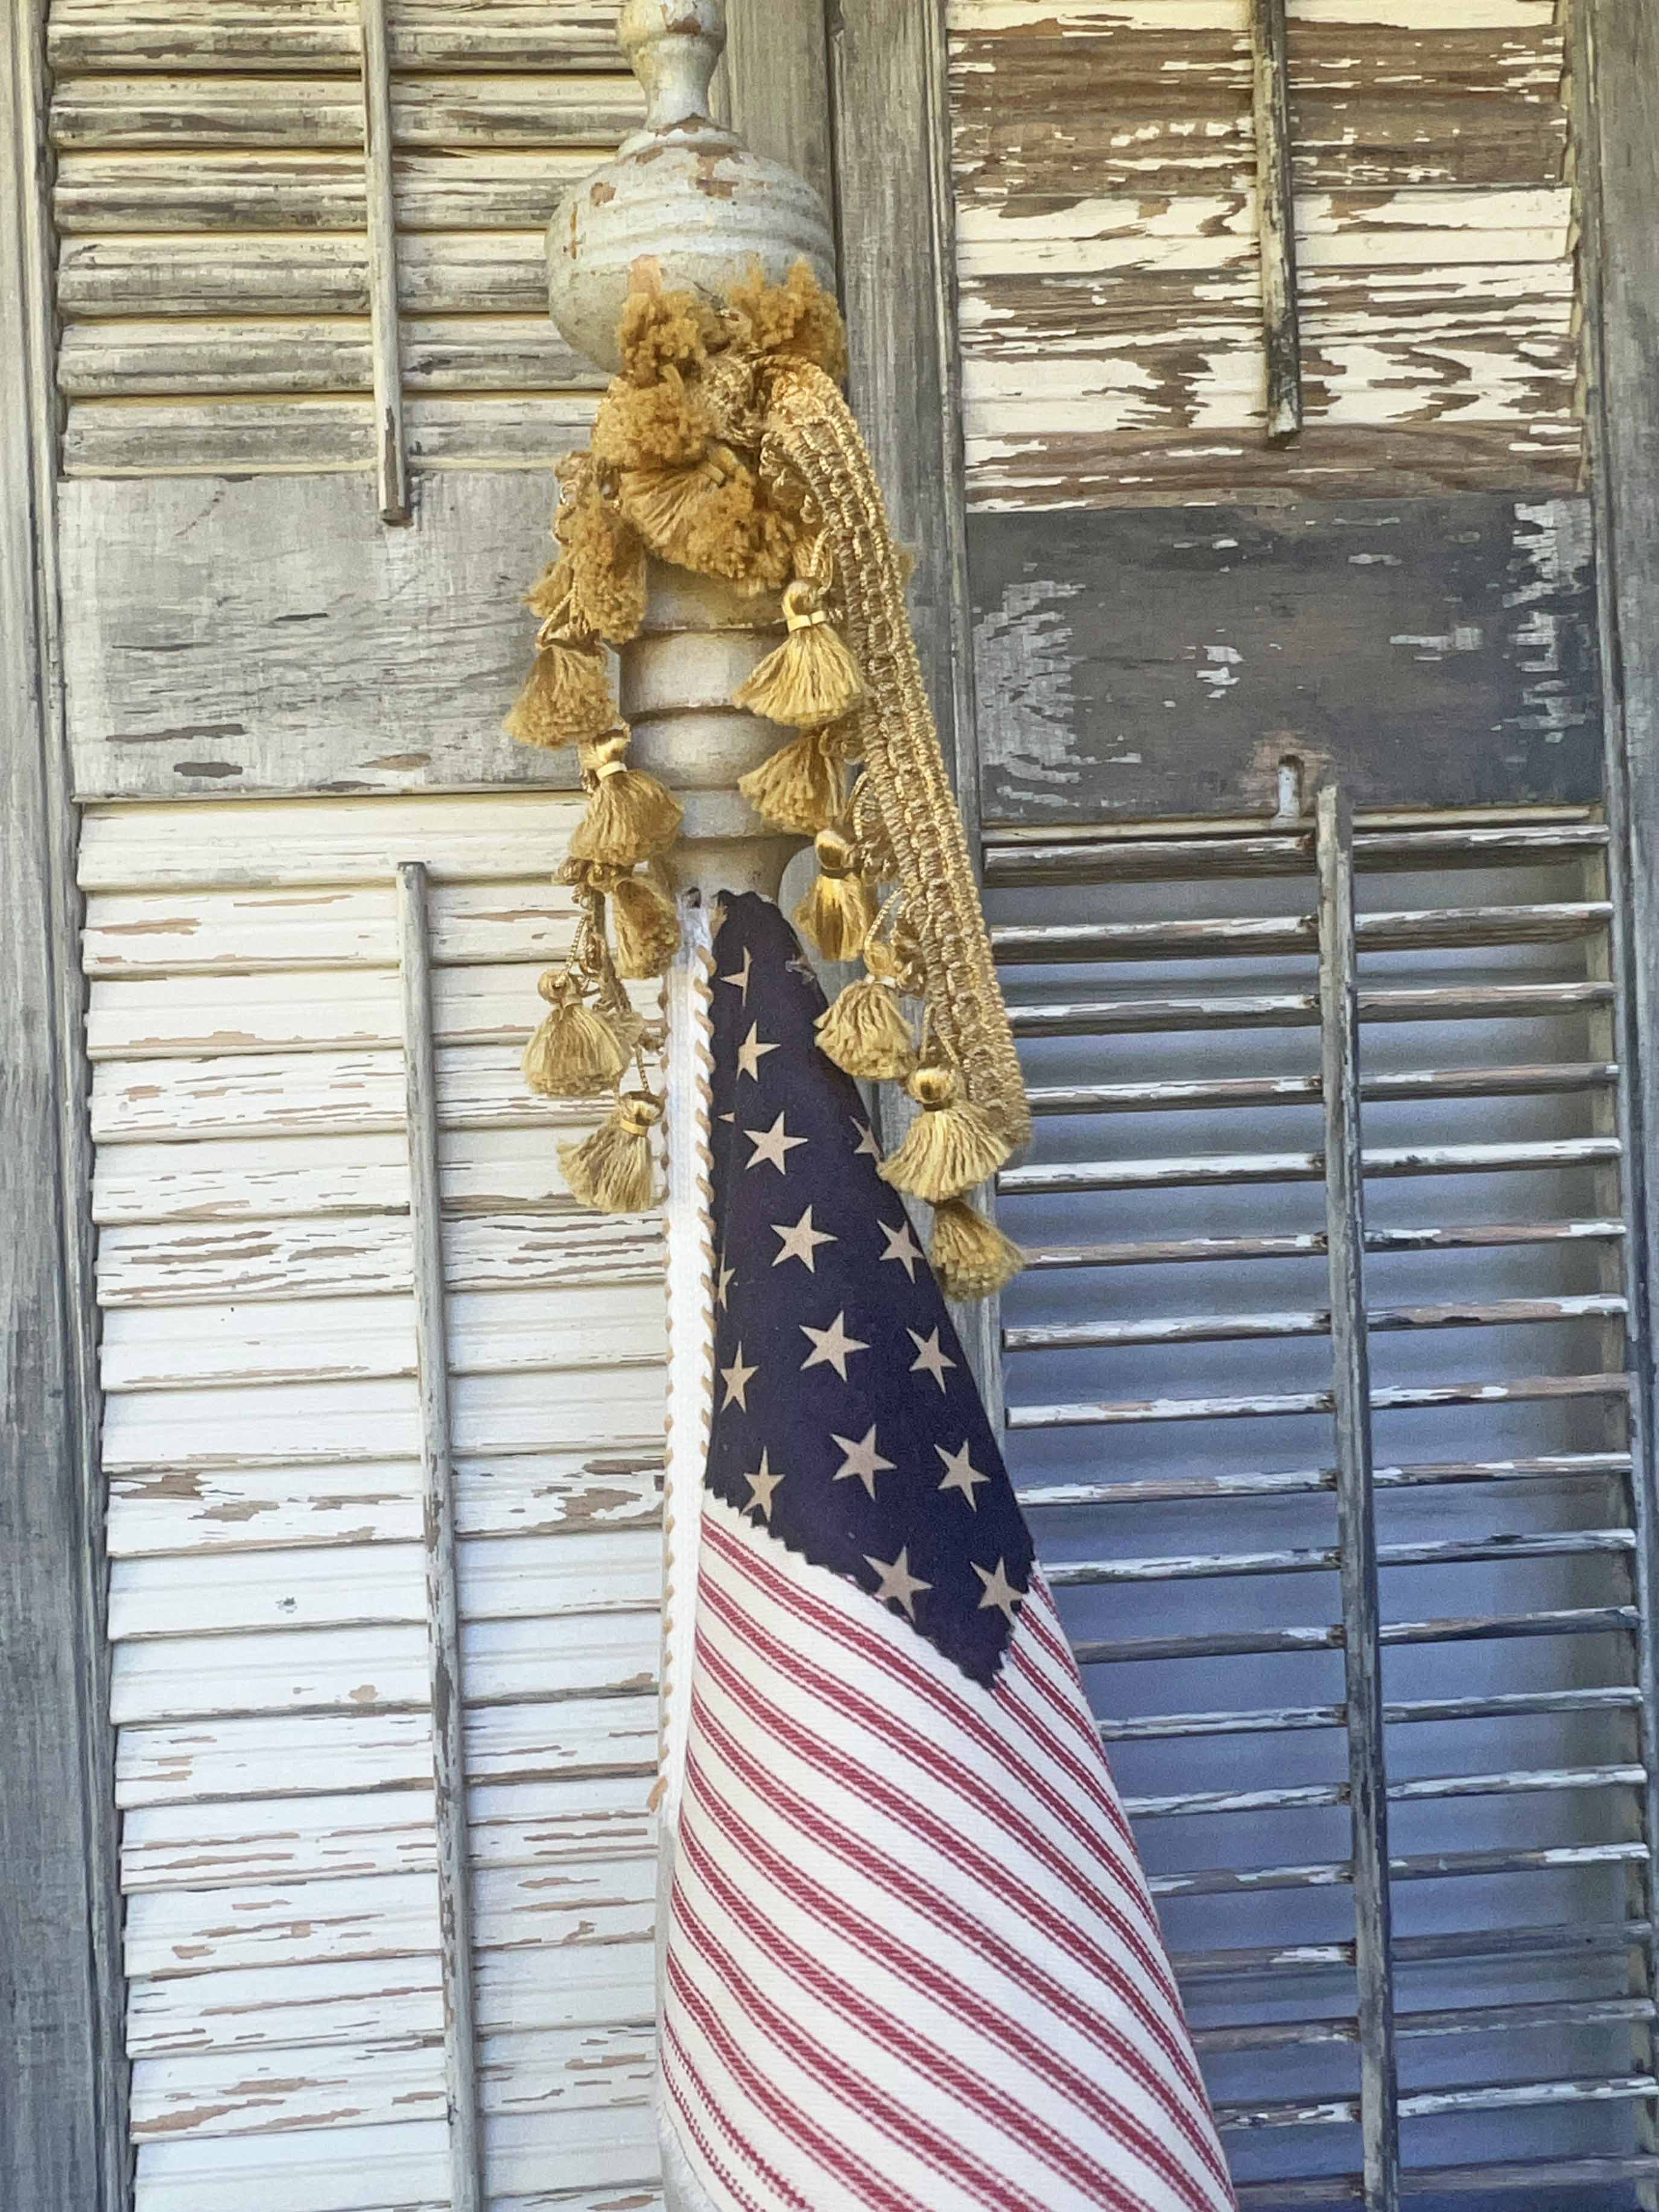
I wanted to create stars for the 4th of July holiday with the vintage tile look. Charms for the wreath on the front door is the perfect application. I picked up a patriotic hanger from the DT and used the stars as my guide to create the tin charms.

Supplies
- Faux Tin Wall Tile
- Star Hanger
- Red, white and blue paint
- Jute Twine


Tools
- Scissors
- Sharpie Pen
- Paint Brushes
- Sanding Craft Block
- Hot Glue Gun & Hot Glue Sticks
- Silicone Finger Protectors
Crafting Pro Tip: Read all the instructions through once and then re-read everything again. This way, you are familiar with everything you need and know what to expect.
Instructions
- Read instructions thoroughly and assemble all supplies & tools
- Remove all tags and stickers from supplies
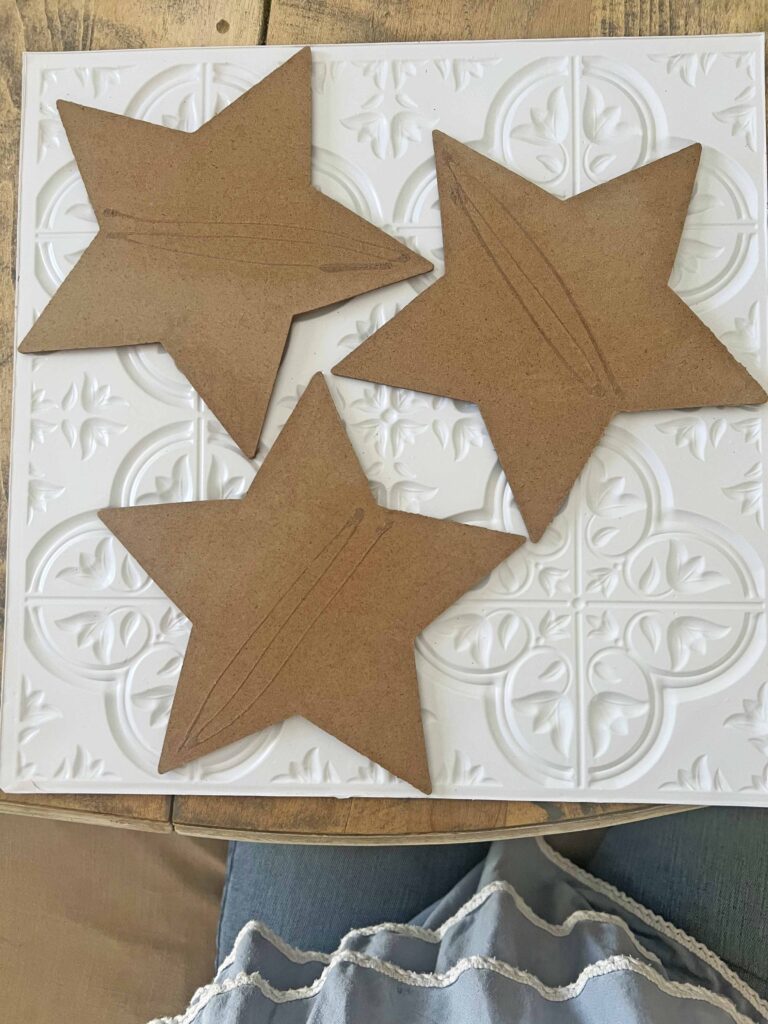
- Remove stars from hanger and sand residual glue on the backs

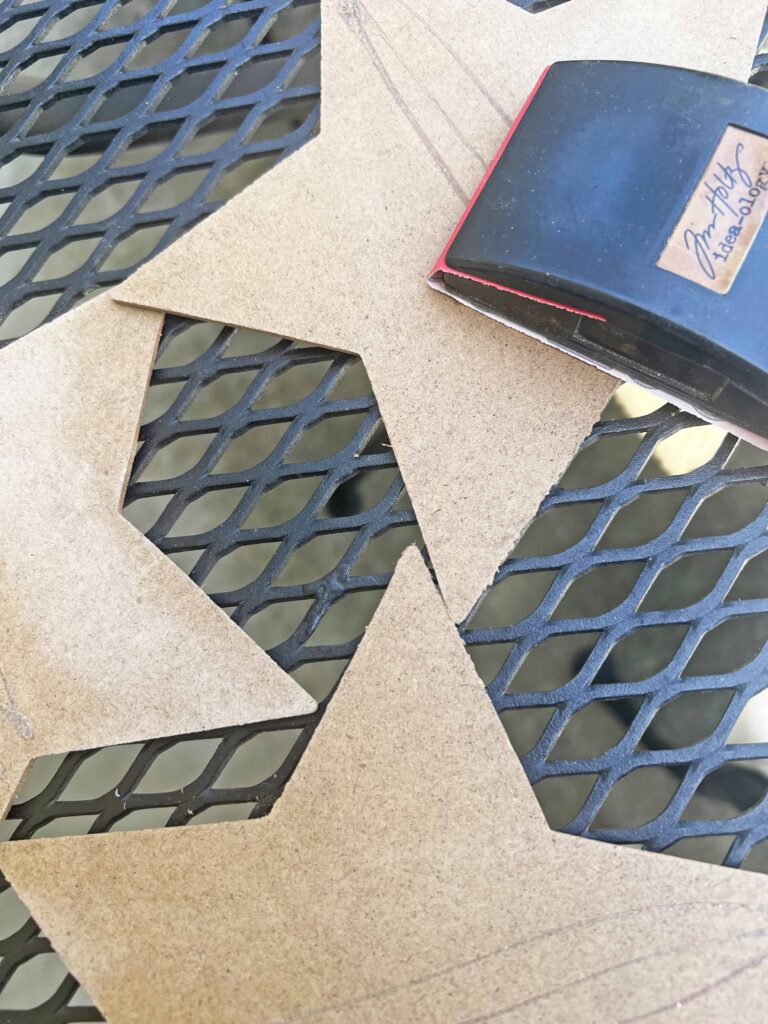
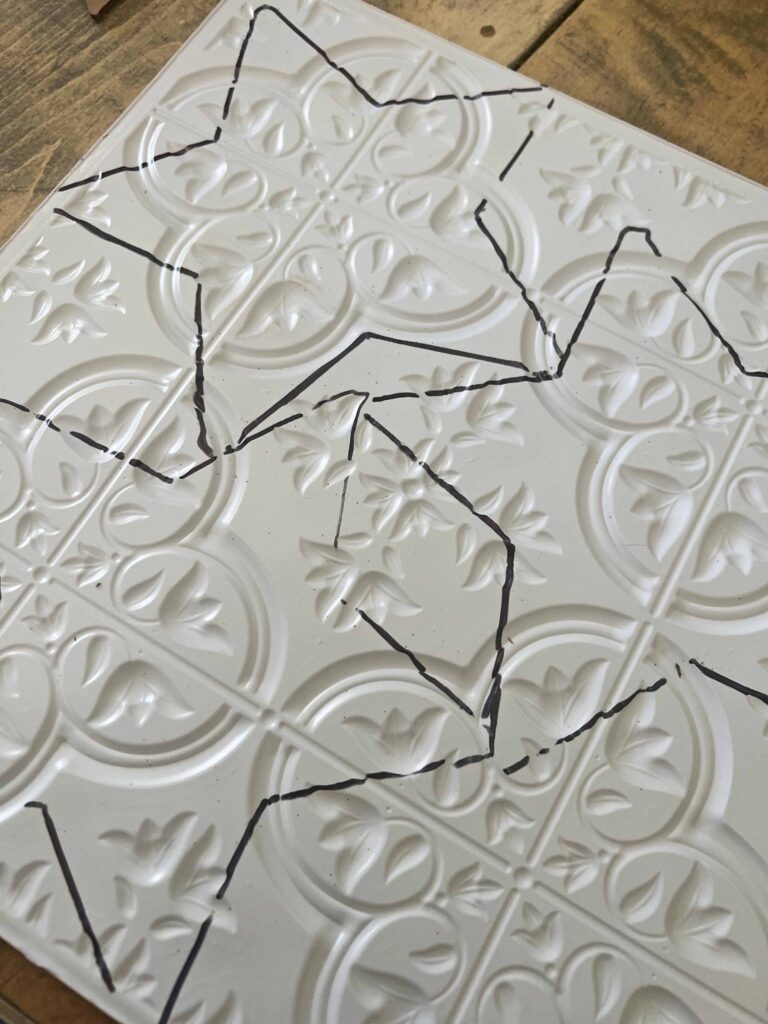
- Use stars as guides to draw shapes with sharpie on back of tile
- Use scissors to cut out stars from wall tile
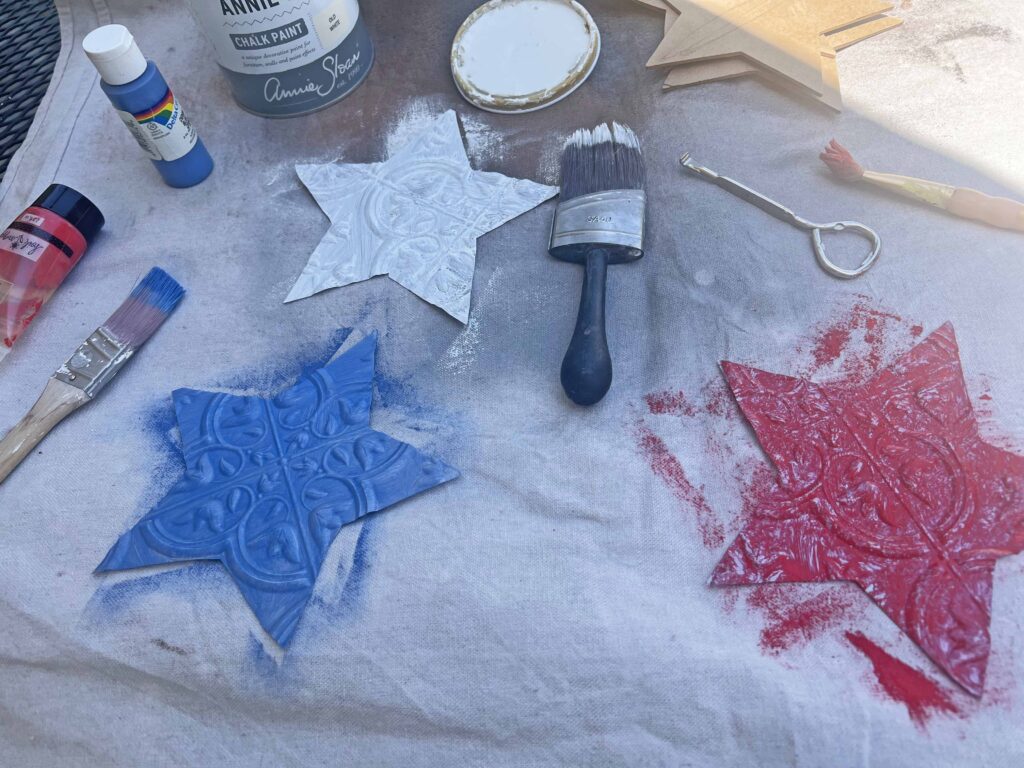
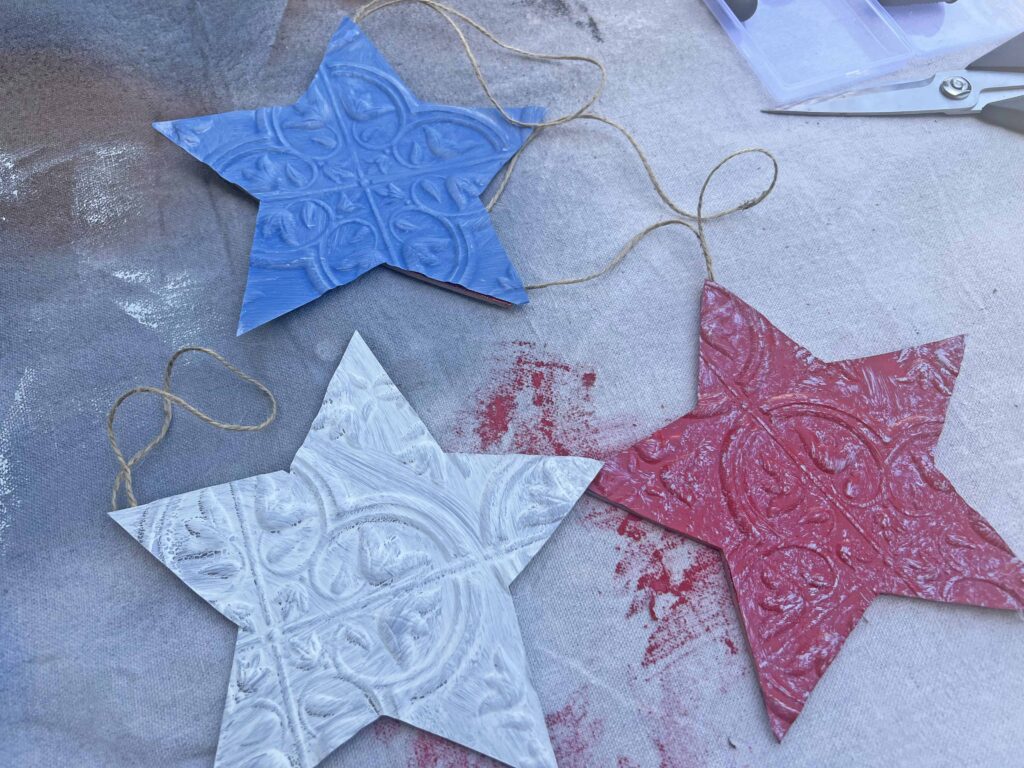
- Paint each tile in red, white and blue, allowing to dry fully
- Cut twine in alternating lengths (I cut mine at 12, 16 and 20 inches)
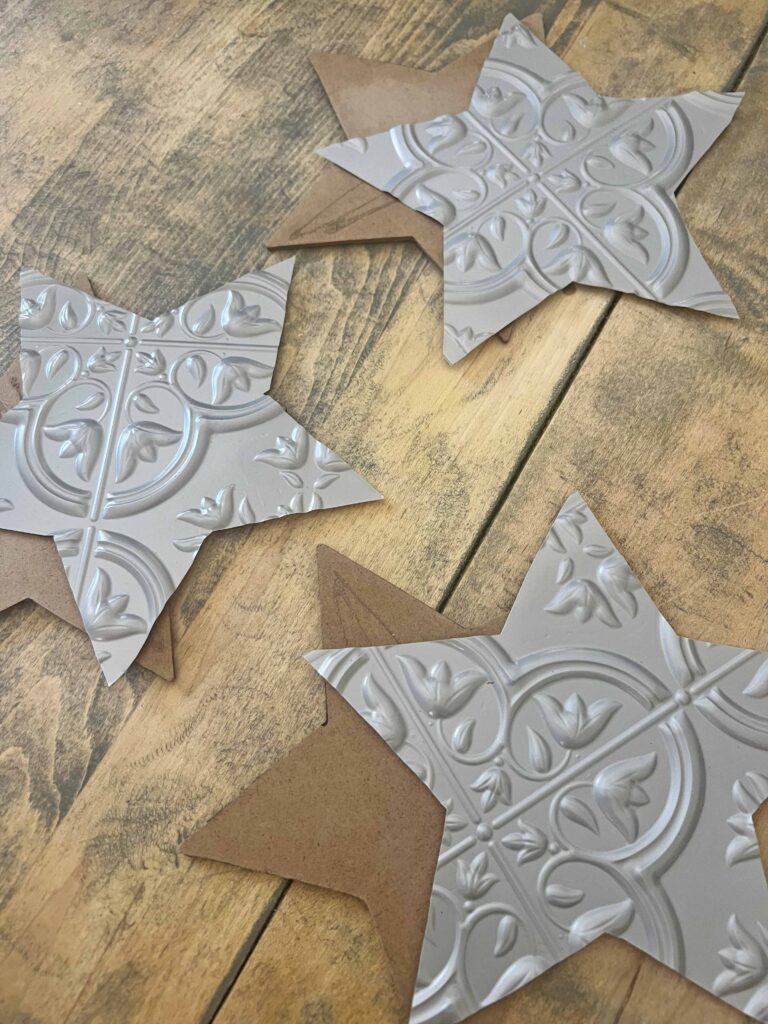
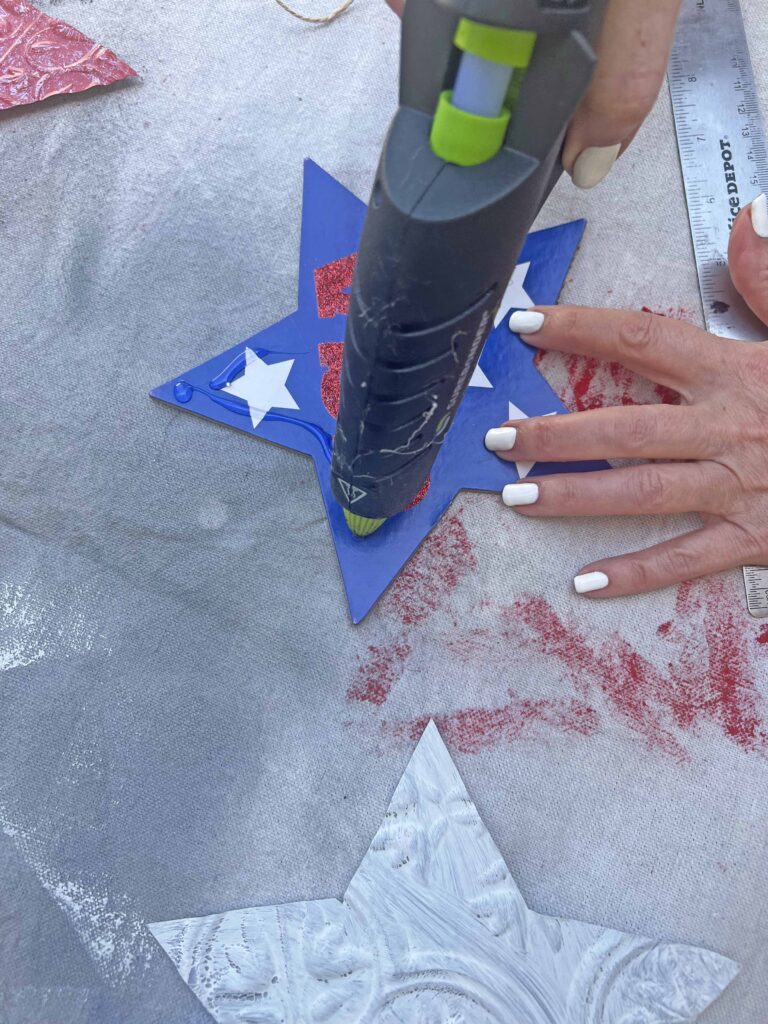
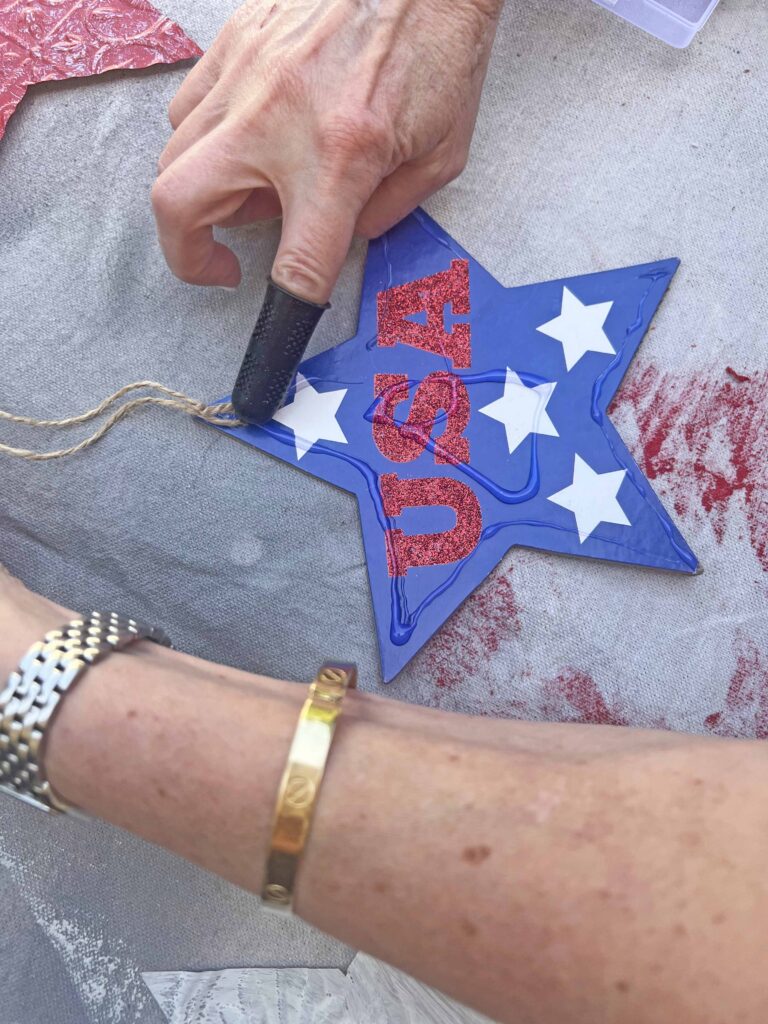
- Hot glue tin star to star cut-out from decor piece, gluing twine doubled up as hanger between tin star and chipboard star

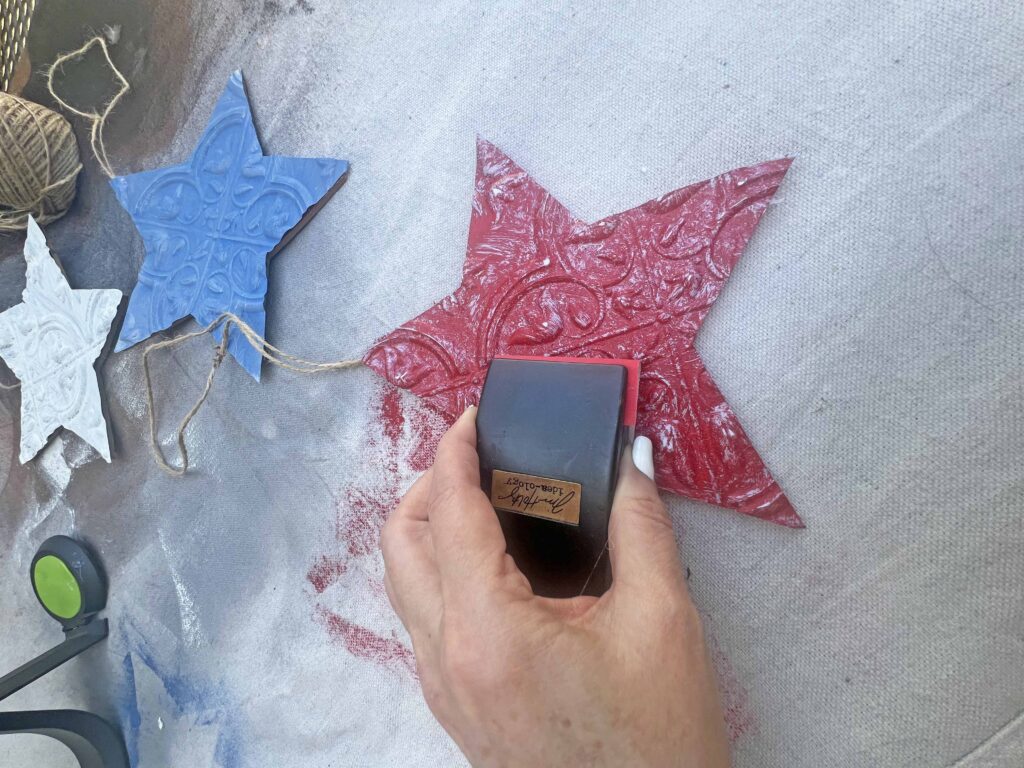
- Use sanding block to distress stars by removing paint on embossed raised areas
- Voila! Enjoy your new faux tin tile star charms for the 4th of July (or any patriotic holiday)!

Tips & Recommendations to Keep In Mind
Paint Techniques
Since the tiles have the embossing pattern it helps to pounce the brush a bit to get the paint into all the crevices. I used paint brushes for this project but I have also used foam brushes and spray paint for different applications on other faux tin tile projects.
I used paint colors I had on hand for this project. These are the colors I used:
- Red: Crimson Heidi Swamp Acrylic Paint
- White: Old White Annie Sloan Chalk Paint
- Blue: Demin Blue Delta Ceramcoat Acrylic Paint
I like that the colors are more muted than the usually bright red, white and blue, but feel free to use colors that fit you home aesthetic. I have included some options in the shopping section for your convenience.
Distressing Tips
I used a sanding block to remove some of the paint from the embossing detail on the faux tin tile. Although I used the same technique on all the stars, each paint reacted differently to the sanding technique. The acrylic paint exposed relief better than the chalk paint, which I will keep in mind for future tile projects.
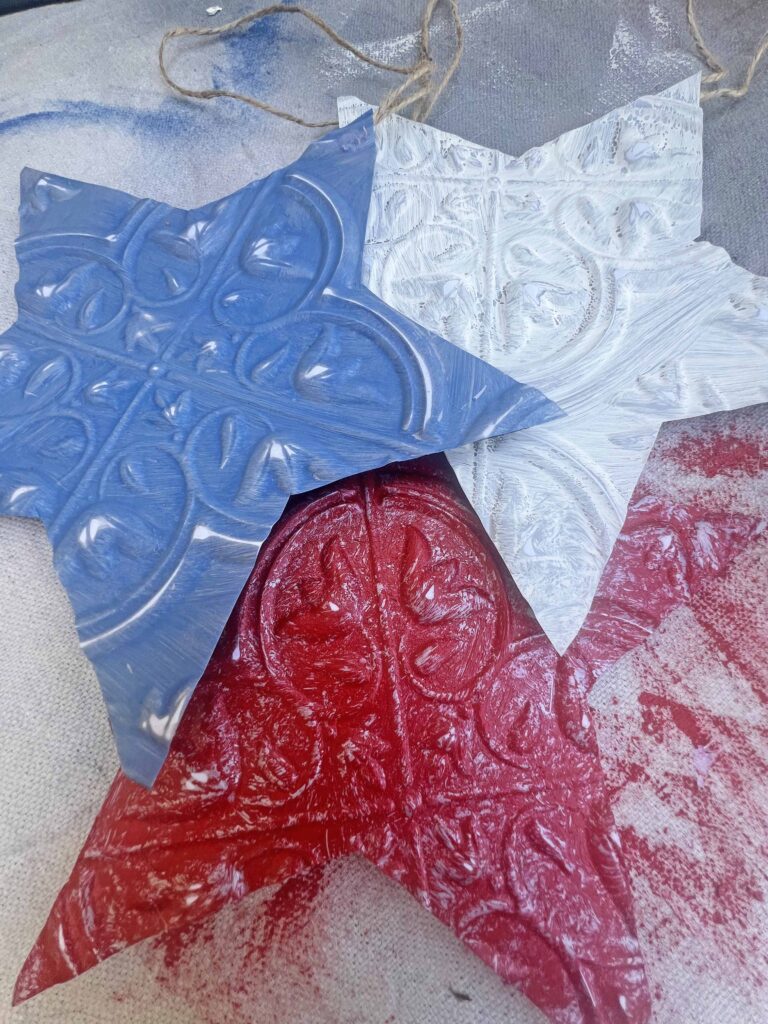
Since each star is a different color I opted to not use additional distressing techniques, since I was worried it would make the tiles look disparate, depending on the reaction. Other techniques used in the past to distress these tin tiles include, dark furniture wax, dark acrylic paint, stamping ink pad and gold rub-n-buf. Always test a small area and start gently. You can always add more distressing, but not so much to take it away.
Hanger Options
I use twine to hang the stars in this project, but you can use other options, depending on the look you are going for and the materials you have on hand. You can use ribbon, or wire, or yarn, etc.
I used hot glue to attach twine between tin star and chipboard star, but you could also drill a hole on tip of stars to attach twine. I chose the path of least resistance, but you do you. I was also fortunate to find a hanger at DT that had 3 chipboard starts style perfect size for charms on the wreath. You can create your own star forms from cardboard or chipboard if you can’t find a similar prefab hanger.
Styling Ideas
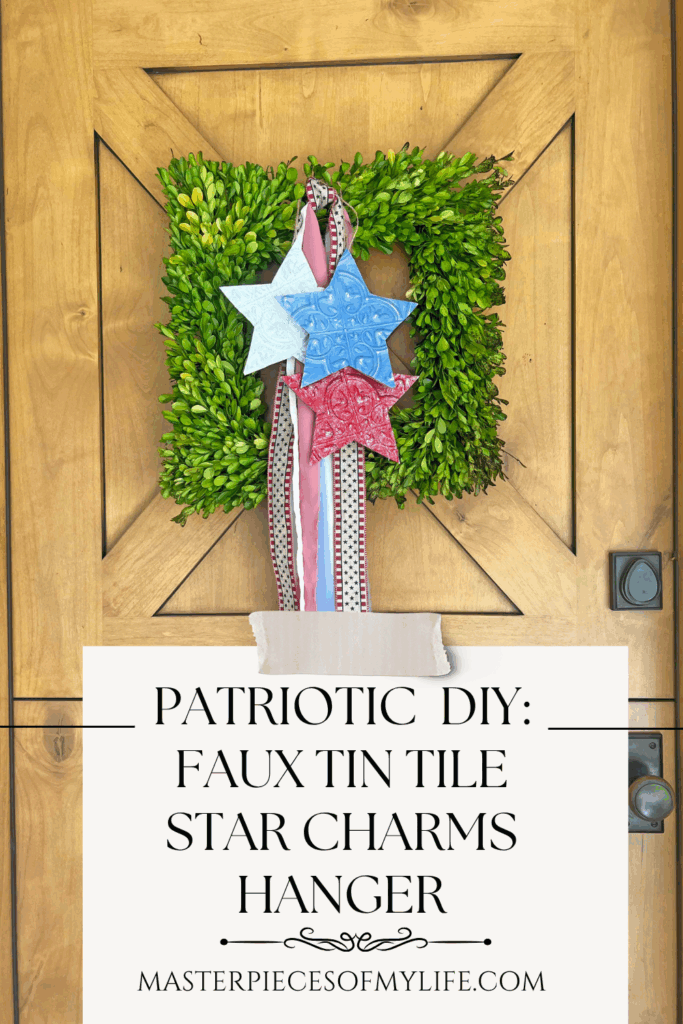
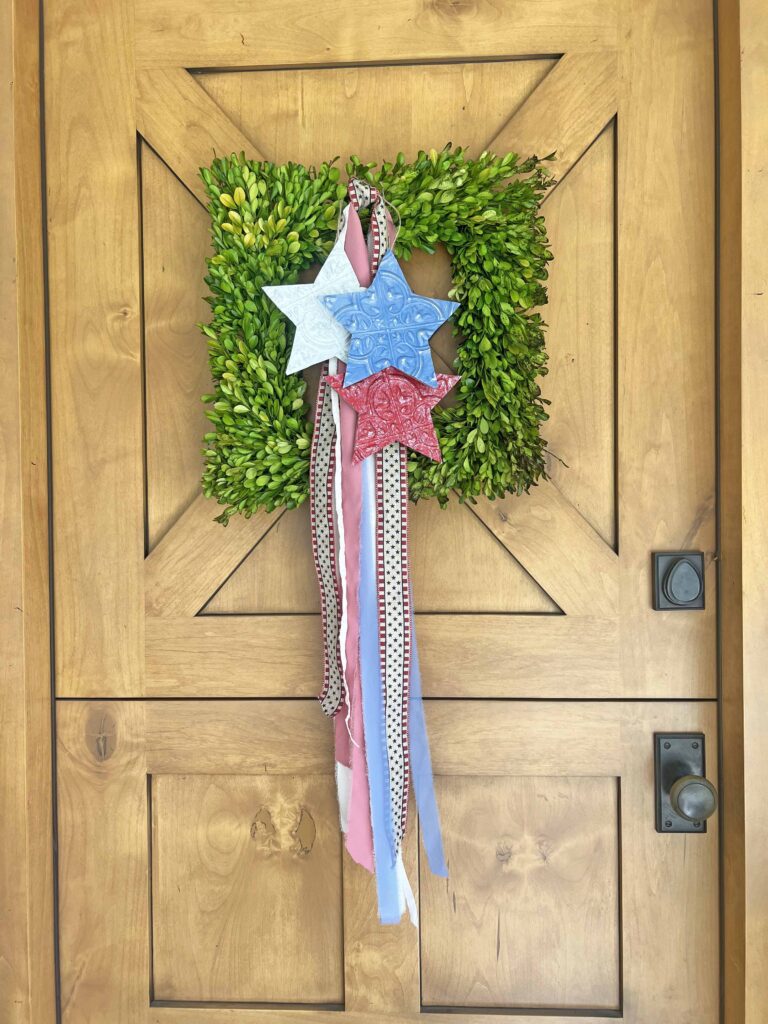
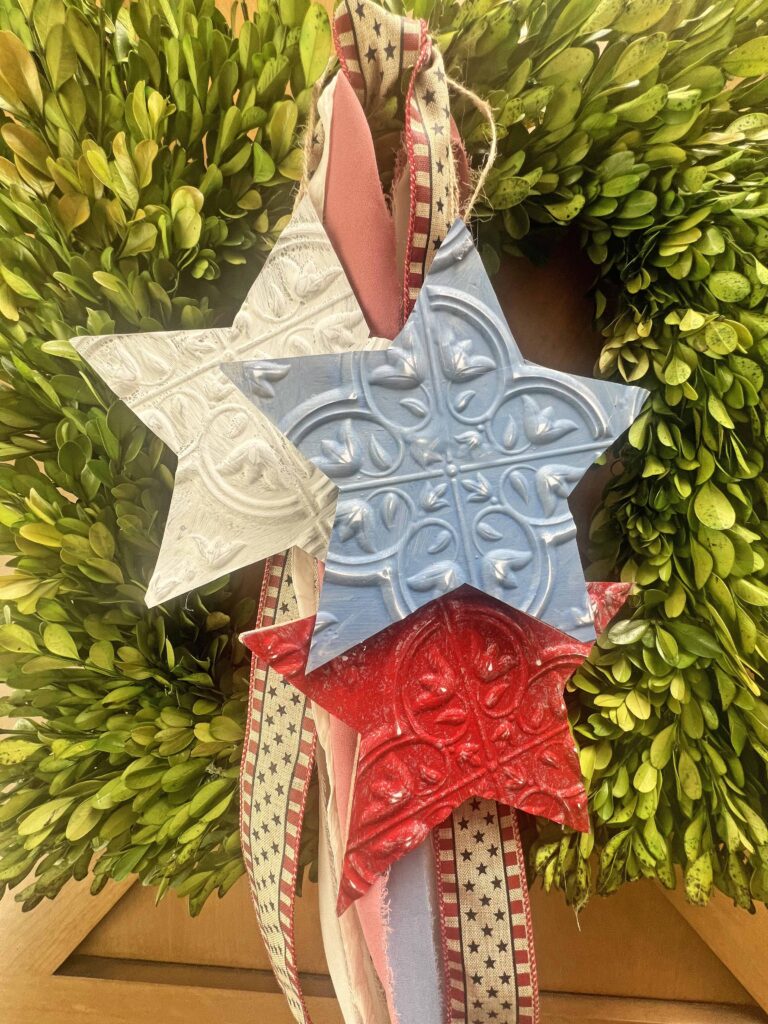
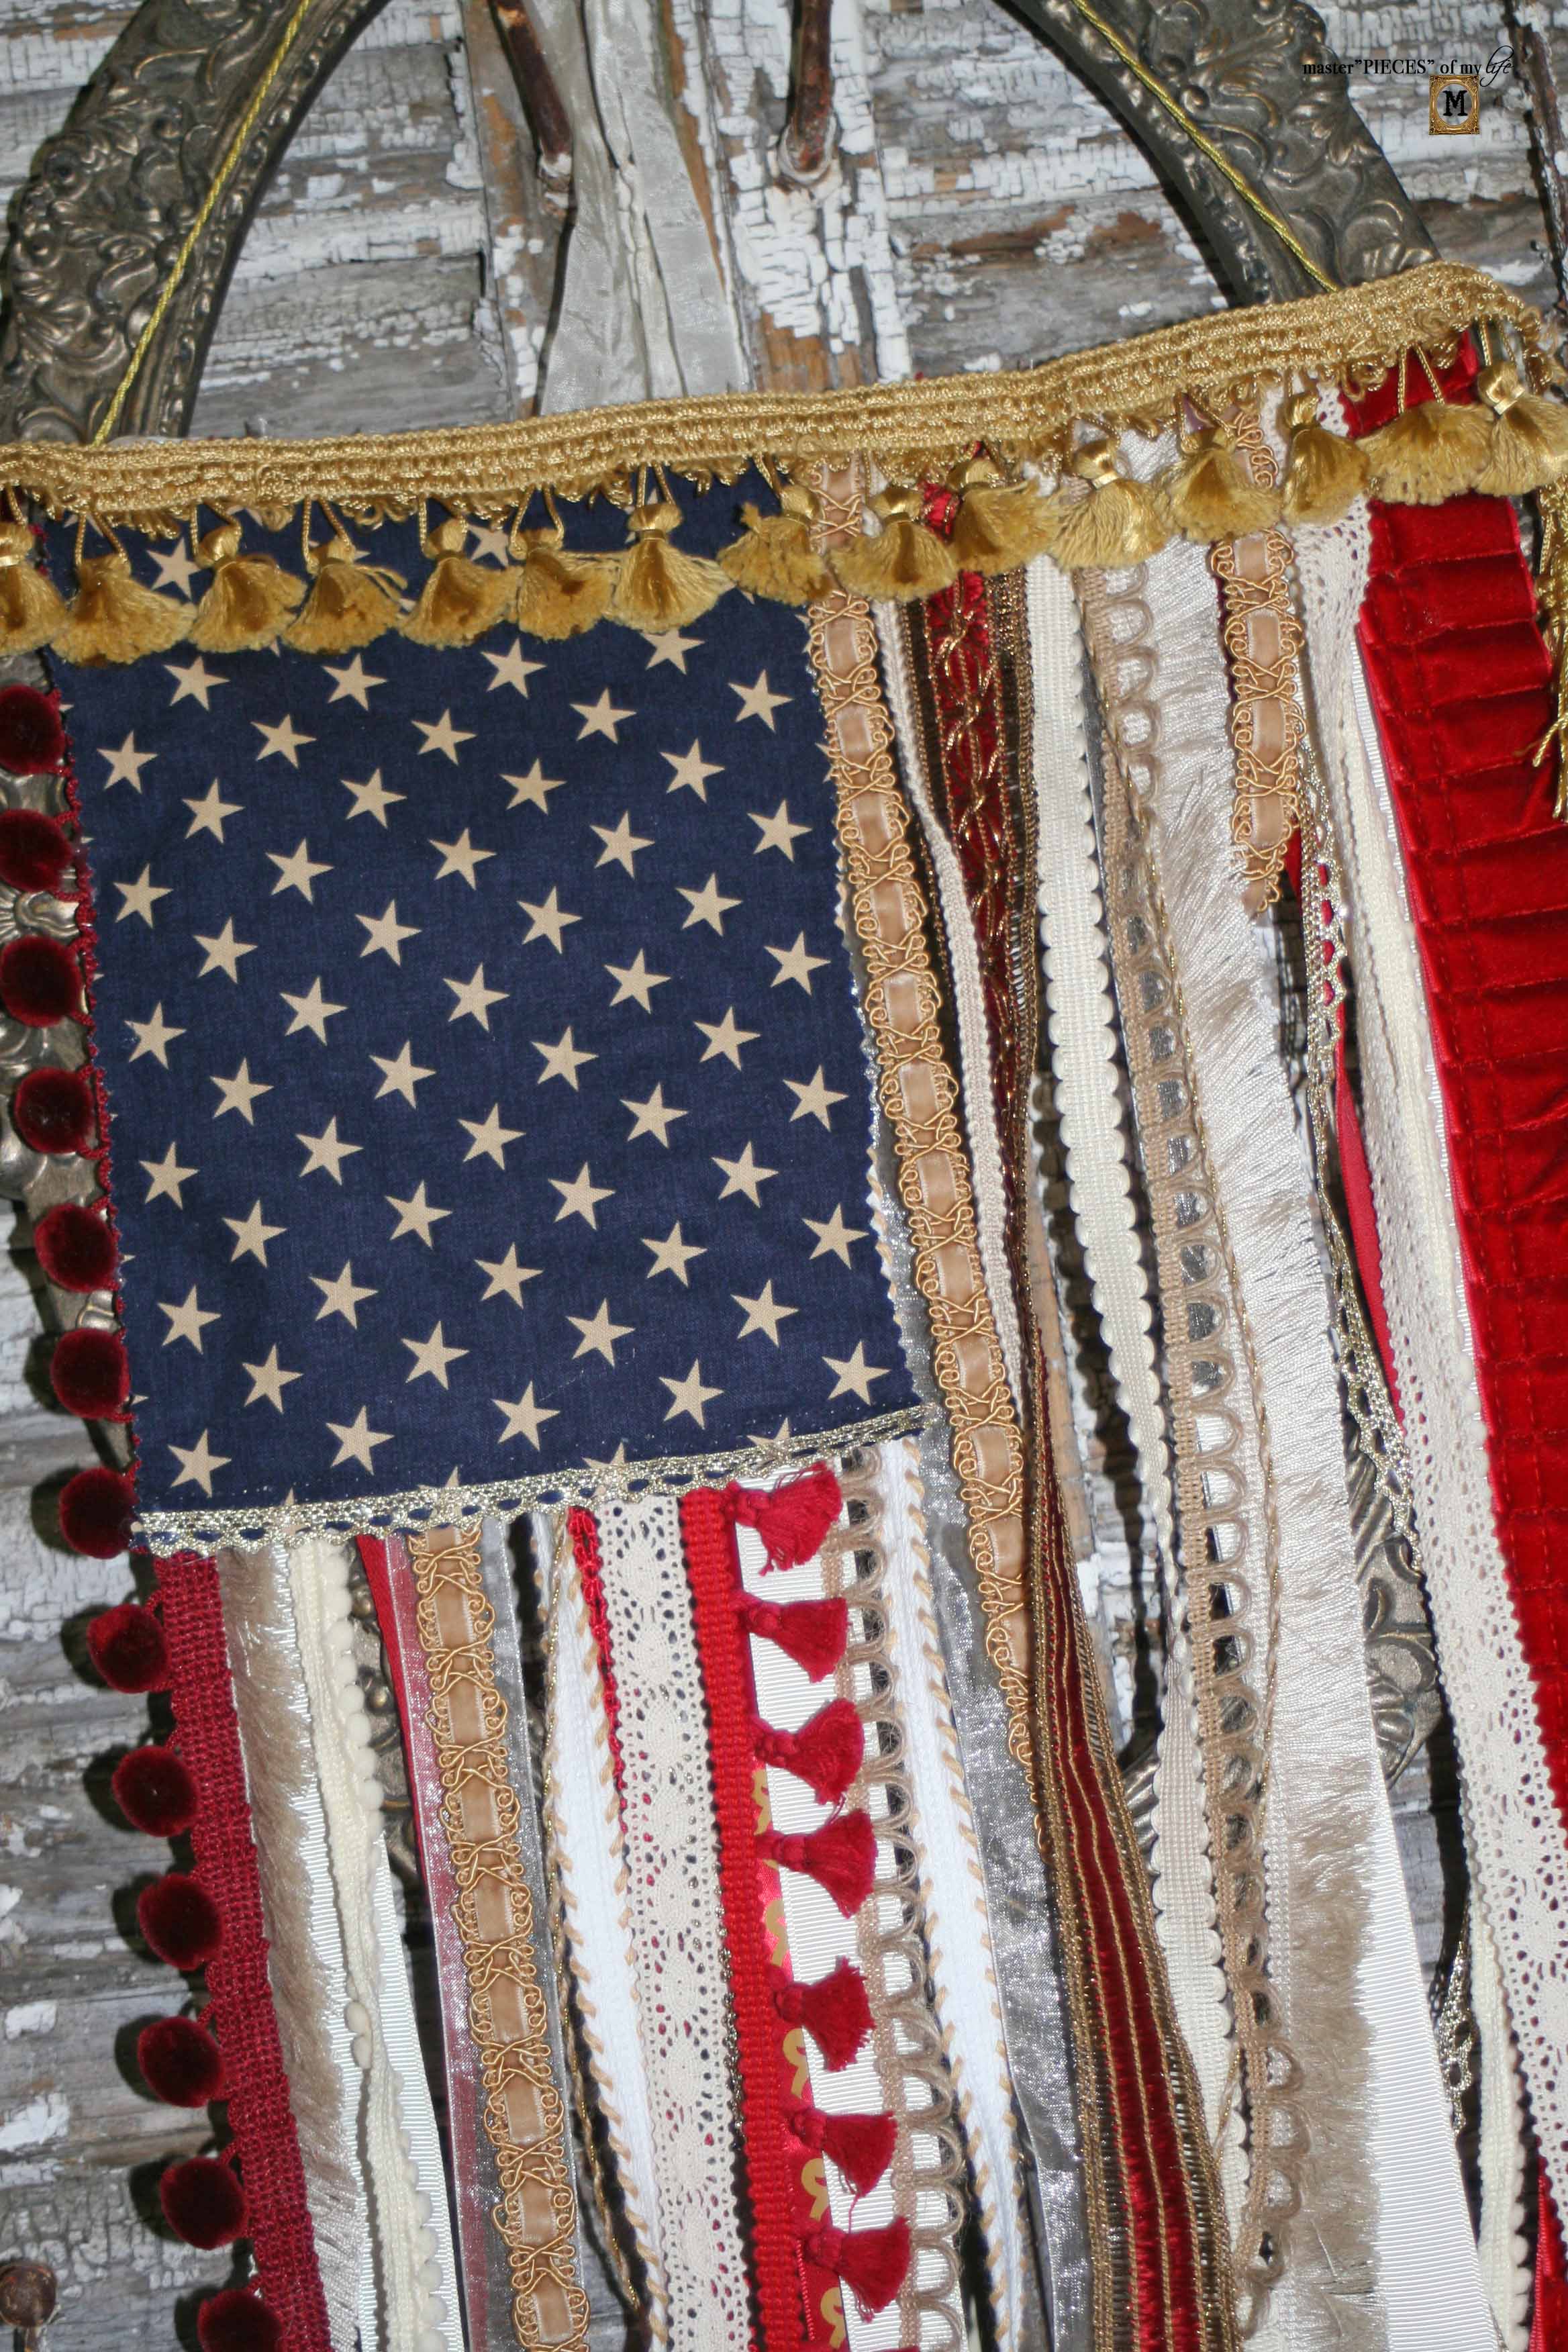
I hung the tin tile stars on the front door boxwood wreath. I created a simple knot bow with red, white and blue ribbons along with a patriotic star and stripes ribbon. The ribbons and the tin star charms create a welcoming patriotic display, which can also be placed on a cabinet, mirror, knob or anywhere a surprising seasonal accent brings a smile.

Floral wire simply attaches the ribbon knot onto the back of the wreath, which also holds the star charms in place. It’s a super easy way to glow -up a wreath for seasonal feels, which can easily be removed when the season passes. I recently shared how I gave the boxwood preserved wreath a refresh here.
Closing Thoughts
I hope this inspires a. patriotic mood. I am super jazzed how these faux tin tile stars turned out, and they have started injecting patriotic vibes to our front porch. More patriotic decor and inspiration coming your way soon.

Thanks for dropping by today and can’t wait to see you next time. Au revoir!


Shopping the Look
- Faux Tin Tiles
- Annie Sloan Old White Chalk Paint
- Uniform Blue Acrylic Paint
- Flag Red Acrylic Paint
- American Crafts Heidi Swapp Paint Set Red and Green
- Jute Twine
- Hot Glue Gun
- Glue Gun Glue Sticks
- Silicone Finger Protectors
- Craft Sanding Blocks


More Related Posts


Most Recent Posts


In the valley of the giants where the stars and stripes explode, the peaches they were sweet and the milk and honey flowed.”
Bob Dylan