


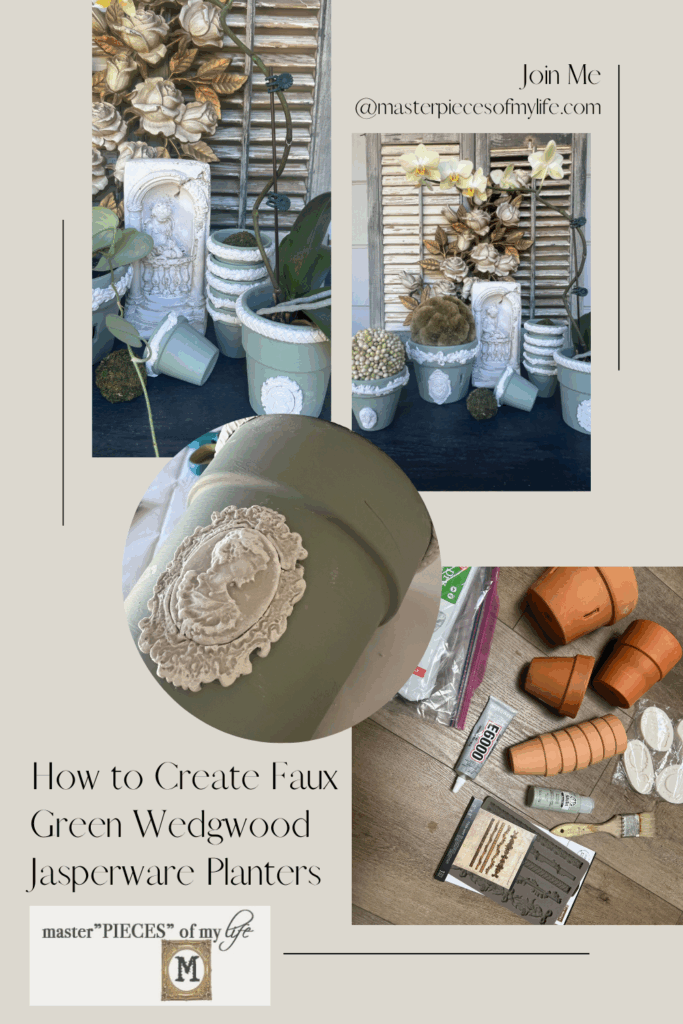
I am so glad you’re here today! I am super excited to share how to create your own faux green Wedgwood Jasperware Planters. Are you familiar with this stoneware pottery? It’s one of my favorite to collect, and this DIY is a great way to get the look at a fraction of the price. Let me show you how you can easily do this too.

Wedgwood Jasperware is a beautiful collectible pottery. The English ceramic pottery has a traditional, stately presence, which is beautifully crafted. The stoneware pieces range from small trinket dishes to grand urn masterpieces. These planters with the Wedgwood Jasperware “look” expand our modest collection, using basic terra cotta pots and air-dry clay moldings. Please join me as we create these faux masterpieces.
*Affiliate links might be included for your convenience. These affiliate links mean a small commission is earned if you make a purchase using these links at no extra cost to you. As an Amazon Associate qualifying purchases support this website. For more information: Full Disclosure Policy.
The Inspiration Behind the Faux Wedgewood Jasperware Look
Jasperware was developed by Josiah Wedgwood in the 1770s in Staffordshire, England. It is known by its unglazed matte “biscuit” finish. Although it is produced in several colors, it is best known for its pale blue color, which is known as Wedgwood blue. My preference of course consists of the green Jasperware variety. Regardless of the body color the relief decorations tend to be white, although other colors are used as well, which are characteristic of jasperware, giving it a cameo effect. The Jasperware decor is known for its fashionable Neoclassical style.

In researching how to use air-clay earlier in the year for this {air-clay shamrock charm DIY for St. Patrick’s Day}, I perused many tutorials which used the silicone molds with air-clay. I love the look and it reminded me of many of the Jasperware pieces we have. The wheels started turning and here we are. If you’re interested, you can preview our Green Jasperware collection used in various ways in the following posts.
Air-dry clay is a a great medium to work with and the more I work with it the more ideas I have. Other projects are scheduled, which are coming your way soon for all the upcoming seasons and holidays. Some pieces are already prepped for some of the future concepts.
How to Create Faux Green Wedgewood Jasperware Look
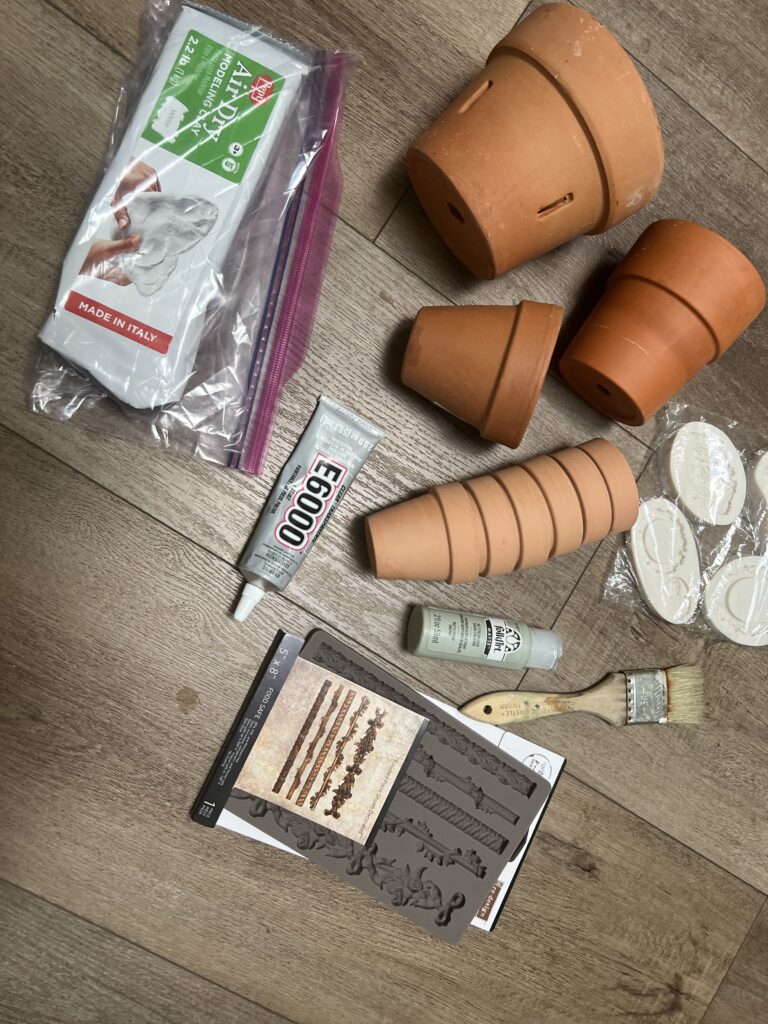
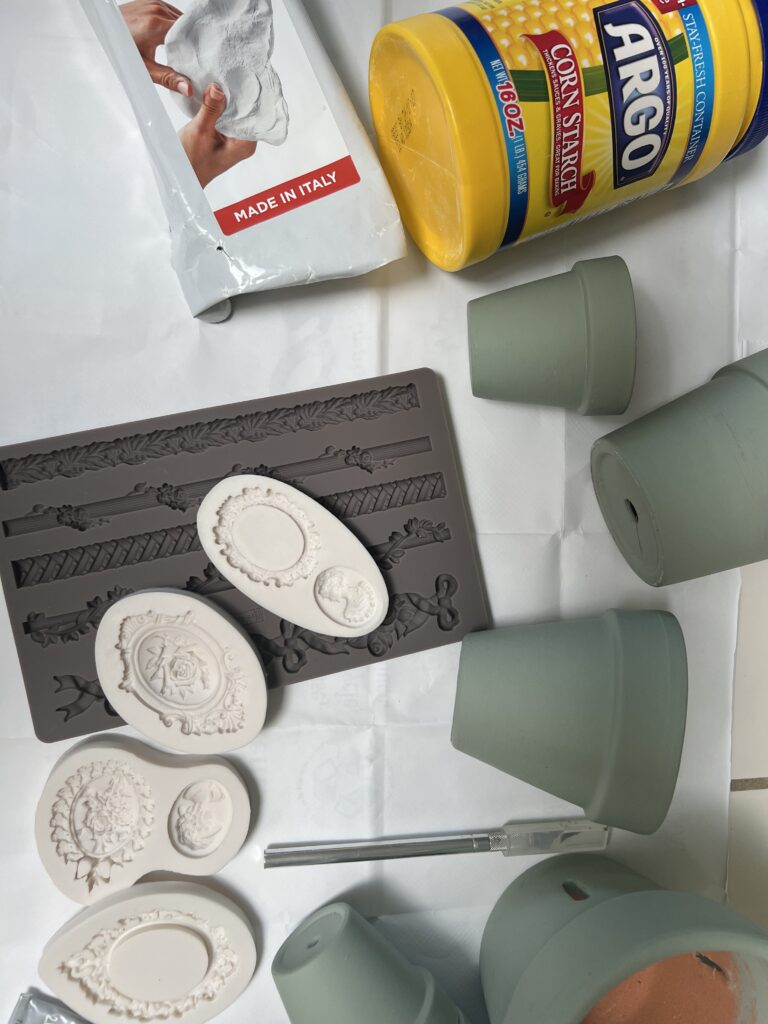
Supplies
- Assorted terra cotta pots
- Green Acrylic Paint
- Air-Dry Clay
- Cornstarch
- E6000 Adhesive
Tools
- Paint Brush
- Silicone Molds
- Craft Knife
- Craft Brush
- Exacto Knife
Instructions
- Assemble all your supplies, tools and read all the directions thoroughly
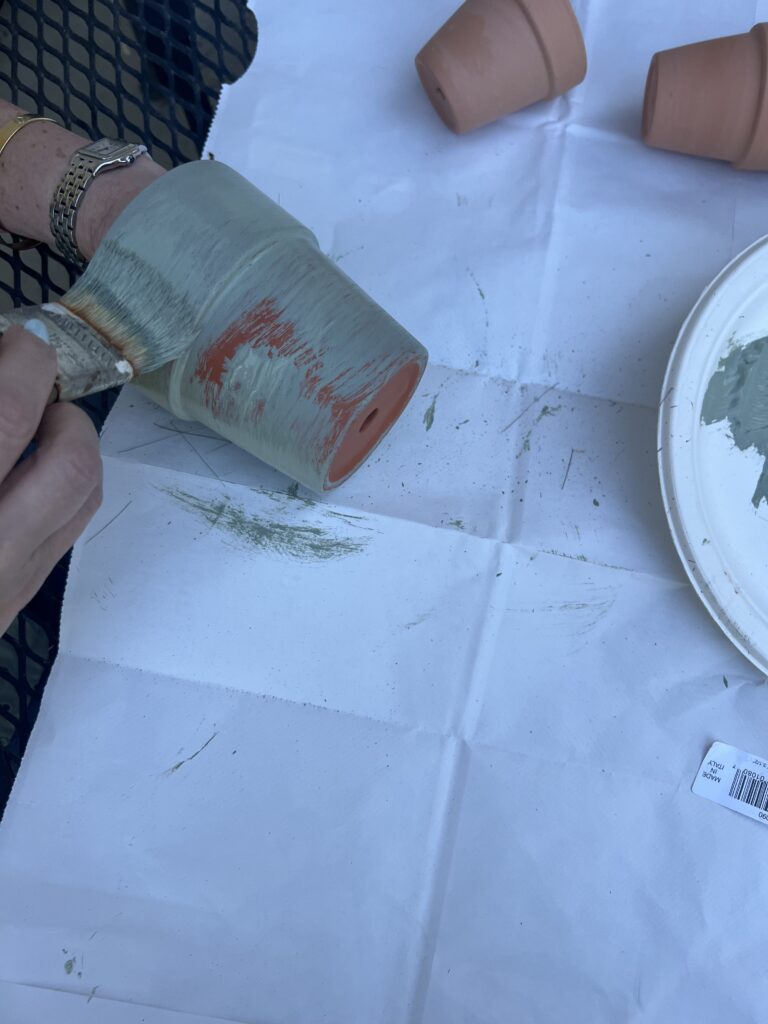
- Using paint brush apply one coat of acrylic paint to pot(s) fully covering outside and inside lip of pots
- Allow paint to dry thoroughly (I recommend allowing to sit overnight to dry fully)
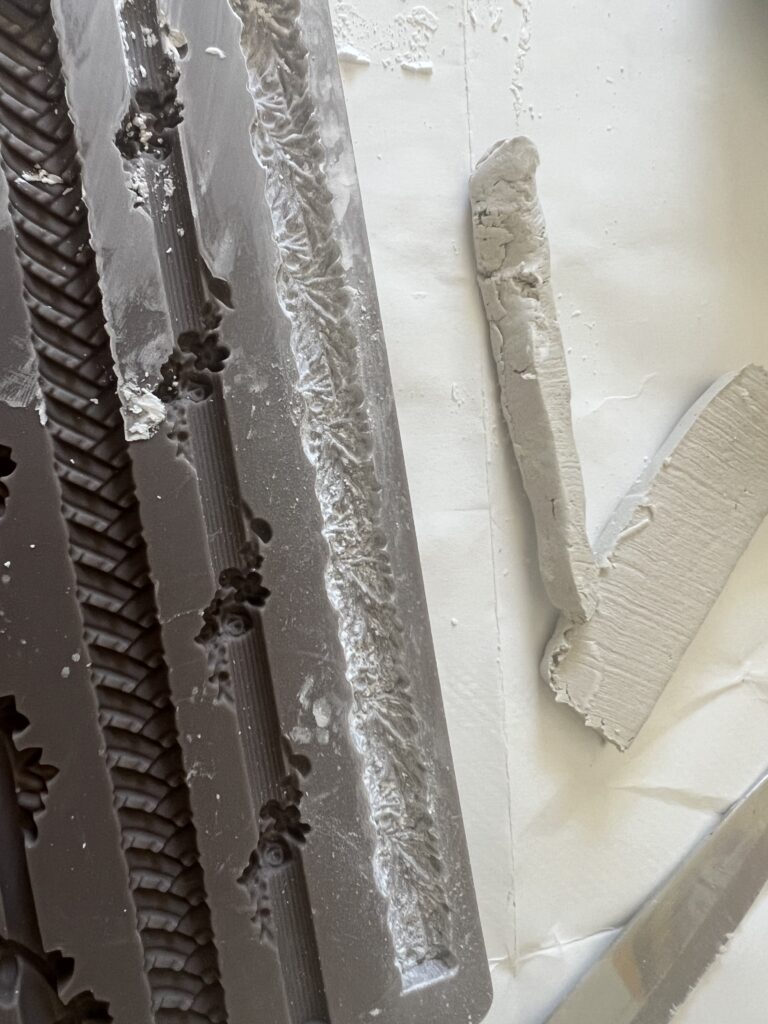
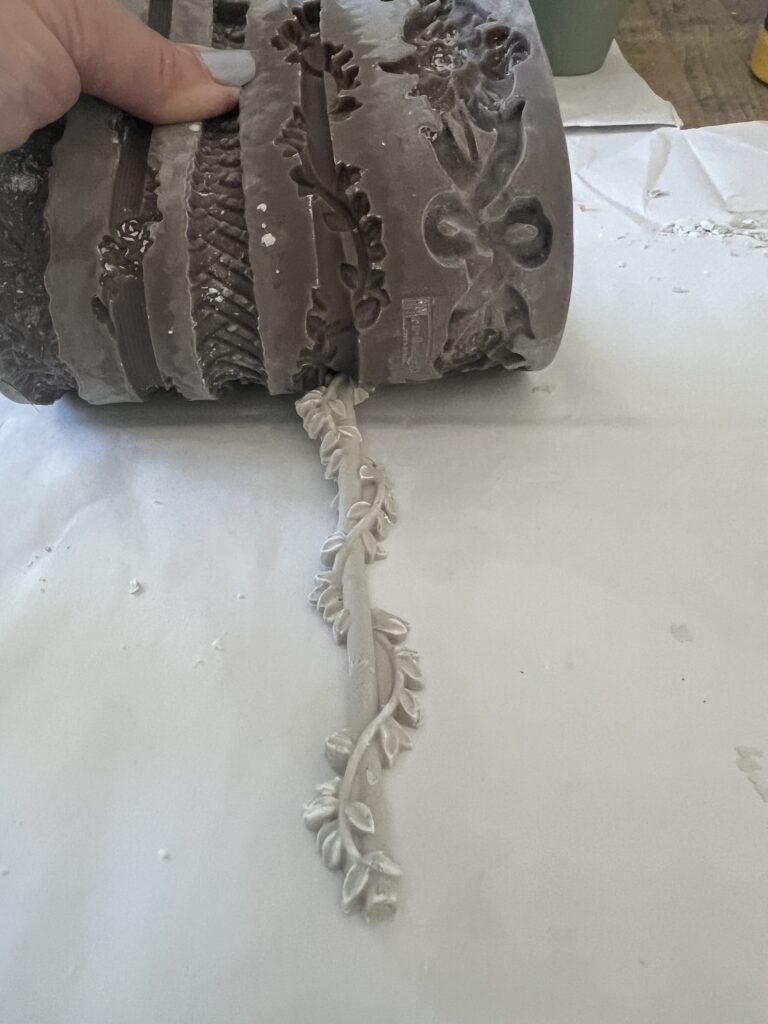
- Select desired silicone mold and brush with cornstarch liberally, shaking out excess
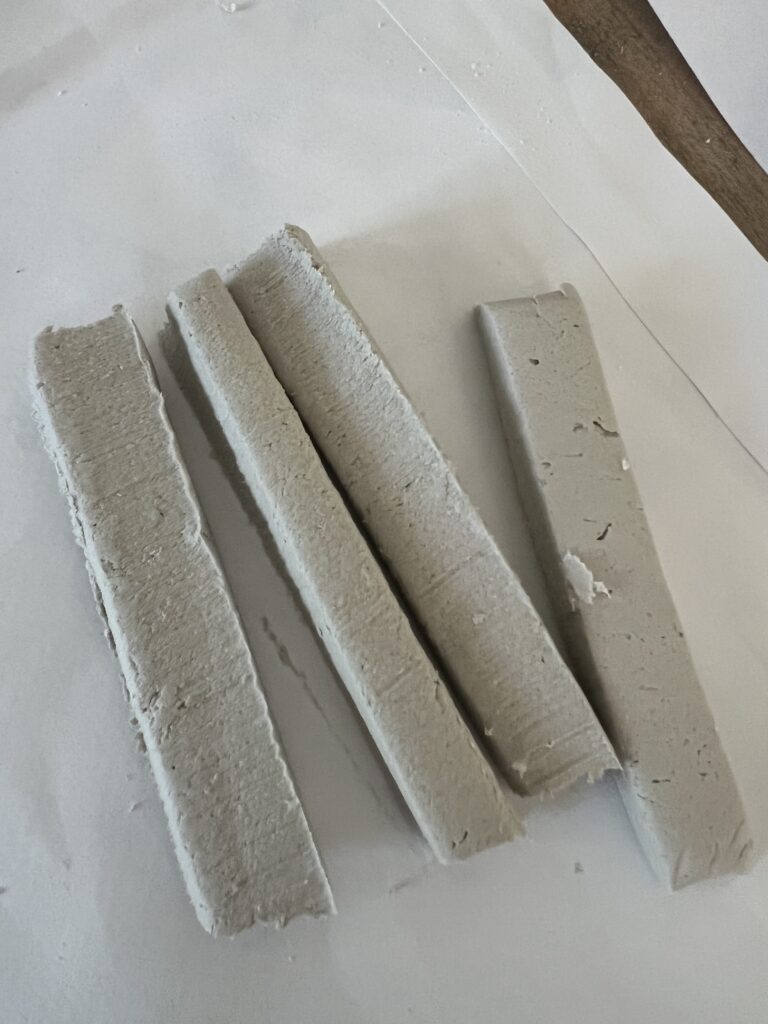
- Cut small sections of air-dry clay and insert into silicone molds, pressing clay down to fill all the nooks and crannies fully
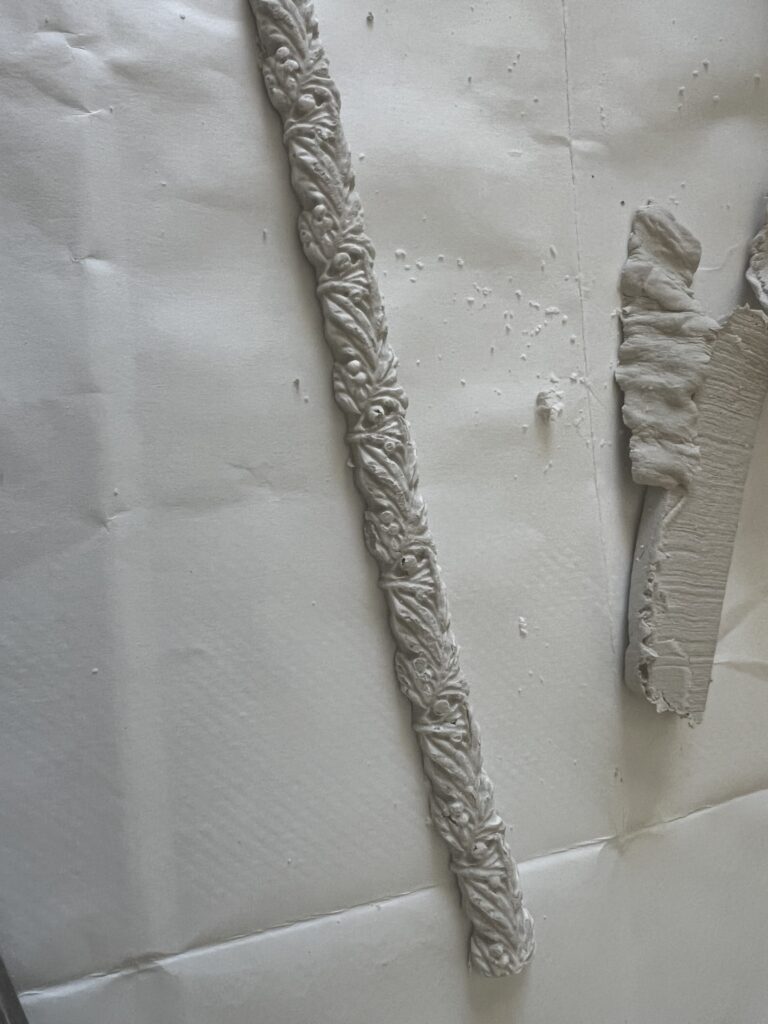
- Remove clay from silicone mold gently as to not tear or break the form
- Allow formed air-dry clay to sit for a few minutes to settle
- Use exacto knife to clean up edges if necessary
- After a few minutes apply E6000 glue on back of air-clay form and adhere to pot in desired position
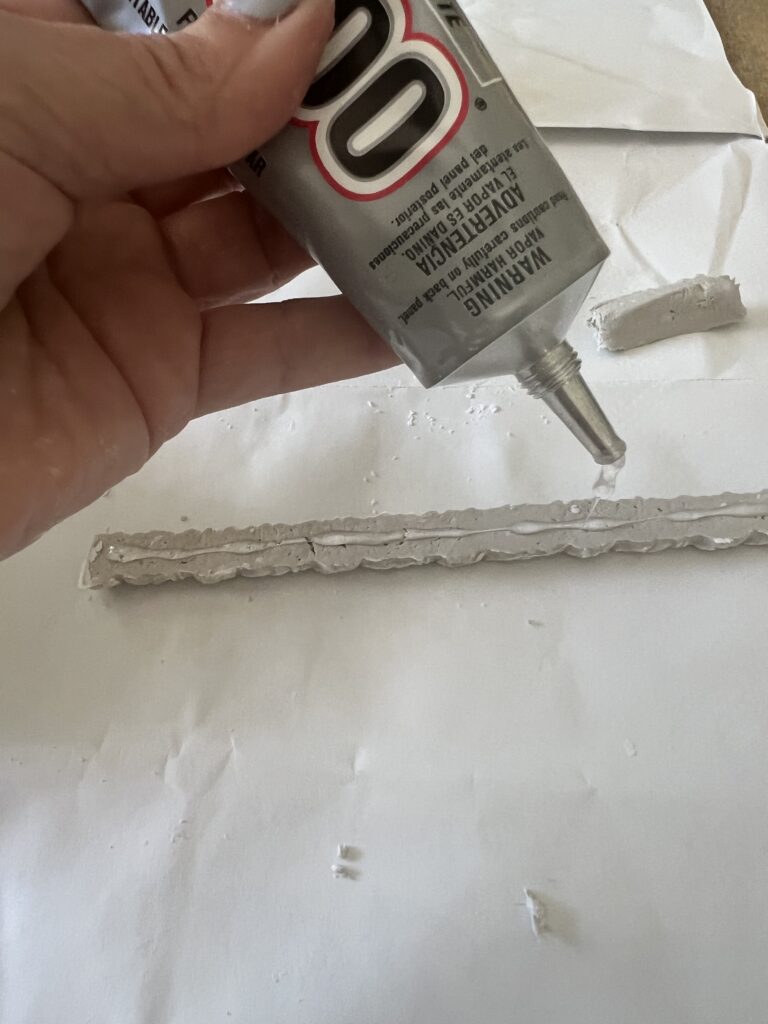
- Hold clay form to pot for a few seconds to assure secure bond
- Once all moldings are adhered to the pot(s) allow to fully cure for 24-48 hours
- Voila! enjoy your faux Wedgwood Jasperware pottery
Crafting Pro Tip: As I recommend with all my projects, read all the instructions through once and then re-read everything again. This way, you are familiar with everything you need and know what to expect.
Tips & Tricks in Creating Faux Wedgewood Jasperware Planters
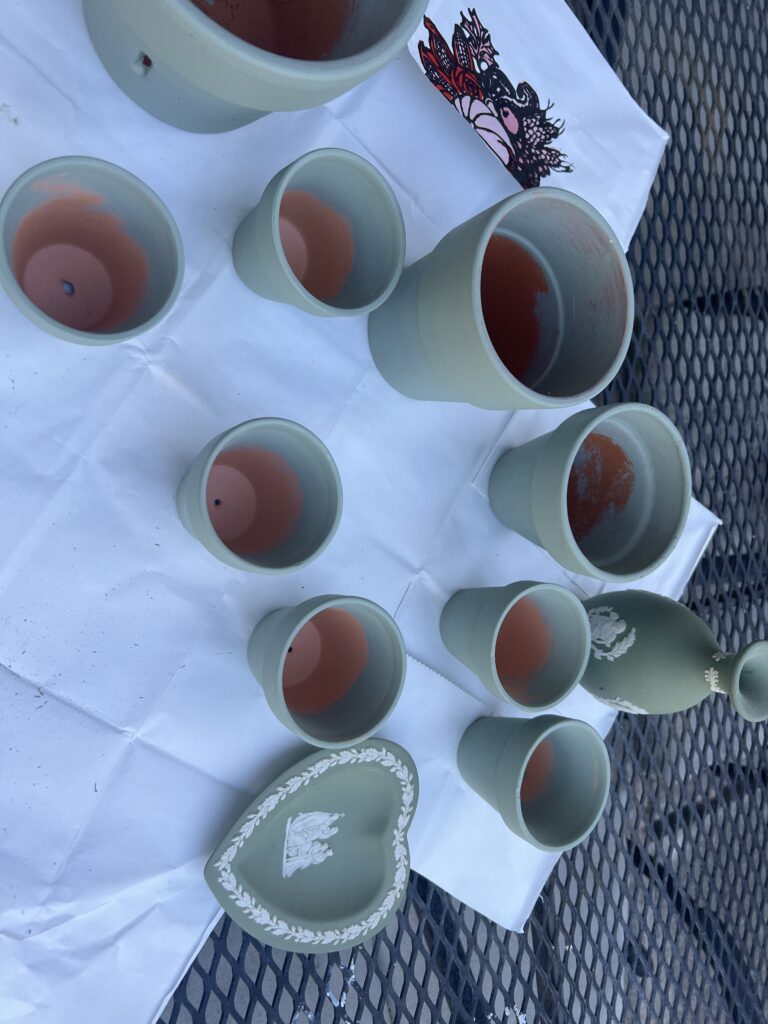
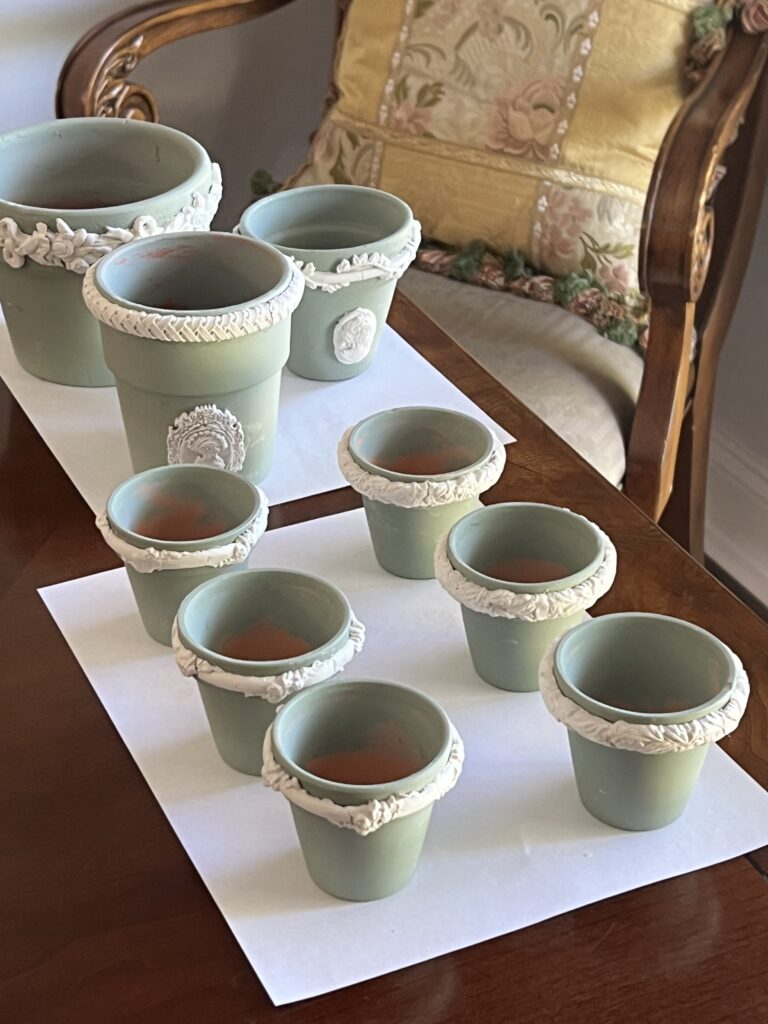
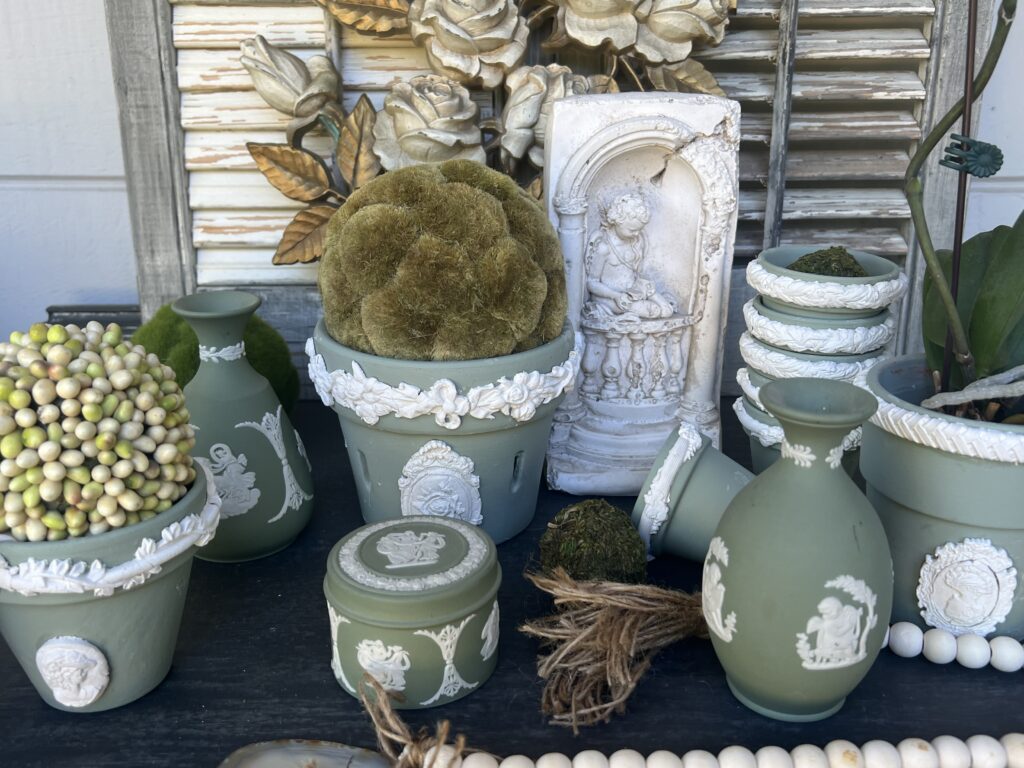
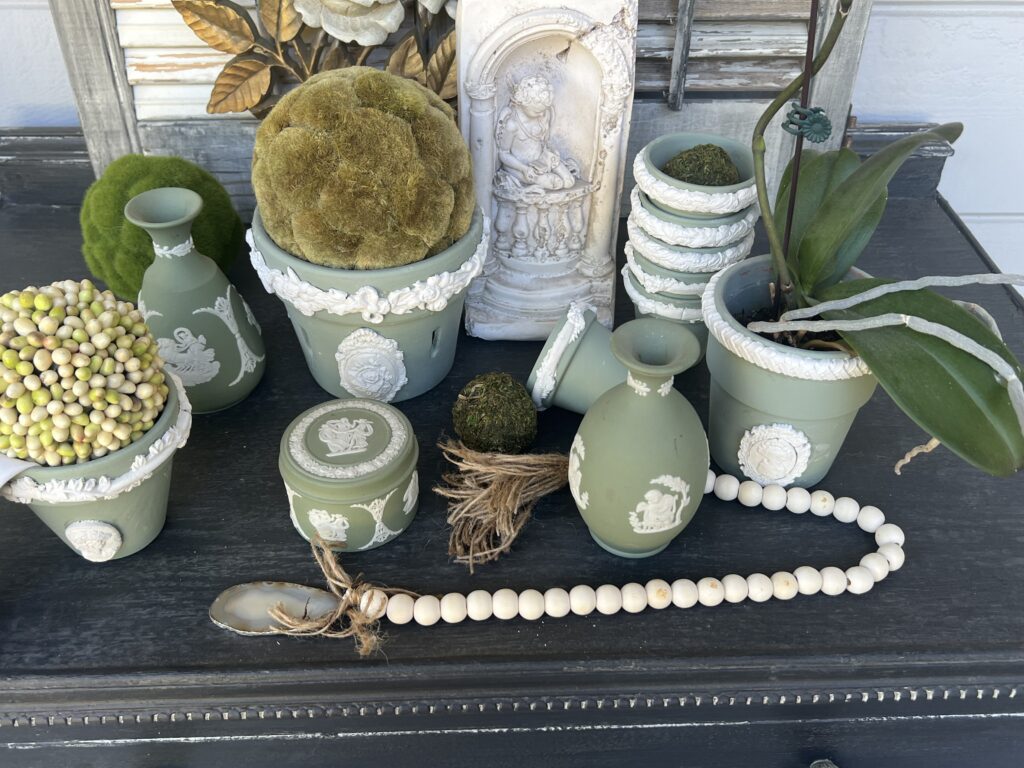
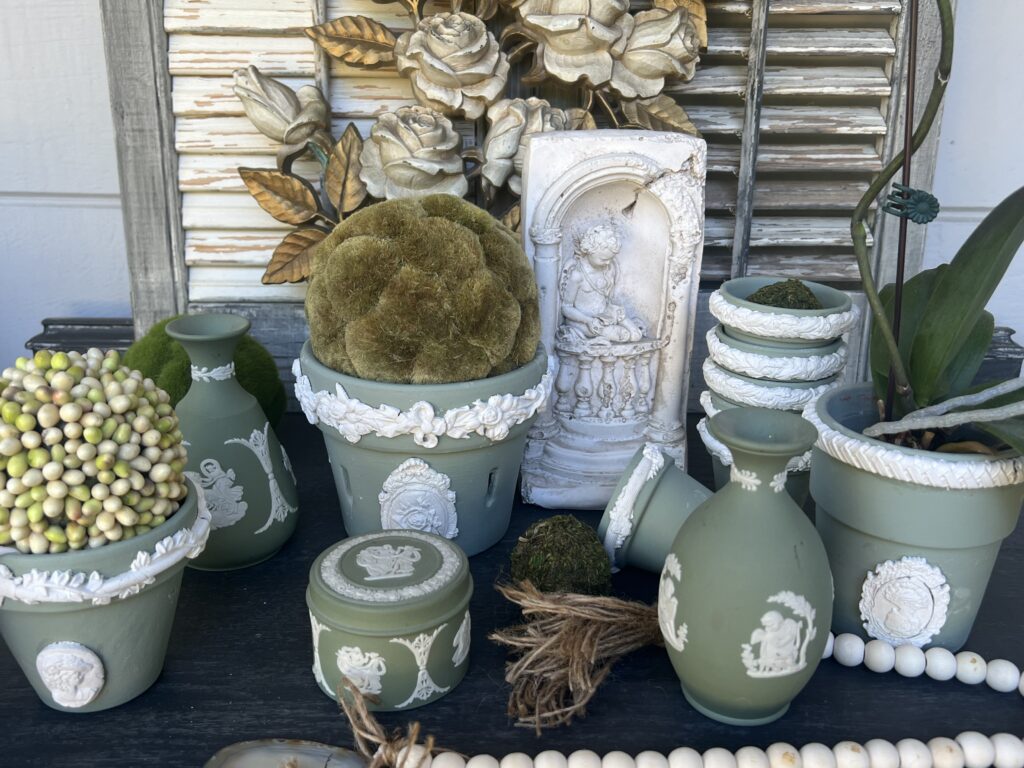
I used FolkArt acrylic paint in the Italian Sage color. The paint is in a matte finish, which achieves the Jasperware “biscuit” look. I just used a chip brush to apply the paint liberally and made sure to paint well into the inside of the pots to give them a finished look. The color was a good match to the original Wedgwood green. Only one coat of paint was needed to achieve the matte biscuit look. To compare and contrast, I mixed in some vintage pieces with my faux pieces below.
I used green paint since it’s my favorite, but you can create the Wedgwood blue look or any other color that grabs your fancy or fits your home decor aesthetic. The key is to achieve the soft matte look for the background color and the natural white color for all the relief details. The air-dry clay used here dries perfectly to the desired effect and did not require any paint.
Using cornstarch in the silicone mold before applying the air-clay is critical since it prevents the clay from sticking when it’s released from the mold, which retains its shape well. I had to create many mold sections and sometimes I would forget to apply the cornstarch in between applications and invariably it caused problems. I applied the cornstarch with a small craft brush picked up at the Dollar Tree in an assorted pack.
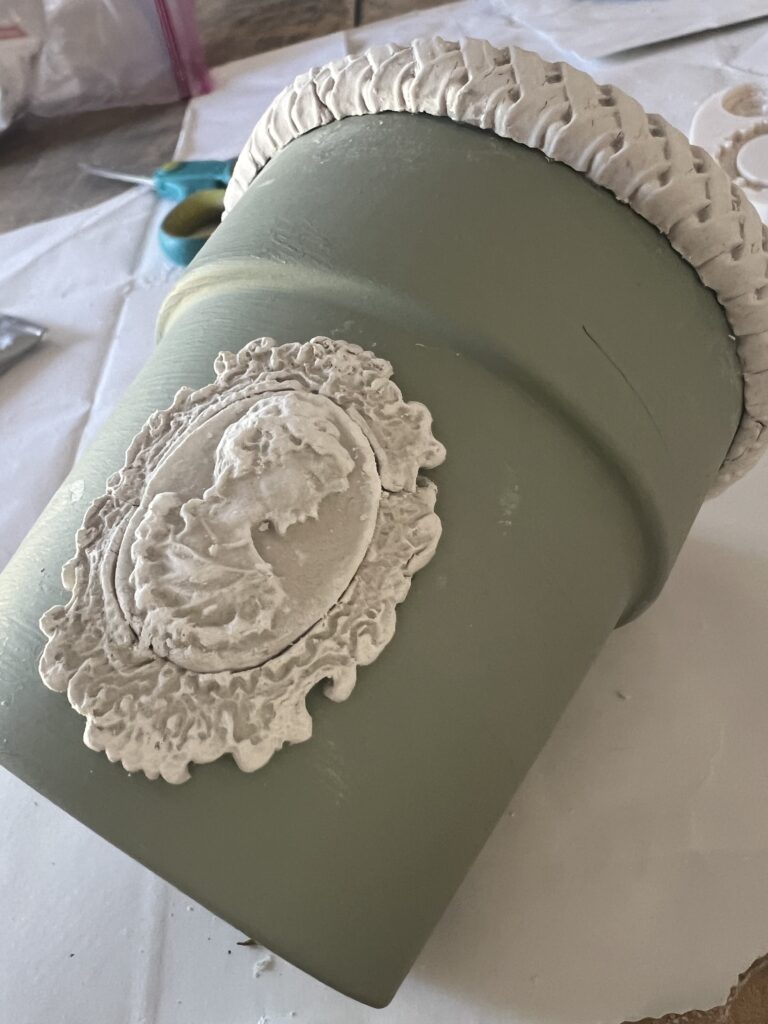
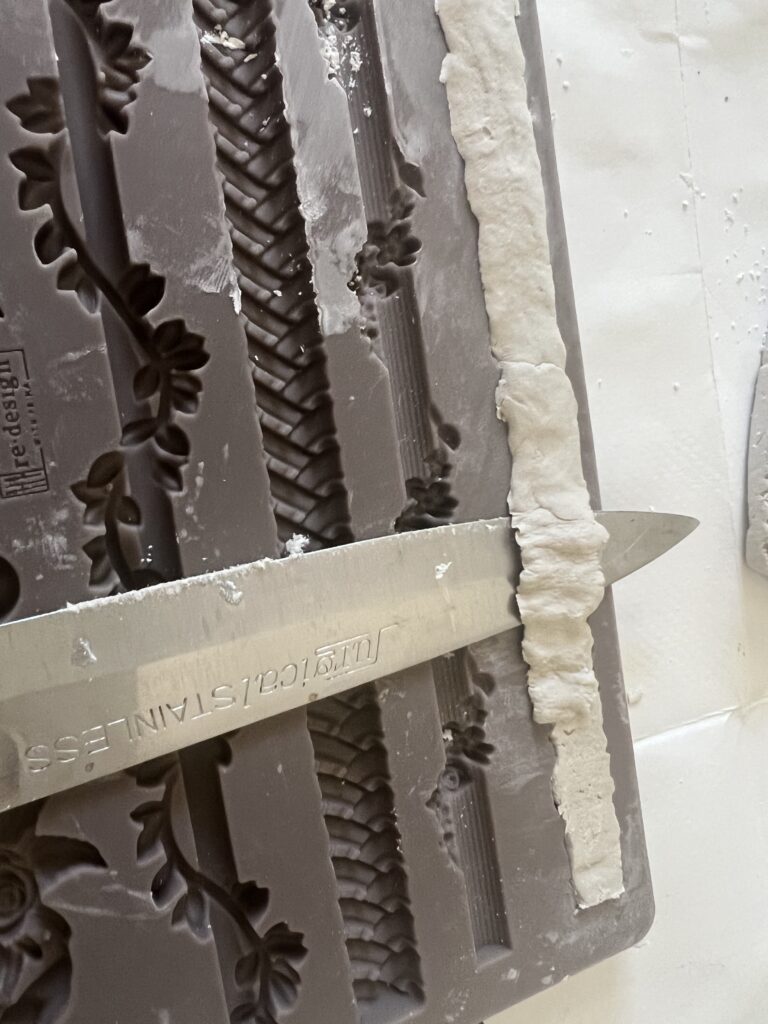
Make sure to press plenty of clay to fill all the details in the molds. When you think you are done pressing, press some more. You will invariably have excess clay outside the mold. I used a craft knife and ran it down the mold to make the clay flush to the silicone mold form before I removed the air-dry clay. This helps create a flat surface on the back allowing for a strong surface to adhere to the pots.
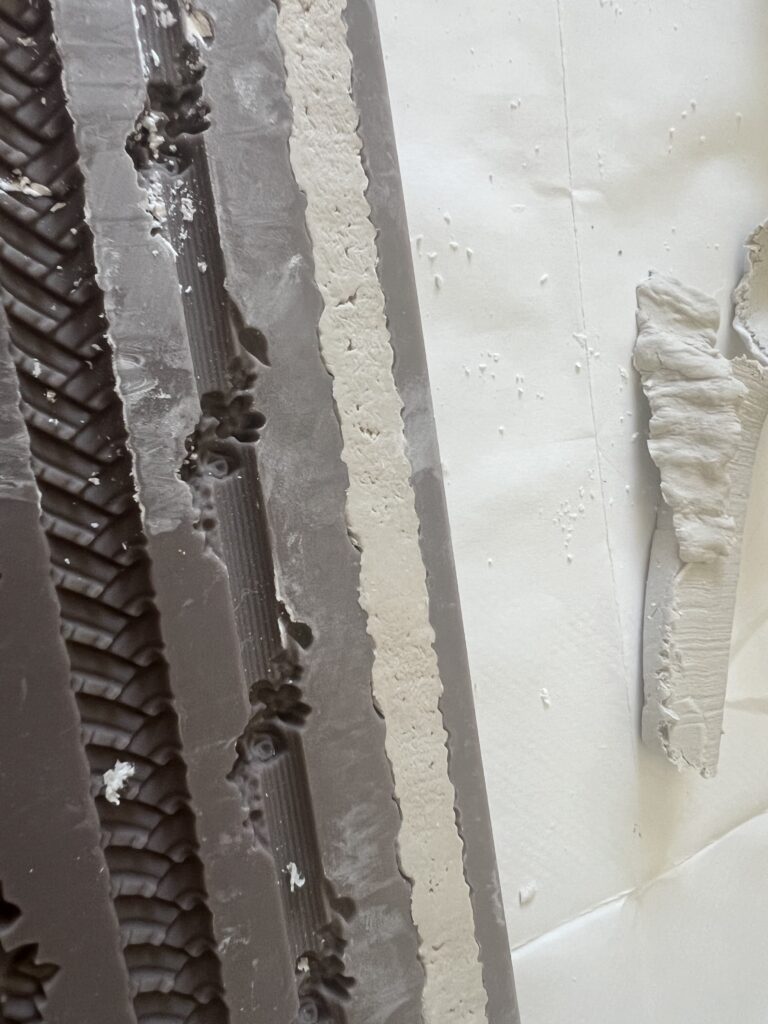
To release the clay from the molds I found it best to invert the mold onto the work surface. Then slowly curve the mold away as the clay gently folds out of the mold. Slow wins the race in this step and just be patient. I am not patient, and rushed the process which causes the mold to crack. You can fix the problem by pressing the broken pieces together and using a bit of water to massage them together. Since the molds used here have a ton of detail they were forgiving to disguise these joints.
I highly recommend storing an opened package of air-dry clay in a tightly sealed plastic bag. My clay was stored in a gallon ziplock bag, where the big block was in it’s original packaging but there was a small piece left over from a previous project, which was just loose inside the gallon bag. I attempted to use this clay at first for this project, but it was extremely brittle and cracked. Thankfully it was a small piece, which I just tossed. Once I used clay from the original packaging it was much more pliable and it was smooth sailing from there.
Closing Thoughts about How to Create Faux Green Wedgwood Jasperware
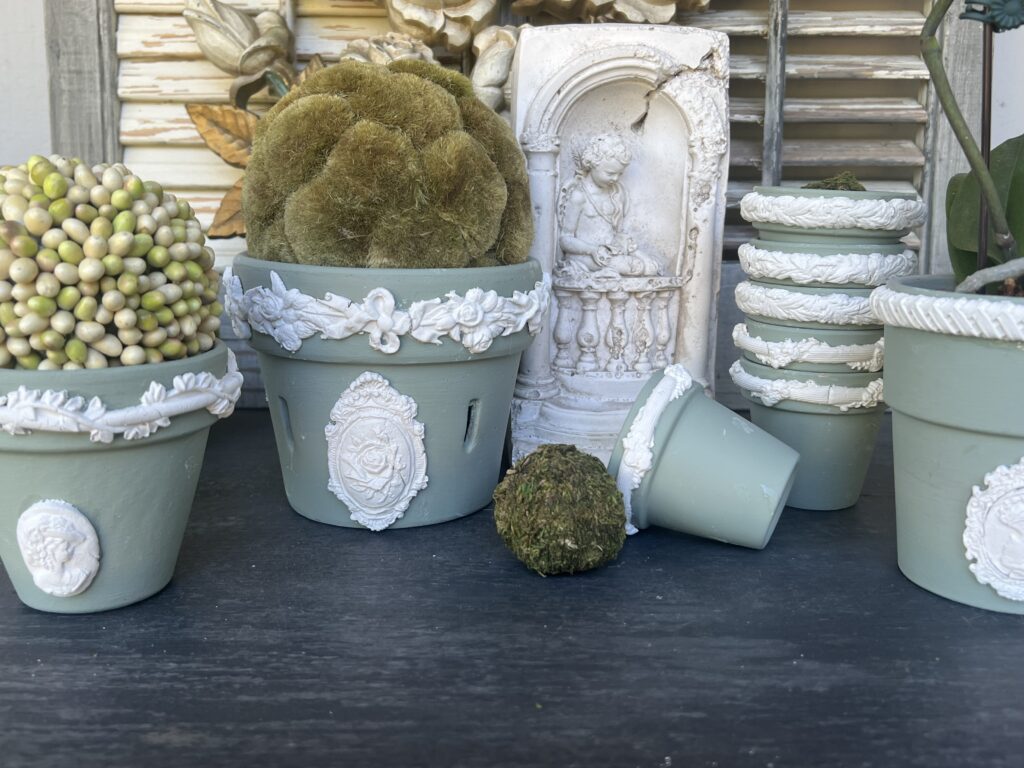
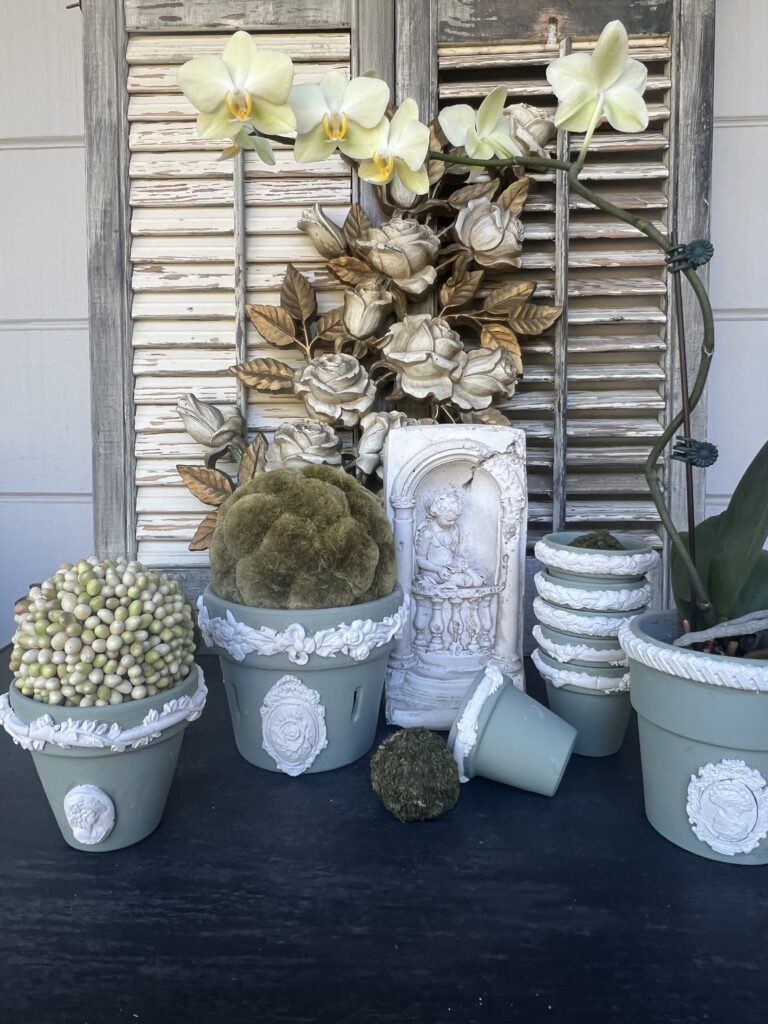
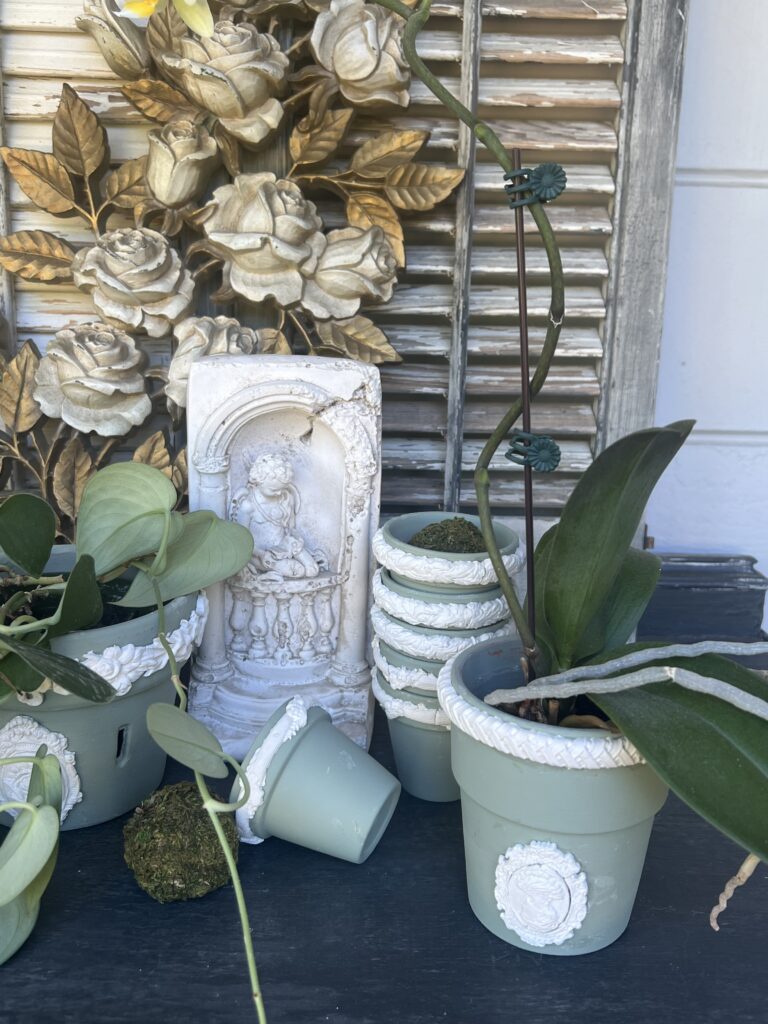
I am absolutely in love with how these turned out. It’s by far one of my favorite knock-off projects. These faux Wedgwood Jasperware planters play so well with my true vintage pieces. They will be perfect for so many vignettes throughout the year. The acrylic matte paint on the terra cotta really created the effect of the Jasperware biscuit finish. Plus the air-dry clay was the perfect finish for all the relief pieces.
I will admit it’s a somewhat labor intensive project depending on how many planters you decide to create, BUT it’s so rewarding!! I created a few planters for house plants and the such plus a few mini pots I will use in table top projects. They will make fabulous accents for table stylings. I have so many ideas for Fall inspired tables.
I hope this inspires you to create Faux Green Wedgwood Jasperware or something similar. It’s a classic look which yields beautiful pieces to inject into your decor. Air-dry clay is such a fun medium to work with, and I highly recommend it if you haven’t worked with it before. It’s like adult Play Dough. I encourage you to play and have fun. Thanks for being here and always appreciate the company.


Get the Wedgewood Jasperware Look
- Vintage Green Wedgwood Jasperware Vase
- Green Wedgwood Jasperware Trio
- Green Wedgwood Jasperware Vase & Trinket Box
- 4″ Terra Cotta Pots
- 2.5″ Terra Cotta Pots
- Terra Cotta Orchid Pot
- Green Acrylic Italian Sage Paint
- Chip Paint Brush
- Air-Dry Clay
- Border Silicone Mold
- Cameo Silicone Mold
- E6000 Adhesive
- Craft Exacto Knife


More Related Posts


Wakefield Garden Pottery Knock-off
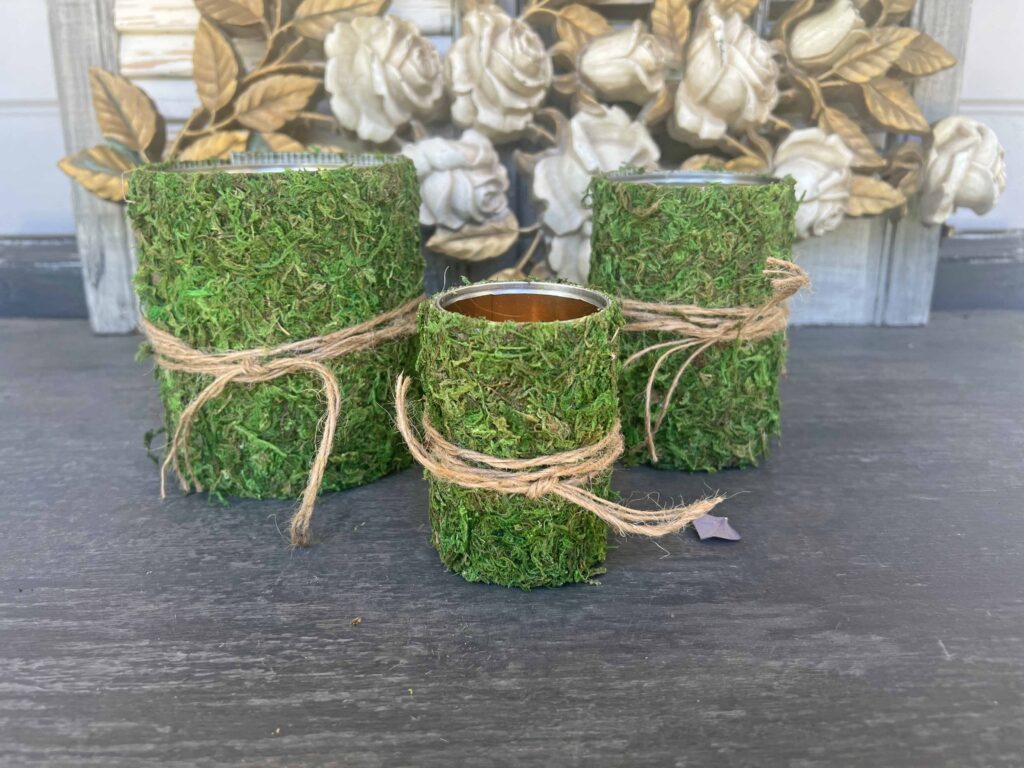
DIY Moss Containers from Tin Cans
Most Recent Posts
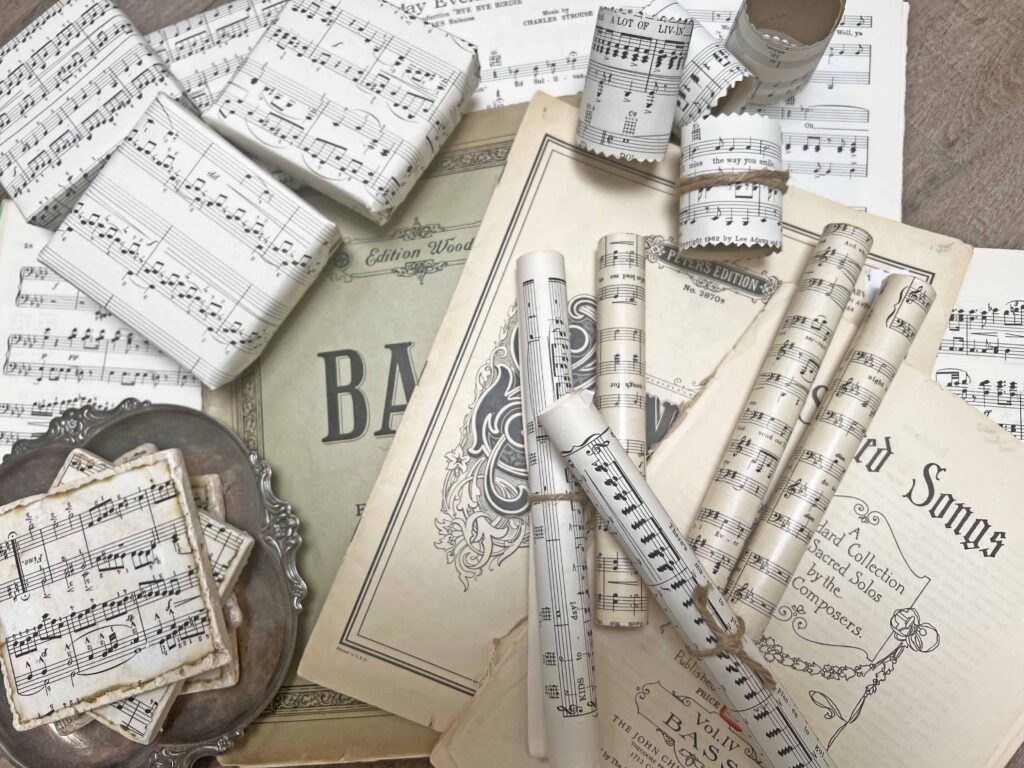
Using Thrifted Vintage Sheet Music in your Home Decor

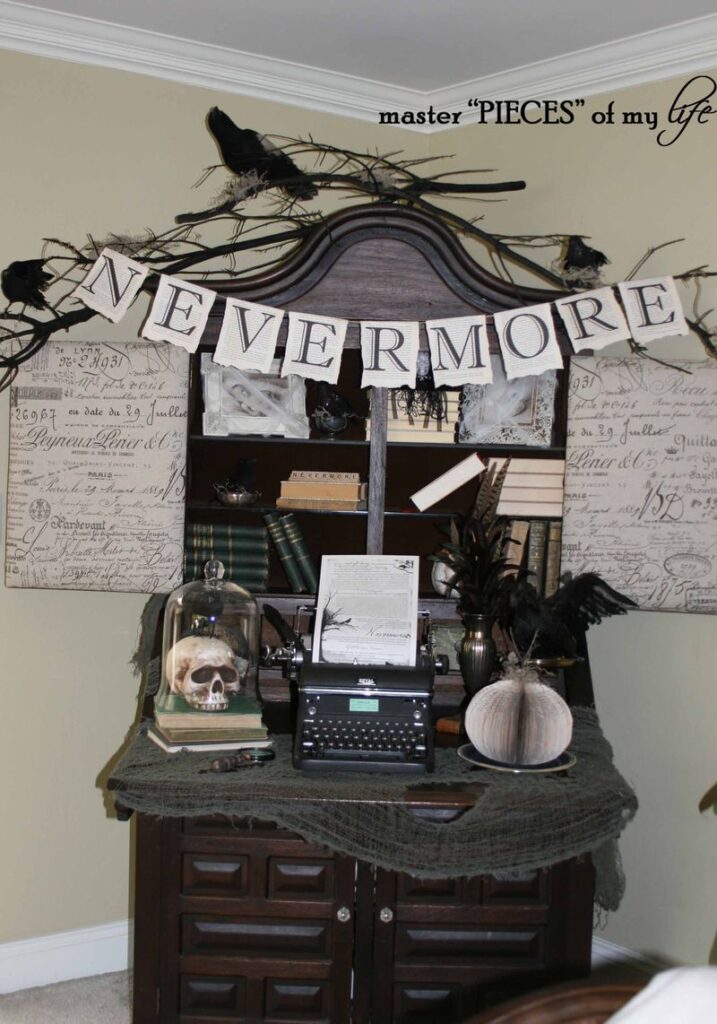
Nevermore Inspired Halloween Decor Vignette
Beautiful forms and compositions are not made by chance, nor can they ever, in any material, be made at small expense.”
Josiah Wedgwood