


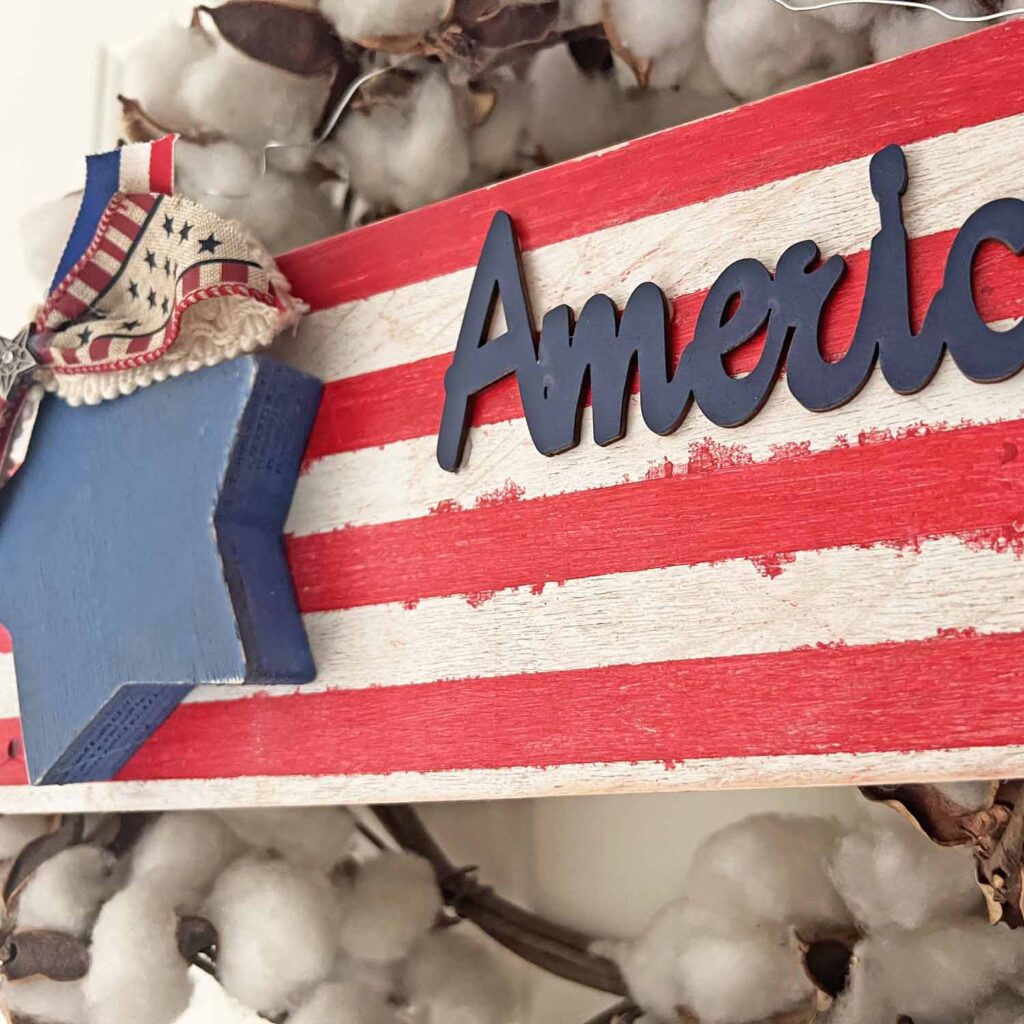
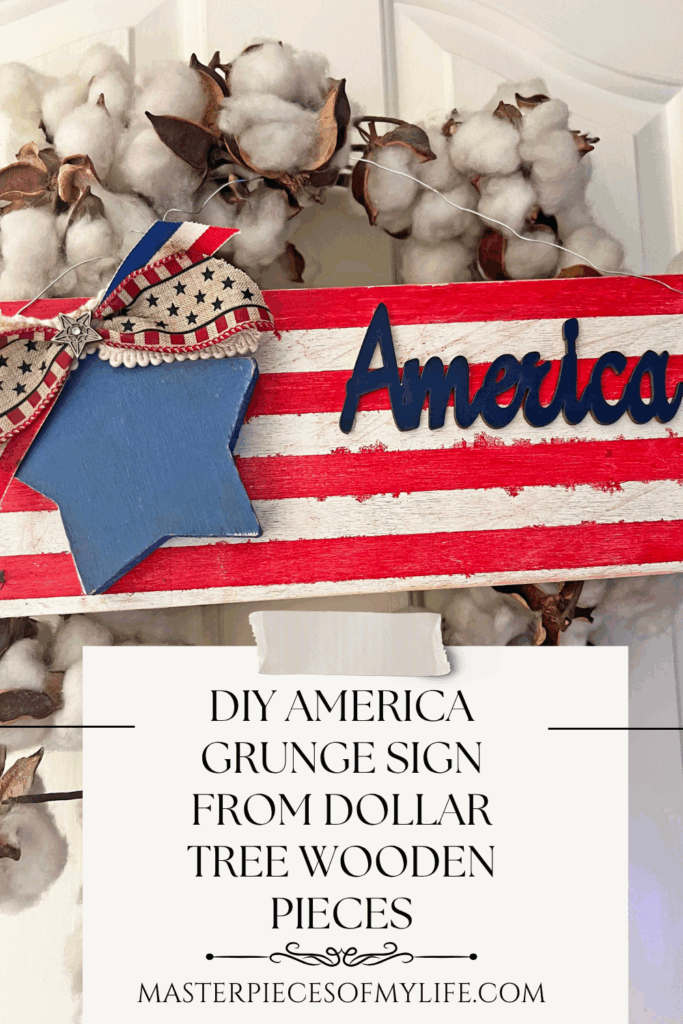
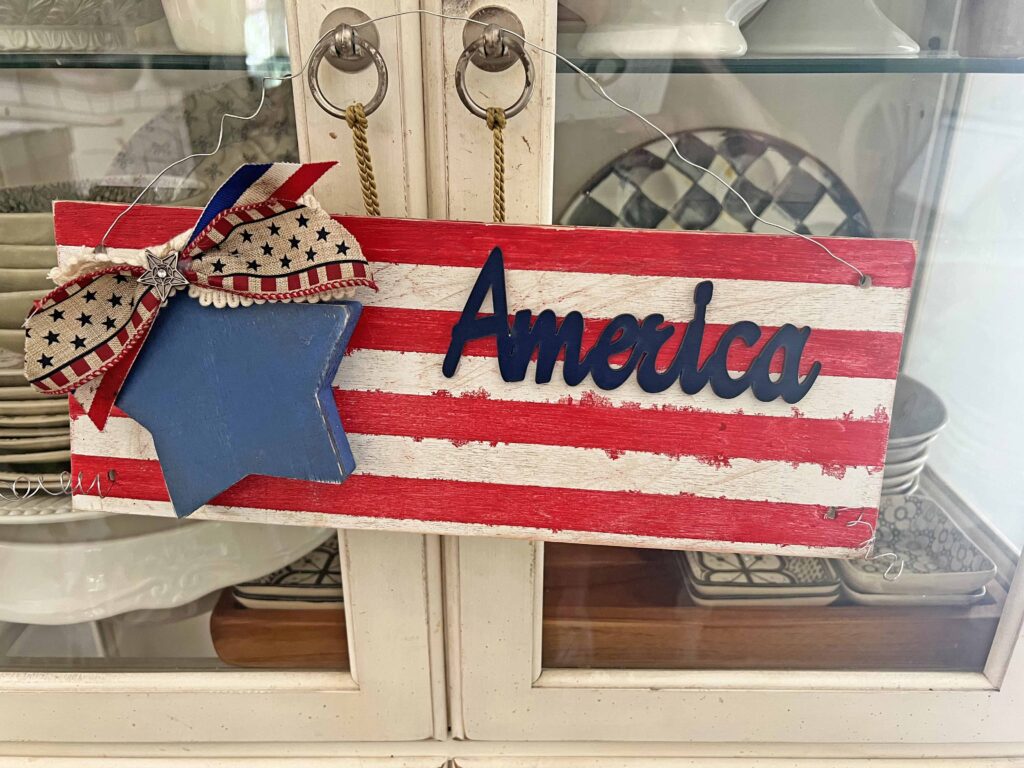
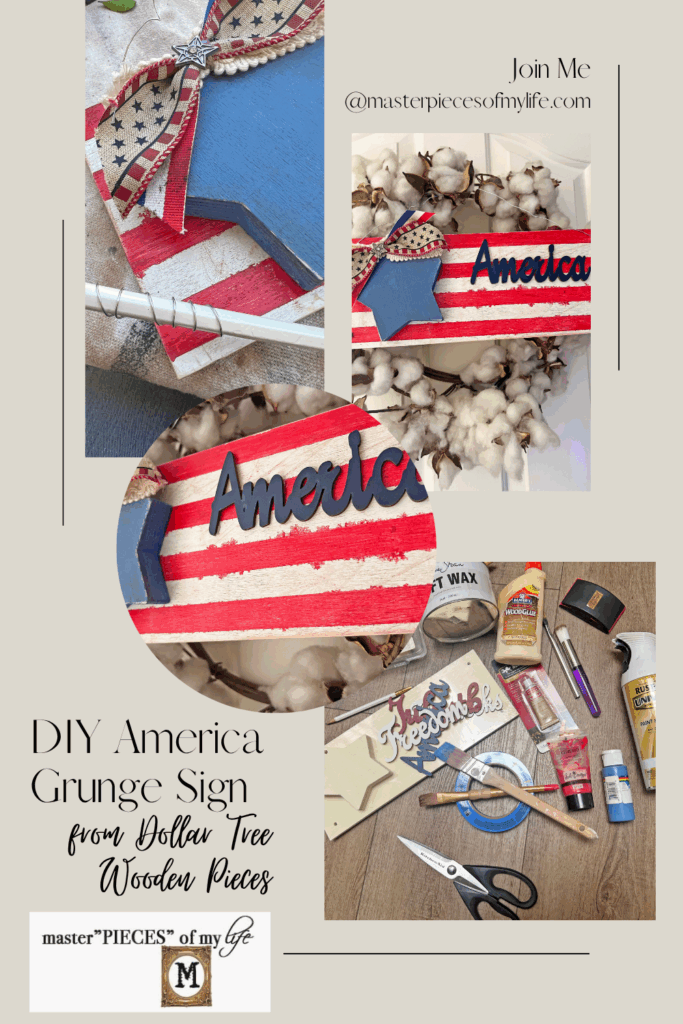
Are you ready for the 4th of July holiday? Independence Day is fast approaching and if you need a quick, easy and affordable decoration, I’ve got you. A few Dollar Tree supplies creates this patriotic DIY America Grunge wooden sign. It’s an easy craft with fantastic stars and stripes vibes for the 4th of July or any patriotic celebration.

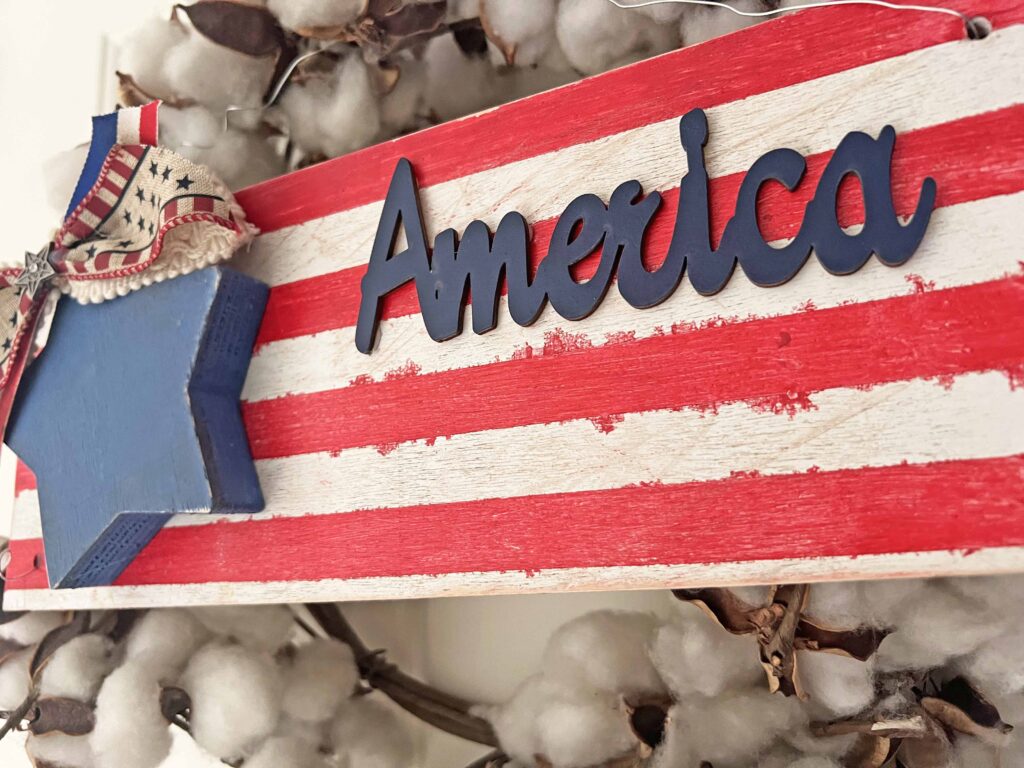
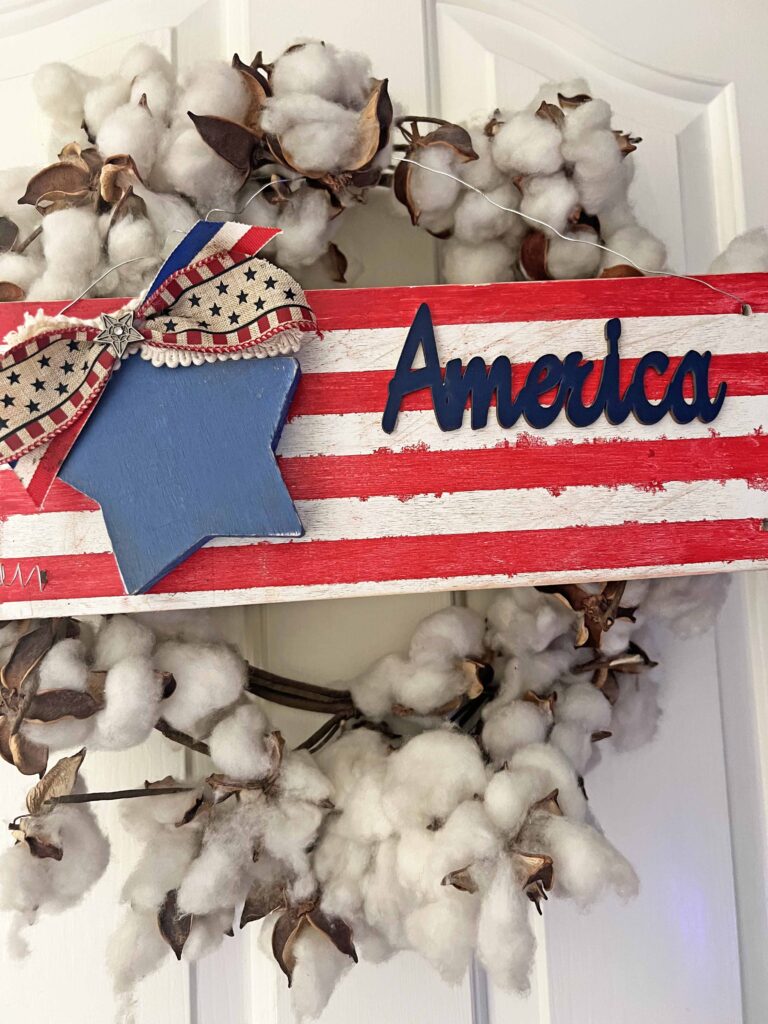
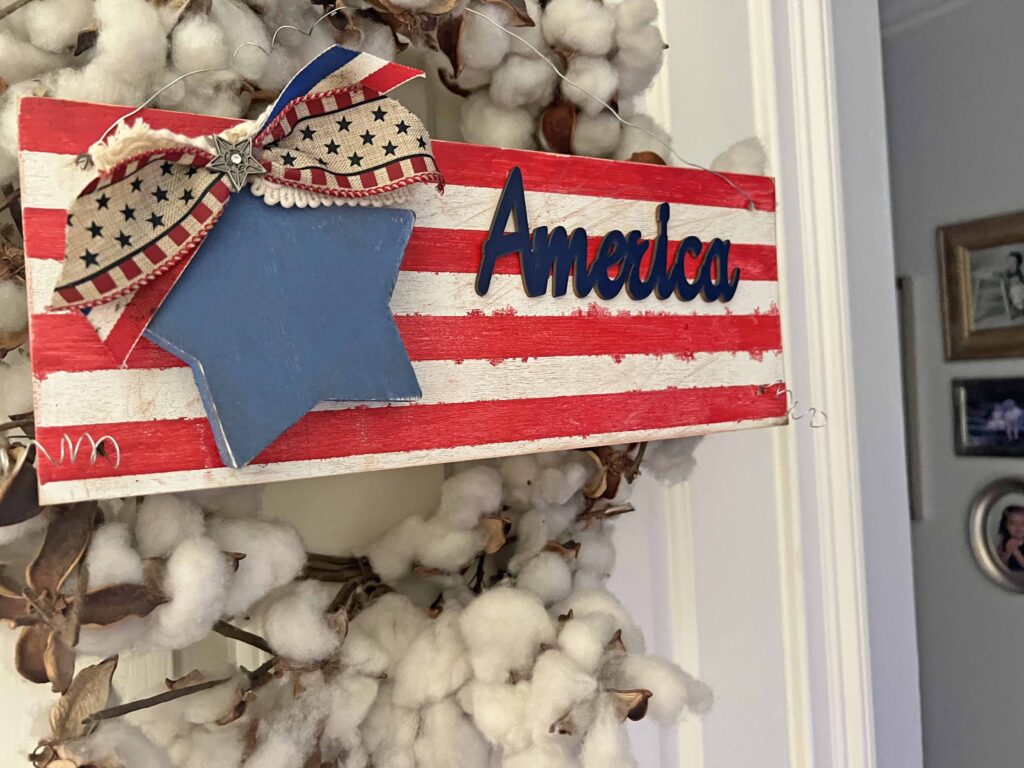
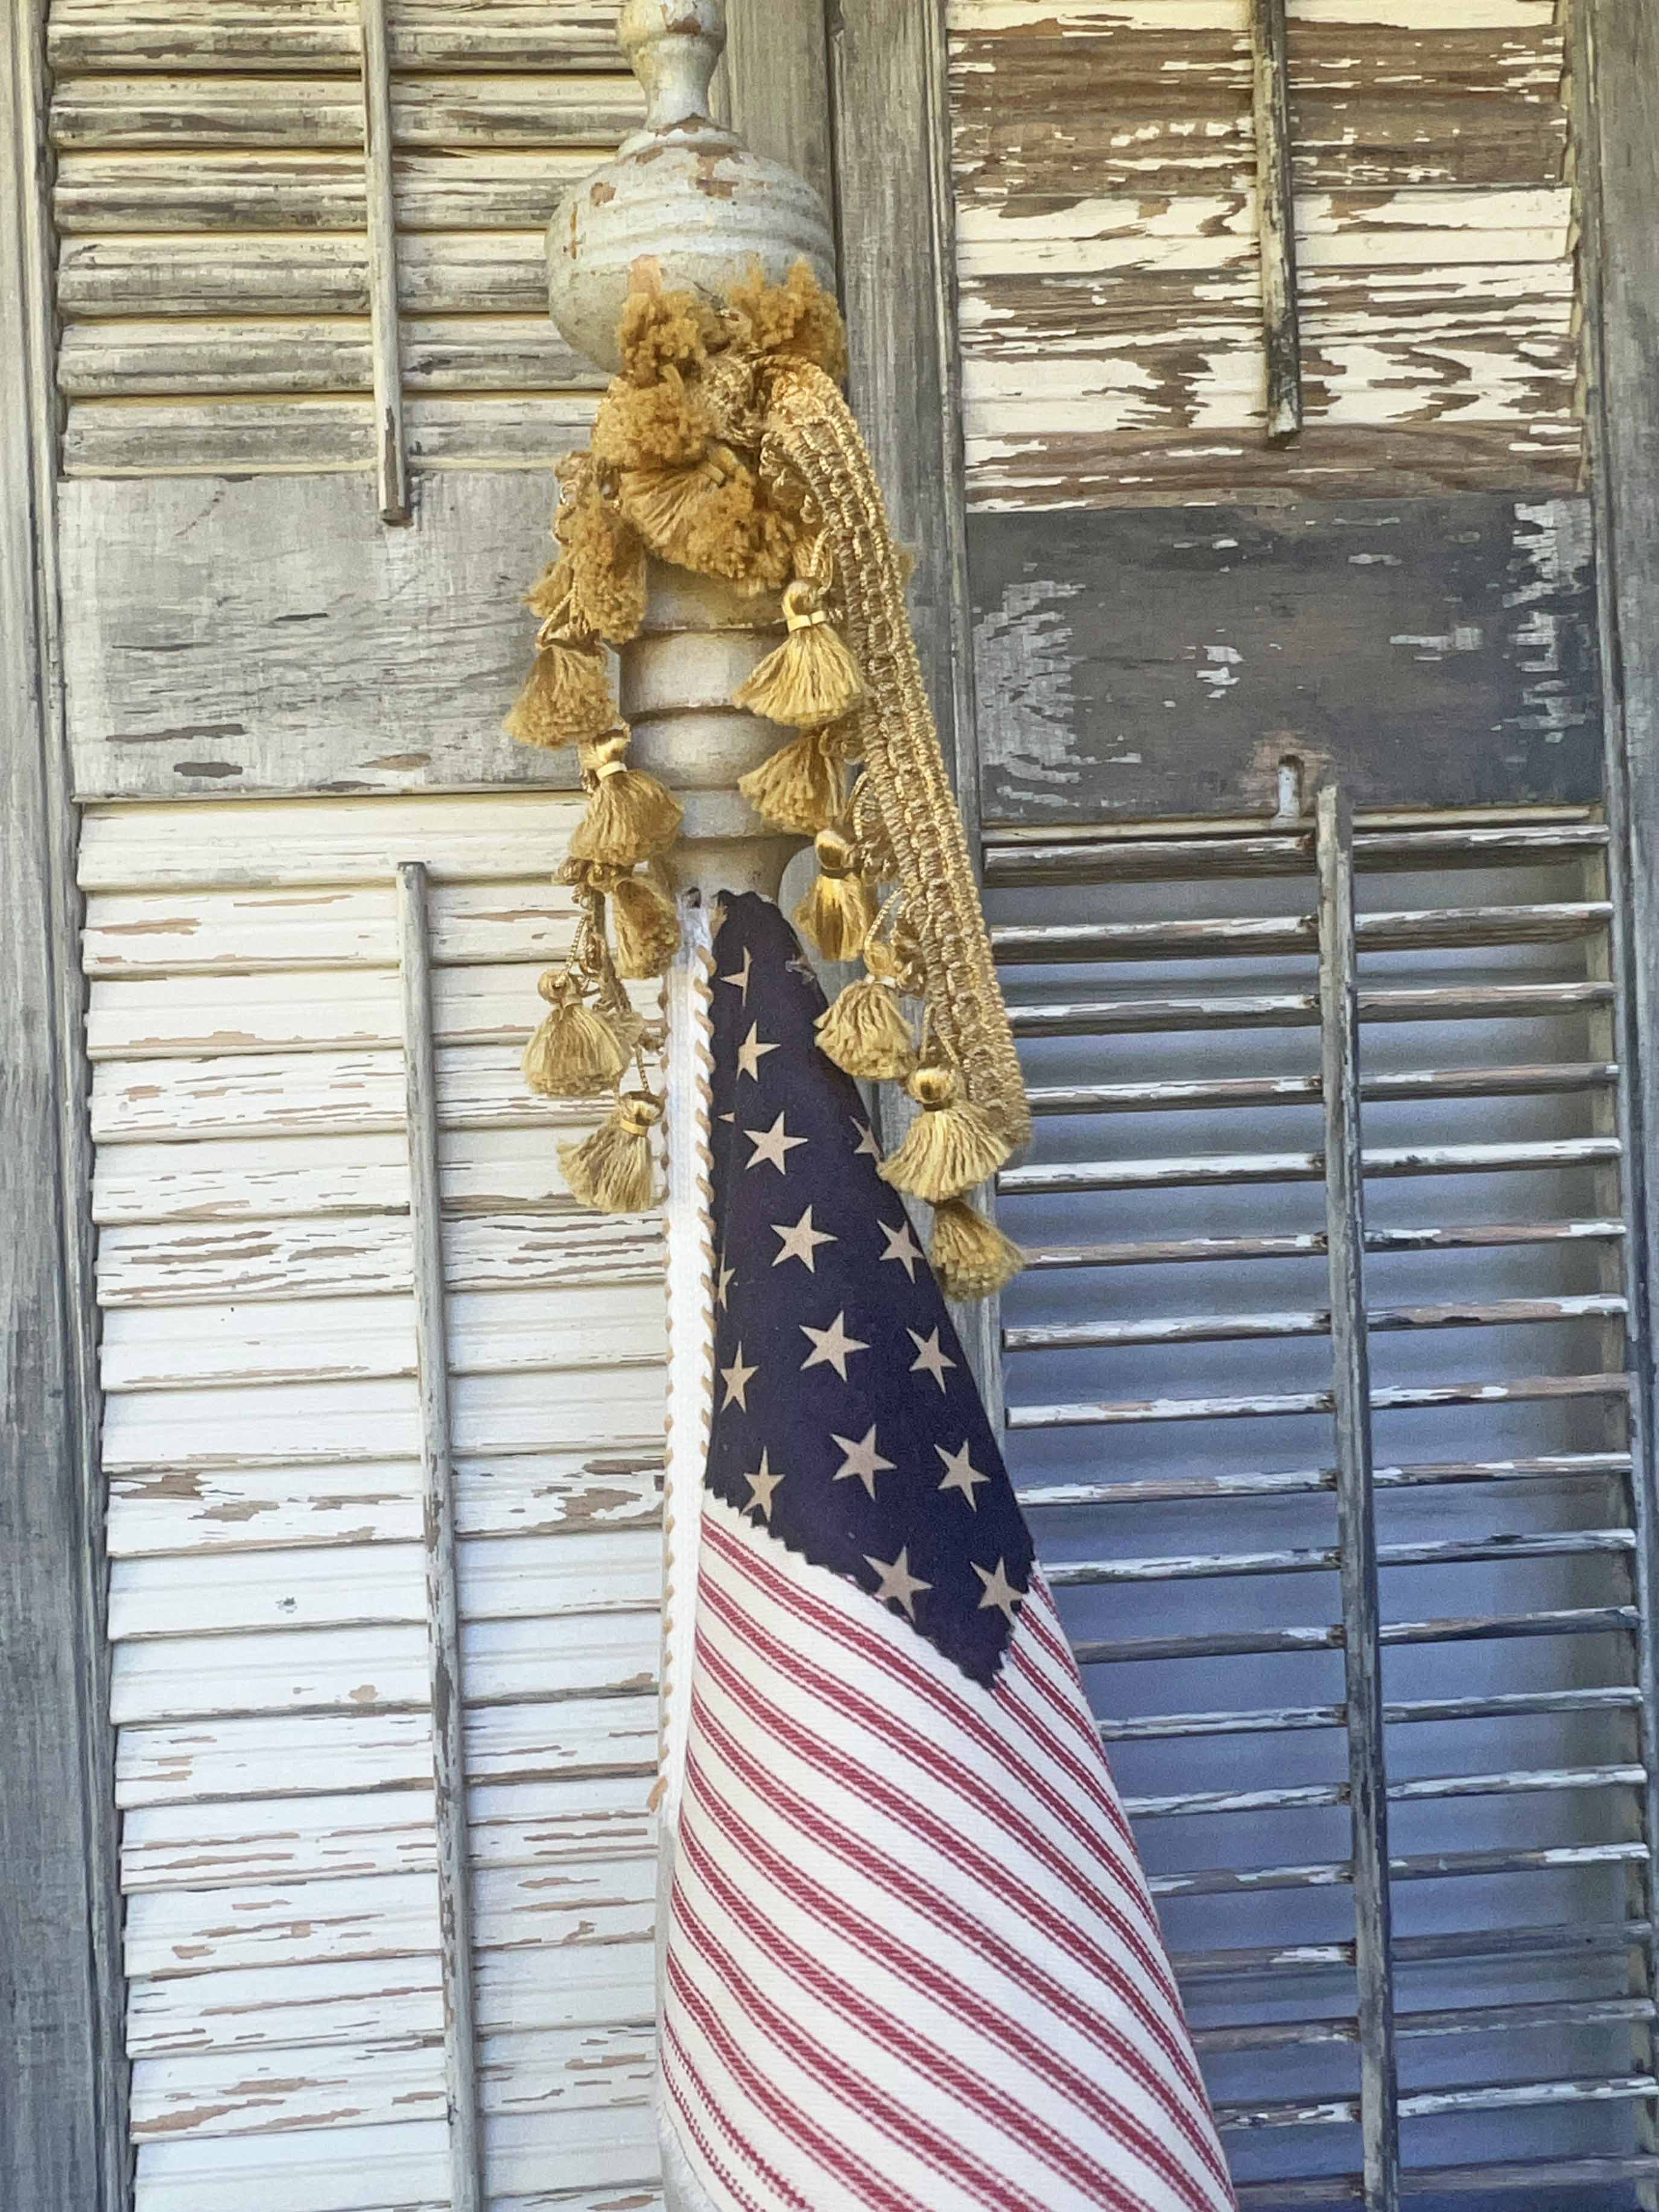
This cute sign can hang-out anywhere in your home. Over the mantel, or on a wreath or on a cabinet door to name a few options, which add immediate patriotic charm to any space..

*Affiliate links might be included for your convenience. These affiliate links mean a small commission is earned if you make a purchase using these links at no extra cost to you. As an Amazon Associate qualifying purchases support this website. For more information: Full Disclosure Policy.
Inspiration for a DIY America Grunge Sign
Dollar Tree is a popular destination for homespun crafts and while shopping for something else I spied the wooden star and sign, which instantly clicked for a patriotic inspirational decor piece.

The sign is actually a hanging shelf, which I did not even realize until I started this project. I disregarded the hanging apparatus and stuck to my vision of a patriotic seasonal sign. When I flipped it over to open the packaging I saw this. Goes to show I was focused on my idea for this project, and did not notice or read the packaging in the store. lol.

How to Create a DIY America Grunge Sign from Dollar Tree Wooden Pieces
Although you can find most of the supplies at the Dollar Tree, I have also included alternative options in the shopping section below for your convenience. I know everyone doesn’t necessarily have a local Dollar Tree store, or sometimes they don’t have all the exact items. Also feel free to take the basic idea and create a unique item to your personal style. It’s all about patriotic inspiration.

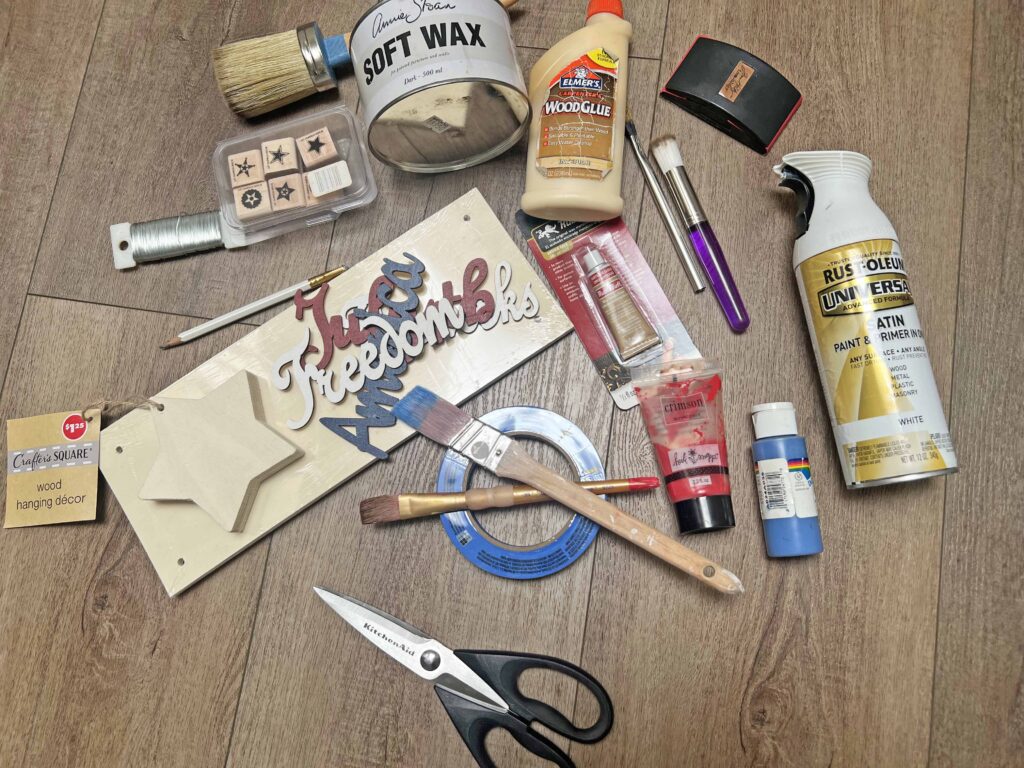
Supplies
- Wooden Sign (dimensions: 13-1/4 in X 5 in X 1/4 in)
- Wood Star (dimensions 4-1/2 in point to point & 3/4 in thick)
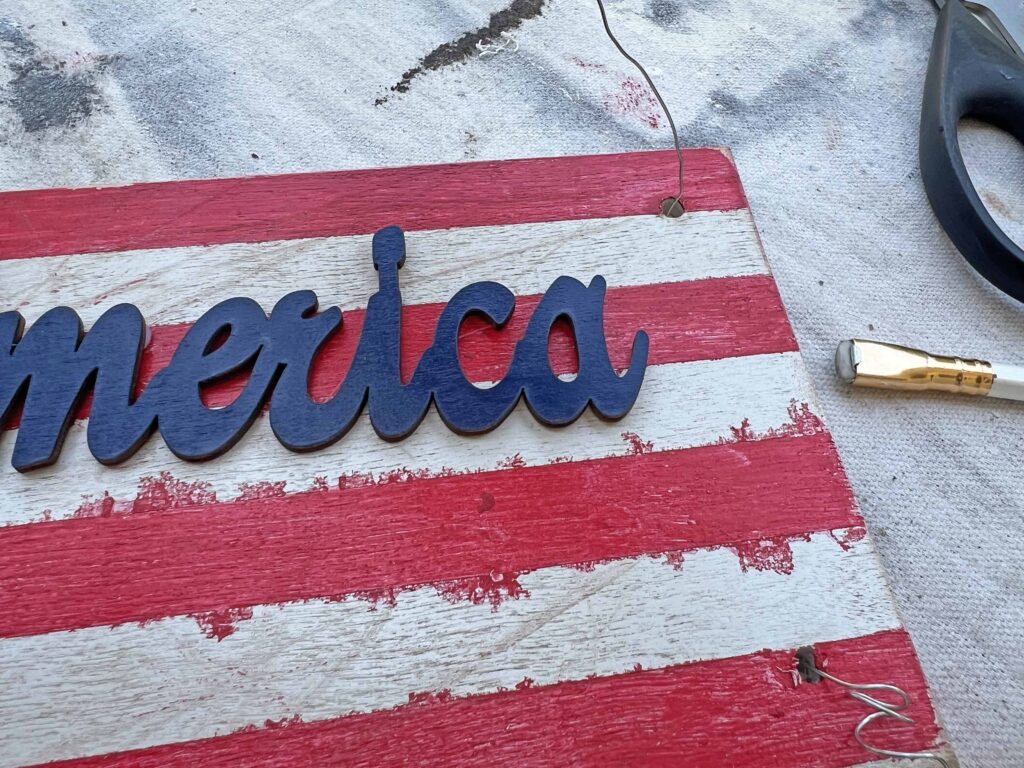
- Patriotic Lettering
- Red, White & Blue Paint
- Floral Wire
- Dark Wax
- Assorted Ribbons
- Twine
- Star Embellishment
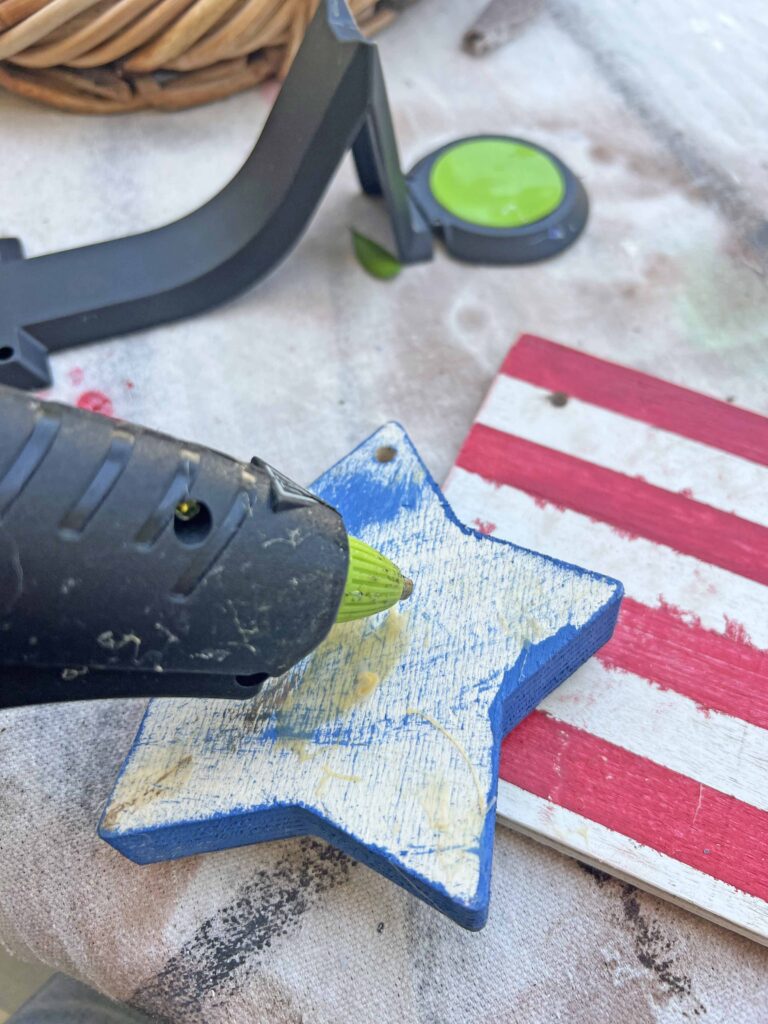
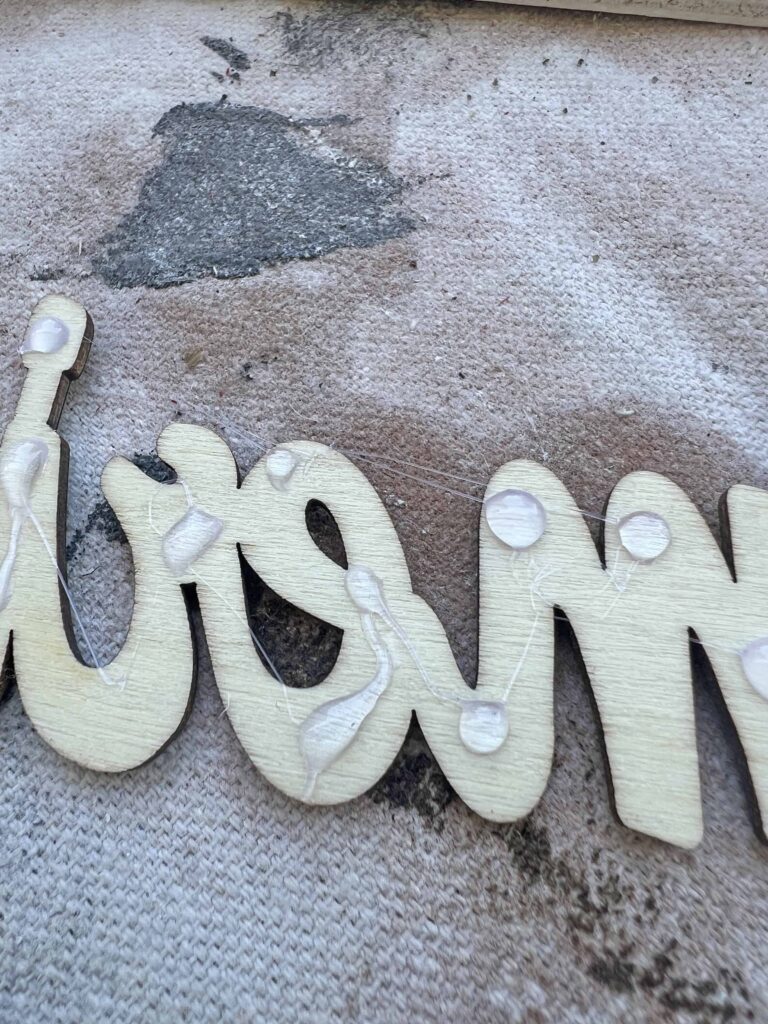
Note: Originally wood glue was going to be used to adhere the star and “America” lettering to sign but unfortunately it was not effective. I think the wood glue had been in the garage too long, so I pivoted and used a hot glue gun instead. Both the star and word are super light so it provides a secure bond.
Tools
- Paint or Foam Brushes
- Painter’s Tape
- Crafter’s Sanding Block
- Wax Brush
- Crafting Rag
- Scissors
- Pencil
Crafting Pro Tip: Read all the instructions through once and then re-read everything again. This way, you are familiar with everything you need and know what to expect.
Instructions
- Read instructions thoroughly and assemble all supplies & tools
- Remove all tags, stickers, strings etc. from supplies
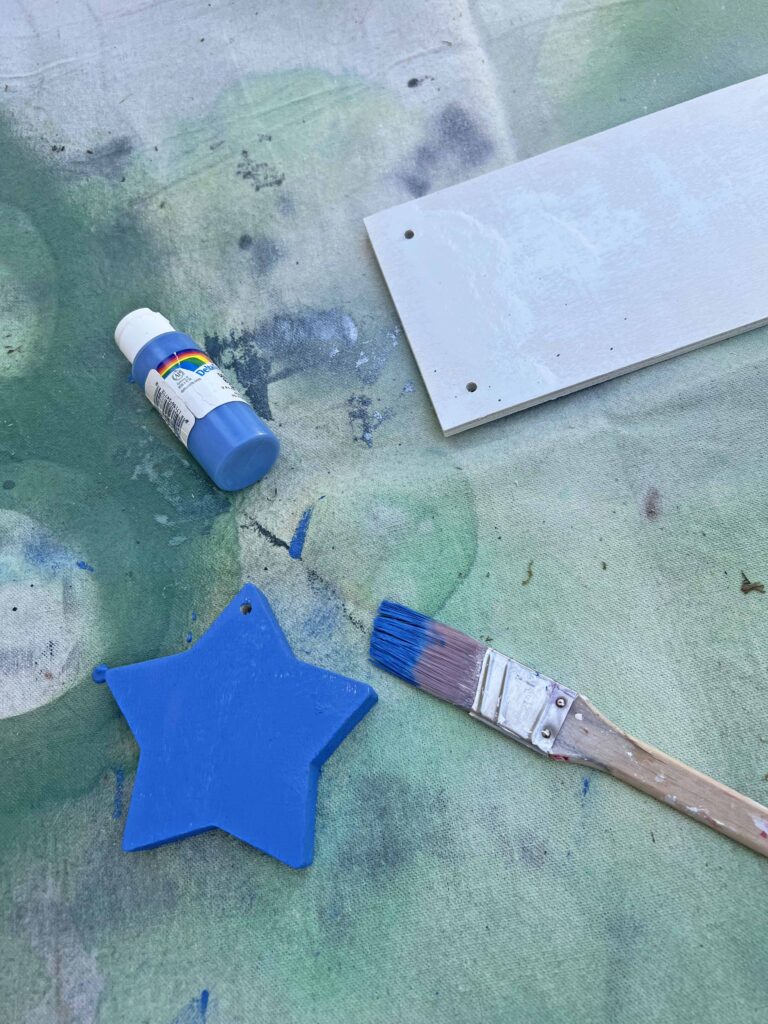
- Use white paint and fully cover wooden sign
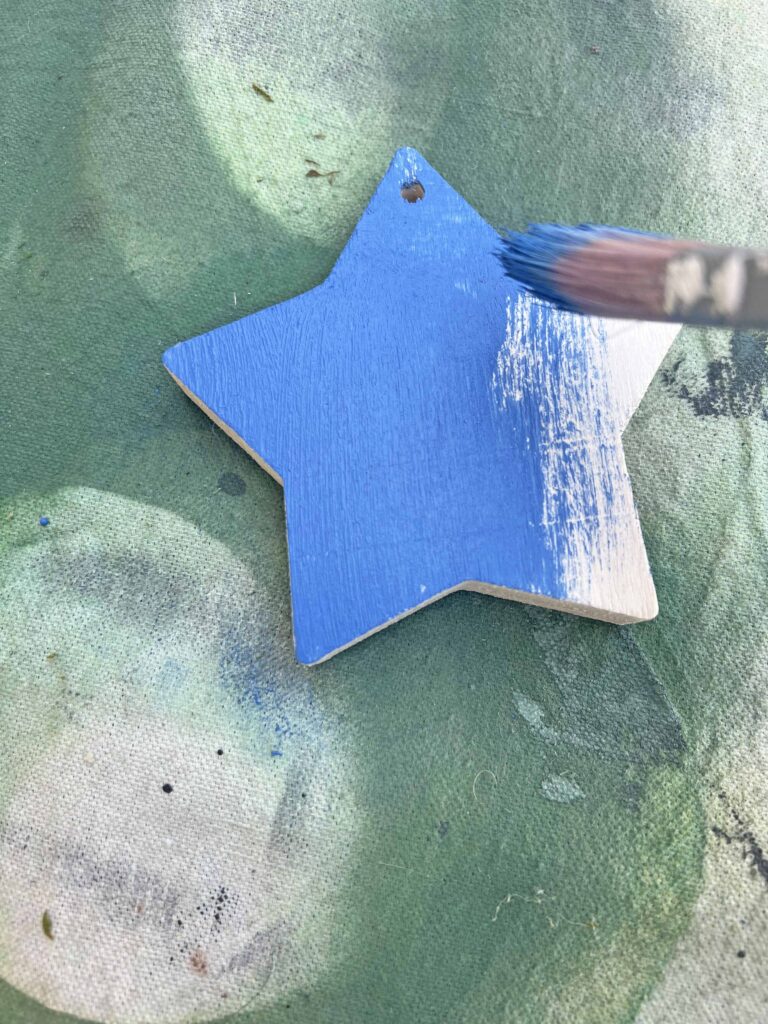
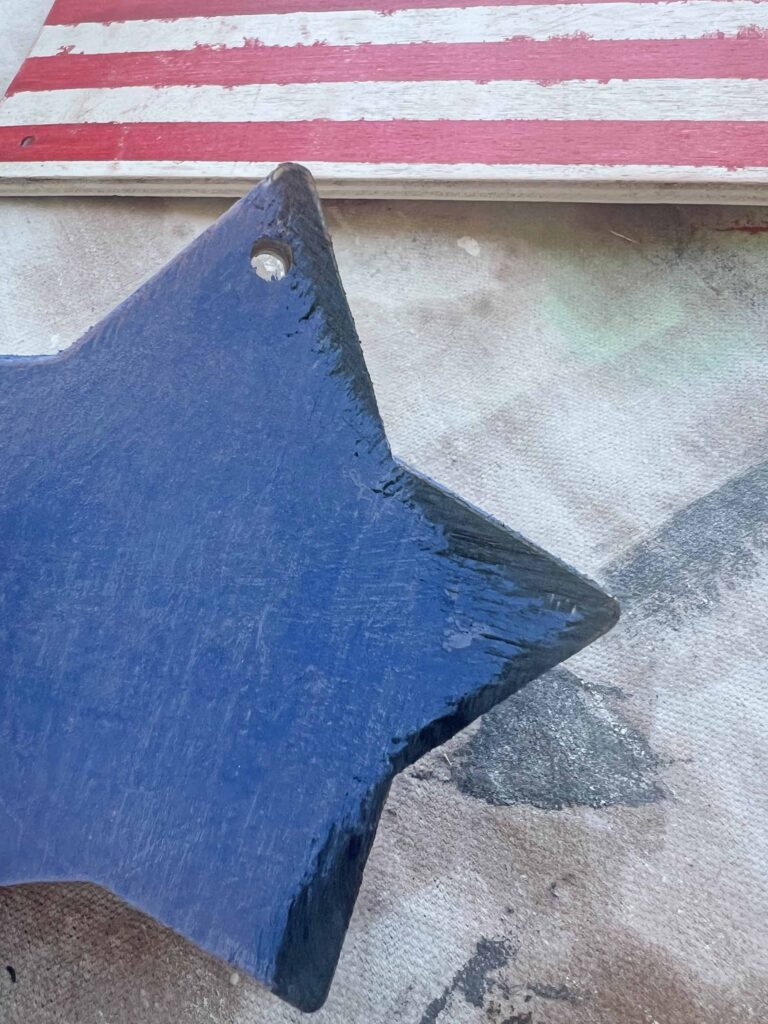
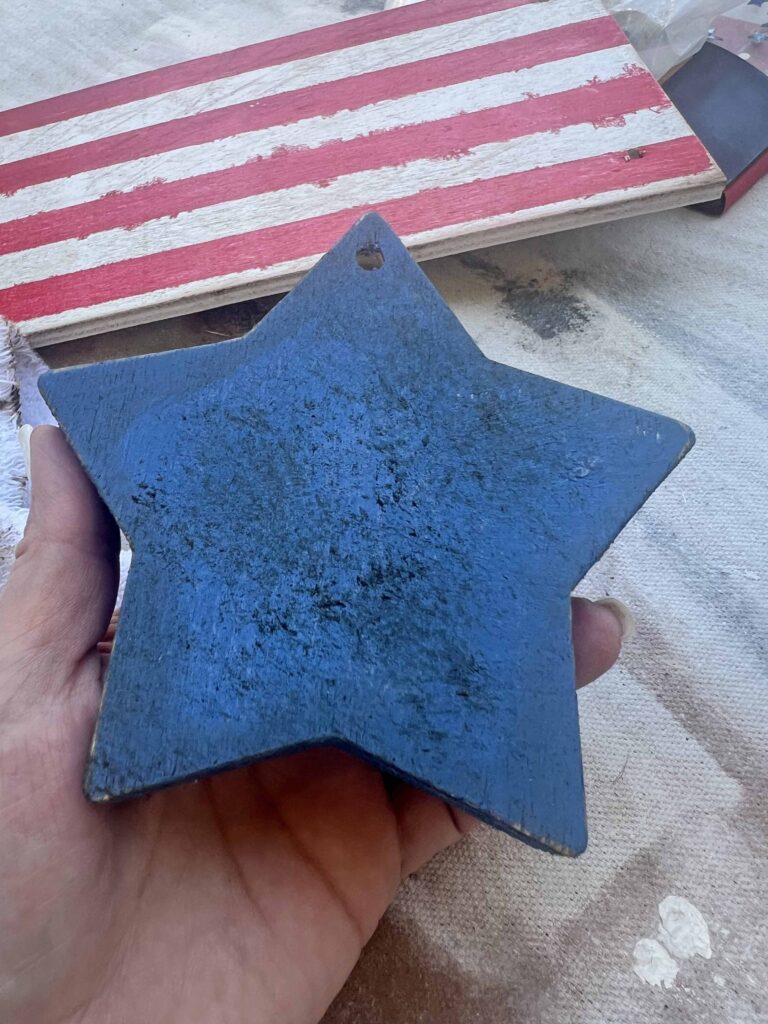
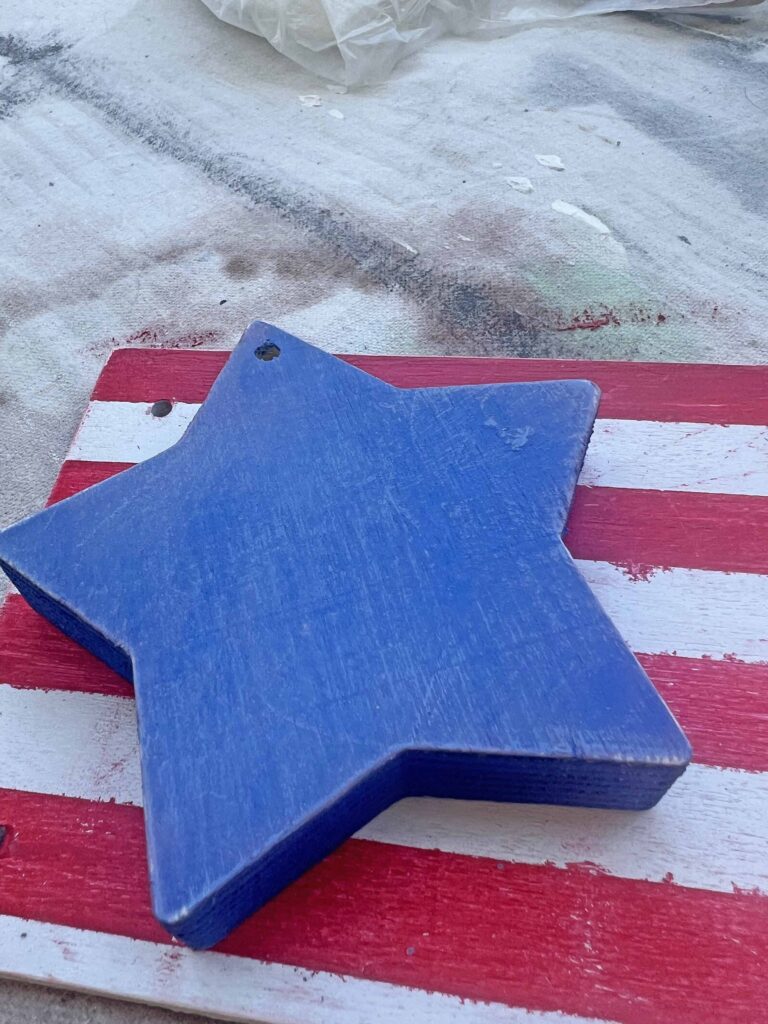
- Use blue paint and cover wooden star fully, including sides
- Set wooden pieces aside to dry fully
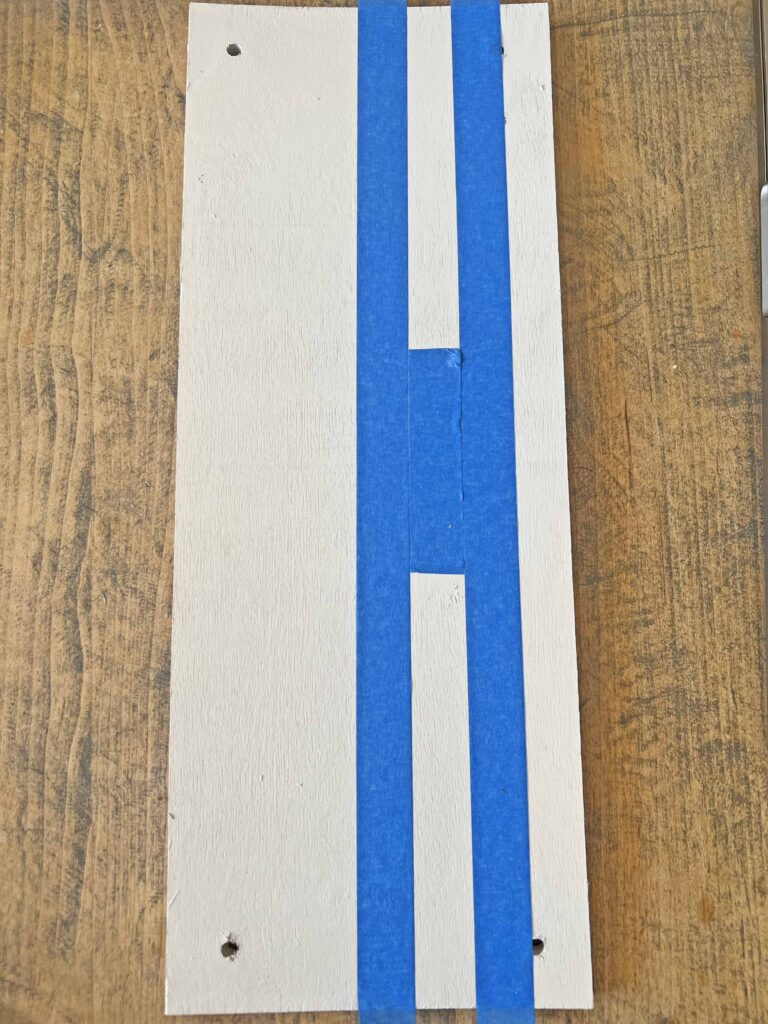
- Depending on white paint coverage apply second coat of white paint on wooden sign
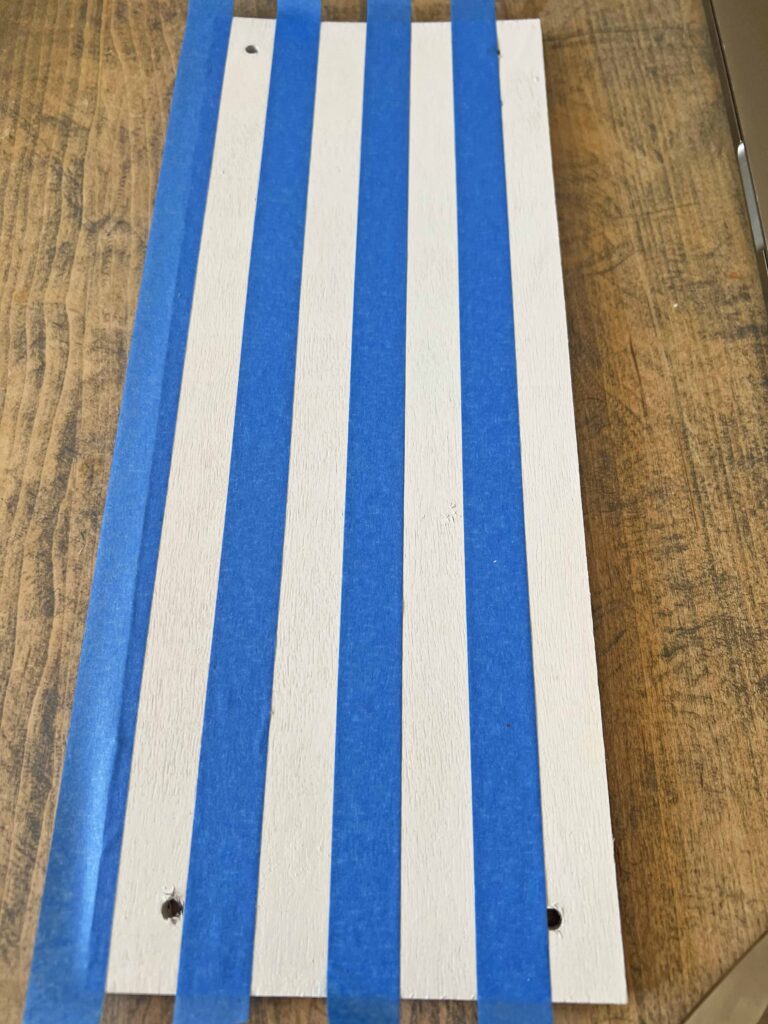
- Once white paint has dried thoroughly, use painter’s tape to create horizontal stripes
- Using red paint, cover stripe areas on wooden sign, setting aside to dry fully
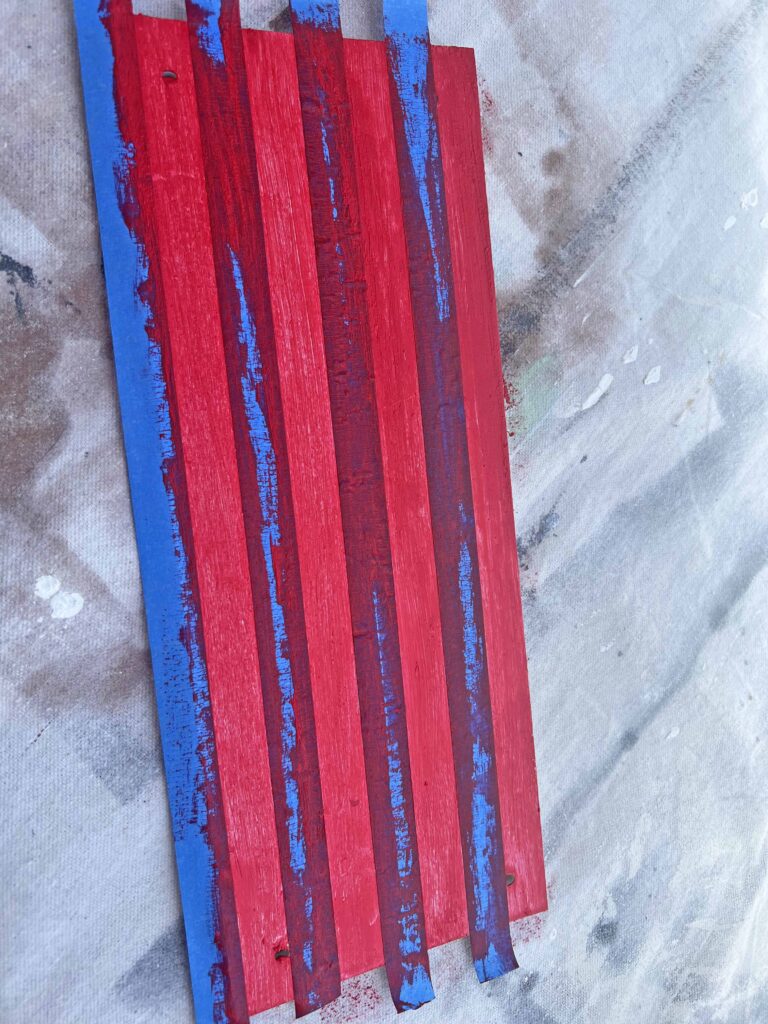
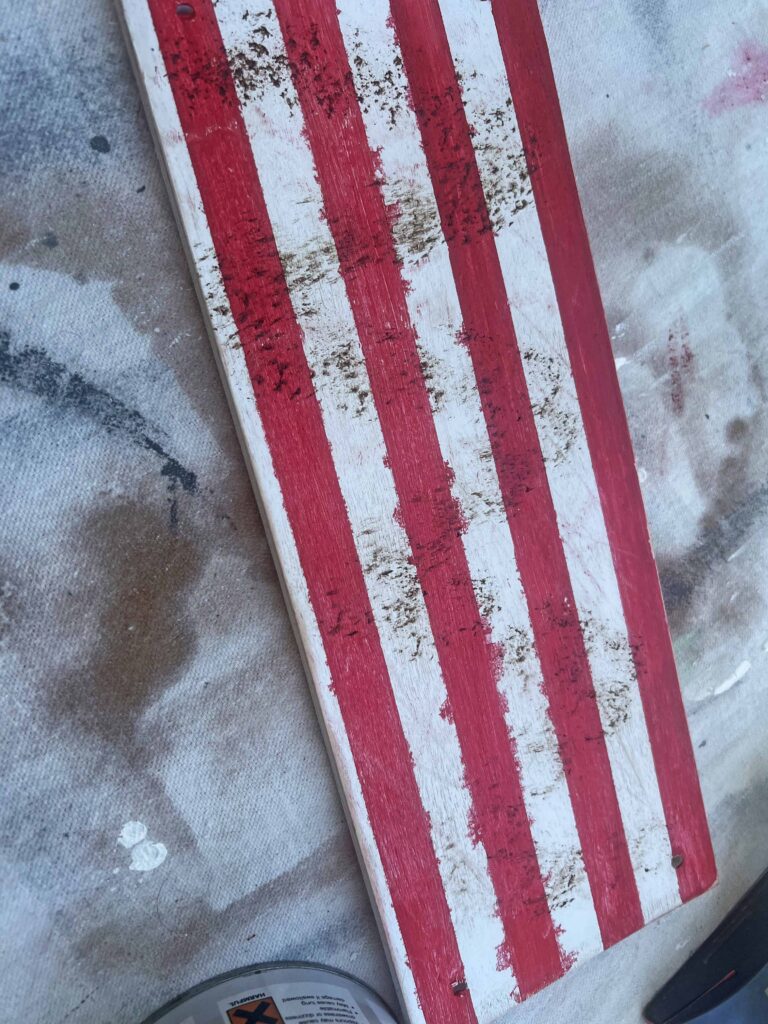
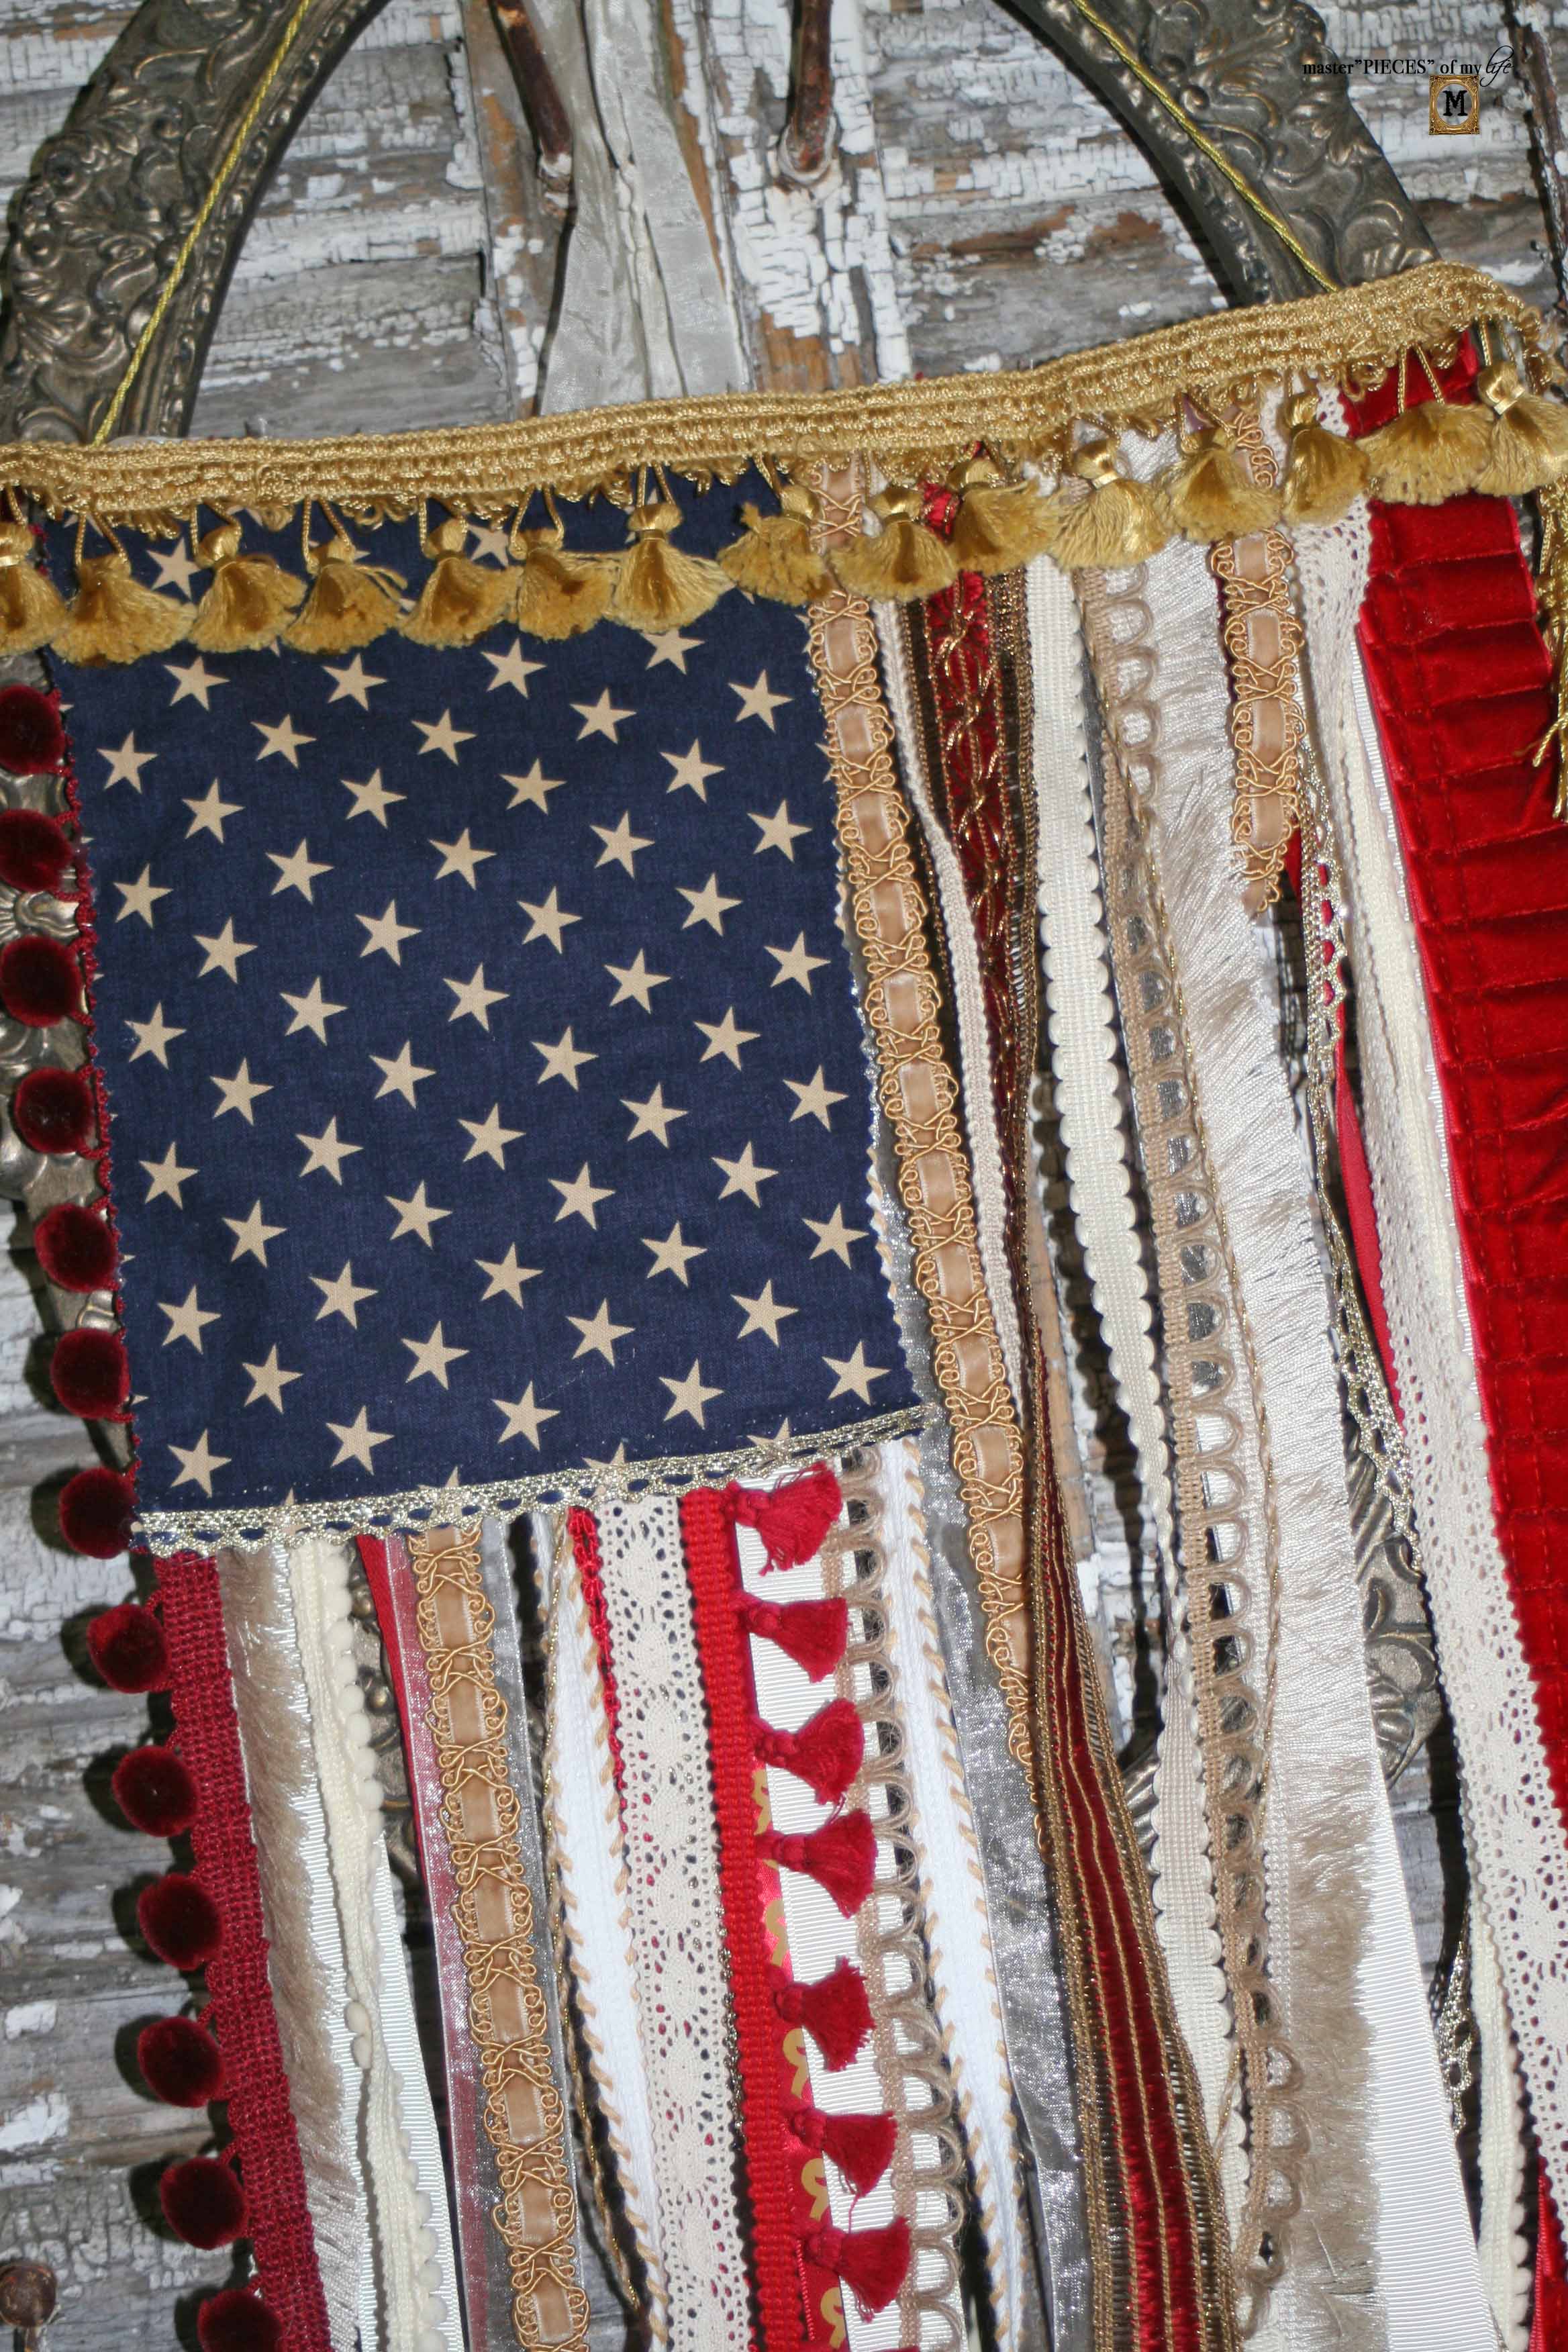
- Once paint is dry on sign, remove painters tape (my red paint bled but I went with my oops, and embraced the grunge feels; more about that below on the tips & recommendations section)
- Use sanding block to distress sign and star
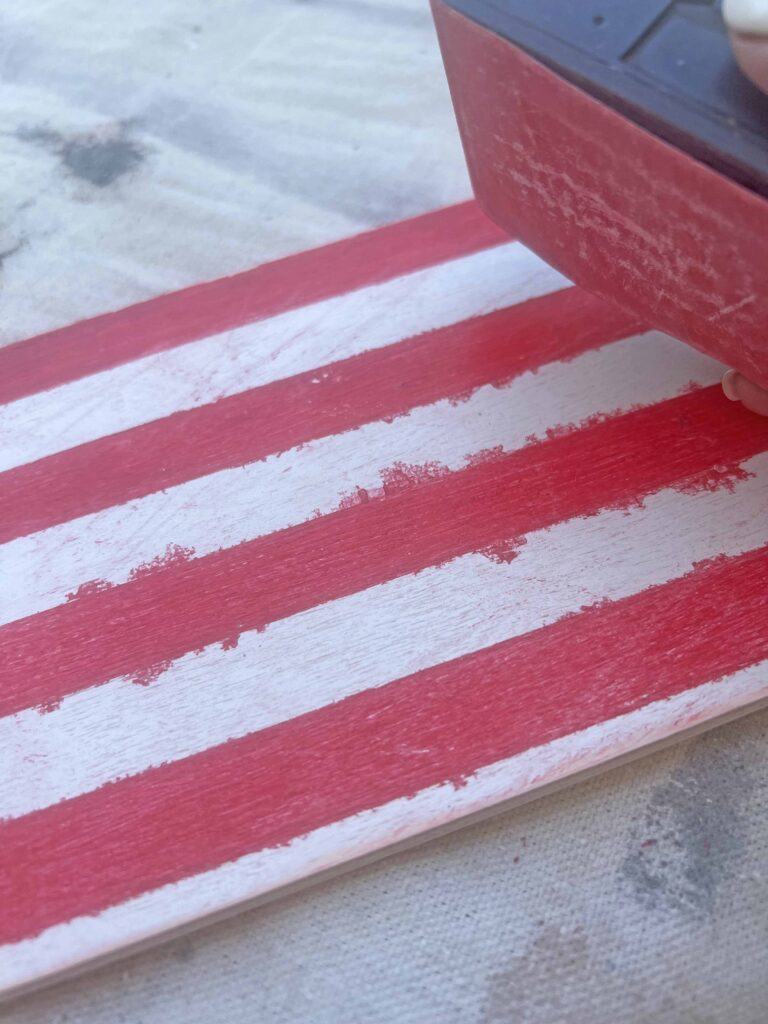
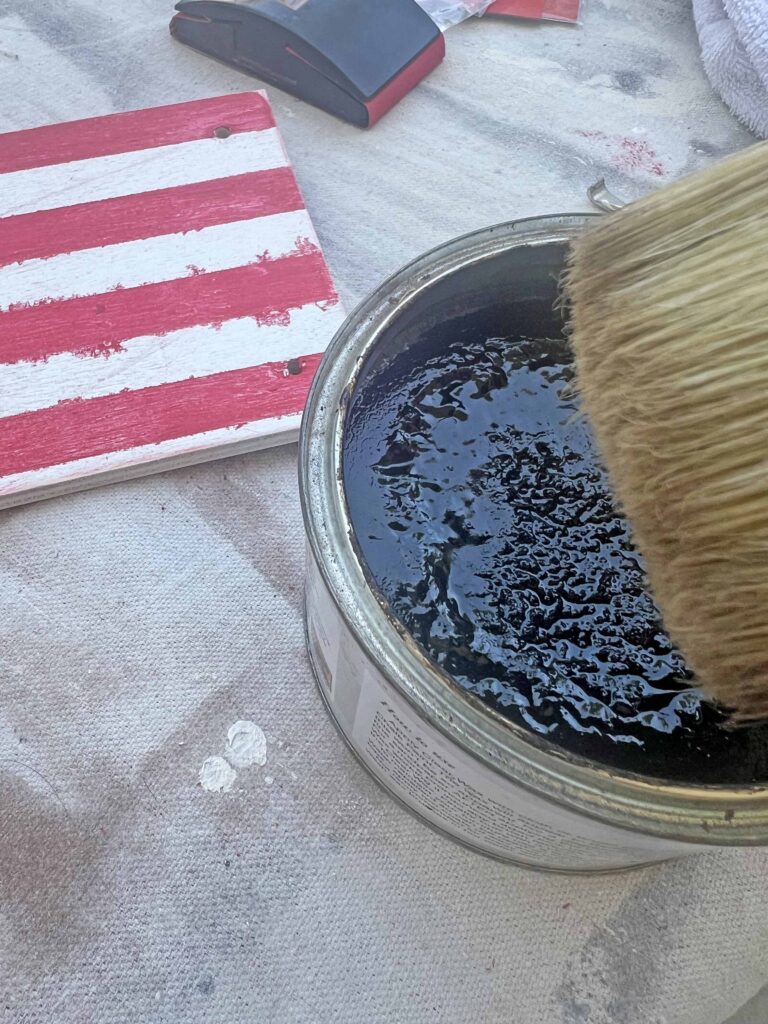
- Use dark wax to antique by dabbing gently and wiping with rag, add as much or as little as you desire based on the amount of distressing you prefer
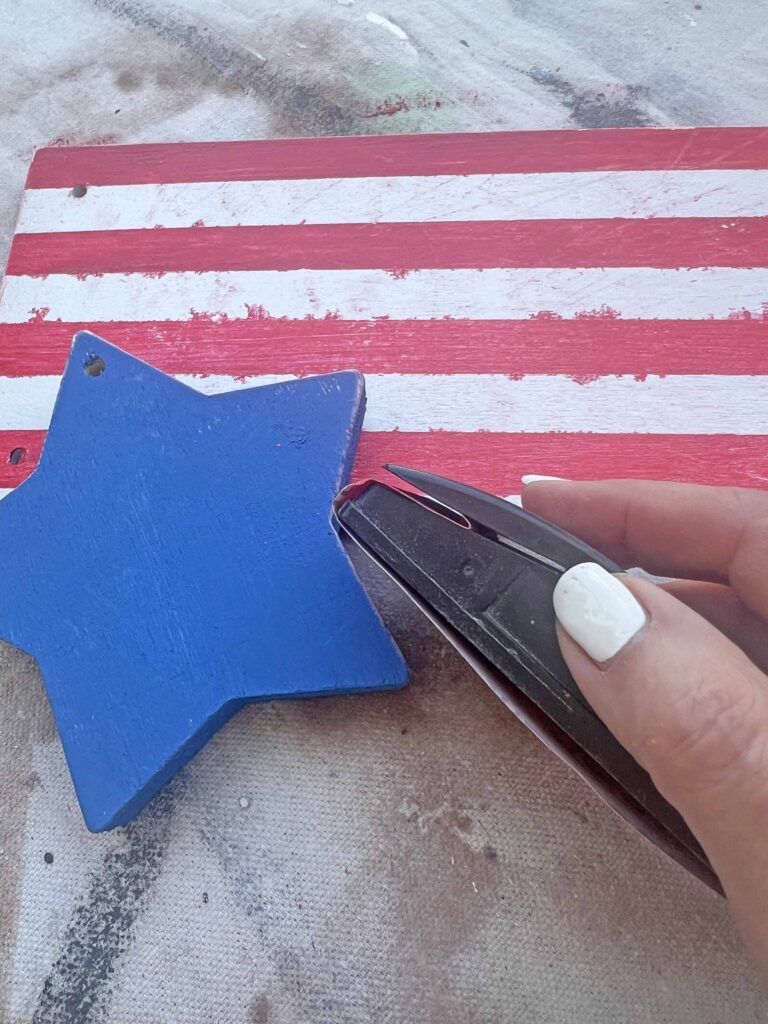
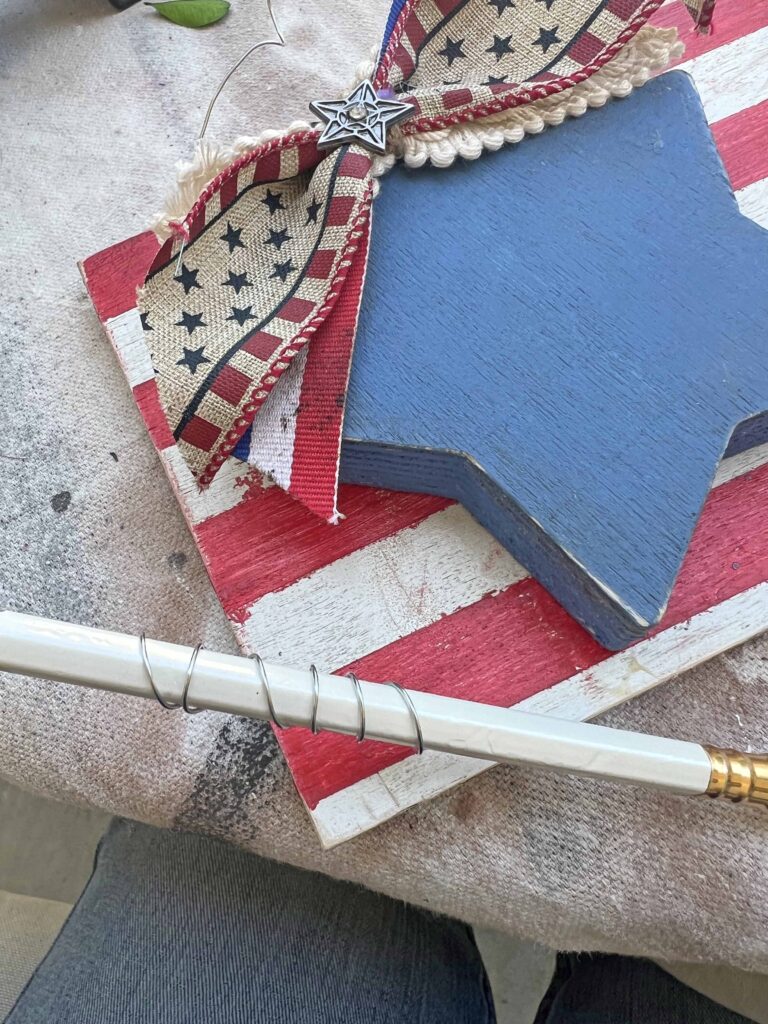
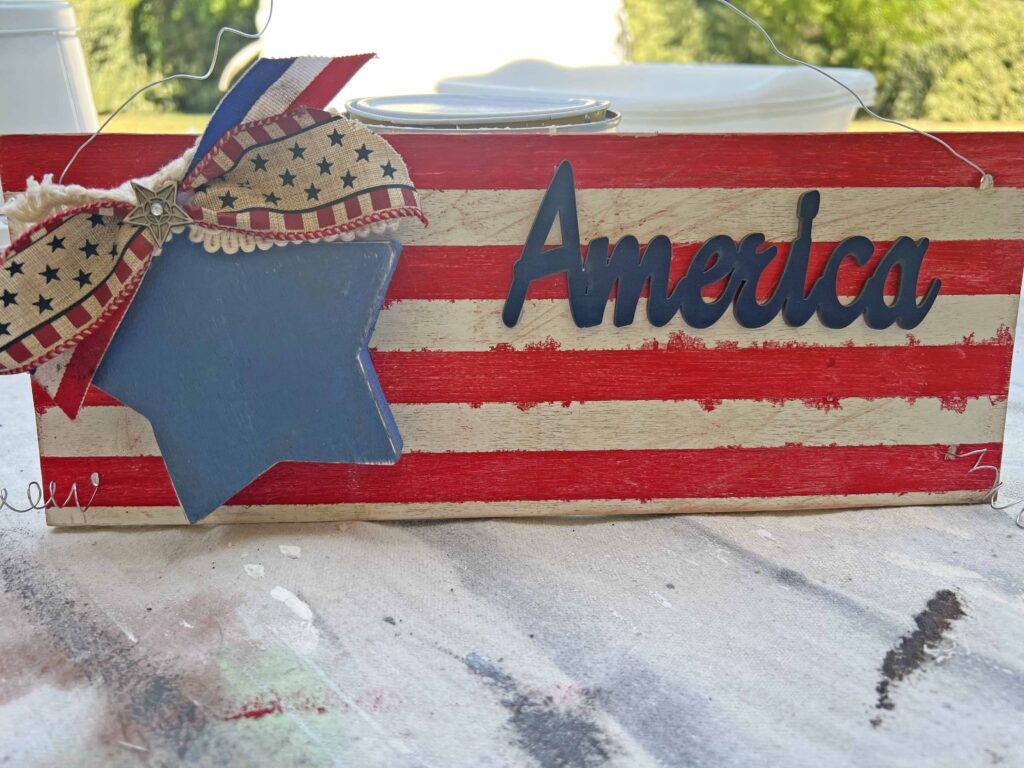
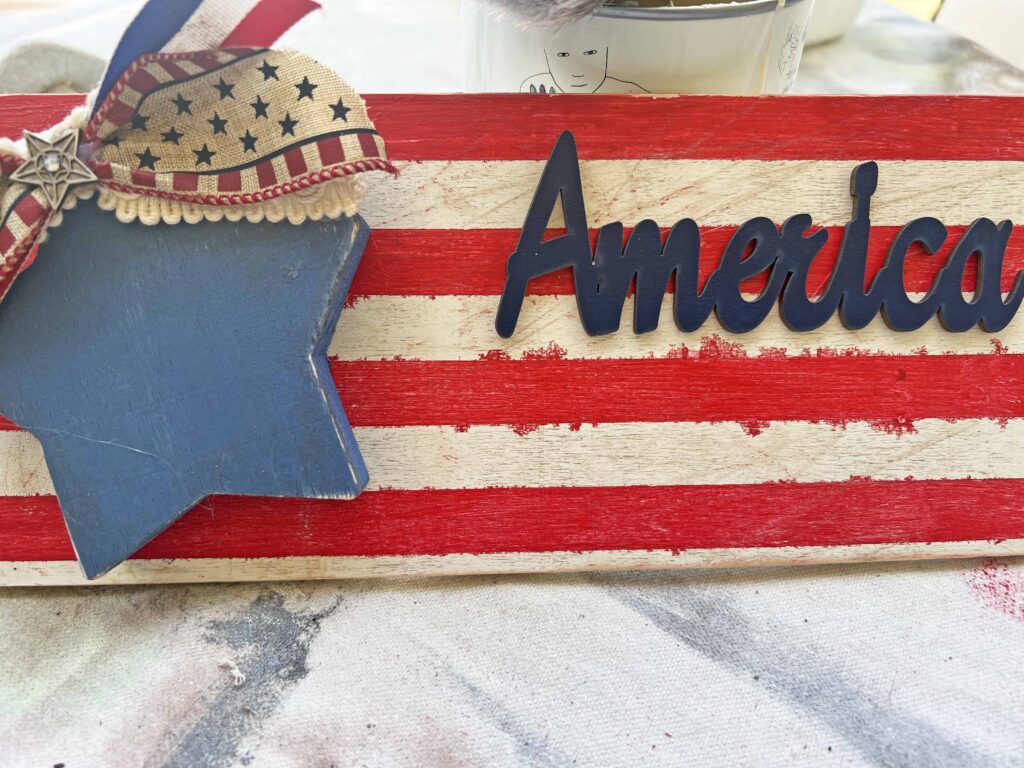
- Once grunge distressing is at desired level, use hot glue gun to adhere blue star on left handside of striped sign, centered from top to bottom
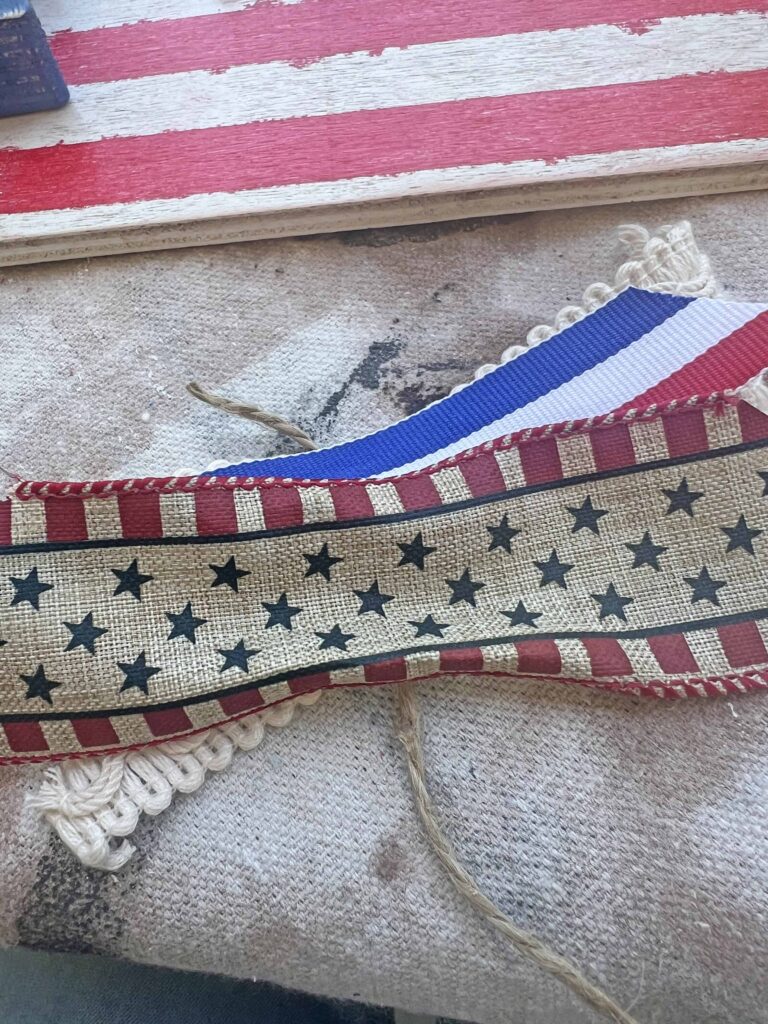
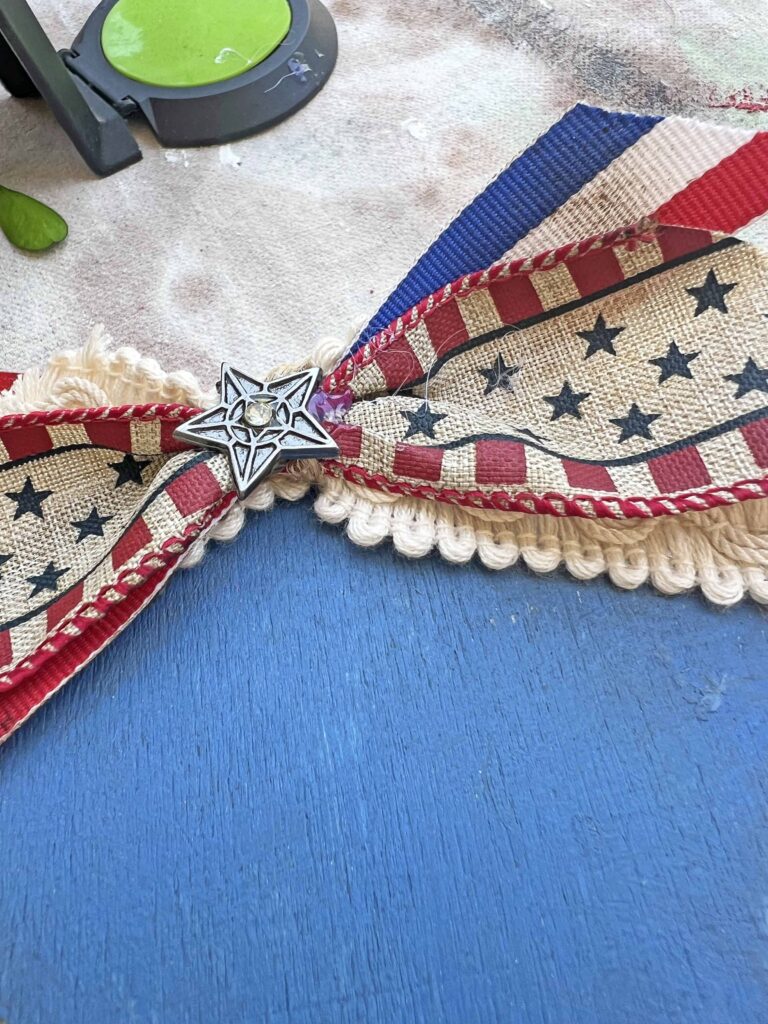
- Cut 3 assorted ribbons about 7-inches long
- Stack ribbons and tie them together in the middle with a piece of twine to create a small bow
- Using hot glue gun adhere bow on top of star covering hole
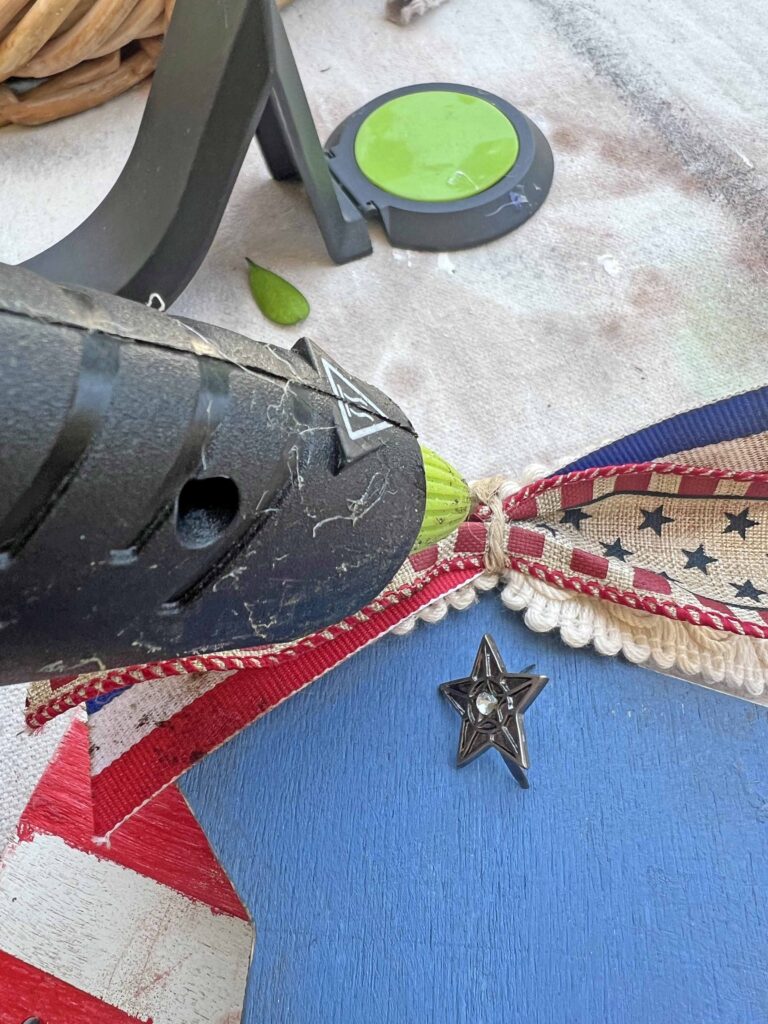
- Hot glue star embellishment in center of bow
- Use glue gun to adhere word sign on striped section in desired position
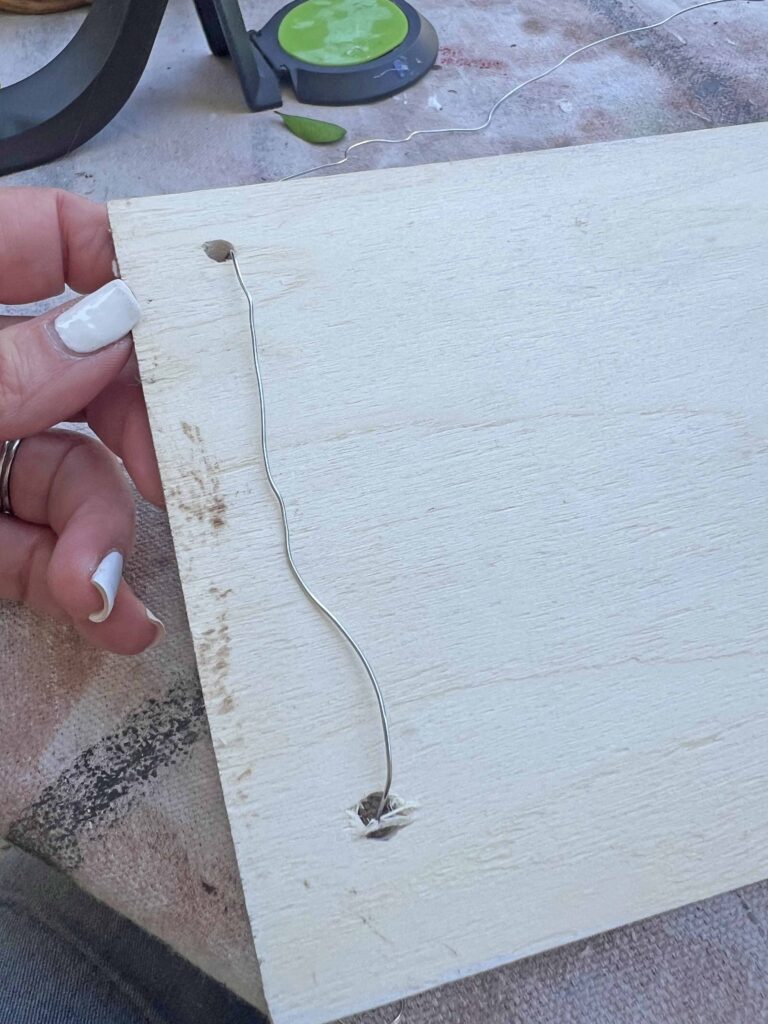
- Thread floral wire from front to back on a lower hole, leaving 6 inch section in front
- Using a pencil, wrap floral wire around to create coil
- Thread wire from bottom hole to top hole on back of sign and thread to front, creating a hanging loop towards opposite top hole
- Coil center portion of hanging wire to create more detail
- Thread hanging wire on opposite top hole from front to back
- Bring wire from top hole to bottom on the back of sign and thread towards front leaving an 6-inch tail
- Coil 6-inch piece with pencil to match opposite end
- Voila! Place your newly crafted stars and stripes sign in your home to give all the patriotic vibes.
Tips & Recommendations to Keep In Mind
Paint Options
The paint colors I used are a bit muted plus the wax darkens them more. Feel free to use colors that fit your home aesthetic. I have included some options in the shopping section for your convenience. I use either paint brushes or foam brushes for this type of application, which both can be found at the Dollar Tree as well.
So as I mentioned above my red paint bled under my painters tape. I used water to dilute the red paint a bit, and I think that was the culprit. What to do when a mishap like this happens mid project?
- Flip sign and start over.
- Use white paint and with small brush clean up red paint.
- Embrace the faux pas and roll with it.
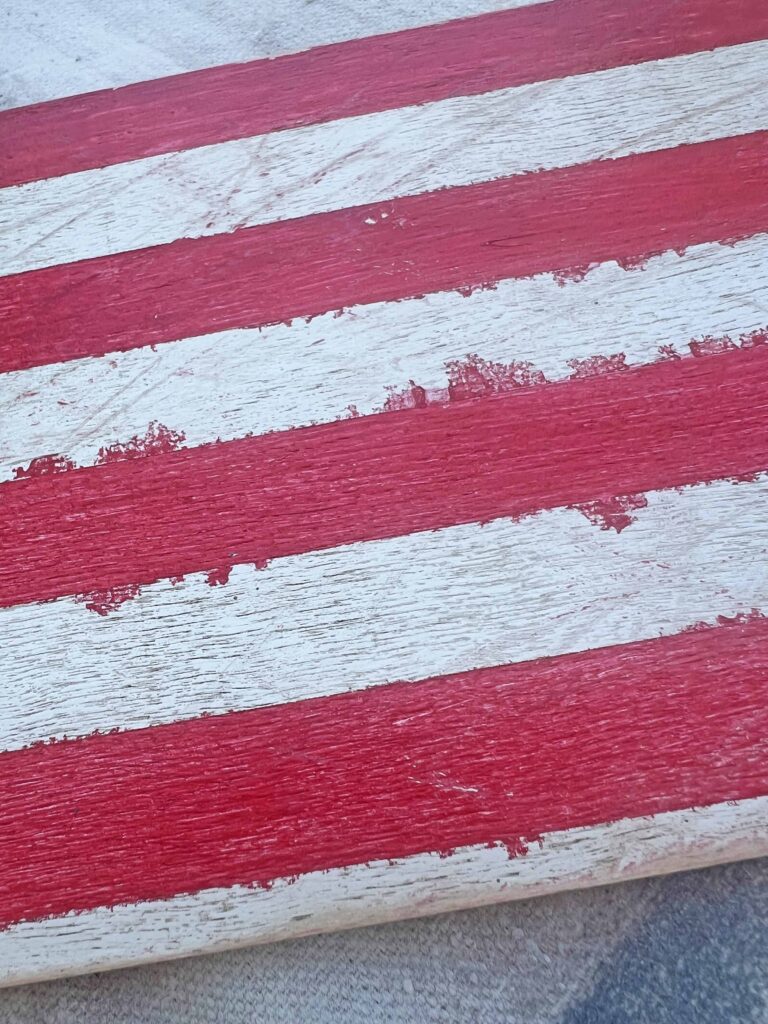
You know what I did! I embraced it, and went with an even heavier grunge, distressed look. And I actually like the red splatter look, giving more texture and interest to the sign. Sometimes these accidents can create a more unique look for home crafts and DIYs. My advice is to not sweat the details and go with it.
Distressing Techniques
Distressed and antique patina are preferred finishes around here. I use layers to create an old world look. Sanding and dark wax are used to give the sign an old weathered look. You can use the distressing techniques as much or as little as you’d desire, depending on the look you want to achieve. Make the sign yours! The sanding distresses the piece, while the dark wax ages the sign. And the bonus here is the splatter look red paint.
Styling Ideas
This sign is a versatile piece which could be hung in many spaces and places. The sign is pretty light, allowing it to be easily hung on cabinets, or wreaths or mirrors and more. It’s a cute sweet piece, which adds patriotic charm in an unexpected way.
If you enjoy seasonal decor and projects feel free to sign up and receive all new posts directly into your in-box for your convenience. We would be delighted to welcome you into the Masterpiece community.
Closing Thoughts
I hope this inspires a patriotic mood. Easy, quick and affordable seasonal crafting is key. It’s a great way to inject festive seasonal vibes into your home without having to make a big investment every time. If you enjoy crafting and DIY projects, let me know what type of creations you would prefer to see here. Simply leave me a comment down below or shoot me an e-mail.
I hope you enjoyed your visit here today. It was lovely having you stop by. Until next time friends. Au revoir!


Shopping the DIY America Grunge Sign Look
- 8 Pack Unfinished Wooden Plaques 6″x14″-0.25 Inch
- Unfinished Wood Sign Blank Rectangle Hanging Wooden Plaque DIY Craft Project Wood Sign
- 2 Pcs Wooden Star Cutouts 3.94 Inch
- Rust-Oleum Universal All in One Spray Paint, Satin White
- Uniform Blue Acrylic Paint
- Flag Red Acrylic Paint
- American Crafts Heidi Swapp Paint Set Red and Green
- Jute Twine
- Hot Glue Gun
- Glue Gun Glue Sticks
- Silicone Finger Protectors
- Craft Sanding Blocks
- 2 Rolls Patriotic Grosgrain Ribbon,3/8 Inches,Total 20 Yards,Red/White/Blue,Stars and Stripes
- 15 Yards Red White Blue Ribbon
- Satin Stars and Stripes Patriotic Craft Ribbon


Don’t forget to Pin It and save for later. You never know when inspiration will strike!
More Related Posts


Most Recent Posts


Europe was created by history. America was created by philosophy.”
Margaret Thatcher