


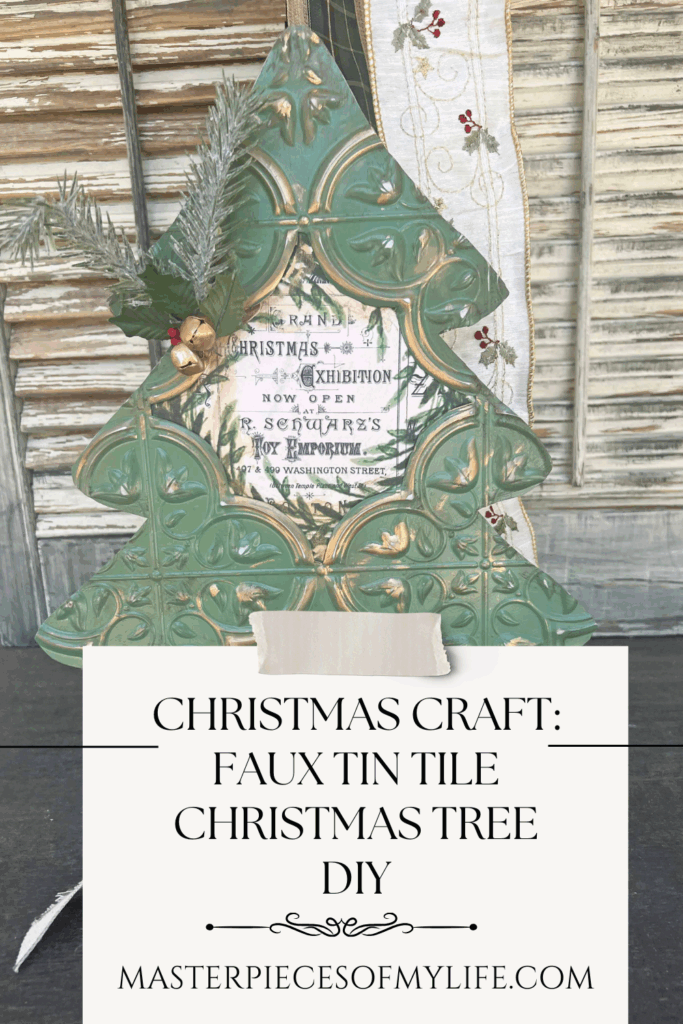
Do you like to create your own decor and seasonal decorations? If you do, I have some inspiration for you today. Starting Christmas crafting now, in July, is smart and helps relieve stress during the hectic holiday months. Today I am sharing a new Christmas craft you can make now. A faux tin tile Christmas tree with a peek-a-boo feature has all the pretty vintage vibes.

The embossed faux tin tiles from the Dollar Tree are a favorite craft medium of mine, which provide vintage vibes to any project. It’s no different for this festive Christmas tree craft. If you enjoy the faux tin tile look and vintage vibes in your decor you might enjoy these other projects:

*Affiliate links might be included for your convenience. These affiliate links mean a small commission is earned if you make a purchase using these links at no extra cost to you. As an Amazon Associate qualifying purchases support this website. For more information: Full Disclosure Policy.
Welcome to Styled 2 Ways – Christmas in July Edition
Styled 2 Ways is a collaboration between my blog, Master”pieces” of my Life, & the blog From the Bay to the Beach, penned by Susan. Two different points of view for a particular styling, project or concept are shared. A guest host sometimes includes another styling for triple the fun. Thank you for joining us; we’re happy to have you here with us.

Although Susan and I both like many of the same things, we both have unique styles of our own, and we want to share how the same idea can be expressed in different ways. Both ways are equally as fantastic, and appreciating other unique takes on the same idea expands our own personal style.

When you are done here, please hop over and visit Susan. If you are here visiting from Susan’s place, welcome, I am so happy you are here. Leave me a comment down below; I would love to get to know you. Come on in, have a seat and enjoy!


Inspiration for the Embossed Faux Tin Tile Christmas Tree Craft
The embossed tin wall tile is one of my favorite mediums to work with from the Dollar Tree. It’s a plastic tile with the look of tin tile, which gives many projects major vintage vibes. By distressing the faux tin tile a rustic vintage look is easily achieved.

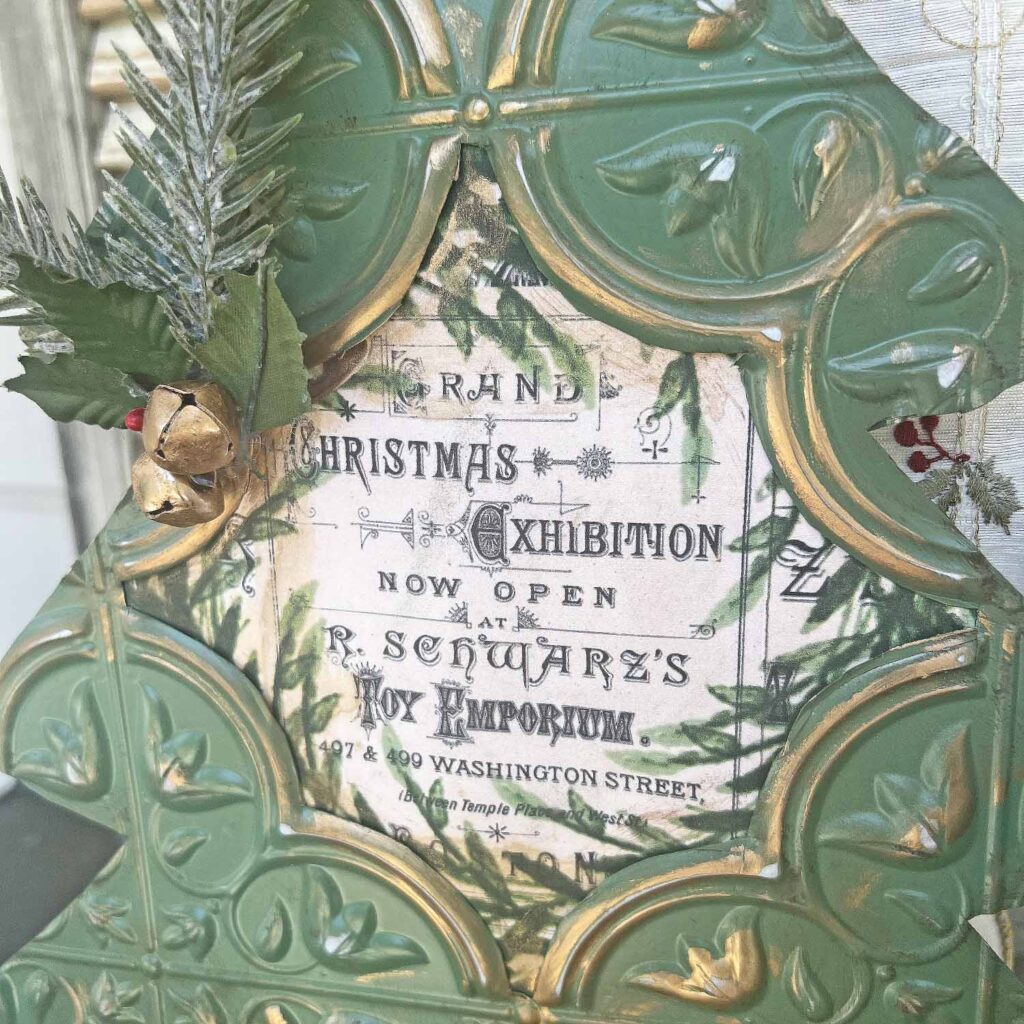
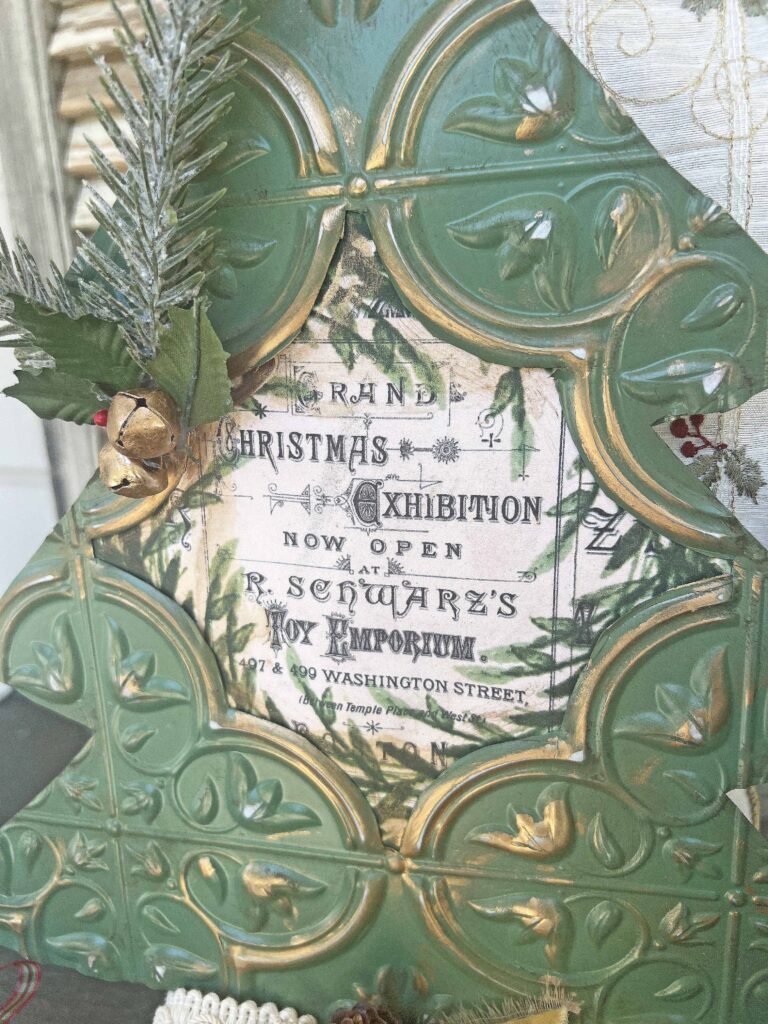
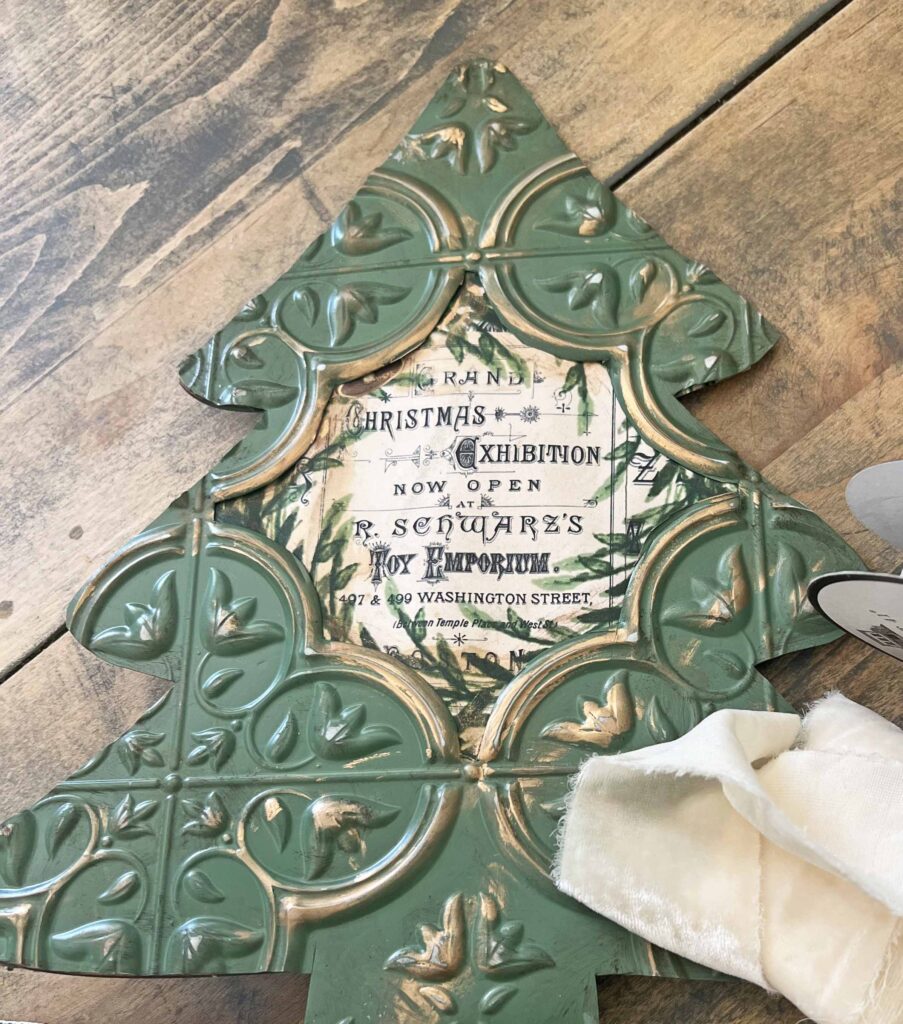
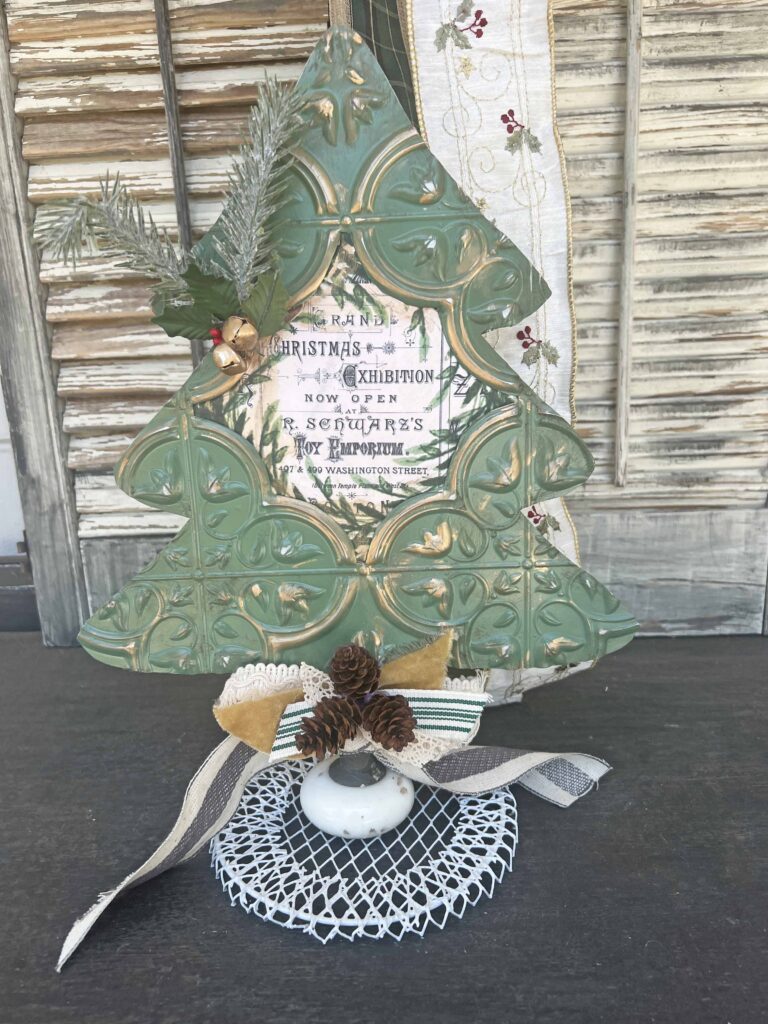
I’ve seen a few similar tutorials for an embossed tin tile Christmas tree DIY. The feature, which appealed to me is the peek-a-boo opening with an inserted graphic. Many of the other projects use Santa Claus images, angels and snowy images, but I really wanted to use typography. And here we are. I used colors, embellishments and techniques that coordinate with my decor style. Feel free to adapt theses methods and techniques to coordinate with your decorating aesthetic, making it yours.
How to Create a Faux Tin Tile Christmas Tree Craft
All these steps and techniques can be used to create a similar look, or you can skip a step if the technique doesn’t speak to you. Use colors and styles that appeal to you or items you have on hand. Using supplies on hand is the best way to go sometimes. The key to this project is the faux tin tile from the Dollar Tree. If you don’t have a DT near you, I have also included an alternative option in the shopping section below for your convenience.
Supplies
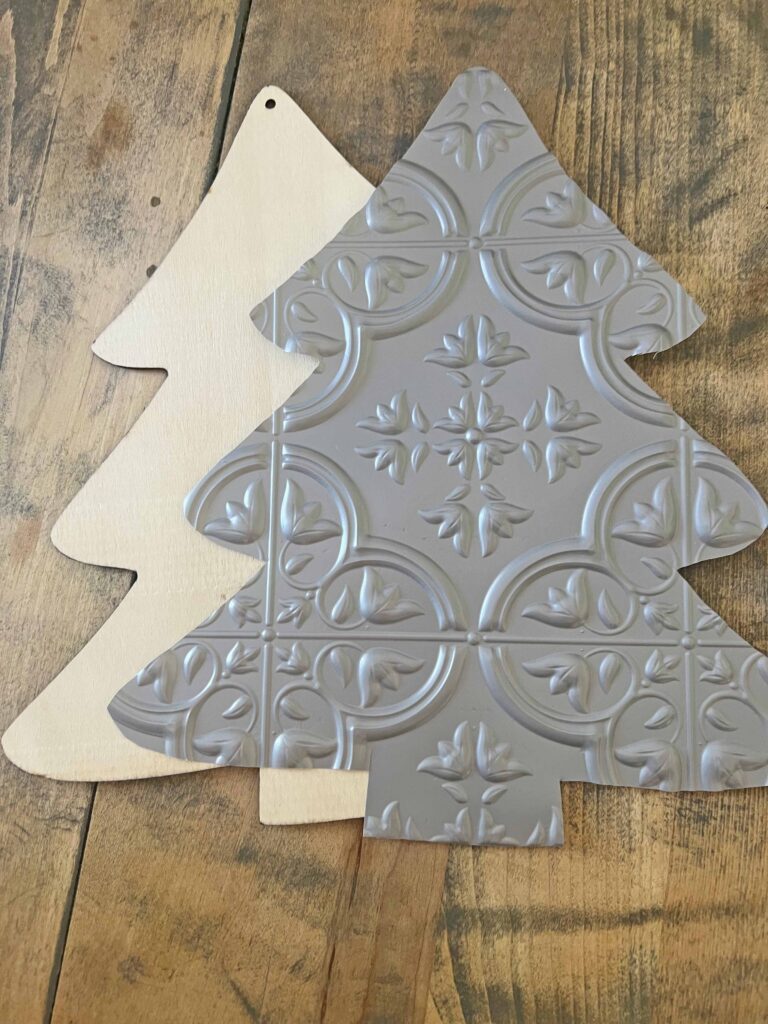
- Wooden Christmas Tree Form
- 12-in x 12-in Faux Tin Tile
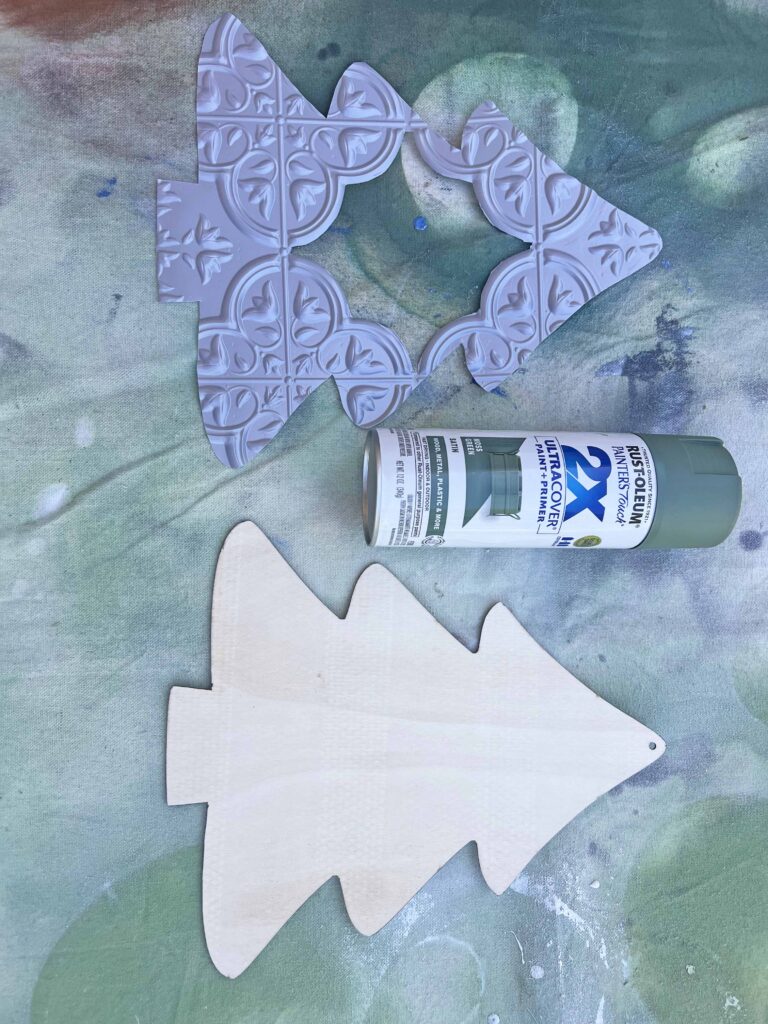
- Green Spray Paint (I used this)
- Christmas Image (I share the image I created bellow on the Tips & Recommendations section below)
- Brown Acrylic Paint
- Gold Rub ‘n Buff
- Vintage Porcelain Door Knob (I used this as my base but other options are discussed below)
- Assorted Ribbons
- Assorted Christmas Embellishments (mini pine cones, bells, greenery, etc.)

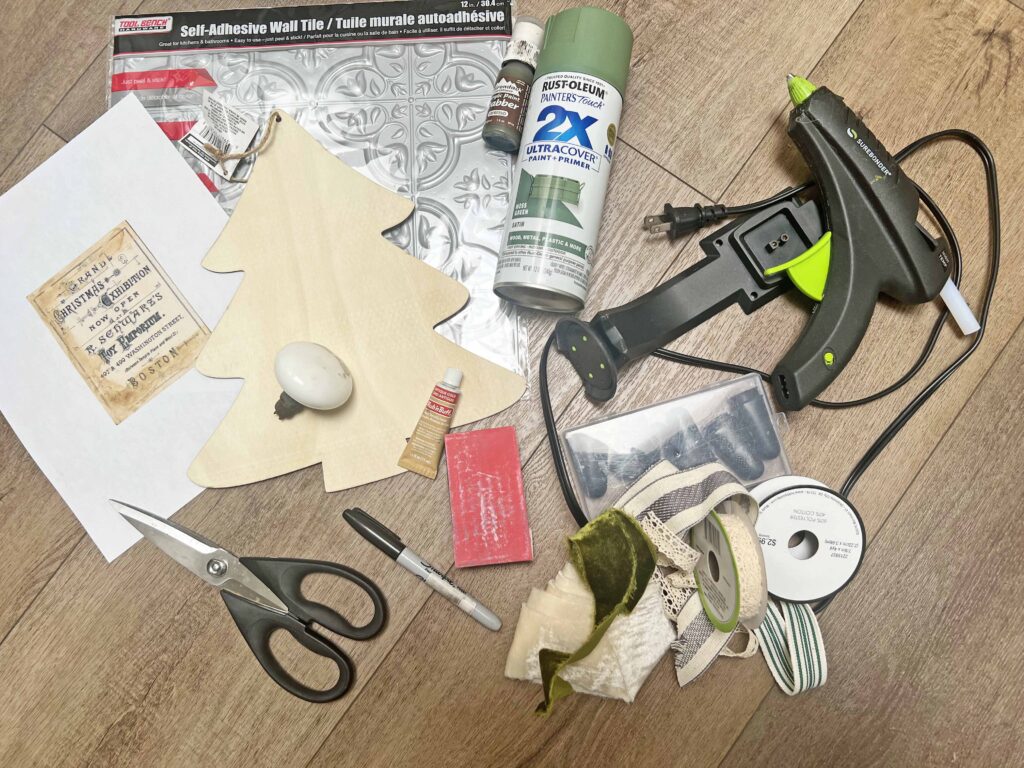
Tools
- Scissors
- Sharpie Pen
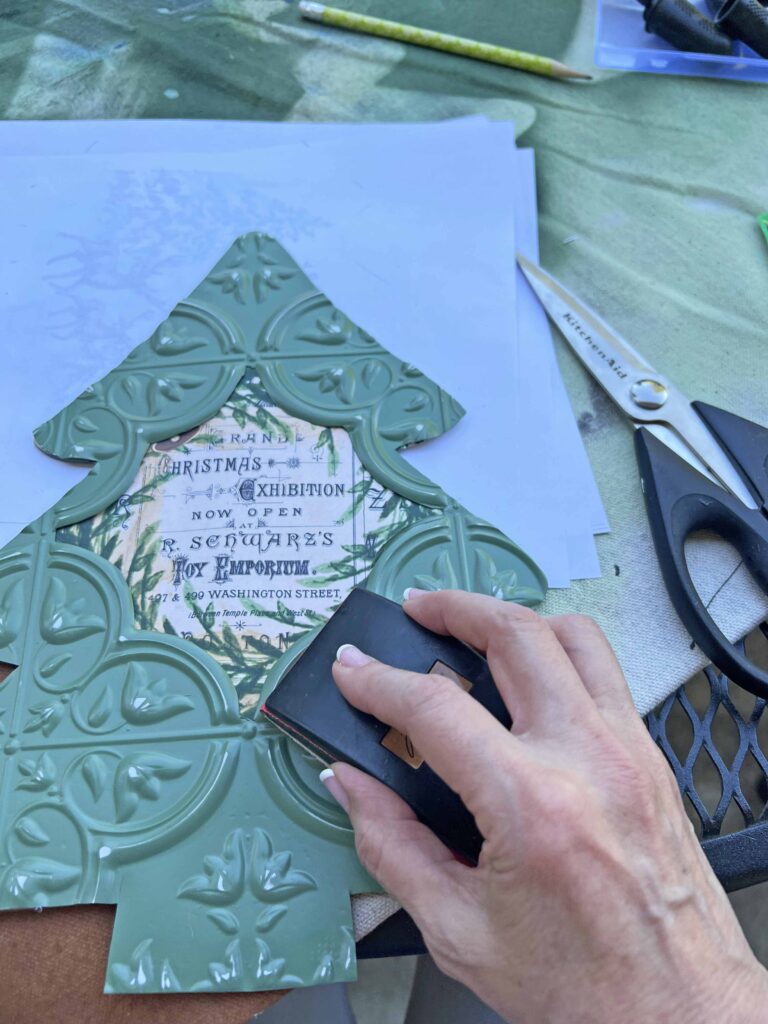
- Sanding Craft Block
- Hot Glue Gun & Hot Glue Sticks
- Silicone Finger Protectors
Crafting Pro Tip: Read all the instructions through once and then re-read everything again. This way, you are familiar with everything you need and know what to expect.
Instructions
- Read instructions thoroughly and assemble all supplies & tools
- Remove all tags and stickers from supplies
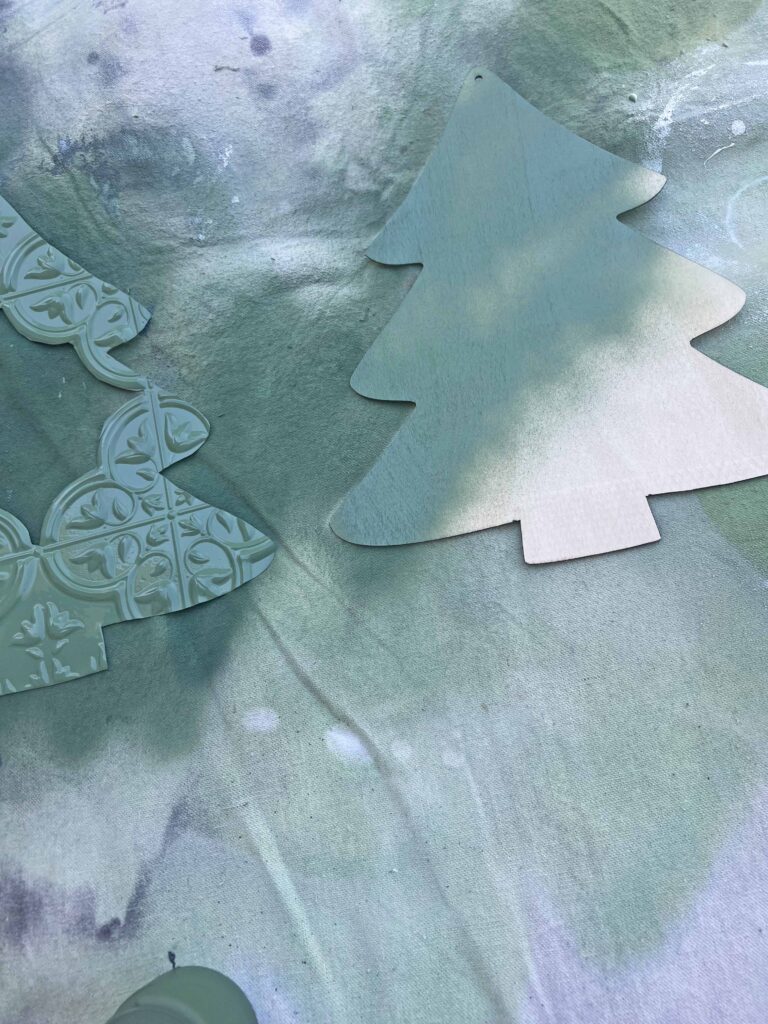
- Using wooden tree form as a guide draw shape on back of tile with a sharpie, making sure to center form on tile
- Use scissors to cut out tree form from wall tile
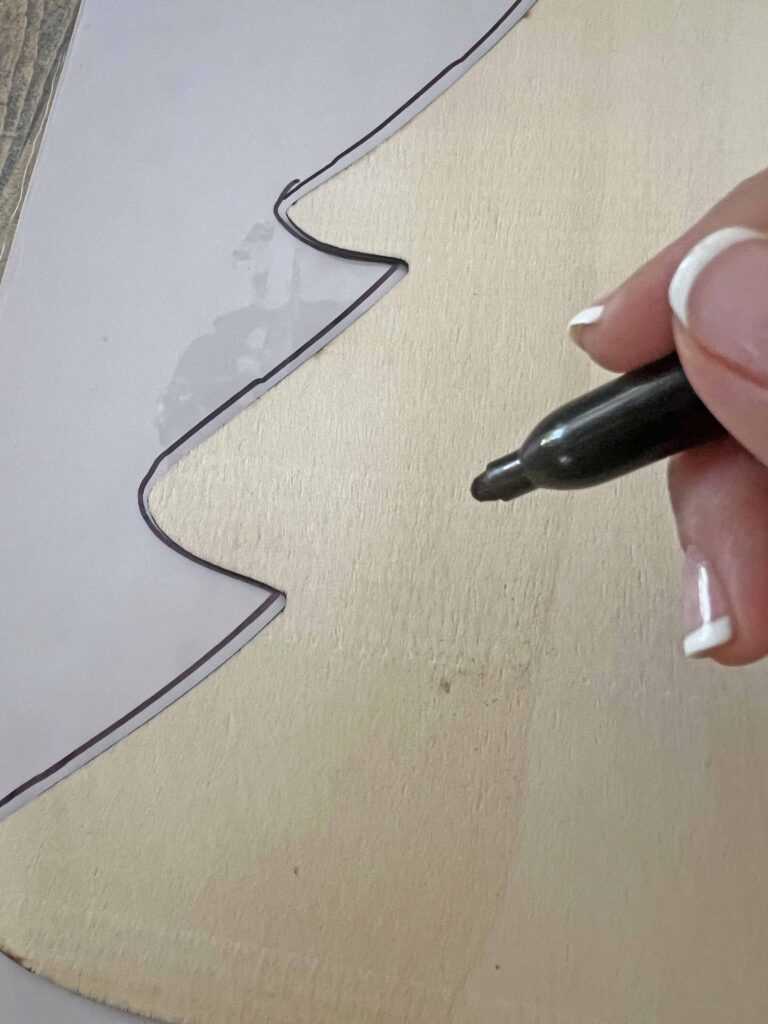
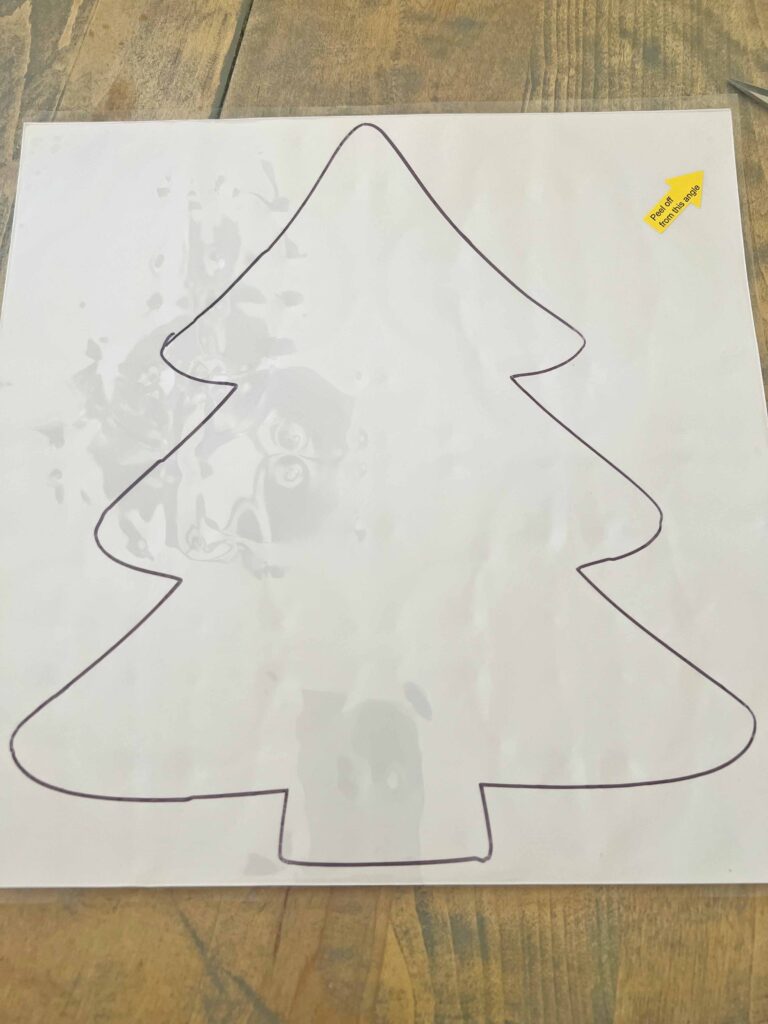
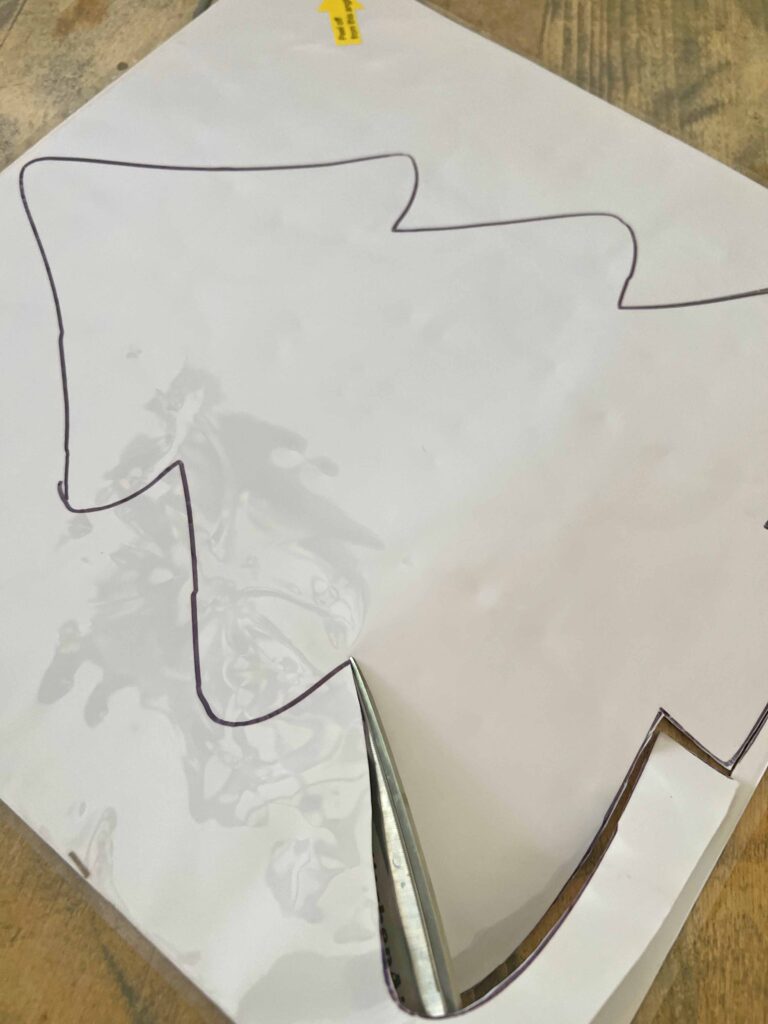
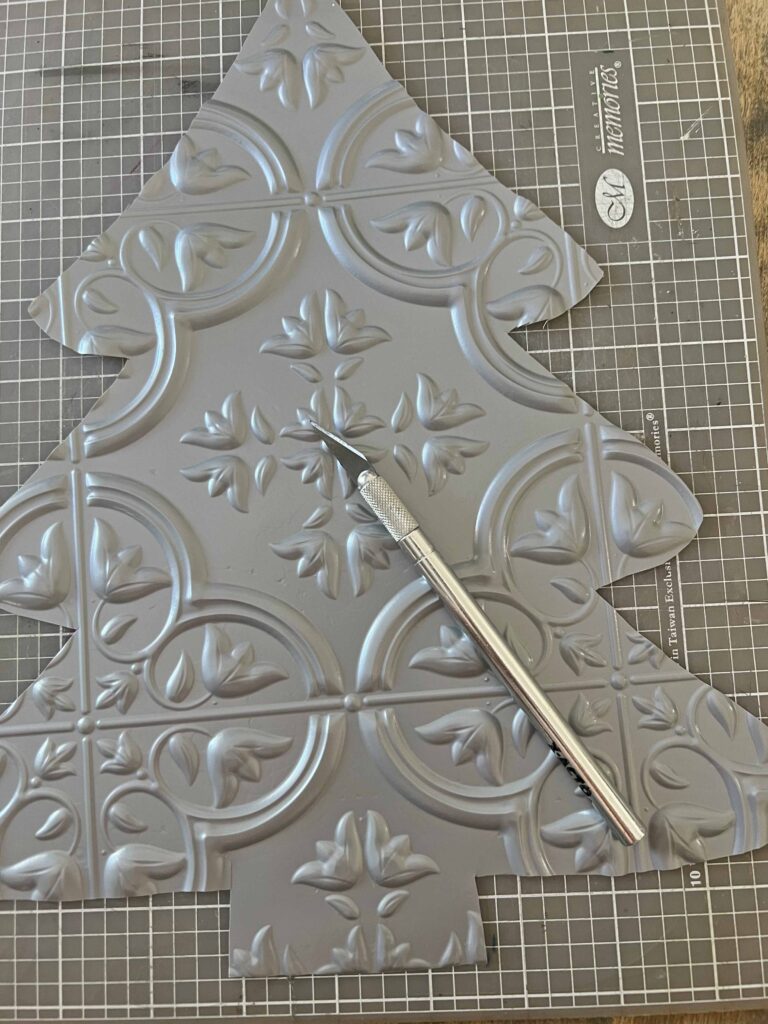
- Using scissors or an x-acto knife, cut out center diamond section of embossed tree to create an opening in the middle of tree (why it’s important to center tree on tile)
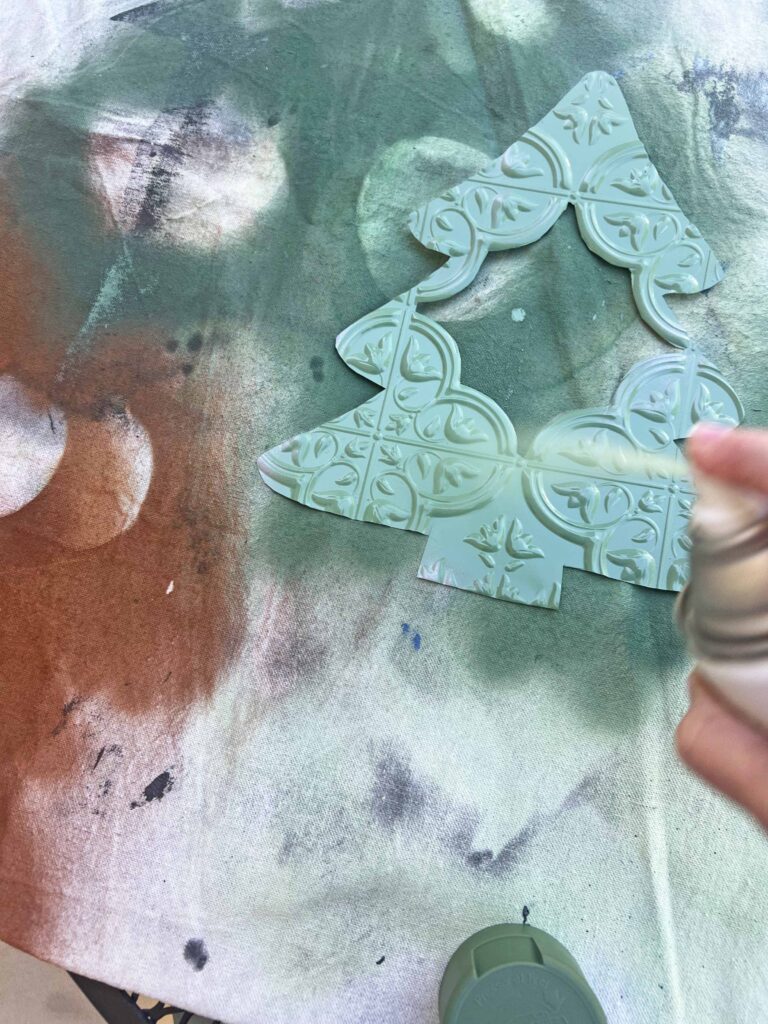
- Use spray paint to cover embossed tin tree and one side of the wooden tree form, setting aside to allow to dry fully
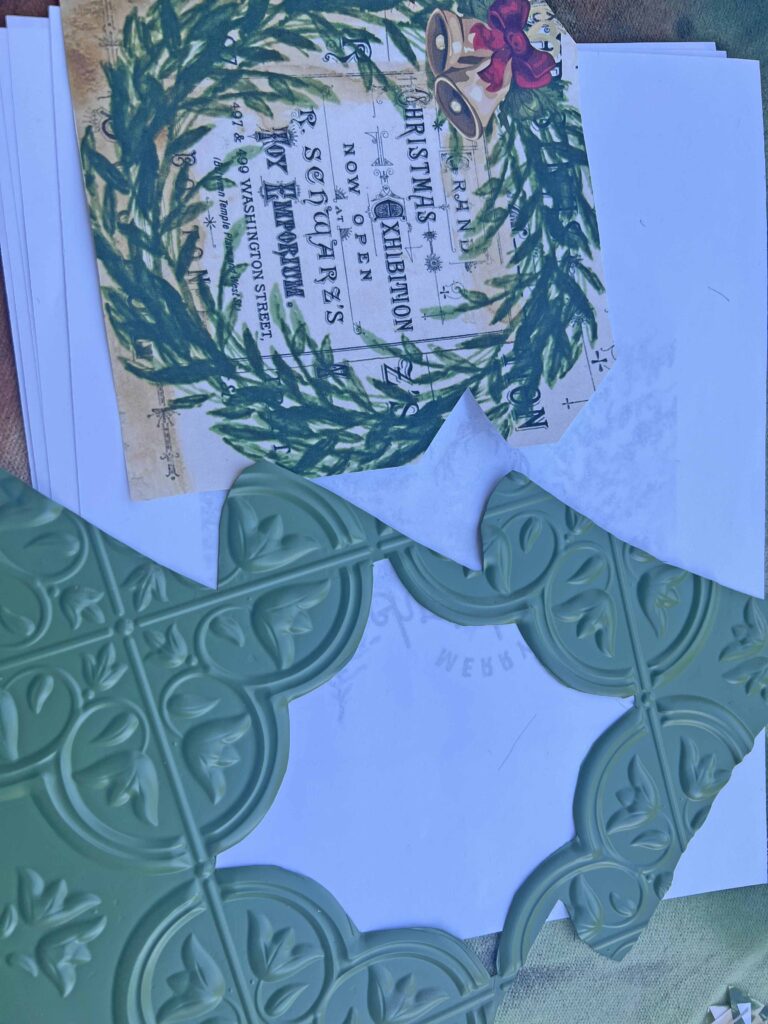
- While paint is drying, select graphic and size on computer and print
- Cut out image so it fits inside cut-out diamond in the tree (more details on this in Tips & Recommendations section below)
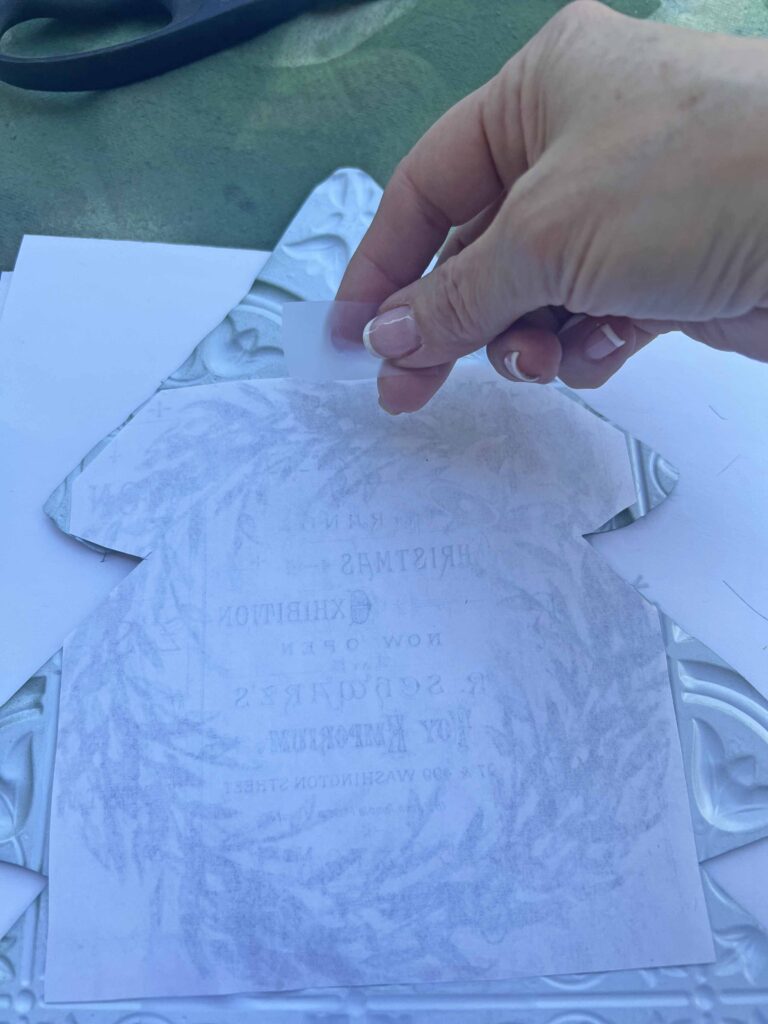
- Once paint is dry, adhere image on back of tin tree so graphic shows through opening (I used scotch tape)
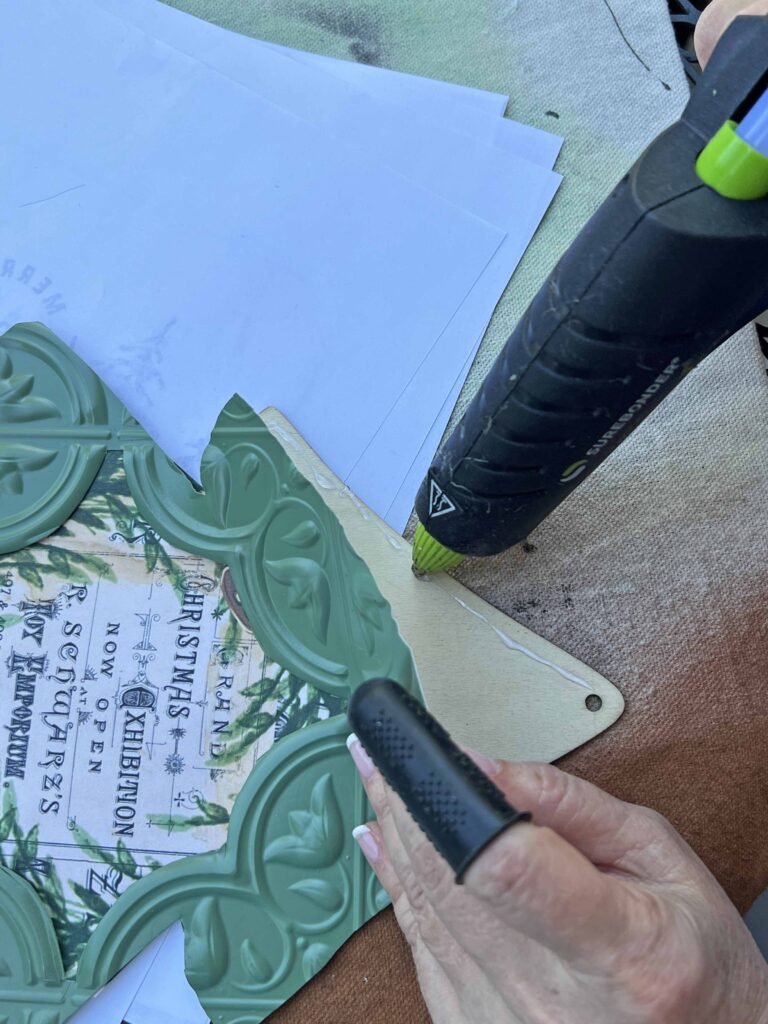
- Hot glue tin tree to plain side of wooden tree, allowing painted side to face out as backside
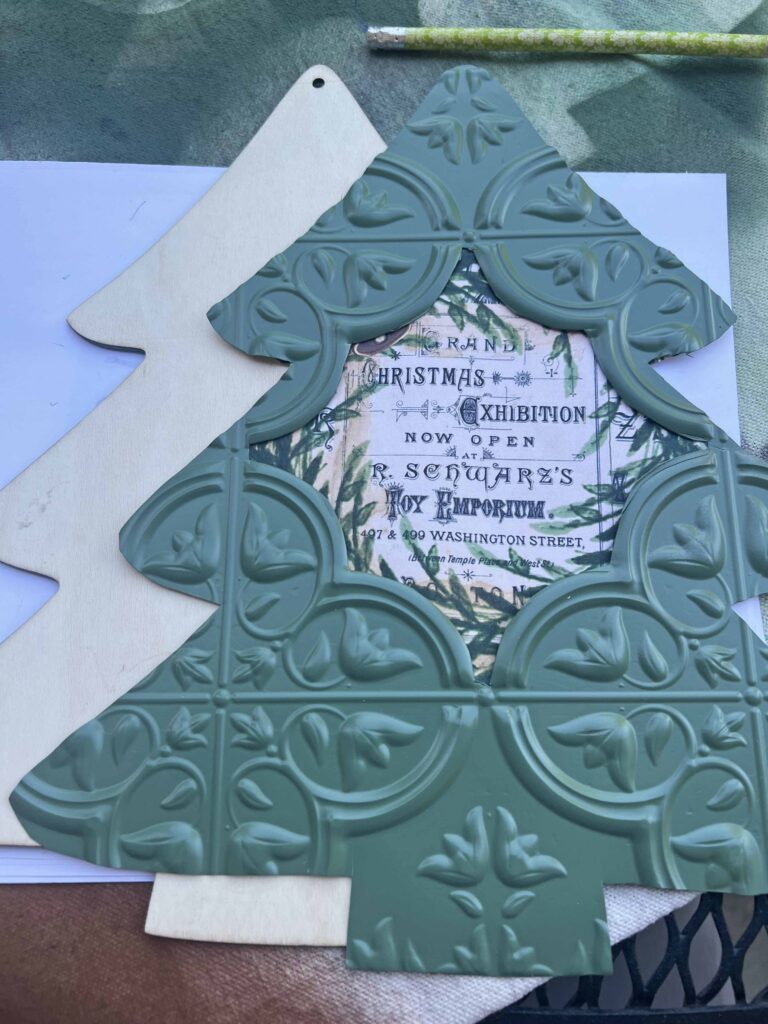
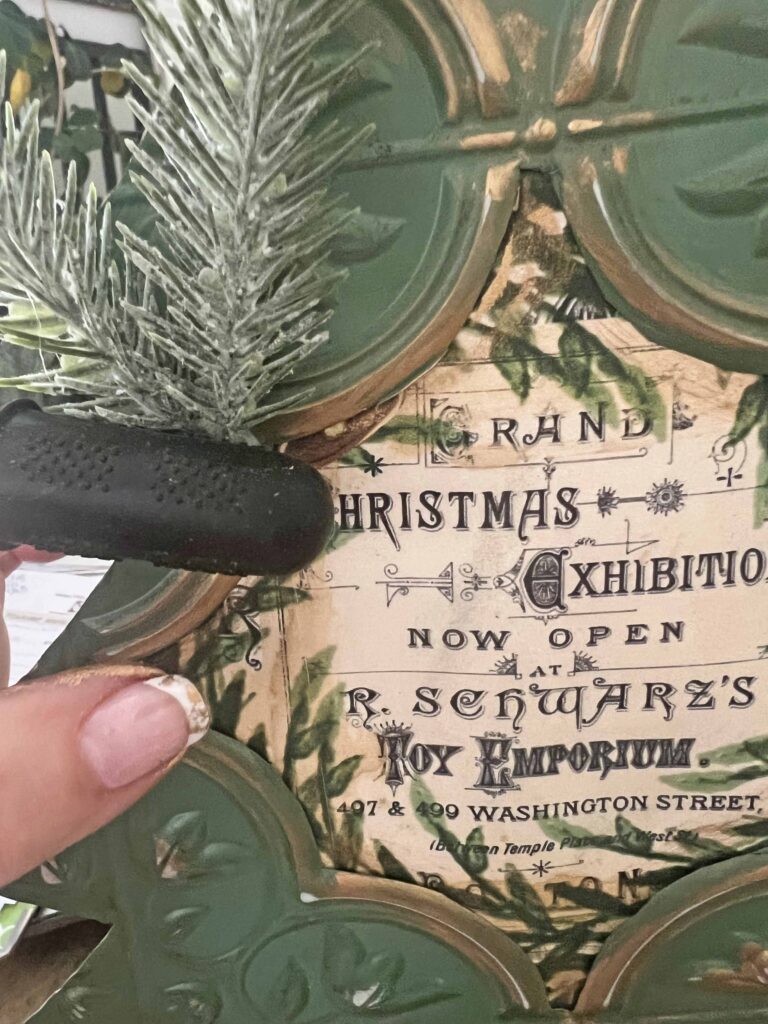
- Use sanding block to distress tree by removing paint on embossed raised areas also sanding edges
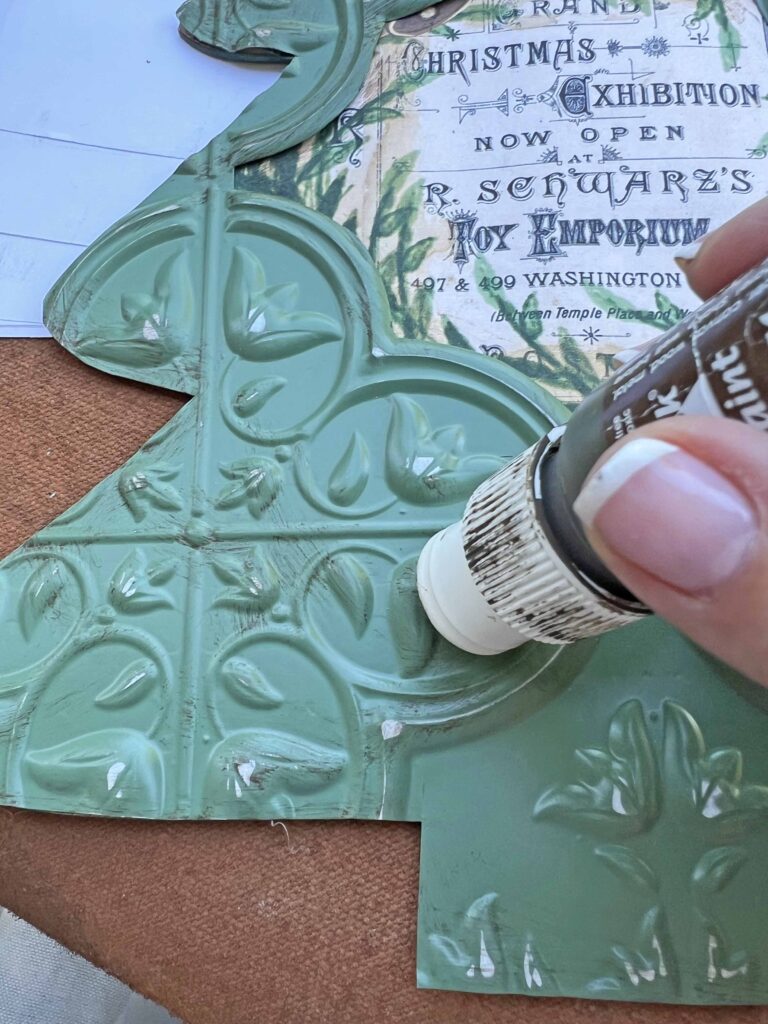
- For more distressing use brown paint in random areas of tree to create an aged effect
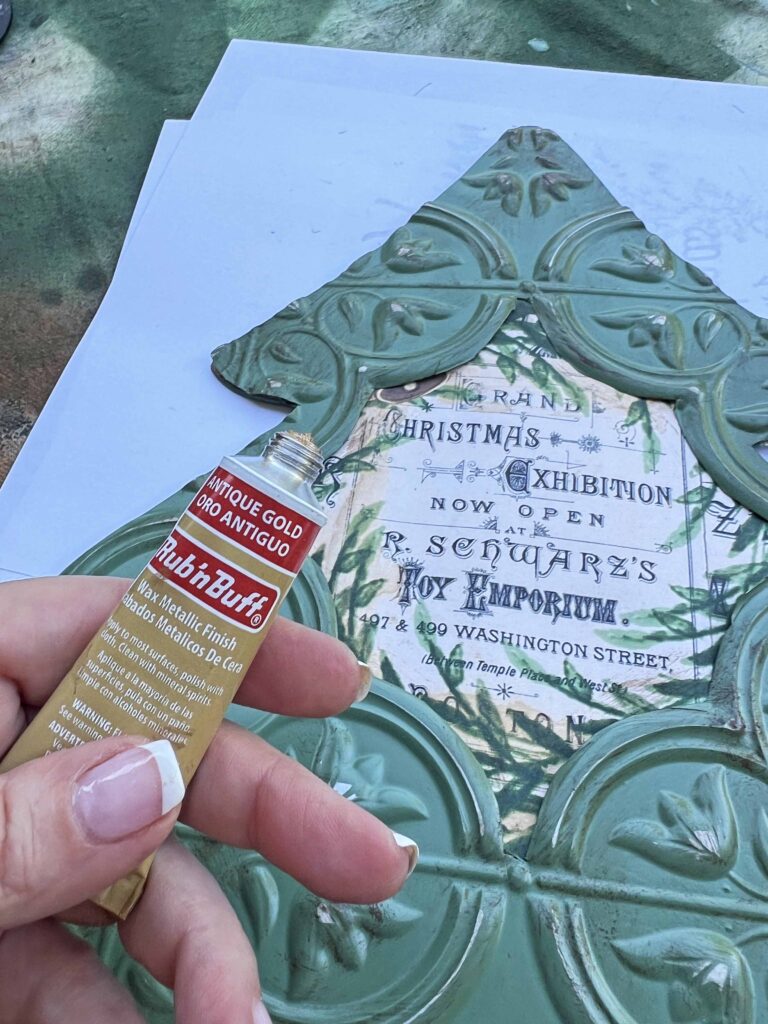
- Add gold rub ‘n Buff in raised areas of embossed tile to further bring out more detailed relief
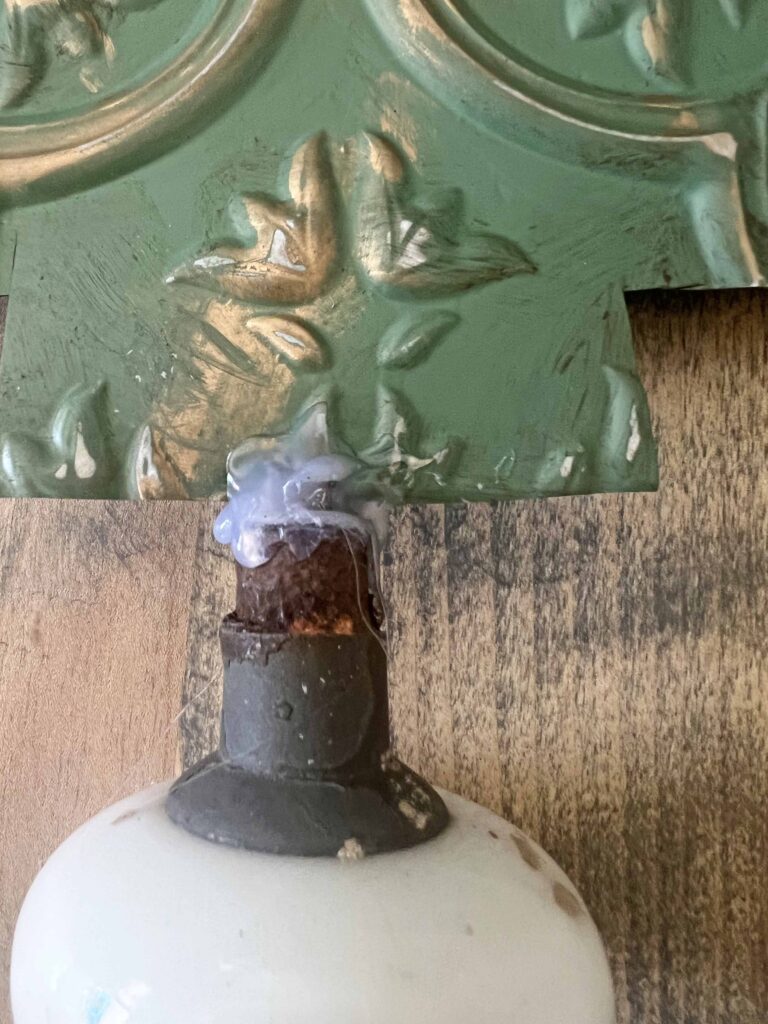
- Using hot glue attach base of tree to desired base (I used a vintage door knob but more options discussed below)
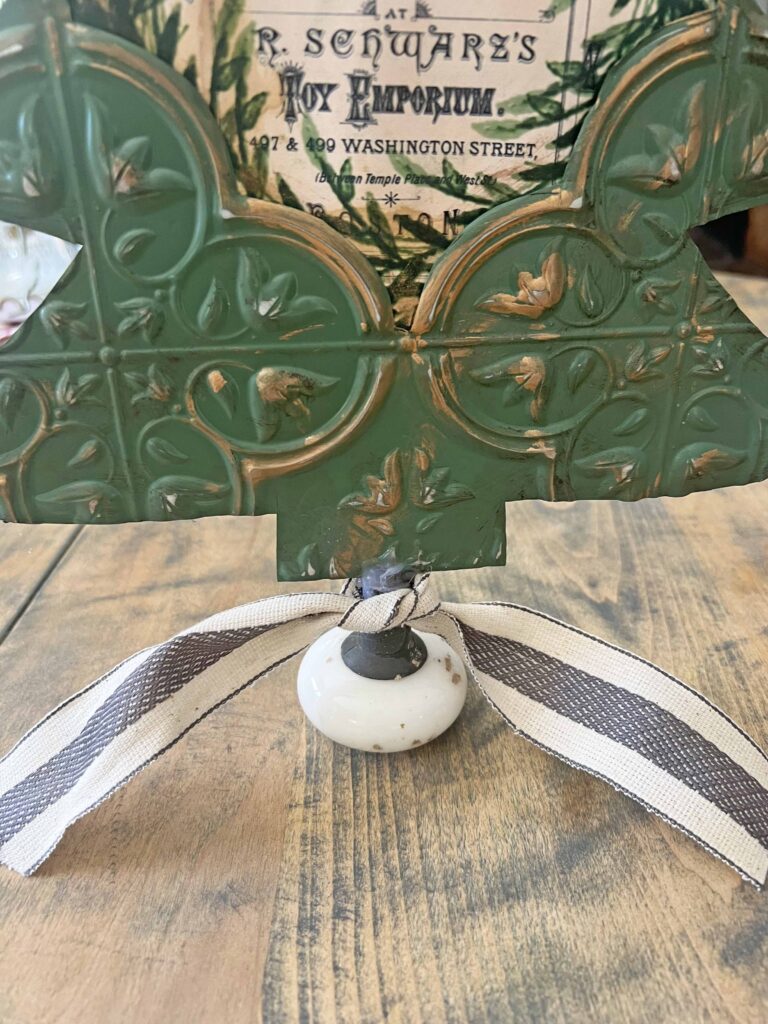
- Tie ribbon around base where it meets tree trunk to disguise mechanics
- Layer ribbon with a bow and mini pine cones, using hot glue gun
- Adhere more embellishments like greenery and bells around peek-a-boo opening, using hot glue gun

- Voila! Enjoy your new Faux Tin Tile Christmas Tree
Warning: Please proceed with caution when handling a hot glue gun. Silicone finger protectors are highly recommended. Maintain personal discretion and responsibility at your own risk.
Tips & Recommendations
Paint Tips
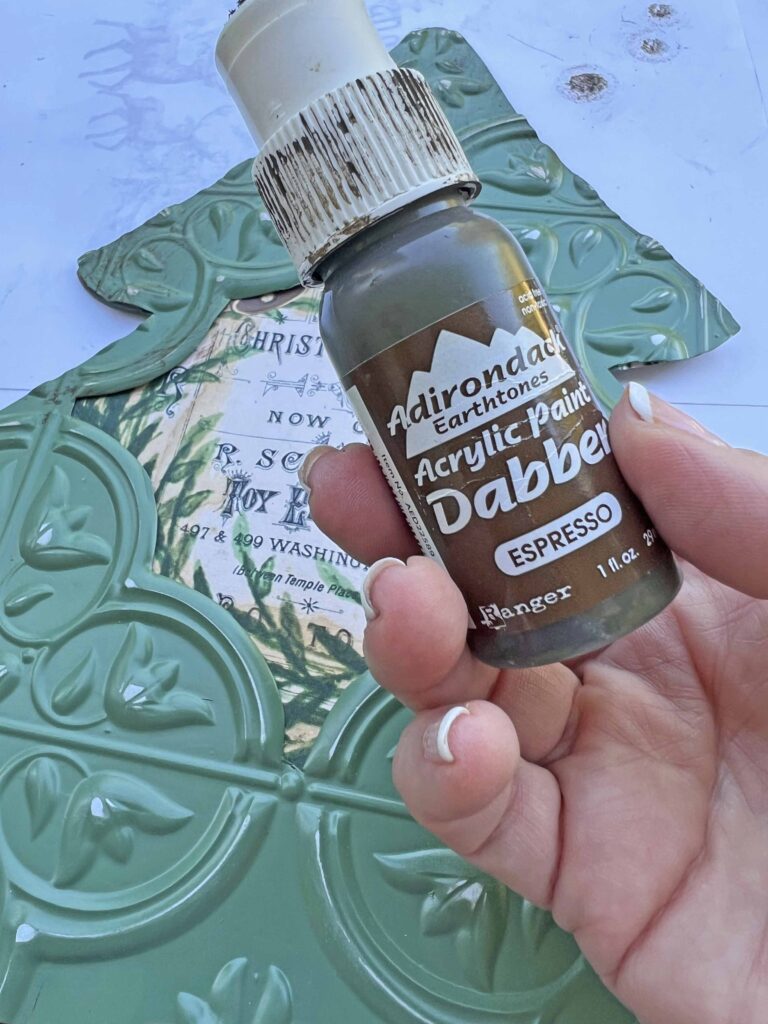
Rust-Oleum spray paint is used for this project. I had the moss green satin spray in the garage left over from this project {Elegantly Rustic Ornament DIY}. Spray paint is an easy and fast way to get full coverage on the tile projects. I have also found acrylic and spray paint works best with these plastic tiles if you wish to use a sanding distressed technique. Also for additional distressing, an acrylic paint dabber is used. The dabber mechanism makes it easier to pounce the paint and get in crevices of the embossed tin.
Distressing Techniques
A few different distressing techniques are used here, layering an aged patina effect. The sanding removes paint and exposes some of the relief on the tin tile. The espresso brown paint is strategically added throughout to create an aged effect. The gold gilding effect with the Rub ‘n Buff brightens the piece, and gives it an aged patina, which compliments the other distressing techniques. All the layers add depth and dimension with an Old World feel.
Graphic Ideas
Ok, full disclosure here. The peek-a-boo graphic is what attracted me to this project, but proved to be the most difficult to execute. I initially wanted to use the Christmas typography image from the Graphics Fairy, but the shape, sizing and scale did not fit properly in the opening. Consequently, I tried a few other images including vintage Santas and deer and, and… none of them fit well. So I went back to the typography image and layered it and created my own image on Canva. It ended up working out perfectly for the look and feel I wanted for the piece. I have included the image here if you would like to download it and use it yourself. I’ve done the heavy lifting for you.

Base Options
A vintage porcelain knob is used as the tree base here. I had it in my craft stash, and I love the vintage vibes it exudes, but truth be told it can be a bit wonky and unreliable for proper standing placement. I used greenery and other accents to stand the tree up straight, which I’m ok with. Sometimes pretty wins over practical. If this is something that would bug you, I recommend using a candle stick or styrofoam block covered in moss or something that will provide a more trustworthy base.
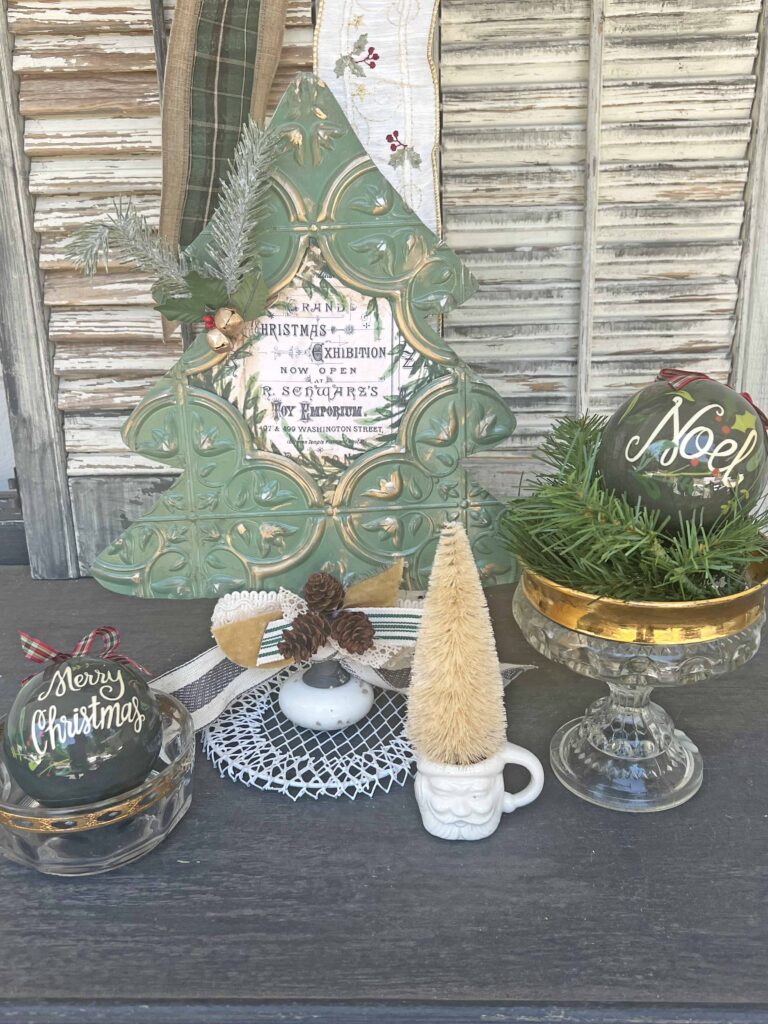
Styling Suggestions
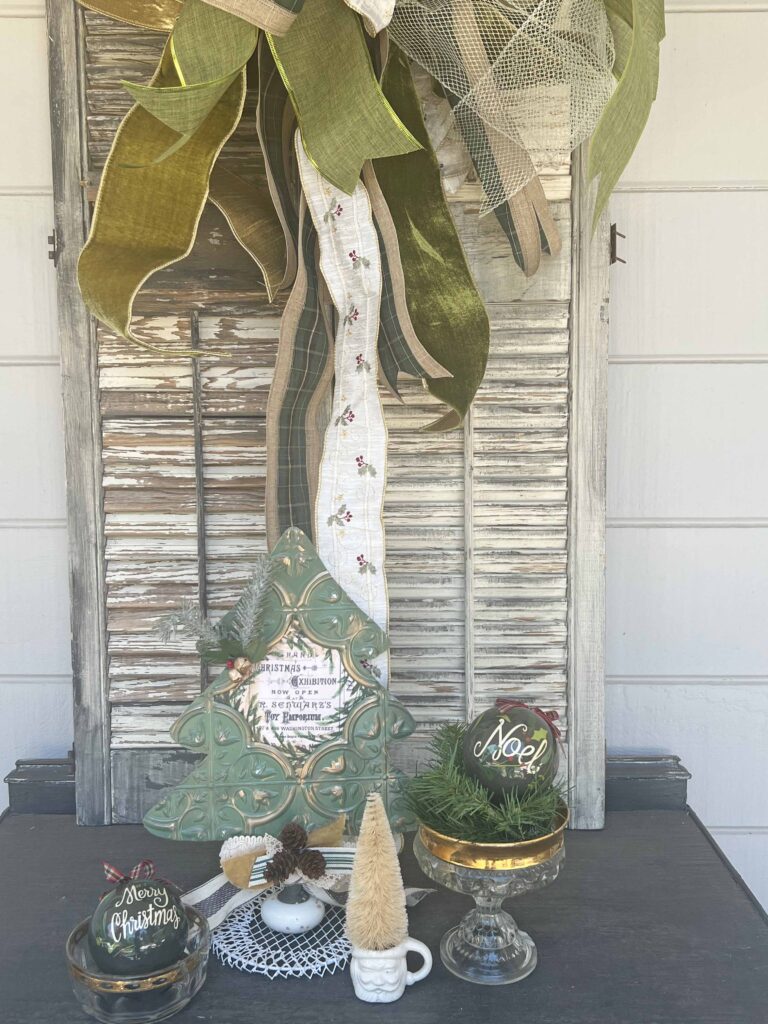
The vintage tile Christmas tree craft will elevate any Christmas decor vignette. It can stand alone or compliment any other holiday decor. The back is spray painted green to give it a finished looked if the back is visible. This way it can be used against a mirror or on a couch table where the back is visible or even on a tablescape centerpiece styling..
Closing Thoughts
Are you a crafter and prefer to make your own seasonal decor? I hope this inspires you to get your Christmas in July craft on. It helps keep you organized and prepared for the holiday season, which tends to be hectic and busy.
Please don’t forget to visit Susan. You can also find Susan in her other spaces; give her a follow.
Let me know if you make your own tin tree! I would love to see your masterpieces. Thanks for stopping by, and I hope to see you again soon. It’s always lovely having you here. Au revoir!


Shopping for the Embossed Faux Tin Tile Christmas Tree Craft Look
- Rust-oleum Moss Green Stain Spray Paint
- Faux Tin Tiles
- Espresso Brown Craft Paint
- Rub n Buff Wax Metallic Finish Antique Gold
- Natural Cotton Stripes Fabric Ribbon 1 inch Black and White Stripe
- Champagne Gold Velvet Ribbon
- Beige Lace Trim
- Mini Pine Cones
- Hot Glue Gun
- Glue Gun Glue Sticks
- Silicone Finger Protectors
- Craft Sanding Blocks


More Related Posts


Most Recent Posts


It is Christmas in the heart that puts Christmas in the air.”
W. T. Ellis